Did you see it? I was in the path of totality this year. It was my first time ever seeing a total solar eclipse and it was AMAZING. My photography skills aren’t that great, especially when it comes to sky photos, but they’re not too terrible.
Something interesting is that it never got pitch black like I saw in some areas on t.v. I’m guessing that the cloud cover we had reflected what little light there was to make it like dusk without the pinks and purples.
Solar eclipse before totalitySolar eclipse totality.Solar eclipse totality with grey clouds.Me being nerdy.
Okay, lovely readers. I’m a nerd, so if you have any awesome eclipse photos, (current or otherwise), or other cool nerdy photos, I would love to see them. I’m honestly not sure if photos can be shared in the comments. If not, feel free to drop a link to them on social media.
Affiliate disclosure: This post contains affiliate links. If you make a purchase through any of the links on this page, I will receive a small commission at no additional cost to you. All the statements contained in this post are my honest opinions of the product, the Creative Home Projects Bundle 2020.
Between sewing machine troubles and children keeping me busy, I haven’t had much time for crafting lately. Even when I do have a few spare moments, my brain is so focused on everything else that I don’t know where to begin, which is unfortunate. Crafting is a great way to destress, and we all need ways to unplug and destress, now more than ever!
But that’s not all….Crafting and DIY projects give you the chance to learn new skills, do something with your hands, and beautify your home. With Christmas right around the corner, now is a great time to get started on unique handmade gifts as well.
Do you want to spend more time creating?
My friends at Ultimate Bundles have curated a brand new bundle to help.
It’s called the Creative Home Projects Bundle. It has resources inside to help you master beautiful hand lettering, create vinyl crafts with your favorite cutting machine, repaint your cabinets, furniture and walls, make one-of-a-kind jewelry, improve your sewing, refashioning ideas, upcycling and so much more!
When you buy the Creative Home Projects Bundle, you’ll get access to:
11 eCourses
30 eBooks
9 workbooks & printable packs
14 tutorials & templates
The creators behind all 64 resources are makers who are passionate about creativity, helping you make your life more beautiful, and teaching you new artistic pursuits!
And best of all, you can get the entire package for just $19.97.
What I’m Loving in the Bundle
I’m especially excited about the Easy Refashions for Every Season ebook by Elizabeth Farr and the printable Upcycled T-Shirt Romper and Dress Sewing Pattern by Heather Paulsen. There’s also the Fun & Easy Halloween Crafts by Stephanie Gilbert ebook. With COVID-19 concerns, Halloween will probably look different this year. Hopefully Gilbert’s book will give me ideas for activities to make it more fun for the kiddos.
P.S. If you buy by midnight tomorrow, you can also get a free subscription box from KiwiCo (value $19.95). They offer a box for every age and interest, so you can choose the box that fits your family best! Check out the bundle and the bonus here: http://ultimatebundles.com/sale/chpb2020-main#a_aid=5ef0b9e06ff22&a_bid=41f3cb48
Do you love Ultimate Bundles as much as I do? Click here to find out how to become an affiliate.
Like this article? To make sure you don’t miss out on future posts, sign up for my newsletter.
Whether it’s a new project, work, or just daily life, sometimes it’s easy to get overwhelmed. Maybe you’re struggling to find balance while juggling work, home life and new schooling situations. Maybe a task seems too huge or unpleasant to tackle. It could be that you’re unsure of how a project will turn out, so fear keeps you from making the first move. Maybe there’s just so many other things on your plate that you find yourself too mentally or physically exhausted to tackle that one thing. Here’s a few ideas to get unstuck and moving forward again.
Overwhelmed? These 10 tips will help
Brain dump
When you’re really anxious or don’t know where to begin, doing a brain dump helps. Grab a pen and paper and just write out everything on your mind. Don’t think about it, don’t worry about complete sentences or cohesive ideas, just get everything out on paper. When your done, look it over. Is there a theme to what you wrote, some repeated word or idea or area of focus? Use that to help you determine your next move.
Making a list of what needs to be done creates focus. It also takes the pressure off of yourself to remember everything. Once it’s written down, you’re free to focus on one task at a time. Because it’s all written down, you don’t have to keep a running list of everything in your head. As you complete a task, mark it off. Focus on your list getting shorter, not how much is still left to do.
Break it down
If a task seems too big, it’s easy to get overwhelmed. Breaking it down into smaller tasks makes it more manageable. For example, if you need to clean the house for company, don’t look at the whole task of cleaning the house. Take it room by room. If that still seems too big, list specific tasks within each room. Don’t say “Clean the kitchen”, have individual tasks like wiping down counters, sweeping the floor, mopping the floor, etc. listed separately.
Prioritize
Some tasks come with a deadline or are more important than others. If there’s a deadline, make a note of that deadline on your list and mark it somehow to make it stand out. If it’s something that is high priority, regardless of a specific deadline, make note of that, too. I like to draw a star next to high priority tasks, and highlight or double star things with a deadline.
Set goals
Be realistic about what you can accomplish in a day and set goals accordingly. If there are specific tasks that have to be done first, then set your goals around those. Otherwise, your goals could be something like marking off five tasks each day. If you meet your goal, good for you! Do you have the time, energy and desire to mark off a few more? Go for it! Didn’t meet your goal? See if you need to re-evaluate your expectations so as not to get overwhelmed and discouraged. If it was simply a case of other obligations taking too much time, try again tomorrow.
Set alarms
If you have something that needs to be done at a certain time, like an appointment at noon or starting dinner at five pm, set an alarm in plenty of time to stop and get ready. When I have an appointment or event coming up later in the day, it’s hard for me to focus on other tasks, even when I have plenty of time. Knowing that I have an alarm to remind me when I need to stop makes it a little easier.
Setting a timer is useful in a few ways. First, if you find yourself completely unmotivated, pick a task and set a timer for five, ten or fifteen minutes, whatever seems manageable. You can do anything for five minutes. Pick a task and see how much you can accomplish in that time. When the timer goes off, give yourself permission to stop for a break or switch to a a different task. I often find that when the time is up, I’m so close to finishing that task that I want to keep working.
You can also use a timer to break up a bigger task into smaller chunks of time. Give yourself thirty minutes or an hour to work on a bigger job. When your time is up, stop and take a break or give yourself a five to fifteen minute window to knock out a few quick tasks. This helps you keep the little things from snowballing while you work on a big project.
Finally, setting a timer helps with time management. Everyone needs a break now and then, but it’s easy to allow a quick break to turn into an hour of getting off task. Decide how long of a break you want, set a timer and stick to it.
If timers work for you, you may want to checkout Flylady. I’ve used that method of home organization in the past and found it really helpful. It’s particularly helpful with establishing routines and taking everything in “baby steps” so you don’t get overwhelmed with the process.
Stop waiting
Do you ever find yourself doing nothing just waiting for something. Things like waiting tem minutes for dinner in the oven or sitting on hold on a phone call. Use waiting time that’s often wasted to knock easy tasks off your list.
Just do it
Sometimes there’s a task that I put off because I find it really unpleasant. Usually that leads to putting off other things, because that task is hanging over my head. Often it’s something simple like making a phone call to set up an appointment. There’s no way around getting some things done, so give yourself a minute to stress if you need and jump in. Once it’s done, you can mark it off your list and wonder why you put it off for so long. If it really was that bad, at least it’s done.
Reward yourself
Sometimes your accomplishments are their own reward, and sometimes not so much. Give yourself little incentives, even if it’s just ten minutes of playing a game, or a cup of tea and your favorite show. Knowing that something enjoyable comes after something unpleasant is motivating, especially after a “Just do it” task.
Not everything is as easy as just make a list and do it, but when you’re feeling overwhelmed, using these strategies where they do apply can help free up energy for dealing with the more difficult problems life throws at you.
In the past, I often featured handmade or vintage shops on Fridays. Over the years, the world of crafting and blogging has changed dramatically. I would love to resume Feature Fridays, but with a broader scope.
Handmade shop and websites are still welcome. I also want to feature guest writers sharing tutorials, tips, advice, recipes, etc. Categories that I feel are a good fit for this blog are crafting, sewing, sustainability, refashioning, healthy living, parenting, hair and beauty tips for busy moms, homeschooling and homesteading. I am open to other topics as well, so if you are interested but don’t quite fit into one of the above categories, please contact me anyway with your idea.
Guest posts will be promoted across my social media sites frequently throughout the week they are published and then periodically after.
Handmade shop/website features
For handmade shop/website features, answer the questions in the following list and email them to csloan@subearthancottage.com. I will contact you before your shop is featured and if any clarification is needed. You can give as much or a little info for each section as you are comfortable with sharing. Be sure to include links to your shop, web page and blog, if you have them. If you sell your products in a brick and mortar store and would like to include that info, you may include that as well.
I also choose a favorite item from your shop on the week that you’re featured and briefly tell why I like it. The first image from your shop for both your favorite item and my favorite item will be included in the blog.
Name and Business Name
Tell us a little about yourself and your business.
What made you get started in your business?
Anything else you’d like to share?
Tell us about your favorite item listed in your shop.
Links to your shop, website, blog, etc.
Email address (This will NOT be published)
Guest posts, tutorials and everything else
Please contact me at csloan@subearthancottage.com with your idea. If you already blog, a link to your blog or site where your writings are published is also helpful. Newbies are welcome, too. I’m also not opposed to reposts if they are a good fit and your own work.
If I think your idea is a good fit for SubEarthan Cottage, I will let you know and we will work out the details from there.
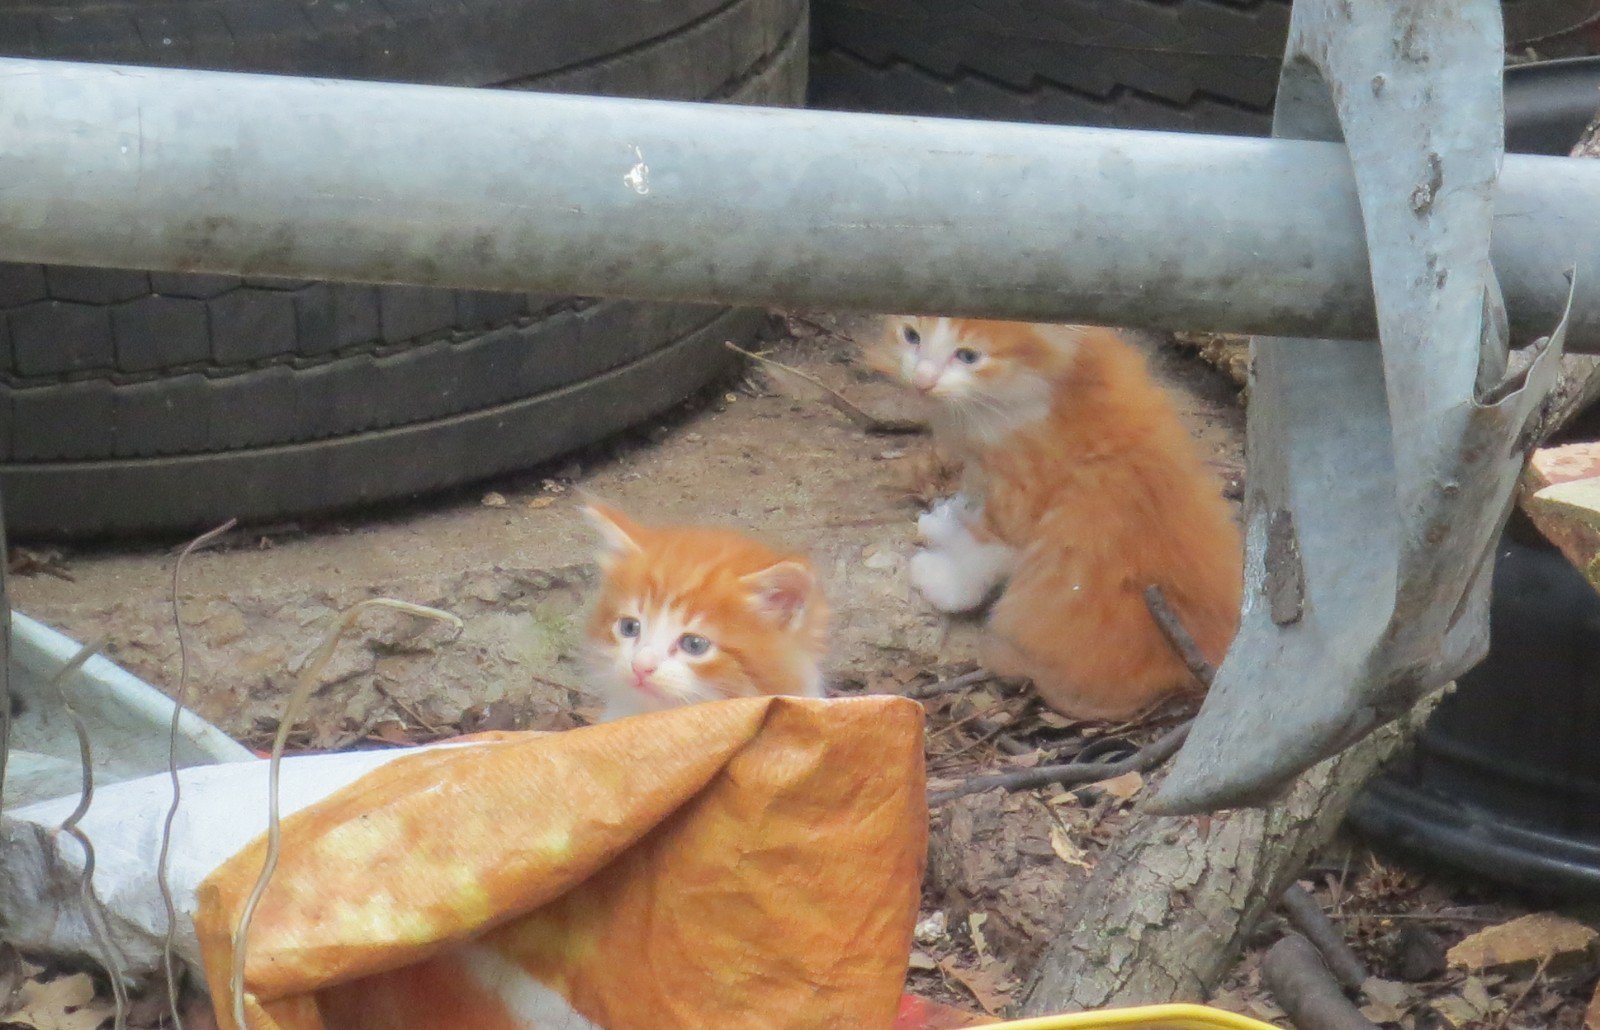
A few days ago, we discovered that a pair of stray or feral cats had a litter of four kittens in the storage area outside of Chris’s shop. There’s two orange and white kittens, one tabby kitten and one calico kitten. They all look like they will have long hair like the daddy.
The parents
The father kitty I would say is definitely feral. He’s very skittish and runs almost immediately when he sees us. The mother is wary but not as quick to run in a way that makes me think she may be more stray than feral. Since finding the kittens, I’ve started putting out kitten food for the mom in hopes of gaining her trust. She already seems to know that I bring food and she doesn’t need to run. At one point yesterday, she actually began walking toward me, but stopped about halfway and went back to the food. Daddy cat was nearby, and it was almost like he warned her to stay back.
Momma Kitty
The kittens
I’m not able to get too close to the kittens, but there are four and they appear to be in good health. I think they are about 4-5 weeks because they are still nursing but have their eyes open and are playful and curious. They have the instinct to run and hide, but one in particular immediately peeks out from it’s hiding spot and watches me.
One of these is the peek-a-boo kitty. They look just like Daddy cat.
Since the mother is taking care of the kittens, it’s my understanding that it’s best to wait until they are a bit older before trying to move them. With shelters and rescues limited by COVID-19 related restrictions, this is especially true.
The tabby and calico kittens are on the right. They tend to hide when I have the camera.
In the meantime, I plan to keep an eye on them and try to get them used to my presence. Today, when I put food out for Momma kitty, she came within eight feet of me and began eating while I talked to her. That’s closer than she’s ever come before.
Like this post? To make sure you never miss a future post, please sign up for my newsletter.
Today’s post is short and sweet because I’m celebrating my 40th birthday at home with my family. Birthday’s mean cake, so here is my favorite chocolate cake recipe to make from scratch. It’s dairy-free, egg-free and easy to make gluten-free as well. Enjoy!
This is a simple chocolate cake recipe that is super easy. It is dairy-free, egg-free, and if you swap the wheat flour for a gluten-free flour blend, it's gluten-free, too! To make it gluten free, I like Bob's Red Mill 1 to 1 gluten free blend because it already contains xanthan gum. If you use a different gluten-free flour without xanthan gum, I would add about 1-1.5 teaspoons of xanthan gum.To top, make a simple buttercream (with shortening and non-dairy milk to keep it non-dairy) or use your favorite store bought frosting. You could also sprinkle the warm cake with dairy-free chocolate chips, let them melt a little, then spread across the top for a rich, chocolaty treat.
Prep Time10 minutesmins
Cook Time35 minutesmins
Course: Dessert
Keyword: 9 x 13, cake, chocolate, dairy free, easy, egg free, gluten free, one bowl, simple
Servings: 292×2 inch servings
Equipment
9 x 13 rectangle pan
Ingredients
3CupsFlour see recipe summary for gluten-free adjustment
1teaspoonsalt
2teaspoonsbaking soda
2cups sugar
6tablespoonscocoa powder
2tablespoonsvinegarwhite or apple cider vinegar
1cup vegetable oilany light flavored liquid vegetable oil is fine
2cups cold water
2teaspoonsvanilla
Instructions
Preheat the oven to 375 degrees Fahrenheit
Grease the 9 x 13 inch pan, either with shortening, butter, or cooking spray
Combine the first five (dry) ingredients in a large mixing bowl and mix until evenly blended. Alternatively, sift them together into the bowl.
Add the remaining (wet) ingredients and mix until thoroughly blended. You can use a spoon or an electric mixer.
Pour the batter into the greased 9 x 13 inch pan.
Bake at 375 degrees Fahrenheit for 35 minutes or until a toothpick inserted near the middle comes out clean.
Notes
I frosted this cake with buttercream tinted blue, then used gel food coloring to paint the faces. I then piped buttercream for the eyes, facial features, outlines, writing and trim. I clearly am not a trained cake decorator, so I can’t really say which tips I used or any other details.
Like this post? To make sure you never miss a future post, please sign up for my newsletter.
I originally shared this tutorial for rainbow cupcake crayons almost ten years ago when Finn was my little preschooler and I made rainbow cupcake crayons for him using all of our broken crayons. It’s easy, and you can get little ones to help with peeling the paper off of the broken crayons, and they get fun new crayons to play with once they have cooled.
Unfortunately my photos of our project got lost, but a quick Etsy search shows lots of examples of similar multicolored crayons in fun shapes. If you like the idea but don’t have tons of broken crayons around, consider supporting one of the shops on Etsy by purchasing from them.
Photo by Kristin Brown on Unsplash
DIY Rainbow Cupcake Crayons Tutorial
Line a muffin pan with foil or a double thickness of cupcake liners. (Note: The wax will likely melt through, so you probably want to use a pan that you reserve for non-food projects.)
Remove all the paper from your crayons.
Break into smaller pieces if needed. I just broke them as small as I could with my fingers. Most pieces were about an inch long or smaller.
Sort the pieces into the lined cups. I sorted by color, but you could also mix for super swirly crayons.
Fill the cups to the top but don’t overfill.
Melt in the oven at about 200-250 degrees F. I recommend setting a baking sheet under the muffin pan. You really don’t want to have to scrape melted crayon off your oven.
Check about every 10-15 minutes. I let them cook until there were just a few solid chunks in the middle. Then I gently swirled them with toothpicks to sink the chunks and blend the colors.
When they are sufficiently melted, turn off the oven. You can carefully remove them at this point or let them cool in the oven. I didn’t need my oven, so I let them cool in there overnight.
Once they’ve cooled completely you can remove the papers and color away.
Mask Update
I made a few of the fitted masks I mentioned in Wednesday’s post. Overall, I think they fit well, but they are a little tedious to make, particularly if you have lots of interruptions.
Awkward photo of me modeling a fitted mask.
I looked into it a little more and found that it seems more hospitals are asking for a more simplified mask, so I’m switching to ones made by this tutorial. With batch cutting and then sewing two or three assembly line style, I can make 3-4 in a hour, even with interruptions.
Shop update: Freebies and a sale
Knowing that so many are stuck at home right now needing distractions, I’ve decided to make all of my machine embroidery design files free until April 7. That’s the day my area’s shelter in place order expires. If it is extended, I’ll extend the embroidery design freebies, too. If you make something with one of my designs, I would love to see it.
My full shop is still open, and will be as long as everyone in my household is healthy. I’m using extra care with handwashing and using hand sanitizer before coming into contact with products and packaging as well.
All of my handmade soaps are currently on sale for 20% off. You can find them here.
Like this post? To make sure you never miss a future post, please sign up for my newsletter.
I, Charity Sloan, am a participant in the Amazon Services LLC Associates Program, an affiliate advertising program designed to provide a means for sites to earn advertising fees by advertising and linking to Amazon.com. Any purchases through those links will result in my receiving a small percentage in commission.
Prices are the same whether you click an affiliate link or a non-affiliate link, so you will not be charged more. Thank you for your support!


.jpg?resize=980%2C515&ssl=1)

.jpg?resize=980%2C515&ssl=1 "Creative Home Projects Bundle 2020")