
Biscuits are one of the hardest things to make gluten free. Most of my gluten free biscuit attempts turn out flat, hard and dry. After much searching, I finally found a recipe that yielded something like the fluffy biscuits we’ve craved since eliminating gluten.
You can find the recipe at Mama Knows Gluten Free here. Audrey at Mama Knows Gluten Free suggests using Pilsbury gluten free flour. I haven’t found it nearby, so I used my preferred Bob’s Red Mill 1 to 1 flour. It does result in a wetter dough, so I use a little different technique for shaping the biscuits. She also gives some info on different gluten free flours and how to make ahead and freeze.
Recipe adjustments for gluten free biscuits

Xanthan gum
In the original recipe, it says to only add xanthan gum if your flour doesn’t already have it. Bob’s Red Mill 1 to 1 flour does have xanthan gum. Lately, though, I’ve noticed that for fluffier types of breads, it doesn’t seem to be enough. I want light, fluffy biscuits, so I added the full amount of xanthan gum anyway.
Dairy free
The original recipe gives instructions on how to make it dairy free, so I didn’t have to make my own adjustments. I used unsweetened almond milk and vinegar in place of the buttermilk as suggested. For the butter, I used vegetable shortening. If you have a kitchen scale, one trick to making shortening easier to measure is to use weight instead of measuring and scraping out one tablespoon of shortening at a time. One tablespoon of shortening is equal to 0.42 ounces or 11.94 grams. Multiply that number by the number of tablespoons you need to get the weight amount.
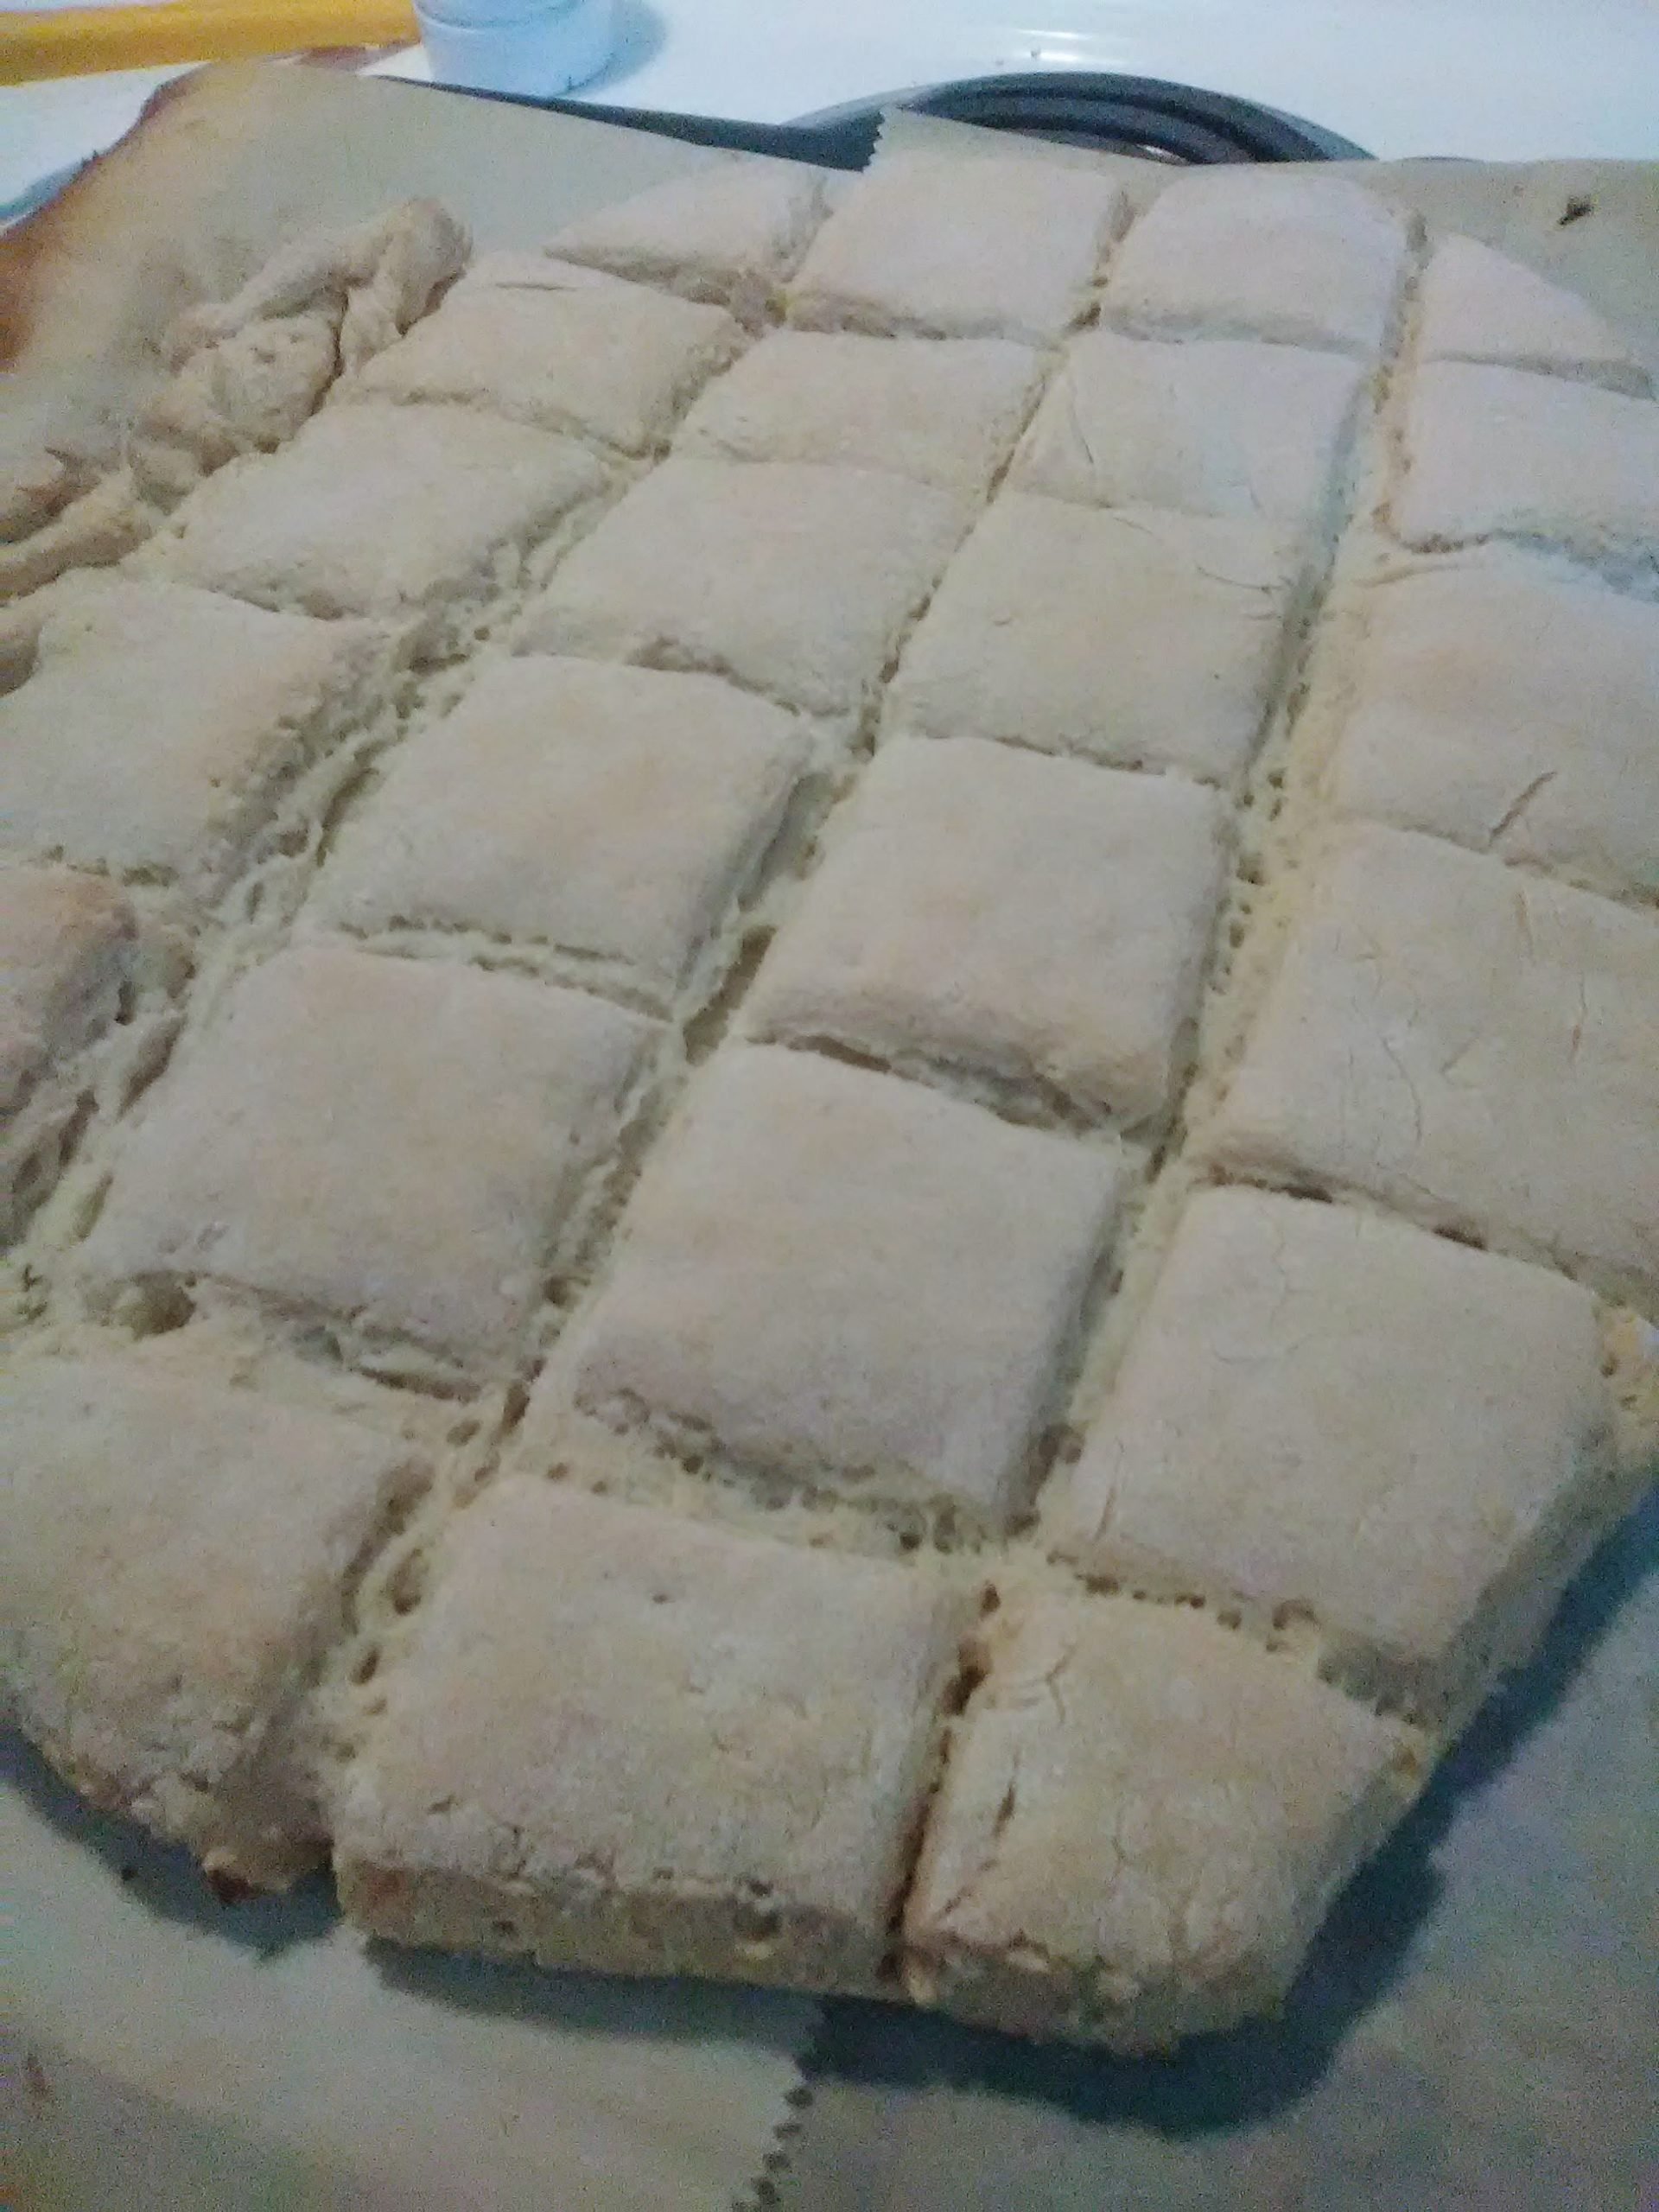
Shaping the dough
In order to limit handling the dough and overworking it, I shaped my dough on the parchment paper. Since my dough was pretty wet, I generously dusted the paper and my hands with flour. Like the original directions state, I patted and folded rather than rolled out the dough.
Instead of cutting with a biscuit cutter, I just cut straight lines with a sharp knife to form square biscuits. That way, I wouldn’t have to reshape the dough to cut more biscuits. Less handling is better. I also trimmed a tiny amount from the edges so that all the edges were cut like they would be with a biscuit cutter. This allows the biscuits to rise evenly. If you do it this way, the trick is to cut with a straight up and down motion, not a sliding motion. Sliding the knife would seal the edges and prevent them from rising.

Baking
Rather than move the biscuits by hand to a greased pan, I slid the whole parchment paper with the biscuits onto a baking sheet. The parchment provides a nonstick surface. If you’ve cut through the dough completely, they will bake perfectly like that. I had a little healper this morning, so I can tell that we didn’t quite cut all the way through in some areas and the biscuits stayed a little doughier in those areas. To help with that, I separated them when they were almost done and baked them for a few minutes longer.
My biscuits did take a about 25 minutes to bake, so just a bit longer than the original. I’m not sure if that is because of how close together they were or just my oven. I usually set my oven a notch lower than the suggested temperature because it bakes hotter than it says. Sometimes I overcompensate, though.
All in all, these biscuits satisfy our biscuit cravings and are good enough to serve to my non-gluten free friends and family. Give it a try and let me know what you think.
Like this post? To make sure you never miss a future post, please sign up for my newsletter.
[…] Gluten Free Biscuits (Dairy Free, Too!) was originally published on SubEarthan Cottage […]