Posted on 13 Comments

10 Reasons I Love My Electric Pressure Cooker (Instant Pot)

This was originally posted in 2017. I’ve been using my electric pressure cooker a lot lately to have easy, healthy meals. It’s been a while since I’ve shared, so I thought it was a good time to revisit it.

Last Christmas my lovely parents bought us an 8 qt. GoWise Pressure cooker that I have used almost daily ever since. This is the exact one I have:

With all the sales happening, and the Instant Pot craze still going strong, I know lots of people will be getting an electric pressure cooker and then wondering what to do with it. At least that’s what I did. Now that I’ve used mine for a while, I have some favorite uses for it to share with newbies. I have never used an official Instant Pot, so I can’t say how they compare. They should work about the same, though, so if you have an Instant Pot or other similar electric pressure cooker you should be able to enjoy all this awesomeness, too.

10 Reasons I Love My Electric Pressure Cooker (Instant Pot)

Easy Instant Pot Boiled eggs:

Boiled eggs on the stovetop are easy, unless you’re getting ready for work or school or have young children or are otherwise easily distracted. Then you either burn them or undercook them. Peeling them also is hit or miss. Sometimes the shell comes off easily, other times it takes half the egg white with it.

In the electric pressure cooker, I can put a dozen eggs in the steamer basket with a little water, push the button for eggs (mine has 1,3, and 5 minute settings for soft, medium and hard), and forget about it. The end result is perfectly cooked eggs that peel so easily my two year old can do it.

Potatoes:

Even in the microwave, I have a hard time getting potatoes and sweet potatoes to cook properly. It seems like I always have to restart it a few times to finally get them done. With the pressure cooker, I set it for 15-17 minutes depending on how soft I want them, and they are always done. I’m trying to quit using my microwave all together, too, so the pressure cooker is definitely the faster option compares to the oven.

Slow cooker recipes:

Anything you’d make in a crockpot can be cooked in the pressure cooker. You can either use the slow cooker setting, or, if you forgot about cooking dinner until after lunch, you can cook it under pressure and have it done in an hour or less.

Not only that, but, unlike with a slow cooker, you can use the sauté setting to brown meats or anything that needs browning first. That means more flavor with fewer dirty dishes.

Beans:

If I forget to presoak dry beans, I’ll put them in my pressure cooker for five minutes to do a quick presoak, drain, and add back to the pot along with the seasonings and broth or cooking water, then cook using the bean setting. It’s possible to skip the presoak entirely and go straight to cooking, if I’m short on time, but I prefer to presoak when I can.

If I get them cooking early enough in the day, I’ll switch to the slow cooker setting after they’ve cooked with pressure. That gives them the super yummy, second day flavor on day one.

Stews, soups and curries:

Browning meats and onions in the pot add flavor, and you can use the pressure then slow cook trick to further develop the flavor.

Bone broth:

Normally I would simmer bones all day on the stove for broth. With the pressure cooker, I set it to the two hour maximum time and get yummy bone broth. Easy Homemade Chicken Broth in an Electric Pressure Cooker

Stackable foods:

Smaller meats like chicken breasts, vegetables and rice can be put into separate heat-proof containers and steam cooked at the same time. I usually cook too much at once to do that, but when it works out, it is handy and doesn’t heat up the kitchen like using the oven. Easy All in One Electric Pressure Cooker Meal

Rice:

It cooks rice even better than my little rice cooker, and I don’t risk burning it like I do on the stovetop. (There’s lots of distractions here, people.) I don’t use it much for rice, though, since I usually cook curries and things I serve with rice in the pressure cooker. Whenever my rice cooker dies, though, I’m seriously considering a second, smaller pressure cooker as a replacement.

Yogurt:

I haven’t quite perfected yogurt with any method yet, but so far, the best I’ve made is in jars on the trivet in the pressure cooker. It is still a little runny, but it works well for smoothies.

Baking in an Instant Pot:

I’ve only done this once, but thought I’d mention it. You can bake cakes and breads in it by setting the bread or cake pan on the trivet and adding water to the pot for steam. This helps keep the bread or cake moist, which is especially handy for baking with gluten or grain-free flours.

Like this article? To make sure you don’t miss out on future posts, sign up for my newsletter.

Ways to use your Instant Pot or electric pressure cooker.
Posted on 3 Comments

DIY Soft Scrub Cleaner

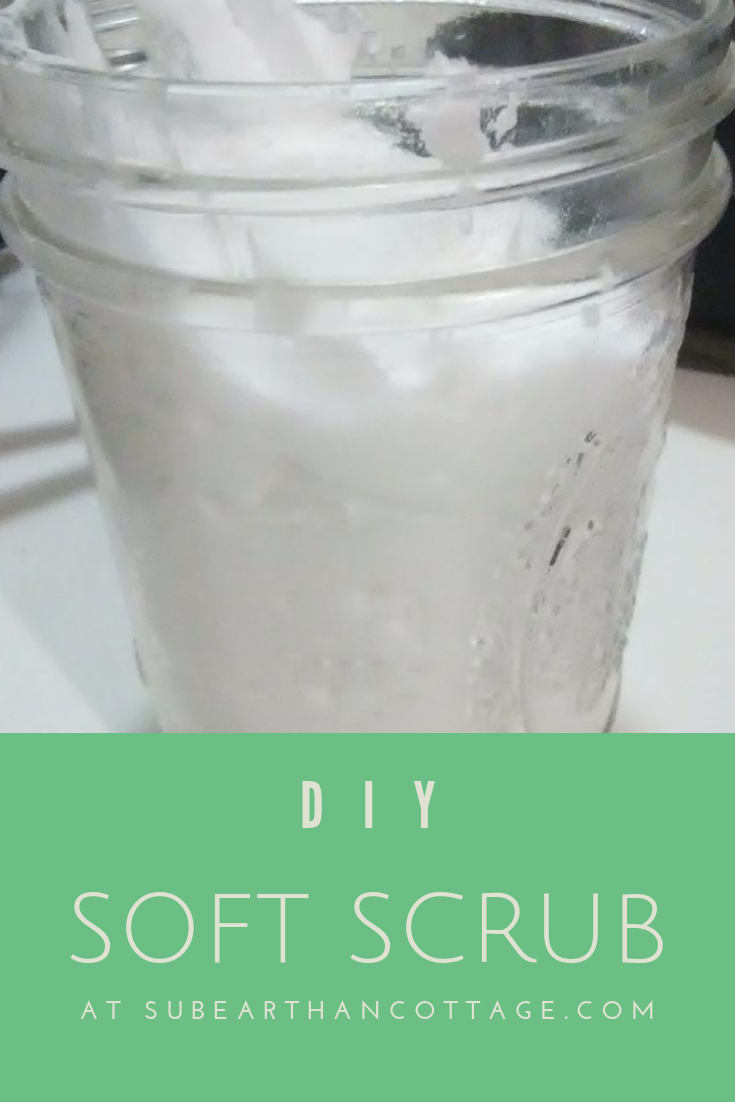
DIY Soft Scrub

I like getting my kiddos involved in housecleaning. Not just because they are highly involved in making messes, but because it is important that they know how to take care of themselves as adults. I’m pretty choosy as to what cleaning products I will let them use. So many cleaners are irritating to the skin, eyes and lungs.

Not only do I want my cleaning products to be safe, I like things that multitask and don’t cost an arm and a leg. Often, I’ve found the best way to achieve this is to make them myself, like with my natural furniture polish. With a few simple ingredients I keep around the house anyway, I find I can cover most cleaning needs.

My most recent cleaning concoction is soft scrub. It works well for when I need a little extra scrubbing power than I get with my usual all-purpose water, vinegar and dish soap mix.

Soft scrub in a jar
Soft scrub in a jar

Soft Scrub Ingredients

  • 1 cup of baking soda
  • 1/4 cup of liquid soap
  • 1 tablespoon of hydrogen peroxide
  • Optional: 2-3 drops of essential oil

Instructions

Place all the ingredients into a big bowl and mix until a uniform paste forms. To store, I like to scoop it into a wide mouth canning jar, but any lidded container will work. The mix will expand, so use a container that allows for at least double the amount to be safe.

Mixing the soft scrub

Variations

Type of Soap

Liquid castile soap will work, but for extra cleaning power I prefer a detergent soap, like Dr. Bronner’s Sal Suds or even Dawn dish soap. You could probably get away with any liquid hand soap or liquefied bar soap, but I haven’t tried those yet. The only time I haven’t liked it was when I made it with Ajax dish soap because that is what I had on hand. I think there was something in the Ajax that reacted badly with the baking soda or hydrogen peroxide. That mixture was fluffier and had an odd smell. I’m not quite sure what it was that caused it, but because of that, I recommend staying away from any dish soap that advertise extra cleaning additives. For the soap, basic is better.

Scent

I rarely add any essential oils for fragrance. Usually the soap I have is already scented, so I don’t see the need. Really, unscented is fine, too, unless you just prefer a scent to signal that something is clean. If I were to add an essential oil, though, I would probably use either peppermint, lemon or tea tree oil. If you choose to use an essential oil, please be aware of safety guidelines for using them around children, pregnant women, pets, and other sensitive individuals.

How to use

To use, I scoop out a dollop of the soft scrub and apply a layer to the area I’m cleaning. I usually let it sit for a minute or two then buff it off with a rag. If there’s a residue left, I’ll either wipe it down with a damp rag or mist it with my all purpose vinegar, dish soap and water solution and wipe it clean.

Results

I almost forgot to take a before photo. This is an embarrassing photo of tomato sauce splatter left on my stove overnight.

Before using soft scrub to clean last night's spaghetti sauce.
Before using soft scrub to clean last night’s spaghetti sauce.

This is a photo of what it looks like after using my soft scrub and minimal elbow grease.

Shiny stovetop
Shiny stovetop

I do apologize for the blurry photos. Lighting in my kitchen isn’t the greatest, and also I was in the middle of cleaning.

Posted on Leave a comment

Easy, Flexible Meal Planning Lists for Stress-free Meals

Meal planning takes away the daily stress of deciding what’s for dinner. I’ve never done well with creating weekly menus by day, though. With a set schedule, I sometimes felt like I had to make what’s on the menu, rather than finish up the leftovers first. Silly, I know. Then there were the days that ended up busier than expected and I either didn’t have time to make the planned meal or I was too tired by the time dinner rolled around and needed something simpler. 

The solution I’ve found to traditional menu-style meal planning is making meal lists. Not only does it offer day by day flexibility, it makes it easier to work in sale items, saving money at the grocery store.

For us, breakfast and lunch are usually either made from the same basic staples or leftovers, so I only use my lists for dinner. You can easily use the same method for all meals, if you like.

Meal Planning Lists

Step 1: Make a Master List

Start by writing down all your favorite meals to make. This isn’t the time to pull out cookbooks or look for recipes online. You want this to be a brain dump of your go-to meals. I would aim for at least 10-14, but a bigger list gives you more variety. If you don’t have that many to start, don’t worry. You can always add to this list later.

You can leave your master list as-is, or sort it into categories such as grouping it by the type of protein, ease of prep, cook time or type of appliance used if you have lots of Instant Pot or slow cooker meals. My list is just one big list.

You could also make note of what sides you like to serve with each dish, but I usually add them later.

Step 2: Decide what types of meals you need for the week

For this step, consider things like what you have on hand that you need to use up, what’s on sale and how busy you’ll be during the week. If you know you’ll be eating out any days, make note of that, too. I don’t usually make a list for this step, but if it’s a busy week you might want to make some notes.

Step 3: Make your meal list for the week

Consider the things from step 2 and pick 5-7 meals for the week from your master list. I like to cook things like big pots of soup or chili at least once a week, so I know leftovers will take care of one or two days, so I usually make a list of five. If your meals won’t include leftovers, you’ll want to list seven, or as many days as you’ll be eating at home.

This is where I consider sides and make note of them alongside the meals I plan to make.

If you’re looking to expand your master list or just want to try something new, you can add a new recipe as one of your meals and make note of the cookbook or other source. Once you’ve tried it, if you like it, add it to your master list.

That’s my meal list for this week.

While I don’t add these to my list, I like to keep staples for one or two really quick backup meals on hand at all times. You can read more about this here. If this is new to you, you’ll want to consider picking a backup meal or two before moving on to the next step.

Step 4: Make your shopping list

Make a shopping list from your weekly meal list, including sides and staples for your backup meal, if you don’t already have one. From your list, shop your pantry then grocery shop for everything else you need.

Step 5: Using your list

If one meal relies on lots of fresh produce or other time-sensitive food, you’ll want to make it early in the week. Likewise, if one day is busy and you have one slow cooker or really simple meal on the list, you’ll want to save it for that day. Otherwise, you know you have everything to make all the meals on your weekly list, so pick whichever one you like for now and one for next. Picking your “next” gives you time to thaw out or presoak anything needed for that meal. Every day, think about what meal you want to be next and do the necessary prep. If that day’s meal has lots of leftovers, you can use them as your “next” and push the rest of the week’s meals down.

Each meal you make gets checked off the list. At the end of the week, if there’s anything not checked off, add that meal to next week’s list.

Customize Your Meal Planning Lists

Planning one week at a time works best for me because that’s about the longest we can go without needing to restock staples. If two weeks at a time works for you, make your list 10-14 meals instead of 5-7. Repeats are fine if you want or need.

If you want to be super organized, turn your master list into index cards with one meal and all the ingredients listed on each card. You can even make them full blown recipe cards, which is helpful if someone else does some of the meal prep or it’s a new recipe. Sort them into whatever categories work best for you, then pick out your 5-7 meal cards for the week. Now your grocery list is as simple as copying the ingredients from the cards.

Background image by Goumbik from Pixabay
Posted on 1 Comment

Why I Love my Air Fryer

Another kitchen gadget I find myself using almost daily is my air fryer. Like my electric pressure cooker, my air fryer was a Christmas gift from my parents. This is the Gourmia model I own. It has a six quart basket and eight preset functions, or I can manually set the timing and temperature.

Unlike with my pressure cooker, I honestly wasn’t sure what to do with the air fryer at first. I don’t fry a lot of things, mainly because it’s messy. I also have the added challenge of making gluten free breading. Even before going gluten-free, I found it hard to get the breading to stick on things like chicken and have it cook all the way through without burning the outside. After some experimenting, though, I’ve found that the air fryer makes frying easier. I’ve also found that the air fryer does so much more than frying.

Ways I use my air fryer

  • Potatoes Whether it’s fresh home fries or frozen tater tots, the air fryer browns them all nicely. My air fryer has a french fry preset, so I just add the potatoes and start it. Every once in a while during the cooking, I give the basket a shake to keep them from clumping. This is especially important if the basket is fairly full. You can cook them completely without oil, but I do like to toss them lightly with a little olive oil. This seems most important with french fries. They’re okay without it, but I like the flavor better with it.
  • Sausage and bacon Both turn out beautifully in the air fryer. All the excess grease drains under the basket, leaving the bacon crisp and the sausage not greasy. I use the bacon setting on mine for both, but I reduce the time to nine minutes for sausage.
  • Reheating leftovers We got rid of our microwave a few years ago. We really only used it to reheat leftovers, which never tasted as good as if I heated them on the stove or in the oven, and it took up a lot of counter space. While I still use our stove and oven to reheat things for the whole family, if I’m just heating a plate of food or other small amount, I’ll use the air fryer. It’s quicker than the oven, and the food heats more evenly than it did in the microwave. The texture is better, too.
  • Frying I still don’t do this much, but I finally got gluten-free fried chicken to work, so that may change. I did cheat a little by quickly frying it on the stove first, just to lightly brown and set the breading. Then I added it all into the air fryer basket and let it finish it with the chicken preset function. While it’s not as low fat that way, the chicken turned out crisp and juicy but not at all greasy. That also freed up my skillet to make gravy while the chicken finished cooking so it was all hot and perfectly done at the same time.
  • Baking It is essentially a counter top convection oven, so it bakes as well as an oven. I don’t use this function as much, because, with a family of five, the oven is usually more convenient. If I’m only making a few cookies, though, it works really well. I’ve also baked cheesecake in it using the recipe that came with my air fryer. It turned out delicious and was super easy to make.

What are your tips?

I’m still learning new things to try in my air fryer. With just those five things, I already use it almost every day. I would love to hear more creative ways to use an air fryer. If you have one, please share your favorite tips and recipes in the comments.

To make sure you never miss a post, please sign up for our newsletter. Once you sign up, you’ll get a confirmation email. Sometimes it gets sent to the spam box. Please look for it, because you won’t be signed up until confirmation is complete.

Air Fryer

If you click through any of the Amazon links and make a purchase, I will receive a small commission. There is no added cost to you.

Posted on 1 Comment

Sunbeam Mixmaster Update

Last Thanksgiving I bought a Sunbeam Mixmaster to help with all the gluten free baking. This Thanksgiving, I broke my Sunbeam Mixmaster by sticking a plastic spatula between the beaters while it was mixing blueberry muffins. Broke as in pieces fell out of the machine and the beaters stopped spinning. It’s probably a good idea to turn off a mixer before scraping the bowl.

A quick internet search told me I probably broke the plastic drive gears, and the remedy for that was a dumpster burial. At that point, I figured it wasn’t going to get worse, so I had nothing to lose by taking it apart and seeing for myself if it was reparable.

When I finally figured out how to open it, everything looked fine. No sign of anything broken, and the plastic gear that turns everything had minimal wear. The part that latches the beaters in place looked fine. I couldn’t find anything that looked like it was missing the tiny broken pieces. Little pieces that, after thinking more about it, looked oddly like the little tabs on the beaters…

At that point I grabbed the the beaters and compared them to the rarely used dough hooks. Sure enough, the tabs were missing from the beaters but not the dough hooks. Yay! Replacing beaters is cheap and easy. The only problem was now my mixer looked like this:

Luckily I reassembled the mixer without breaking anything. I tested it with a loaf of banana bread mixed with the dough hooks, and it worked fine. Amazon had replacement beaters for about $10, so it should be fully functional in about a week.

My guess is that those tabs are designed to break under pressure if something gets caught in between. While the drive gear is plastic, it’s pretty thick. Even with my mistake and a year of using it almost weekly, it looks to be in good shape. It makes me wonder if some of the people who thought they stripped the drive gear actually just needed to replace the beaters.

In the long run, if money allows, a mixer with an all-metal drive would be better. From my year of use and seeing how little wear there is on the inside, I do think this Sunbeam Mixmaster is a good budget-priced stand mixer. It has mixed everything I’ve thrown at it, including a double batch of banana bread and a meatloaf (separately, of course) with no trouble. Everything, that is, except for spatulas.

Don’t forget: this holiday season, take 30% your SubEarthan Cottage order with coupon code “ShopSmall18”. Valid through December 10, 2018.