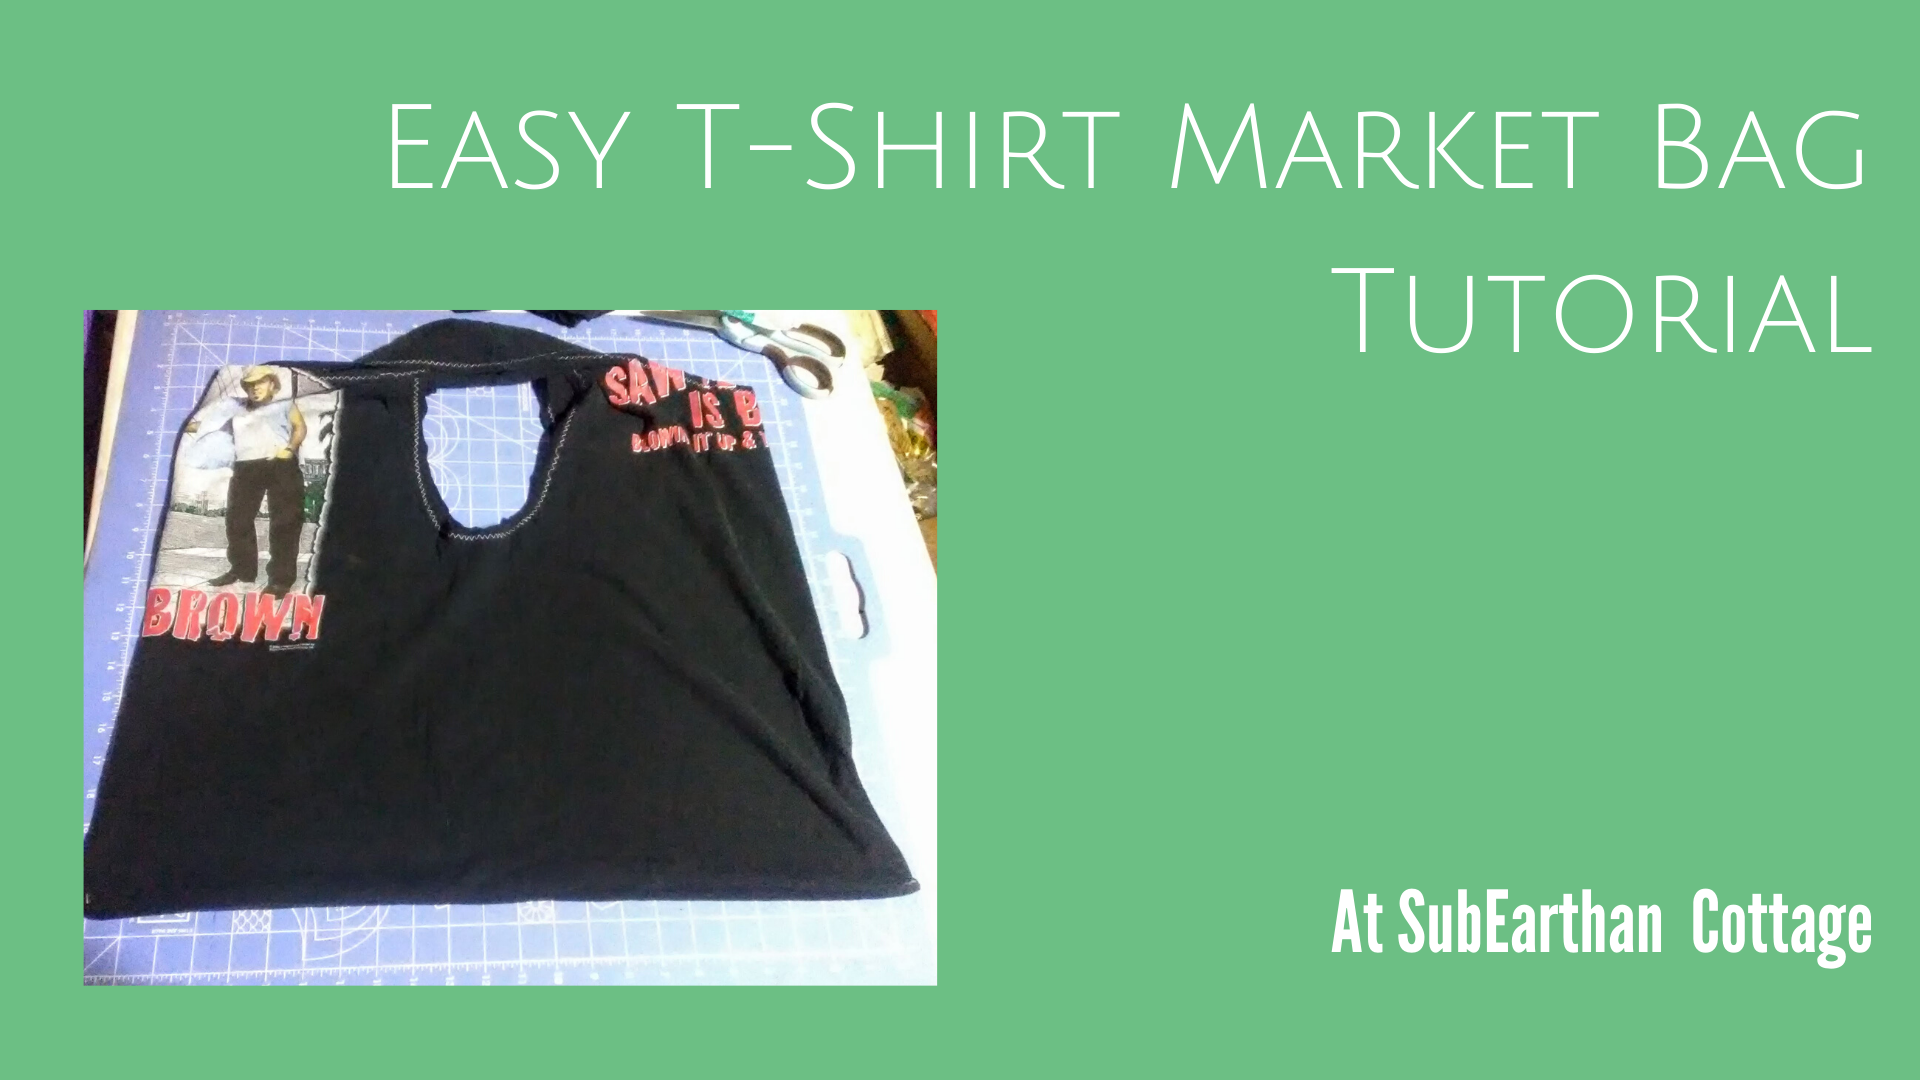
Posted on Leave a comment

Embroidery Machine Tips: Paw Patrol and Using My Brother SE-400

Thaddeus turns three next week! When asked what he wants for his birthday, he exclaims, “Paw Patrol stuuuuuufff!” He is also constantly asking me to sew basically the entire cast of Paw Patrol for him. I may be crafty, but that is a bit beyond my skill set. So, since I have a lovely embroidery machine that doesn’t get used nearly enough, I thought I’d purchase a Paw Patrol design set for my machine.

The set came from Etsy seller OhMyArtDesigns. It comes with all the main pups, Rider, Robo Dog, and the Paw Patrol Logo. They also come in a few different sizes and file types to accommodate different brands and machines. So far, I love the designs. The stitch density is great, and they have a lot of detail. The only problems I’ve had fall completely in the “user error” category.

Embroidery Color Charts Matter

My first mistake was using the thread colors displayed on the machine and my manual chart to choose my threads.

The thread colors and names used by different machine brands varies, so if a design is drafted using different colors than yours, the color suggestions can seem a bit off. I was in a hurry and didn’t pay attention to the color chart provided by the designer, so some of my color choices weren’t quite right.

Everest would be less blue if I had used the appropriate chart. Lesson learned. This also highlights the need to test run any new patterns before stitching them on your final product. Embroidery machine stitching is so dense that it’s almost impossible to remove without ruining the fabric.

Hoop Tightly

The other problem I encountered is also easily fixed. I just need to learn how to hoop my fabric properly. If you look closely, you can see the black outline on both Everest and Rider strays from the edge of the design on one side. I still have trouble getting the fabric and stabilizer drum-taut, so by the time the outline is stitched, the design stitches puckered the fabric in places. I have a magnetic hoop set on my wish list to see if that would help, but honestly it’s probably a case of needing more practice. Considering how many pups I have left to stitch, I may be an expert at hooping by the end of the week!

Rider in embroidery.

It is so fun to watch the designs being sewn. It’s like putting together a puzzle.

Embroidery. Everest after embroidering the first color.
Everest after stitching the first color.

Looking for new designs to try on your embroidery machine? Find my embroidery files and freebies here.

To stay informed about new posts, products and sales, sign up for my newsletter here.

Tips for successful machine embroidery.


Posted on Leave a comment

Children’s Messenger Bag

This morning I made a messenger bag using Merriment Design’s Kid-sized Messenger Bag Free Pattern and Sewing Tutorial. The size is also nice for a small messenger-style purse.

Her tutorial is awesome, so I’m just going to share the minor change I made. Instead of making a fabric strap, I used some webbing I had on hand. Not only did that save time, but it allowed me to make the whole thing with two fat quarters. You could also use a thick ribbon, upcycle an old belt or an old purse strap for the handle.

I like using a light colored fabric for the lining in most bags I make. It makes it easier to find whatever is inside.

The fabric is from a fat quarter bundle I found at Tuesday Morning. I always find fun things in their sewing and craft section.

Posted on 1 Comment

My New Toy

So, I got a new toy for my birthday:


Yay! Now impatient me with no time and a fear of leaving needles around accidentally in the baby’s reach can do embroidery too! It’s also a regular sewing machine. I’ve never sewn on a computerized machine before. I’ve never sewn on a sewing machine newer than from the early 1990s for that matter. Most sewing machines I’ve used have been older than me. Not that I don’t like old machines. You’ll have to pry my trusty metal mechanical Kenmore and back up Signature(s) from my cold hands.

It’s been fun learning how to use it. I also may or may not be a bit obsessive about switching off the power strip and then going back and unplugging it from the power strip and then making sure I’ve unplugged it again later, lest some random lightening storm attack my precious.

It’s a brother se400. I haven’t done much regular sewing with it yet, so I can’t do a full review. I can say that I worried a little about getting annoyed with all the threading and re-threading involved with a single needle embroidery machine. Brother took care of that by giving it the most amazing needle threader I’ve ever seen. I usually skip “automatic” threaders as I find them harder to use than just sticking the thread through the eye by hand. This one is some sort of magic. Seriously, if you were to stop over, I’d probably briefly introduce you to my family and then insist you come see me thread my sewing machine.

Aside from just playing, I’ve rescued a few shirts from (probably coffee) stains by embroidering things on them to hide the stains. Considering my clumsiness and love of coffee, that alone will probably help me get my money’s worth out of it.

I am looking for decent digitizing software so I can do things like embroider the SubEarthan Cottage logo and make traditional monograms a little easier. Embird seems to be the go-to, but it’s a little pricey. Stitch Era is more my price range, but I’m not sure it’s as user-friendly. I’ve also seen Sew What Pro mentioned, but haven’t looked into it enough to know what it’s like. Any advice on software would be appreciated.


Posted on Leave a comment

Quick Ironing Board Cover

My ironing board cover has seen better days. It’s not worn, but it has a few scorch marks and B thought it was a good idea to stamp it a few times with my thank-you stamp. Since it is always visible in my craft room, I wanted something more pleasant to look at, so I decided to make it a shiny new cover.

Eww.

I went with supplies I had on hand and used the ironing board itself to measure, so I don’t have exact measurements. You should be able to adapt from what I did easily, though. Keep in mind that this is just a cover and not the padding. I put mine on right over the old one. If you want to replace everything, you’ll have to find a replacement for the pad, too. (Layers of quilt batting and topped with Insul-brite maybe?)

Supplies:

Enough fabric to go over the top of your ironing board with about a 3 inch overhang on all sides.

Extra-wide double fold bias tape or blanket binding (2-3 packages)

Thin elastic. The bias tape or binding serves as a casing for the elastic, so make sure to choose an elastic thin enough to be threaded through easily.  Mine is 1/4 inch elastic.

Thread.

How to:

Cut the fabric with a 3-ish inch overhang. The easiest way to do this is to put the fabric on the floor, then the ironing board upside down on top and cut around it, eyeballing the overhang.

For this tutorial the pointy curved end is the top, the short, straight end is the bottom and the long edges are the sides. There’s going to be a gap in the bias tape/binding at the bottom, so you will want to finish it some way. If you have a serger, just serge straight across the bottom. If not, you can either zig-zag stitch over that edge or fold over 1/4 inch twice and hem. It doesn’t have to be exact, just make sure when you cut initially that you account for the hem on that end if you go that route.

Find the middle point of the bottom edge. Measure about 1.5 inches on each side of the midpoint and mark. These are your starting and ending points for the casing.

Leaving the three inch space at the bottom open, sew the bias tape/ binding on being sure to enclose the edge of the fabric. Unless you have a really long strip of binding, you’ll probably need to piece the binding together. When you get a few inches from the end of one bias strip, stop sewing and join the new strip by opening the ends flat, overlapping and sewing across. Refold and continue sewing around the edge of the fabric. Stop when you reach the end point.

What happens when you don’t have enough blanket binding on hand? This. This is what happens.

Thread the elastic through the binding all the way around leaving several inches hanging loose at the beginning and end. This works best if you attach a safety pin securely to the leading end of the elastic to help guide it through.

Fit your new cover, pretty side up onto your board and pull the elastic snug.

Tie the elastic securely, trim the ends if necessary.

Admire your new cover.

Questions? Ask in the comments and help me expand on my clear-as-mud tutorial.

Posted on Leave a comment

Thrift store dress refashion

I found this dress at Thrift Town for $1.99. The color and general shape of the dress are cute, but it needed some tweaking.

IMG_4439

Overall, it was a bit big. The sleeves were awkward, and I’m more likely to wear a dress when it’s warm, so the sleeves needed to go. I also think it feels a little frumpy at that length.

Here’s what I did:

The shoulder seams were low, so I was able to just remove the length and hem. I added two darts in the back at the waist to trim it down but keep the fullness of the skirt. I kept the top a little loose, but that makes nursing easier and will allow me to wear it over a long sleeve black tee in the winter if I want. I do need to find a new belt or trim down the one I used for the “after” photos. I really like the belt with the dress, but it is way too long. I like how the width of it breaks up the business of the print, though.

IMG_4440

I had planned to take about six inches off of the length, but Finn thought it looked nice the way it was. I still might, but honestly, for chasing after a toddler the longer length is probably more practical.

Posted on

T-Shirt to TV Pants

I went on a little Pinterest binge a couple days ago looking for ideas to help clear my refashion stash. Saturday night I decided to make a pair of yoga pants out of a t-shirt using this tutorial. I wear a size eight on average, and used an XL adult t-shirt.

I did make a few changes to the design. First, instead of cutting the shirt down the middle, I cut it down the sides from the middle of the underarm to the hem. This also means you’ll have an inseam and no side seams. That keeps any design on the front or back intact and moves them to the hips. For the waistband, I cut the underarm seam from the sleeves and squared them up to be two equal rectangles, leaving the hem intact. I sewed the short sides together making a big, short tube from the sleeves. I then put the tube inside the waist of the pants with the pants right side out and the right side of the tube facing the inside of the pants. The raw edge of the tube lines up with the raw edge of the pants. I serged the top together like that. This made it so when the tube is folded down to the outside, the seam is covered.

IMG_4449IMG_4452IMG_4459

Sorry for the awkward pictures. No one was around to take the pictures and Doctor Who was about to start.

I sewed it all on my serger and it took less than ten minutes. I probably should have added two minutes and switched from white to black thread. Or not.

They are a little loose at the waist. If I were planning to actually do yoga or wear them in public I should probably add some elastic at the seam. Since they will probably be used mainly for watching Doctor Who while sitting on the sofa, I probably won’t bother.

T-Shirt to TV Pants was originally published on SubEarthan Cottage

T-Shirt to TV Pants was originally published on SubEarthan Cottage

T-Shirt to TV Pants was originally published on SubEarthan Cottage

T-Shirt to TV Pants was originally published on SubEarthan Cottage

T-Shirt to TV Pants was originally published on SubEarthan Cottage

T-Shirt to TV Pants was originally published on SubEarthan Cottage

T-Shirt to TV Pants was originally published on SubEarthan Cottage

T-Shirt to TV Pants was originally published on SubEarthan Cottage

T-Shirt to TV Pants was originally published on SubEarthan Cottage

T-Shirt to TV Pants was originally published on SubEarthan Cottage

T-Shirt to TV Pants was originally published on SubEarthan Cottage

T-Shirt to TV Pants was originally published on SubEarthan Cottage

T-Shirt to TV Pants was originally published on SubEarthan Cottage

T-Shirt to TV Pants was originally published on SubEarthan Cottage

T-Shirt to TV Pants was originally published on SubEarthan Cottage

T-Shirt to TV Pants was originally published on SubEarthan Cottage

T-Shirt to TV Pants was originally published on SubEarthan Cottage

T-Shirt to TV Pants was originally published on SubEarthan Cottage

T-Shirt to TV Pants was originally published on SubEarthan Cottage

T-Shirt to TV Pants was originally published on SubEarthan Cottage

T-Shirt to TV Pants was originally published on SubEarthan Cottage

T-Shirt to TV Pants was originally published on SubEarthan Cottage

T-Shirt to TV Pants was originally published on SubEarthan Cottage

Posted on Leave a comment

Vintage sewing presser feet and accessories part four: Stuff that I overlooked while posting earlier

These pictures were hiding. I think most will work on my machine (low shank).

Don’t know.

Bias tape foot? Which, btw I’ve tried to use for that purpose and wound  up with a  mess.

????, darning foot and narrow/rolled hem foot

Weird zipper foot

I think you feed thicker thread through the hole for decoration or to help with gathering. Not sure if it has another purpose. 

Okay, a (formerly) clear foot with metal over the feed dogs. Embroidery? Teflon foot? I don’t know.

???????