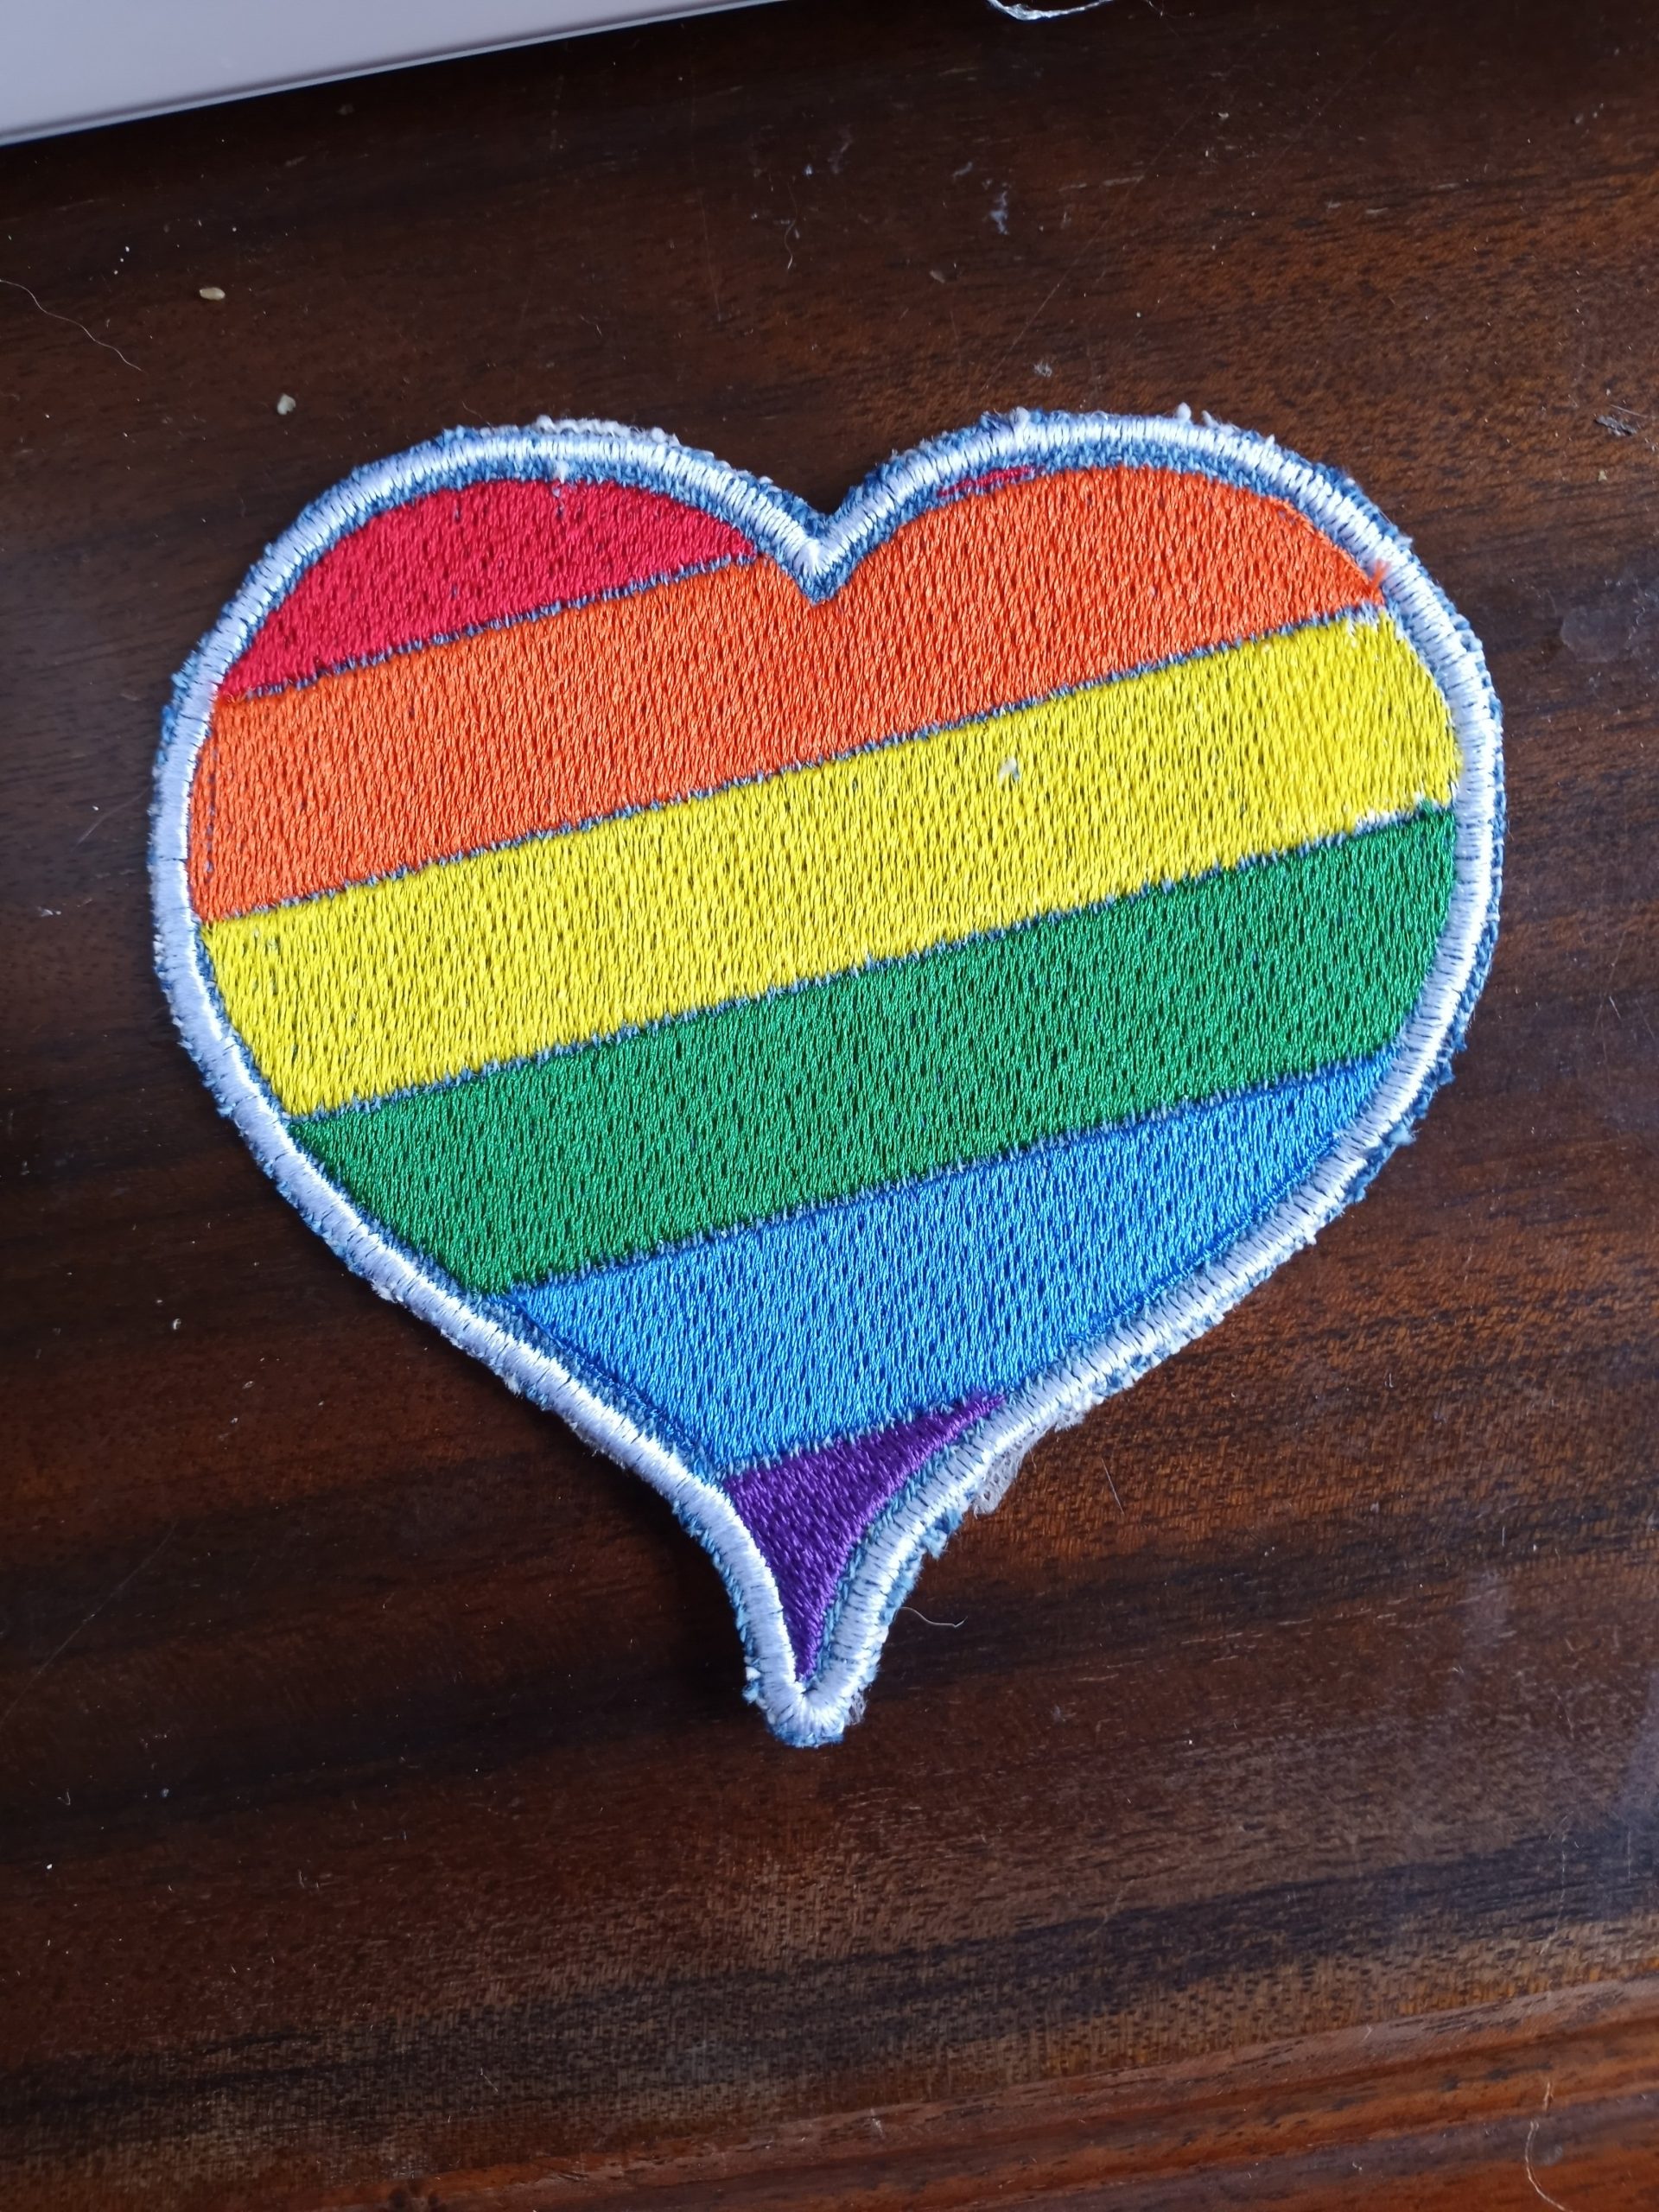
For the whole month of June, my Rainbow Heart machine embroidery design and bonus patch file are FREE! It fits 4 x 4 hoops and includes files compatible with most embroidery machines. If you don’t see your machines file type listed, let me know.
I think this Rainbow Heart would look amazing on denim. You can also play with the colors to get your preferred color combination. My embroidery designs fit the 4×4 hoops common on many beginner home embroidery machines.
If you’re like me and still doing your holiday shopping, you’ll want to keep the shipping guidelines in mind. I currently only ship USPS. You can find the full USPS shipping deadline info here. https://www.usps.com/holiday/holiday-shipping-dates.htm
Here are the USPS shipping deadlines to arrive by December 25 for the lower 48 states:
USPS Ground Advantage® Service Dec. 17
First-Class Mail® Service Dec. 17
Priority Mail® Service Dec. 18
Priority Mail Express® Service2 Dec. 20
Alaska and Hawaii are mostly the same, but USPS Ground Advantage needs to ship a day earlier on December 16th.
Anything overseas requires Priority Mail Express International® Service and needs shipped by December 16th.
While I will pretty much ship until the last minute and do my best to get orders out by the next day, I can’t guarantee delivery by a certain date, so please order ASAP.
Stock up on my Handmade Soap
My five bars for $30 deal is back! To get that price, use this listing and tell me the five you would like in the notes at checkout. If you don’t let me know, or a variety is sold out, I’ll try to contact you first. If I don’t hear back within a day, I’ll send you an assortment of my favorites or substitute the sold out one with a different fabulous bar.
Now through December 19, if you use the coupon code CHRISTMAS25 at checkout, you’ll get 25% off your order, including clearance, sale and the bulk soap listing.
Come See Me!
Sunday, December 21 I will be at V’z Vintage Holiday Market from 10am-6pm. It’s located at the American Legion Post 655, 2817 Carson St., Haltom City, TX 76117. If you’re local, you should totally come check it out. SubEarthan Cottage will be inside this time because it’s December in Texas and you never know what you’ll get weather-wise.
This is my third month at this market. There’s always a ton of unique handmade booths, food vendors and some vintage finds. If you’re looking for some last minute gifts, come support some local small businesses!
Today’s words of wisdom, brought to you by Sylvester the Cat and my favorite Yogi tea. (not sponsored) “Love is the highest of all virtues.”
Right on, Sylvester.
I’m prepping for my first market since my oldest was an only child. 😬 If you’re local, come check it out. All the details are in the second photo. I’ll have all my handmade goodies from my shop out there.
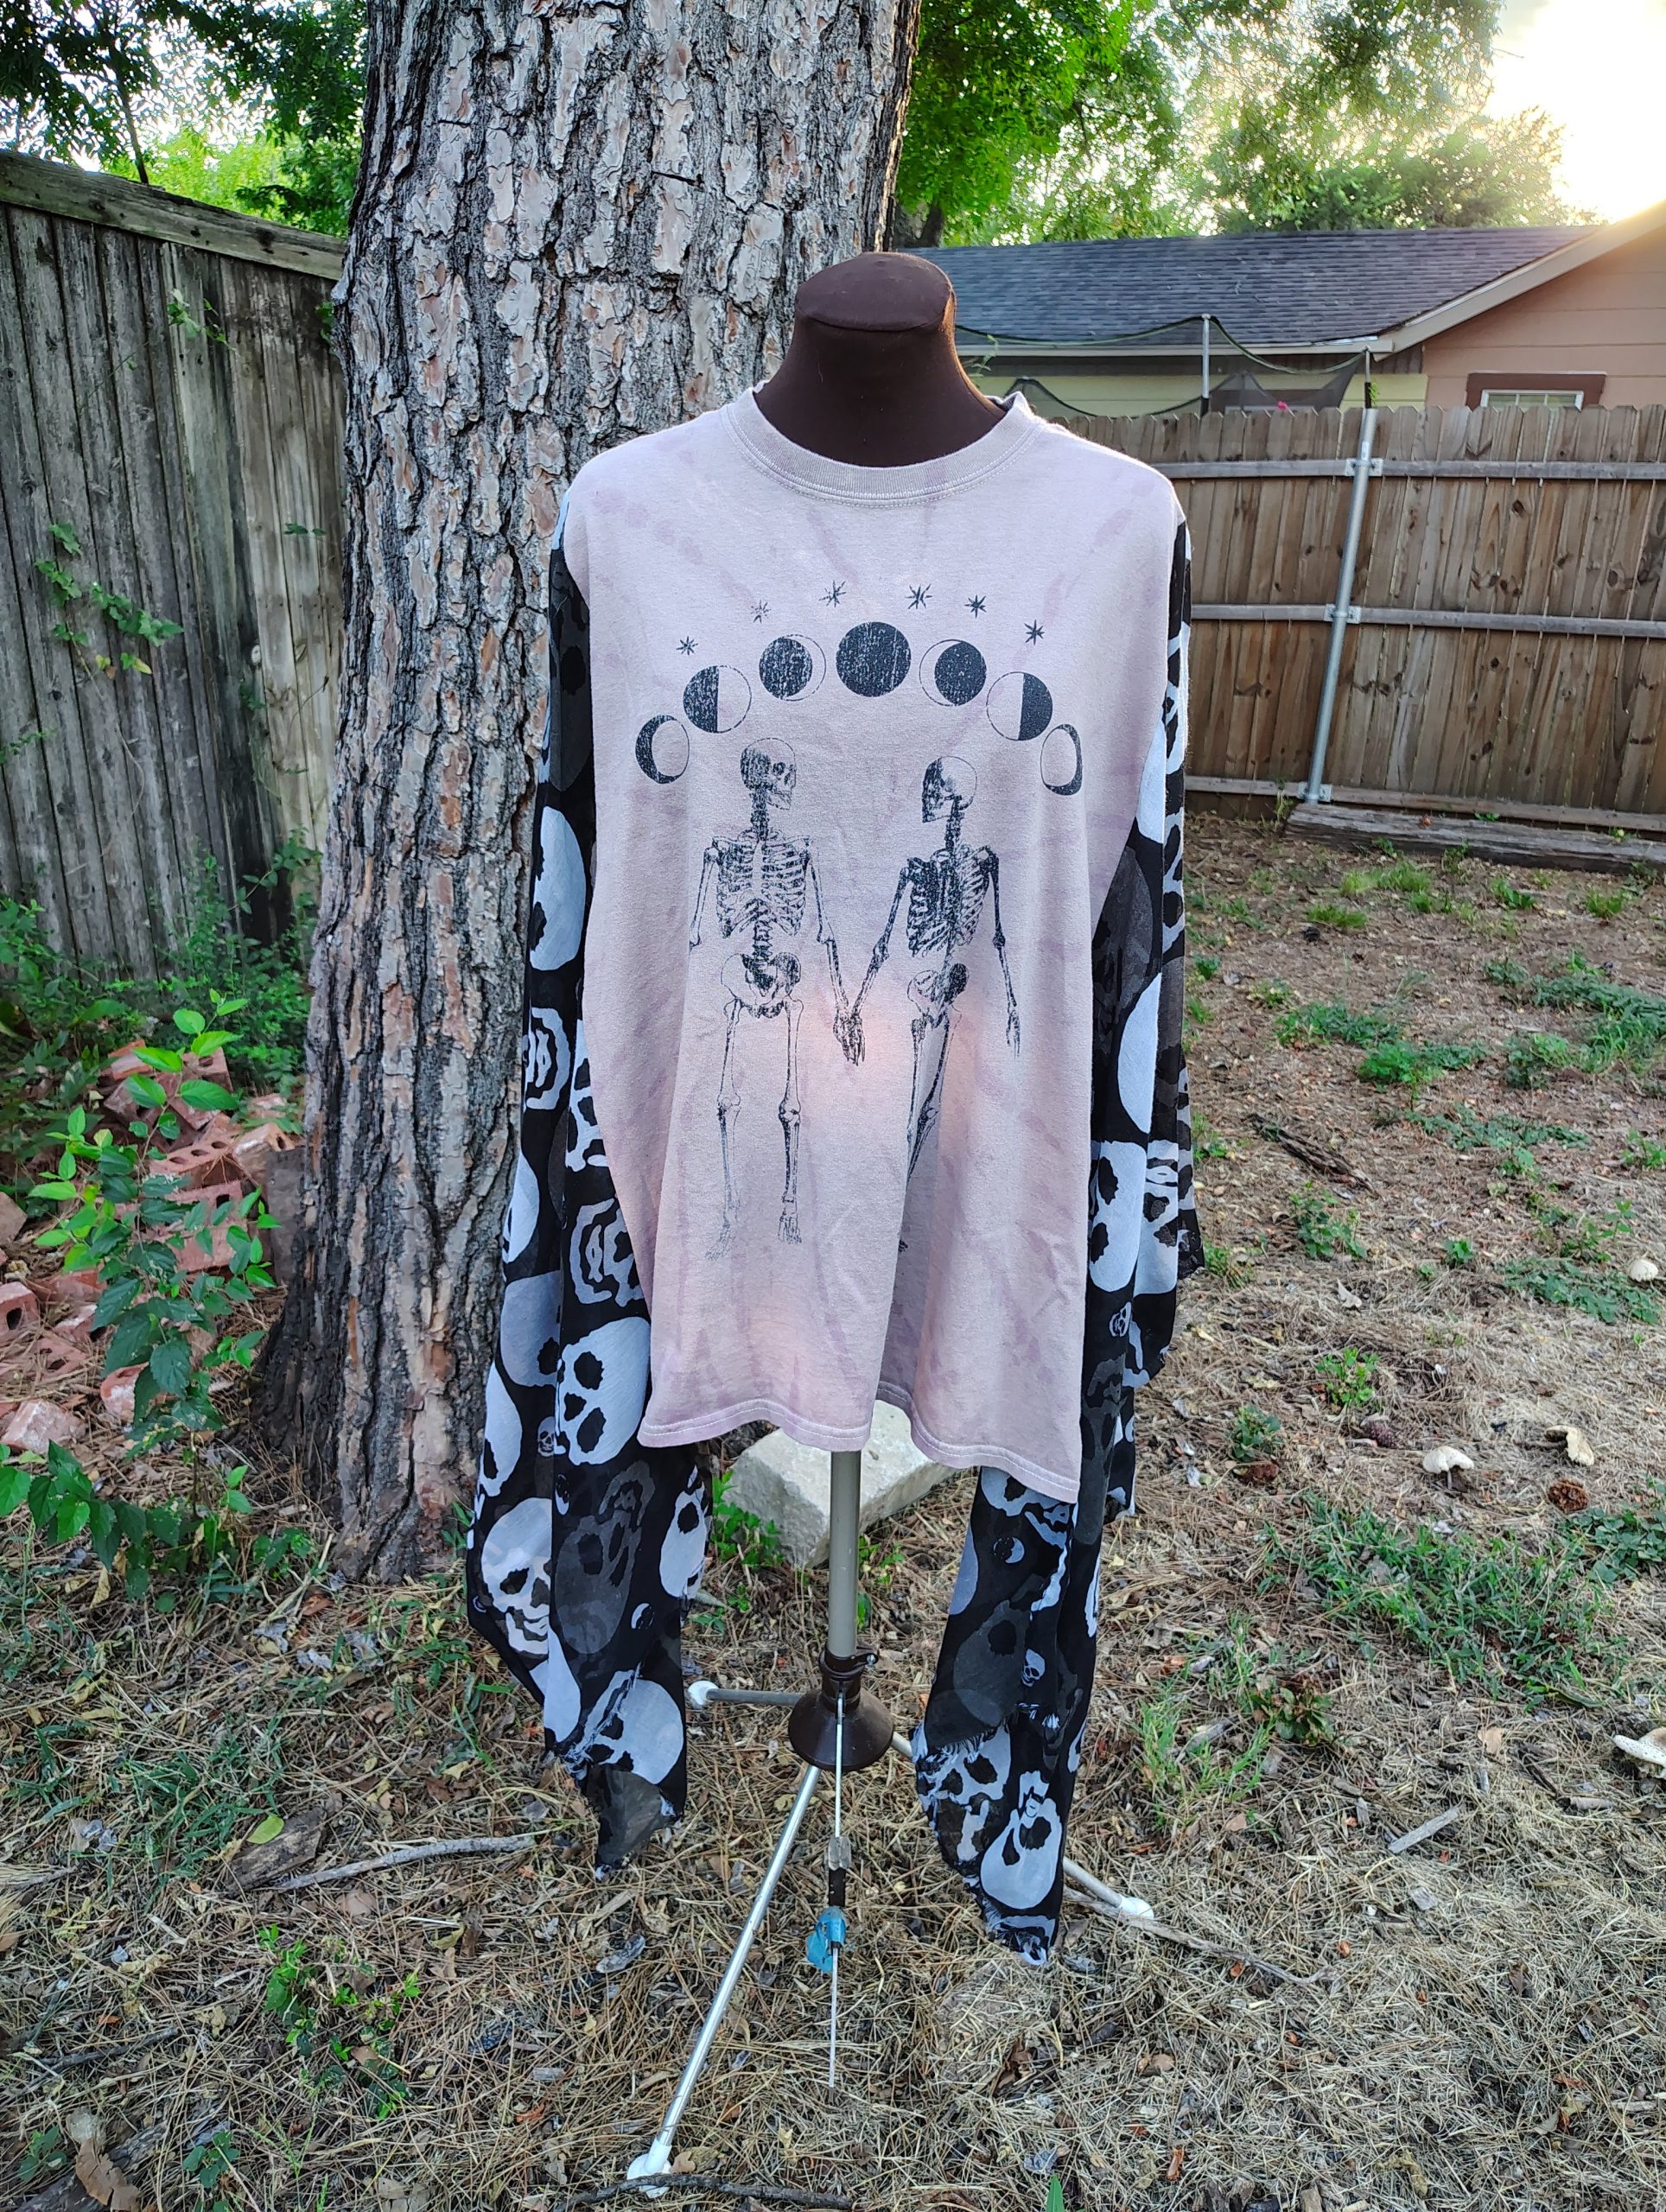
I’ve gotten a lot of questions about my upcycled kaftan or poncho shirts. I thought many of them could be best answered by seeing them on a real person. I didn’t have a model readily available, so you get me with my camera and tripod.
I want to do a product Q&A soon, so if you have any questions, please write them in the comments or send me a message.
I finally got all of the upcycled boho tops listed in the shop. I’ve been calling them poncho tops, but they’re really more kaftan-like. So Kaftan tops? Anyway.
I also finished another upcycle that I’ve been working on for over a year now. If you follow me on the socials, you’ve seen a little teaser of it. Either way, here it is!
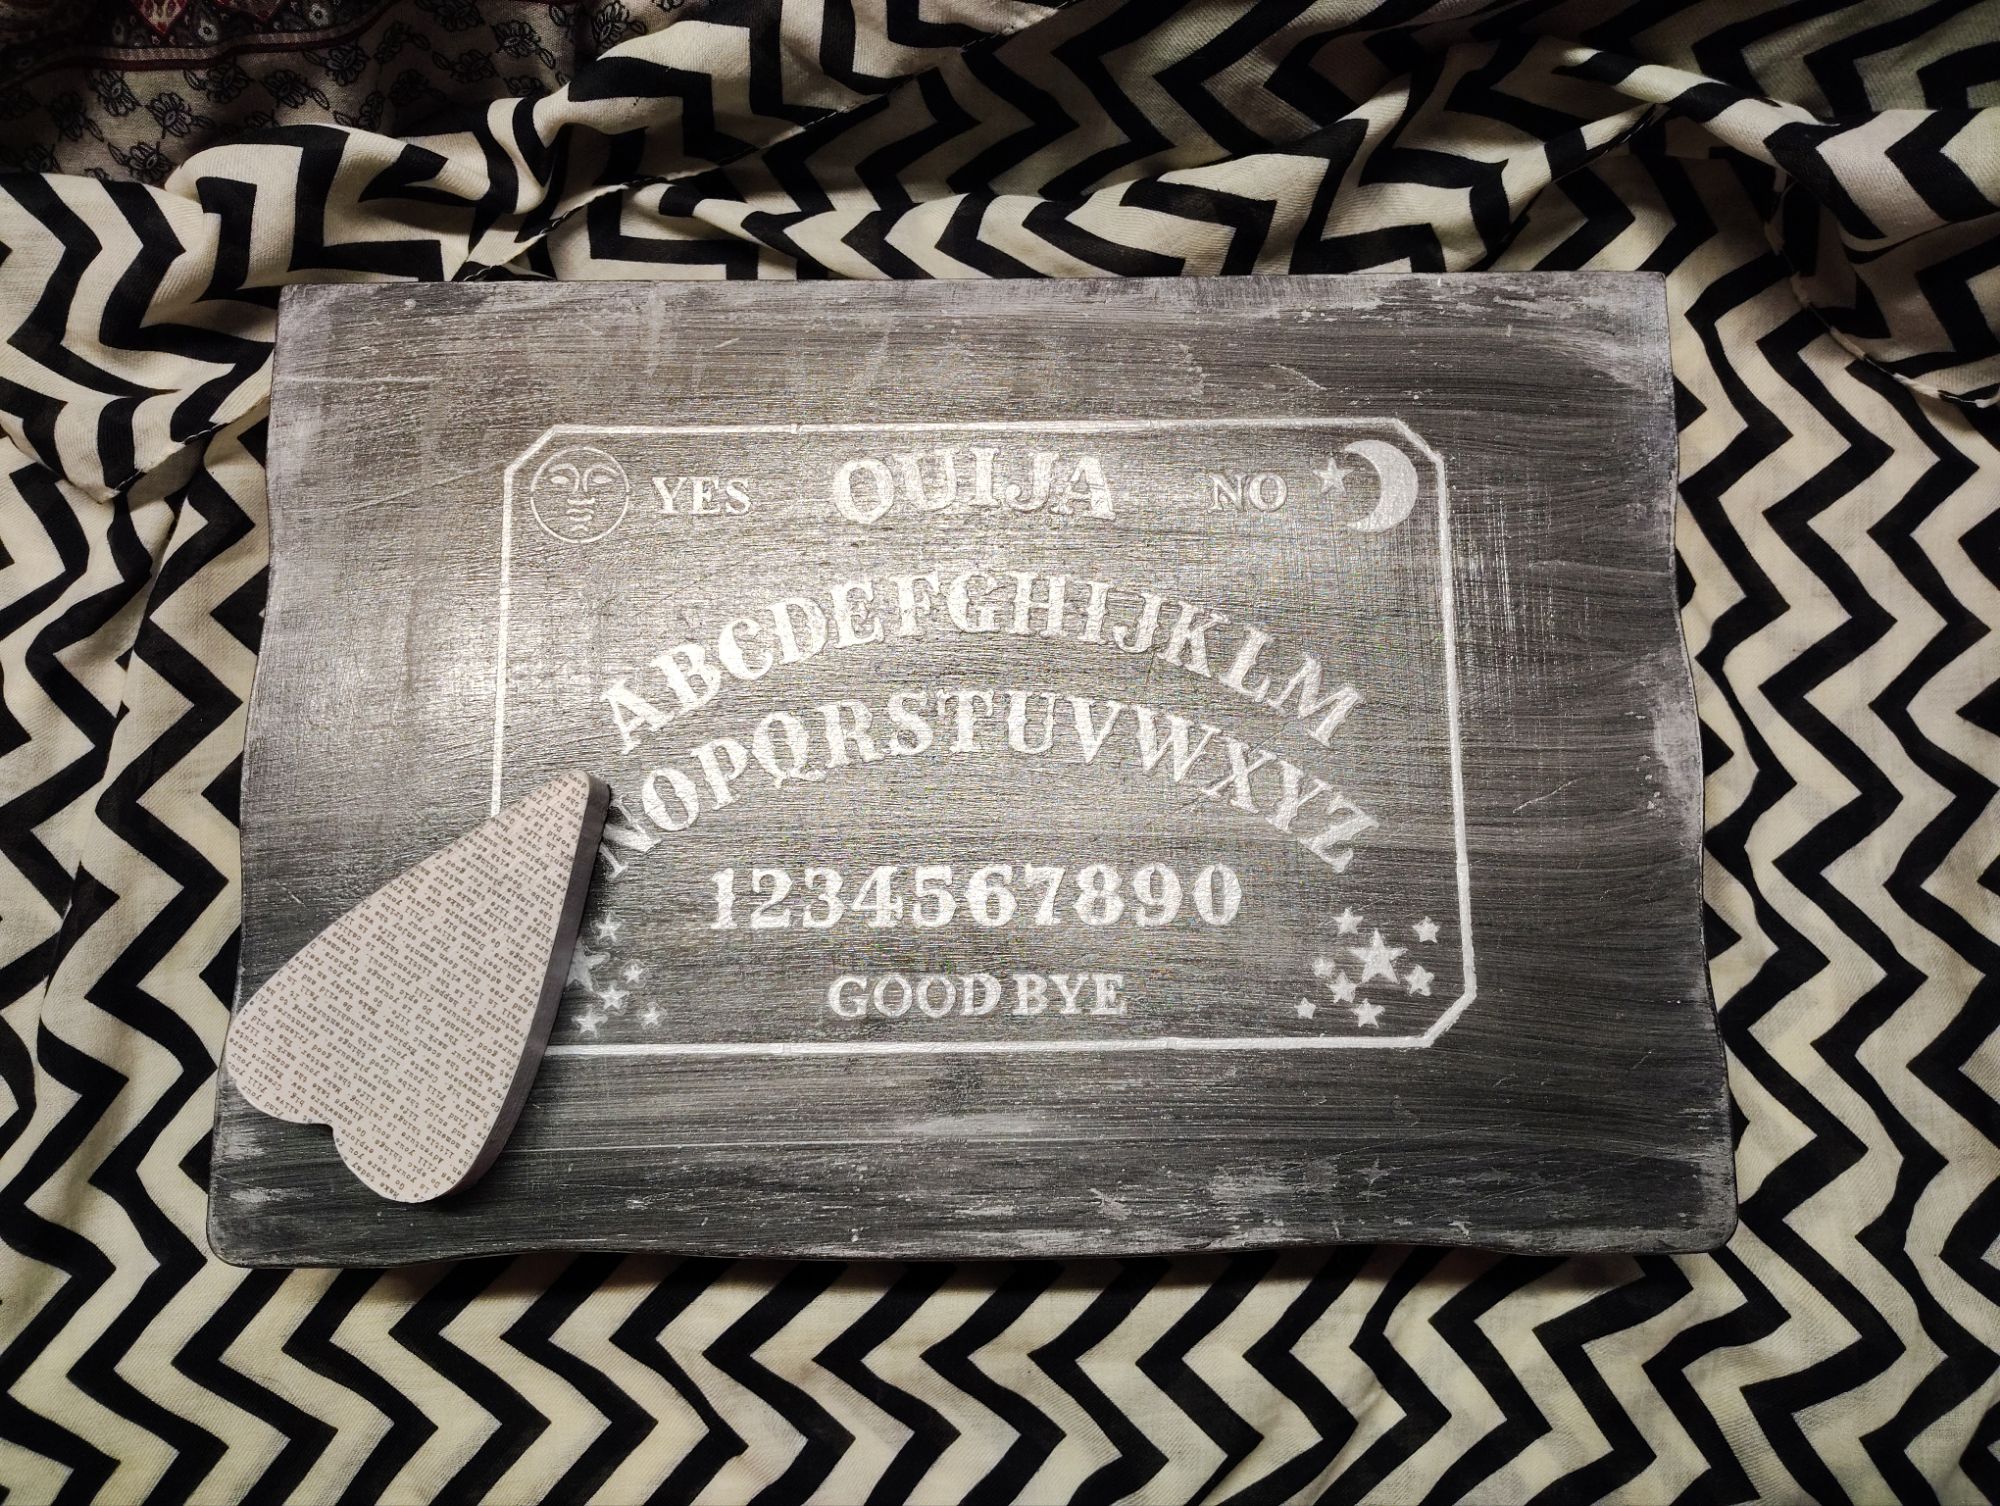
This spooky box began its life as a vintage silverware storage box that had seen better days. (Of course I forgot to take before pictures. Grrr.) I gutted it, painted it, re-lined it with some lovely purple velvet and made a cute wooden planchette to go with it. I absolutely love it. It’s great for spooky or goth decor, or for storing tarot decks, crystals and ritual tools if that’s your thing.
Here’s the inside. the purple is such a nice contrast to the black and silver on the outside.
Everything above can be found in my shop. It’s all one of a kind, though, so if you see something you like, don’t miss out.
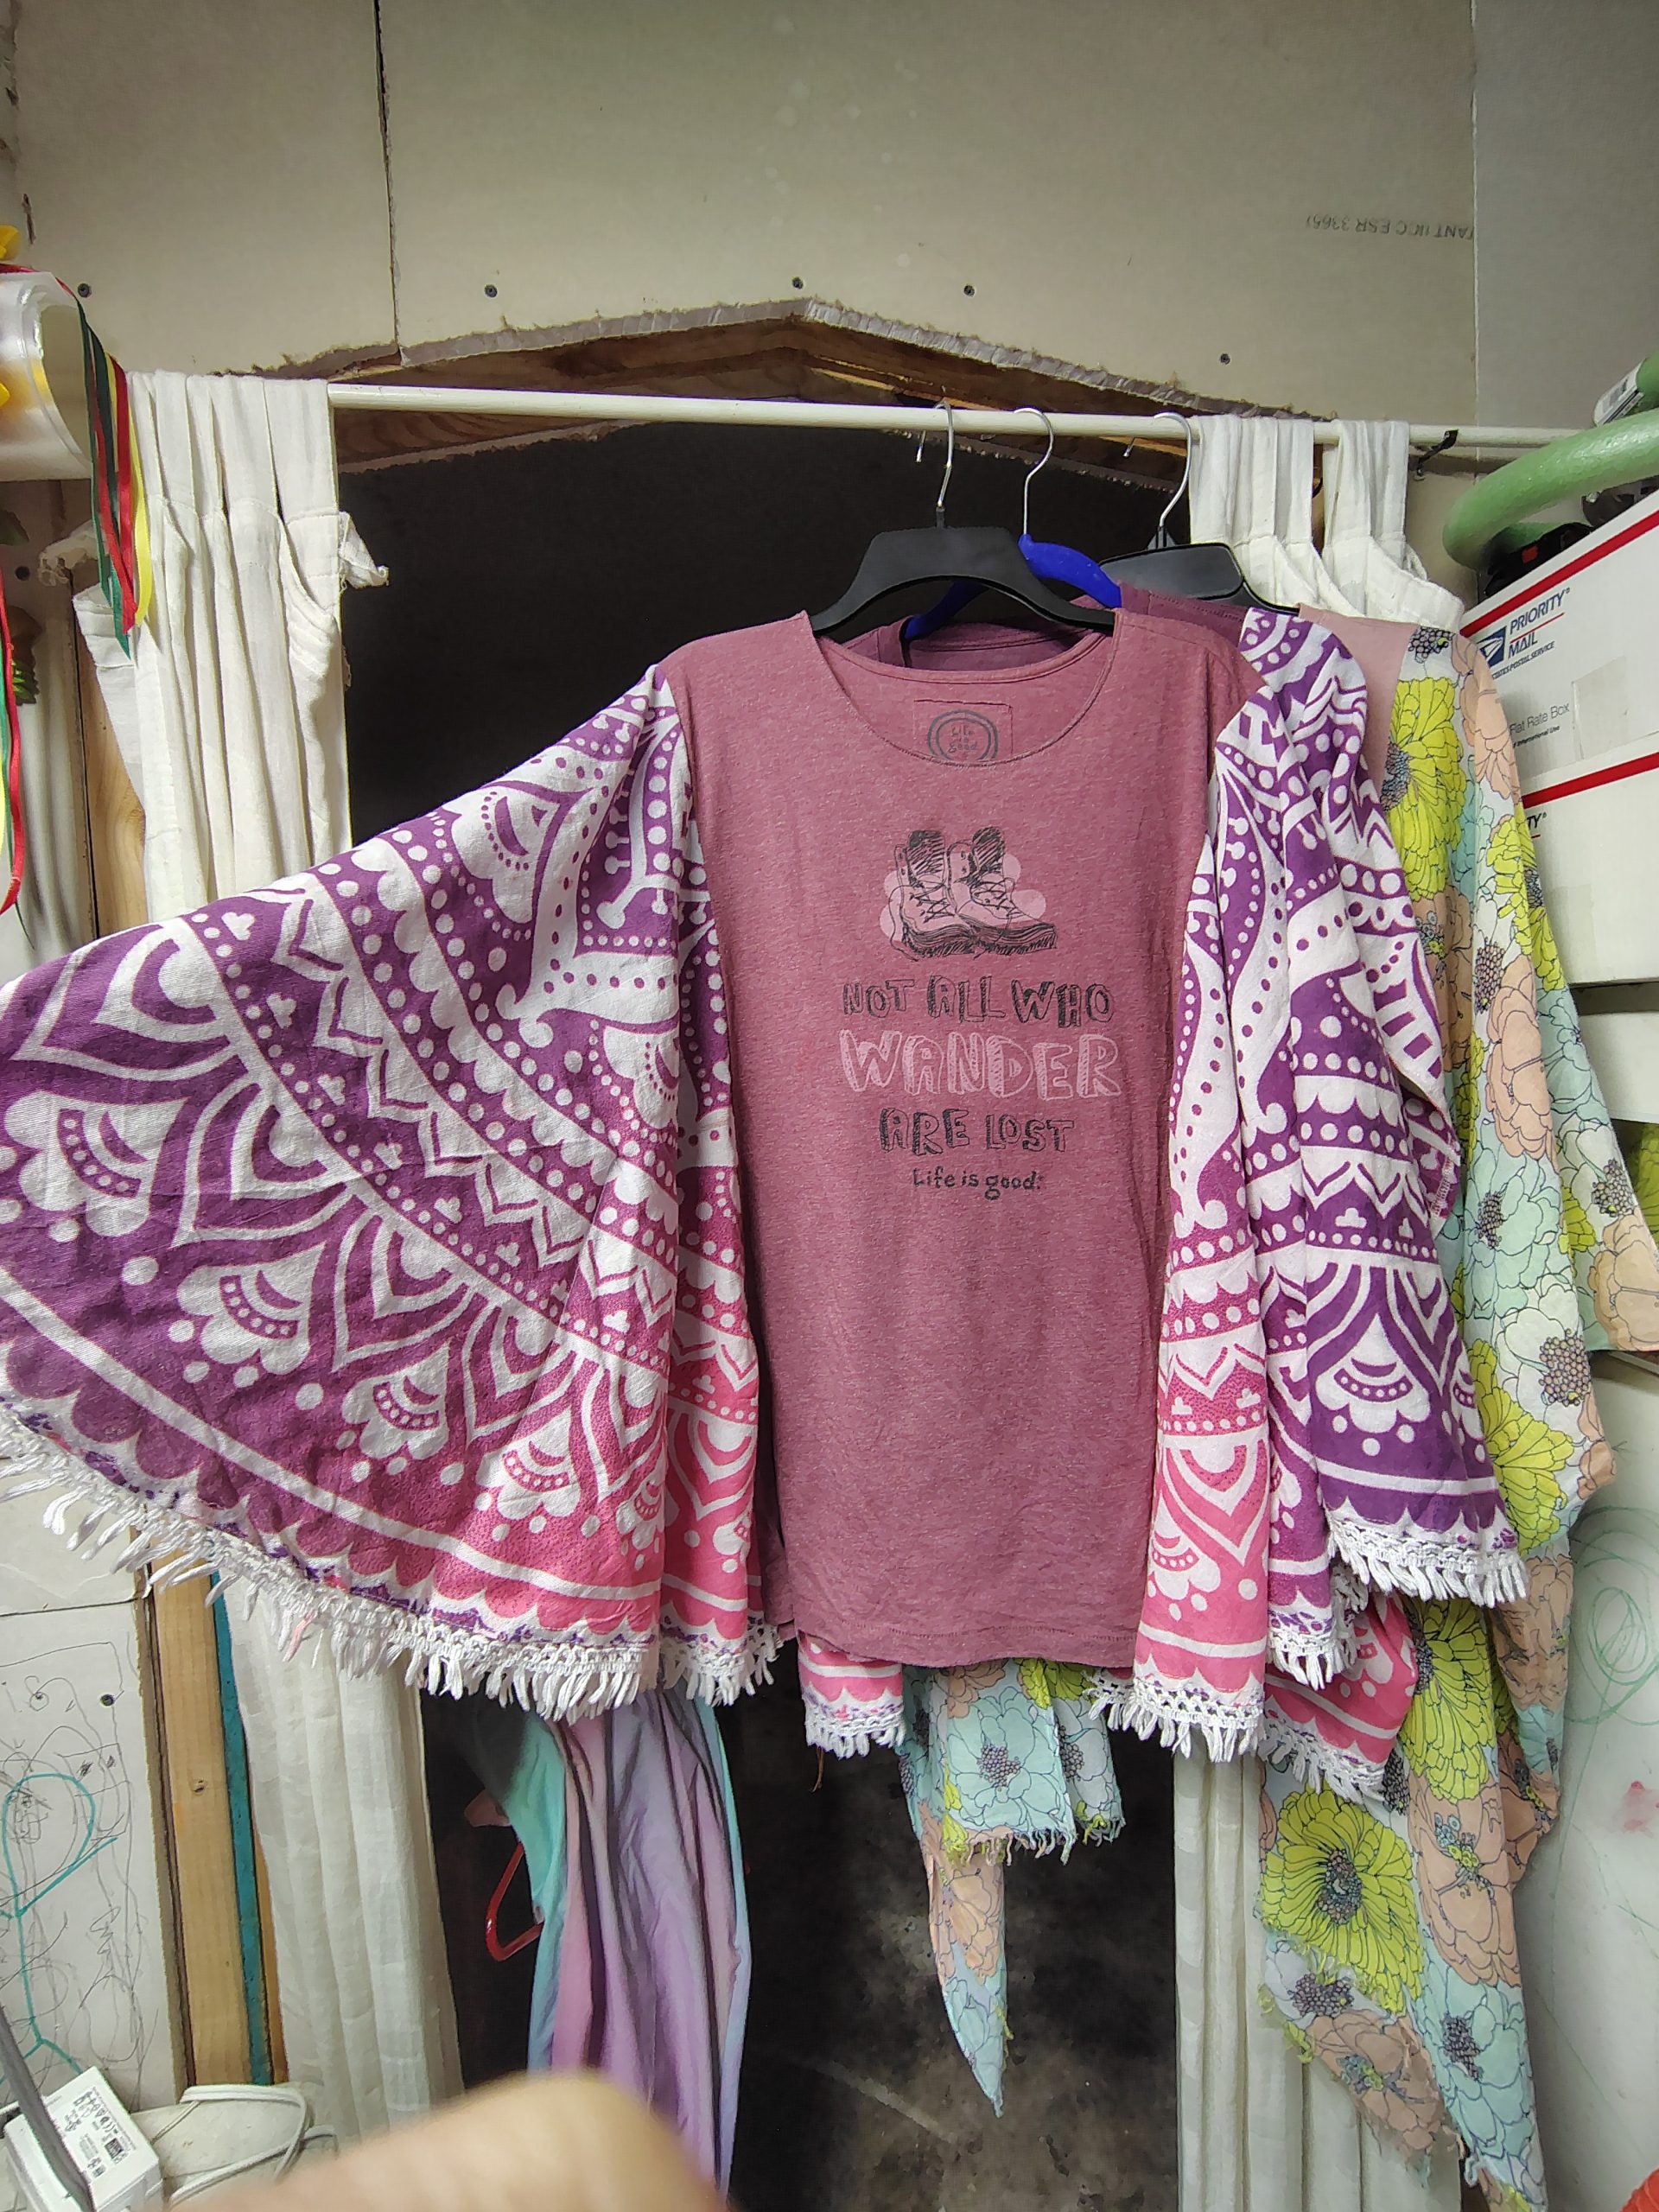
Here’s a quick peek at some boho upcycled shirts I’ve made. They’re flowy and oversized to be one size fits most.
I’ll have them in the shop soon with all the dimensions and details listed. In the meantime, if you see one you like, feel free to contact me about it now. They’re $60+ $45+ shipping. If you’re local to Fort Worth, we can arrange pickup as well. Oh, and I’ve already claimed the first one for myself.
It seems like everyone has at least a couple of promotional mugs hanging out in the back of their cupboards. If you don’t, there’s hundreds at any thrift store. On the one hand, they’re actually pretty useful, as far as promo swag goes. even if you’re not a coffee or tea drinker, they’ll hold any beverage. Or, you could use them to hold pens or random desk stuff, makeup brushes, or toothbrushes. You could even use them as little planters. (Tip: plant in a nursery pot and put that inside the mug. No need to drill holes, and the mug catches the drainage. )
The problem is that the designs usually aren’t very cute, and who really wants advertisements with their morning cuppa?
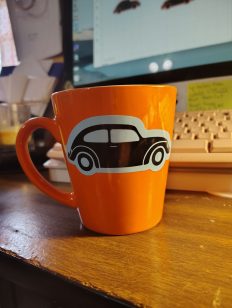
Take this mug. I like the shape. It’s a nice size and a lovely bright orange. I could use it as-is, but the orange reminds me of the orange VW my husband drove way back when, and I don’t even know what idstc is. So, I decided to cover it with vinyl.
My Mug Upcycle Method
First, I measured the height and width of the logo. Then, I used Cricut Design Space to create my design, a VW bug, of course. (If you don’t have a cutting machine, don’t worry. I have ideas for you, too.) I made sure that my Bug was a little bigger than the logo. After that, It was just cut out the design in permanent vinyl and apply. Voila!
(Or, rather, cut it out, realizing after the first cut that you had the wrong color loaded, so you end up making a set in your original color scheme and one in the inverse. Then mess up applying one side so you do one side of the mug in the original, and the other side in the inverse colors only to decide you actually like the inverse better. But you leave it as is because you don’t want to risk messing it up trying to change it. )
One layer cut and weeded.The design I planned…The accidental one I like better.It’s still cute though.
Other Methods
Now, if you don’t have a cutting machine, you could use a big sticker. Clear contact paper does an excellent job making them water-resistant. I did that to cover a graduation logo on a water tumbler that worked well. You could also cut a heart or other simple shape out of adhesive vinyl or contact paper. I find lots of it at thrift stores. Dollar Tree also sells vinyl as well as sticker paper.
Another option that I haven’t tried is adhesive chalkboard paper. I think it would be so cute to be able to write little notes on a coffee cup. I’m not sure how well it would hold up to moisture, though.
So far, I’ve only hand washed any of the mugs and tumblers I’ve decorated with vinyl. I don’t think putting them in the dishwasher is the best idea. I really hate handwashing dishes, though, so at some point it will probably happen. When it does, I’ll let you know how it holds up.
Share Your Upcycles
Share your upcycled mugs in the comments or on our Facebook page.
Don’t Forget!
On a different note, don’t forget my digital and printable planners are all only $0.99 through August 22, as well as all of my single machine embroidery files. I’ve also made some more of my older machine embroidery designs freebies, so be sure to check them out.
I, Charity Sloan, am a participant in the Amazon Services LLC Associates Program, an affiliate advertising program designed to provide a means for sites to earn advertising fees by advertising and linking to Amazon.com. Any purchases through those links will result in my receiving a small percentage in commission.
This only refers to Amazon links found in/on my blog pages. All products in my shop are 100% mine and not linked to Amazon.
Prices are the same whether you click an affiliate link or a non-affiliate link, so you will not be charged more. Thank you for your support!