I wrap my soaps in fabric because it looks nice, it allows the soap to breathe (read here for why), and because it feels better than plastic. I often wonder what happens to the wrapping. I’m sure there are some that toss it. I know of one person who collects the fabric for quilts. For those of you who, like me, don’t want to throw away something that could be useful but don’t know what to do with it, I have a tutorial for a drawstring pouch, just for you.
This is done with the wrapping from one of my soaps, but you could make it in any size you like.
Materials
Cloth wrapper from soap (roughly 8×11 inches)
Jute string from soap (about 29 inches)
Thread
Tools
Needle or Sewing machine
Safety pin or Bodkin
Scissors
Iron
First, iron your fabric flat. Then, fold down a long edge about 3/4 of an inch to one inch and press. This is for the casing. It doesn’t have to be super precise.
Sew a straight seam along the bottom of the flap to form the casing. All the sewing can be done by hand or machine. I have no time or patience, so I choose machine. Fold your material in half with right sides together like a book.
The fold is at the bottom of this photo.
Next, starting just below the casing seam, sew down the side and across the bottom. I use anywhere from a 1/4 to 1/2 inch seam allowance for this. Again, it doesn’t have to be precise.
With scissors, clip the bottom corners, being careful not to cut your stitching. You could probably skip this step, but it helps the corners look square and crisp. Turn your bag right side out.
Now it’s time to thread the string. Tie one end of the string to a safety pin, large paper clip, or attach a small bodkin. This makes it easier to work it through the casing. Thread it through the casing, safety pin first.
Once you get the string to the other side, remove your safety pin or other tool and adjust the string so that the ends are even.
Knot the ends together once or twice to keep it from coming out.
Ta-da! It’s done! Perfect for organizing your purse, storing jewelry or other small items, or as a small gift bag.
Or holding your favorite bar of soap.
Tutorials are always a little complicated to write because it’s easy to overlook small steps in things you do frequently. If something is unclear, please ask. 🙂
If you have any other creative uses for a SubEarthan Cottage soap wrapper, I would love to hear it!
I love in the hoop embroidery projects. They, more than anything, are what make me wish my embroidery machine had a bigger stitch area than just 4 inches by 4 inches. Even with such a small hoop size, there’s still plenty of in the hoop projects available.
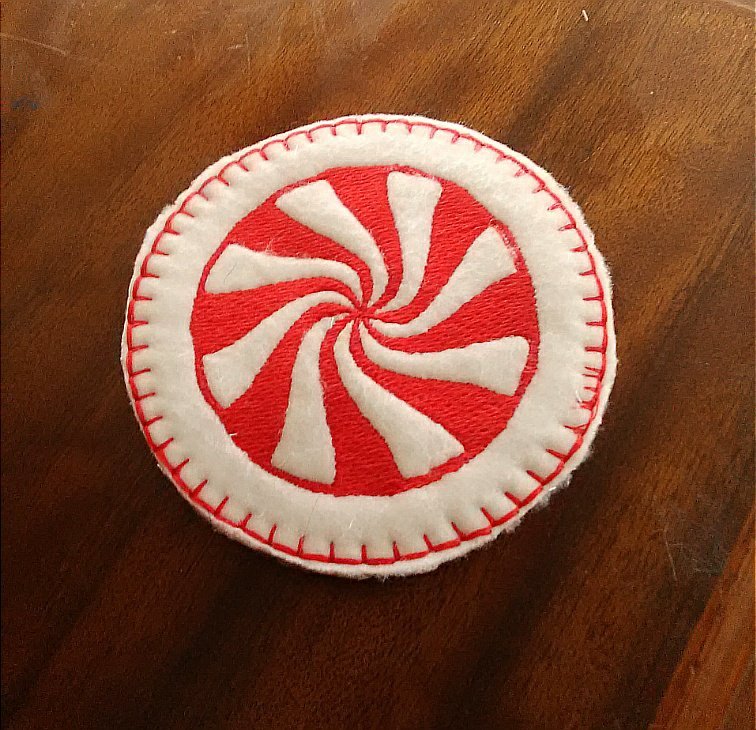
One of the easiest ITH (in the hoop) items to make are coasters. To make these peppermint coasters, all you need is fleece, one or two thread colors, stabilizer, the design file and, of course an embroidery machine. Once you see how they are made, you can easily swap out the design and colors to suit your needs. They are so simple to make, they are perfect for last minute gifts or as decor to match a party’s theme. You could also make a themed set for each month, season or holiday to decorate your home.
In the hoop peppermint coasters
Supplies to make one coaster
Two pieces of fleece cut to your machine’s hoop size
Place one piece of fleece on top of the stabilizer in the hoop. For small projects I sometimes just carefully hold it smooth while my machine stitches. You can also use a glue stick outside the stitching area to glue the fabric to the stabilizer, or pin the fabric to the stabilizer at the top and bottom, outside of the stitching area. I made the mistake of having a pin at the side, and even though it was clear of the design, it caught on my machine’s presser foot. Luckily I caught it quickly, but I will probably use a glue stick whenever possible to prevent that from happening again.
Decision Time: If you want the peppermint to show on both sides, place the other piece of the fabric under your hoop while placing it onto your machine. The bottom fabric usually stays in place on its own, but you could use a glue stick as I mentioned in the previous step. To only have the peppermint show on one side, skip to “Preparing your machine”.
Preparing your machine
If you want the peppermint on both sides, make sure the top and bobbin thread match. For a single-sided design, red or white in the bobbin is fine.
Place your hoop in your machine.
Upload the design file according to your machine’s instructions. The following steps are based on the Brother SE 400, so they may differ depending on your machine.
Resize your design, as desired. I wanted the peppermint as big as possible, so I followed the instructions for my machine to maximize the size. Mine maxed out at 7, which resulted in an overall size of about 6.5 cm. If your machine has a bigger capacity, you’ll need to decide how big you want the design .
Because I used white fleece, I chose to skip the white stitching and only stitch it in red. Again, I followed the instructions to skip to color 2, labeled red. Whatever color you choose, if you’re only sewing one color, skip to color two, because it has the outline. If you want to stitch both colors, skip this step.
Optional: Since fleece has a high loft, placing water soluble stabilizer is recommended. I’ve tried this project both ways, and I don’t see a big difference. For this tutorial, you’ll see the water soluble stabilizer in most photos.
Stitching your in the hoop coaster
Begin stitching according to your machine’s instructions.
If you are stitching both colors and want the peppermint on both sides, be sure to change the bobbin thread to match the top thread after color 1, white, is complete.
Continue stitching until the peppermint design is complete.
Stitching the border.
I like the border to match on top and bottom, so for this step I put red in the bobbin and for the top thread.
If you’re making a single-sided coaster like I did for this tutorial, now is when you add the second piece of fleece. Place it under your hoop as in the last step of “Preparing your hoop”.
On your machine, navigate to frames and select a circle frame.
Select the stitch type. I chose an over edge, blanket-type stitch.
Adjust the frame size. The frame size will determine the final size of your coaster. Make sure it is bigger than your design. Mine maxed out at 9 cm.
Stitch the border. I like a thicker look to the border, so once the border is done, I stitch it again. As long as you haven’t moved the fabric in the hoop, it will stitch directly on top of the first frame.
Finishing the coaster
Remove the project from the hoop.
Carefully remove any pins.
Trim thread tails.
Tear away the tear away stabilizer.
If you used water soluble stabilizer, cut away excess.
Cut fleece as close to the outside edge of the frame stitching as possible without cutting the stitching.
To remove remaining water soluble stabilizer, gently dab with a damp cloth or, swish it in a bowl of lukewarm water until stabilizer is gone and allow coaster to air dry flat.
Done!
I know that looks like a lot, but it’s really simple. I tried to be as detailed as possible, but if anything is confusing, please don’t hesitate to ask for clarification in the comments or through email.
If you notice, in the photo of the finished coaster, there’s a flaw in the border stitching on the left. That is where a pin caught the presser foot. Luckily that was the only damage. In the future, if I use pins, I will only pin at the very top and the very bottom. I really do prefer using washable glue sticks and keeping the glue well outside any stitching. That way my needle and machine don’t get gunked up, and I don’t risk hitting pins.
Finished Peppermint Coaster
Embroidery Files and Freebies
Embroidery design files and freebies from SubEarthan Cottage. All designs are scaled to fit 4×4 hoops common on home embroidery machines.
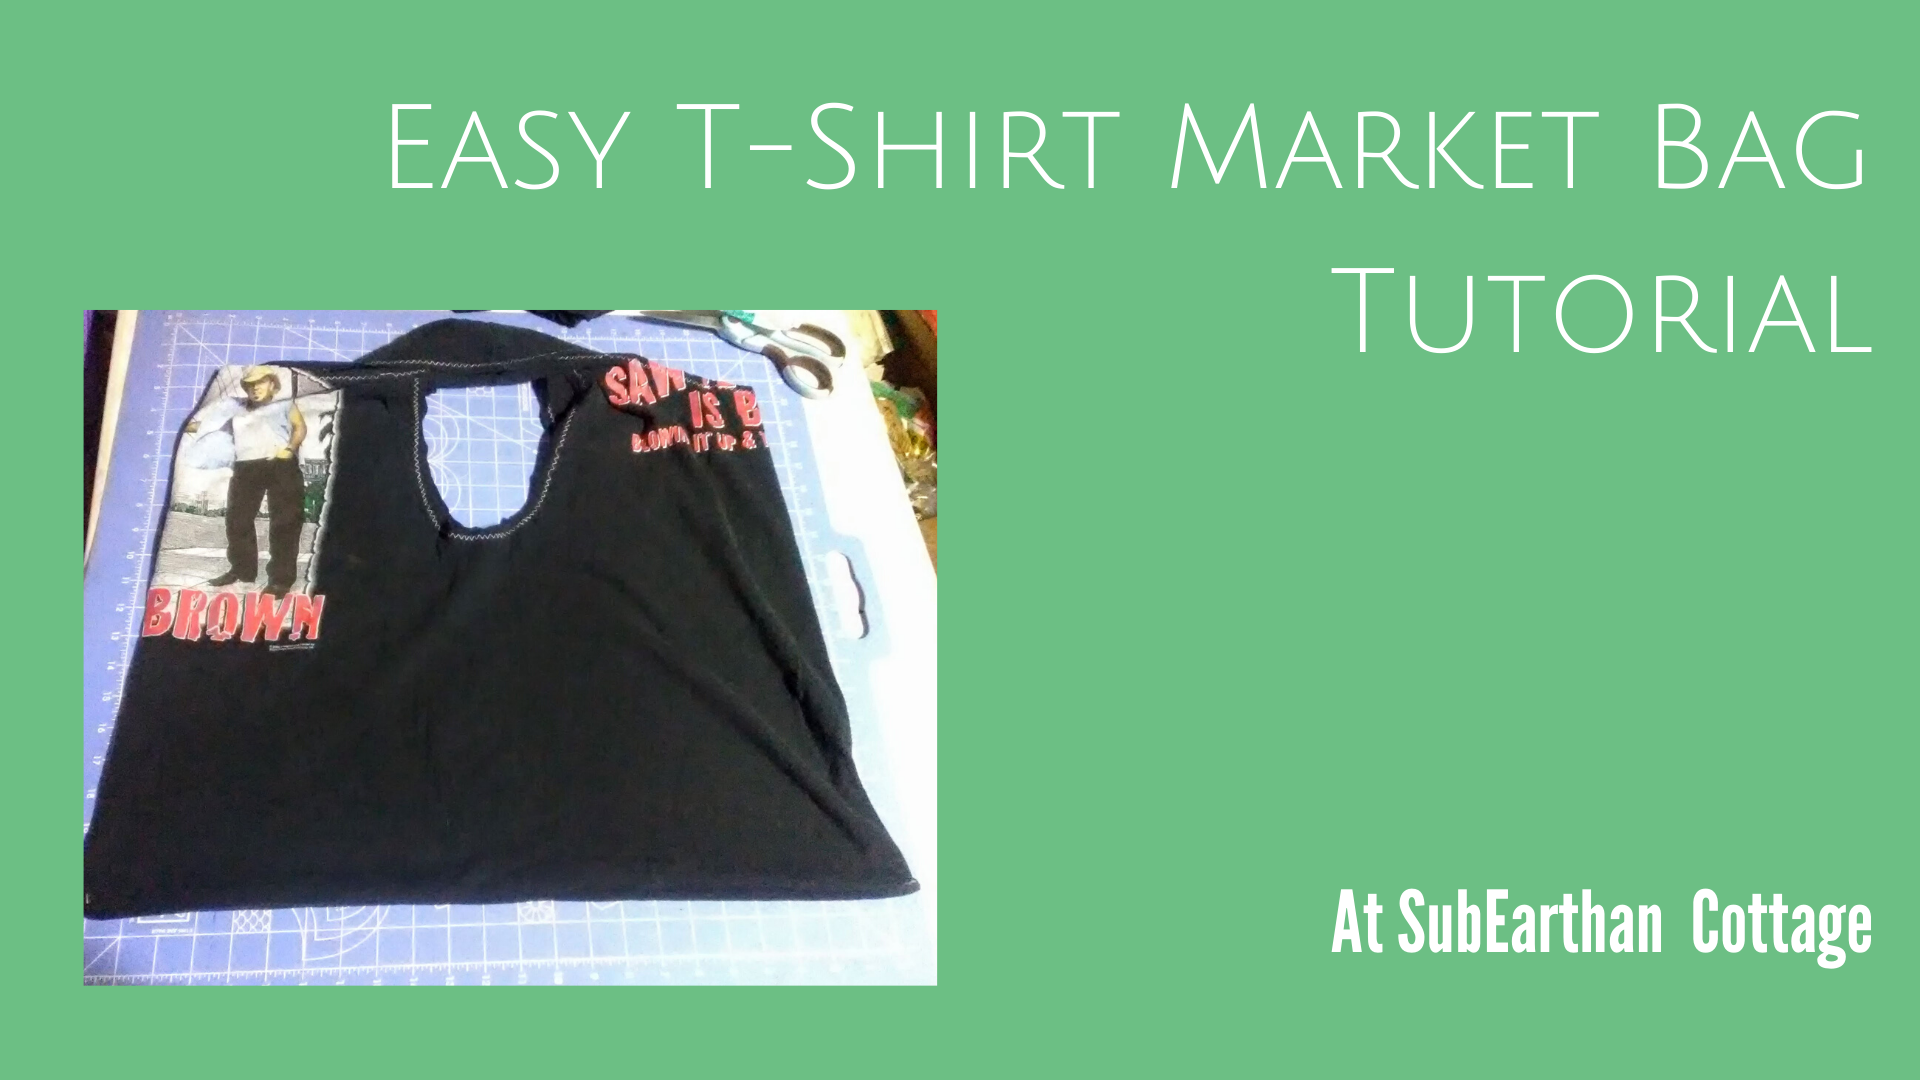
One of my lovely nieces is learning to sew with a sewing machine. To help, I thought I would do a series of beginning sewing project tutorials. Today’s tutorial turns an old t-shirt into a market bag. I’m keeping it simple today, but in the future I’ll do a post on how to make it with and enclosed bottom seam and how to box the bottom. It’s a great way to turn t-shirts that you no longer wear into something useful. If you don’t have a sewing machine, you could even sew it by hand.
Materials:
T-shirt
T-shirts with a high cotton content and no side seams work the best.
Thread in your choice of color.
Fabric scissors
Sewing machine set up with appropriate needle and bobbin threaded in your color choice.
Note: Ball point needles are generally the best for sewing with knits. This project does fine with an all-purpose needle, though, so use what you have.
Preparing the shirt:
Lay the shirt out flat and smooth out any wrinkles. Since this one is just to add to my Aldi bag stash, I didn’t worry too much about wrinkles.
T-shirt. I’m not sure where I got this one. Also, forgive the grainy photos. Lighting in my craft room wasn’t great that day.
Cut off the arms including the armhole seams.
Cut off the neck about 2-3 inches below the neckband. My shirt is pretty big, so I went three inches below the neckband. With smaller shirts you can do less.
I like to fold it in half before cutting to keep everything even. If your scissors aren’t sharp enough to go through all the layers, cut one side and then fold it in half to use as a template for the other side.
Cut straight across the bottom of the shirt to remove the hem. The hemline is often uneven on t-shirts, so focus on keeping the shoulder seams lined up, the shirt smooth and cutting a straight line that removes all of the hem.
Bottom hem removed.
At this point, you should basically have turned the t-shirt into a tank top. Now, decide if you want your bag to look like plastic grocery sacks that have the handles at the top sides (so, your tank top with the bottom sewn closed), or if you want the handles at the top middle, like a purse or market tote.
Looks like a tank top. For a grocery style bag, turn it inside out and lay it back
flat in this position.
For the grocery sack-style, turn your shirt inside out and lay it flat, just like a tank top again. For the purse/market tote, turn it inside out and match the shoulder seams and armholes together, then lay it flat. I’m making a market style tote, so you can see it in the photos.
For a purse/market tote turn it inside out and lay it flat with the shoulder seams at the top, as shown here. I find this style easier to carry on my shoulder.
Once everything is lined up, pin along the bottom to hold it in place.
Pinned hem.
Sewing the bag:
Many sewing machines have an assortment of stitches to use with knit fabric. They are useful for keeping the thread from breaking when the fabric stretches. On my machine, they are labeled “stretch” and shown in brown. Zig-zag stitches also work well on knits.
Normal stitches are in red. Stretch stitches are in brown.
You could use a stretch or zig-zag stitch for the bottom of the bag. Since it really shouldn’t be stretching much, I usually stick with a regular straight stitch set to a long-ish length of 3.
Straight stitch.
Length of 3.
Regardless of the type of stitch you choose, I recommend sewing across the bottom twice to make it nice and strong.
The seam allowance, or distance between the edge of the fabric and the stitches, doesn’t really matter that much as long as you keep it the same all the way across. For this bag, I used a 5/8 inch allowance, marked on the footplate of my machine. To keep a straight line, focus on keeping the fabric lined up with the guideline for the seam allowance rather than watching the needle.
Edge of fabric lined up on 5/8 mark.
At the start , sew about 2-3 stitches then backstitch to secure the stitching before continuing to sew to the end. At the end, backstitch another 2-3 stitches, then sew to the end and cut the threads. Repeat the seam as close to the original line of sewing as possible to make it nice and strong.
Back stitched first seam
Second line stitched for reinforcement.I tried to stay as close to the first line as possible.
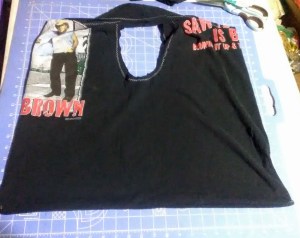
Turn the bag right side out. Since knit doesn’t unravel, you could stop there and be done. I like to sew around the arm and neck holes to reinforce the t-shirts original shoulder seams and give it a more finished look.
Finishing around the t-shirt arm and neck hole handles:
I usually use a serger for this, but it’s not necessary. On a sewing machine, I do like to use either a zig-zag or stretch stitch since there is going to be more stretch on the handles so a straight stitch might break.
Zig-zag setting.
This time, I’m using a zig-zag stitch, keeping the stitch length set at 3 and using about a 1/2 inch seam allowance. If your sewing machine has a free-arm, it can make it easier to sew around the armholes if you use it. Sew around each arm hole and the neck hole separately.
Messy zig-zag backstitching.
To start and finish the zig-zag, I backstitched like normal. It looks a little messy that way. You could leave extra thread at the beginning and end, pull the threads to the back side and tie knots to secure them if you want a cleaner look.
Finished t-shirt bag.
That’s it. You now have a purse or reusable bag from what used to be an old t-shirt. Don’t throw the t-shirt scraps away. I’ll post some creative uses for them soon!
To learn how to make this bag a little more polished, read my t-shirt bag upgrades post.
If you read through the tutorial and like the concept but don’t want to diy, I still have a few left in my shop on clearance here.
Like this tutorial? To make sure you don’t miss out on future tutorial posts, sign up for my newsletter.
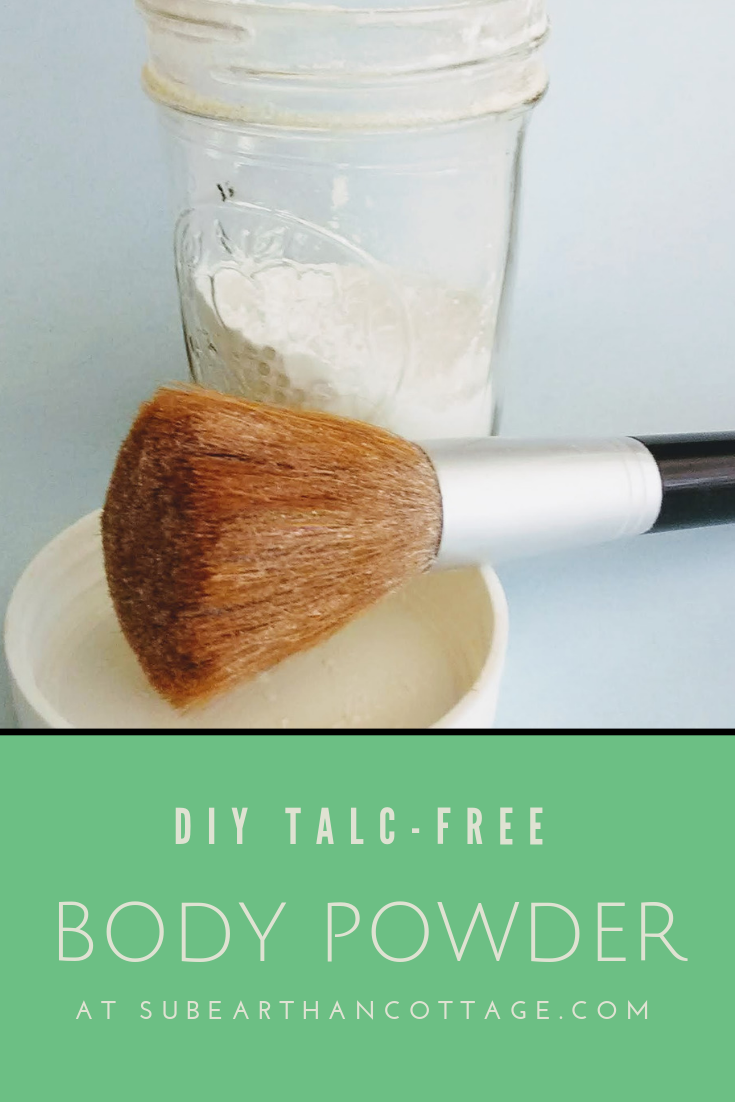
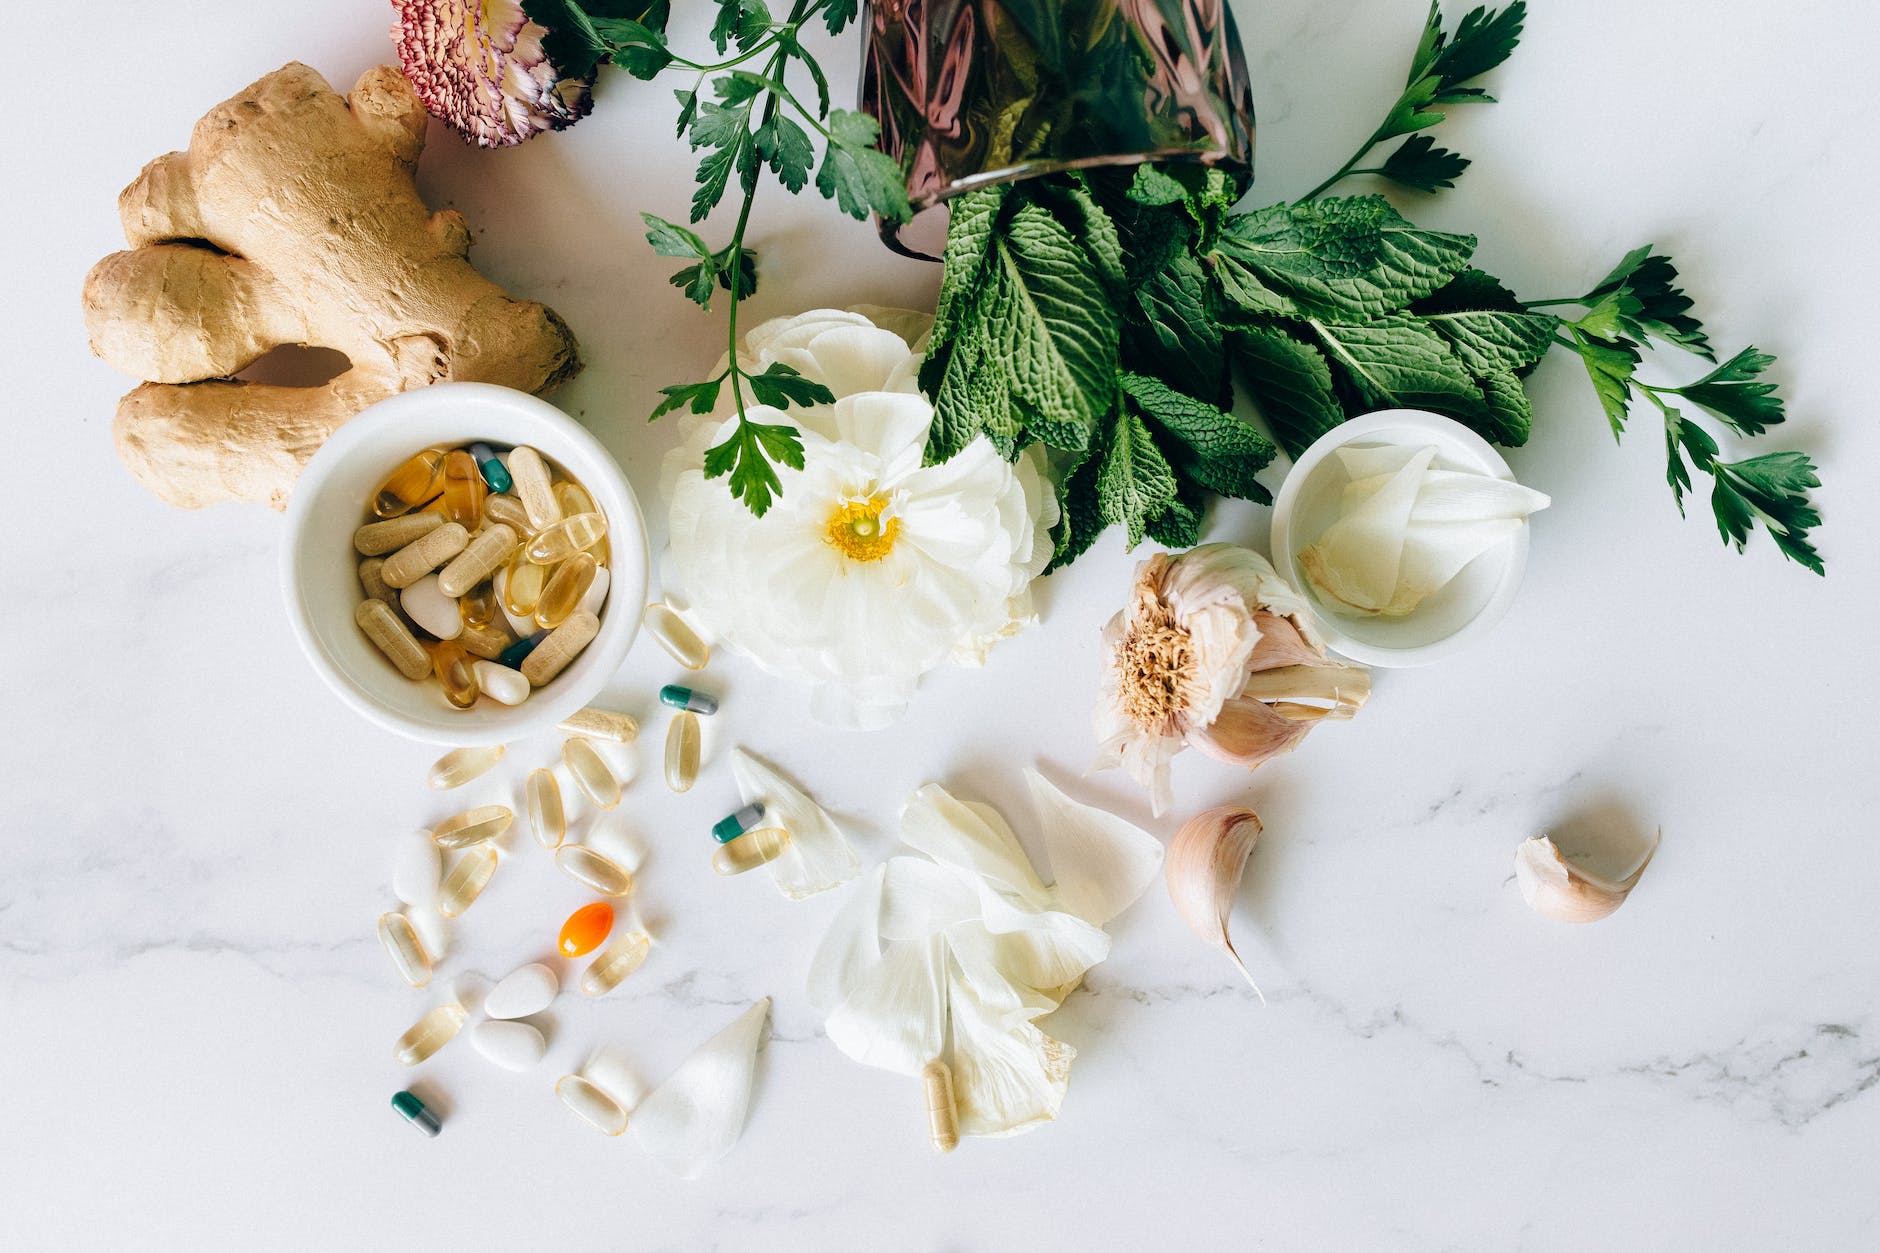
It’s hot outside. Like really sticky, sweaty hot. If you’re looking for a talc-free body powder to help you through it, I’ve got a recipe for you.
While you can purchase talc-free powder, making it yourself is simple, allows you to customize it, and is super inexpensive. Better yet, you probably already have everything you need.
Body Powder Recipe
Ingredients:
3/4 cup of Cornstarch
1/4 cup of Baking Soda
10-ish Drops of essential oil (optional)
Make it:
Combine the cornstarch and baking soda in a bowl or jar. Give it a stir or shake to mix. If you’re using an essential oil, add it now, then stir or shake some more to distribute.
Use it:
I keep mine in a jar and use a fluffy makeup brush to dust it where I need it. It works great as an all-over dusting powder, deodorant and shoe deodorizer. You can also dust a little in your hair in place of dry shampoo. For that, I like to put it in my hair at night and then brush it out in the morning.
Customize it:
The basic recipe is 3 parts cornstarch to 1 part baking soda, so you can use that 3:1 ratio to make as much or as little as you need.
Add more or less essential oil based on your preference. You can also use your favorite perfume to make a coordinating dusting powder.
If you find this formula too drying, reduce the amount of baking soda, or omit it all together.
Not a fan of cornstarch? Try using arrowroot. I personally haven’t tried it, so if you do, let me know how it works.
For babies, I recommend just plain cornstarch as baking soda might be too harsh. If you want to scent it, add a couple of drops of lavender essential oil. Essential oils aren’t generally recommended for babies under six months, so take that into consideration.
If you like using this as a dry shampoo and have dark hair, you can add a little bit of cocoa powder to the mix to make it less noticeable if you don’t get it brushed out completely.
Re-purpose a shaker jar, such as a spice or Parmesan cheese jar, rather than using a brush or puff to dispense.
Good morning! I hope everyone who celebrates had a happy holiday weekend, and to everyone else, I hope your weekend was also awesome.
Between children, cancer treatment and just life in general, things have been pretty hectic. I’ve often complained that I feel like I took better care of myself before I was diagnosed. My diet has definitely suffered, and too much of my spare time lately is spent “doom scrolling”.
There’s nothing wrong with comfort food and relaxing with whatever form of entertainment for a while, but I feel like it’s time to start focusing on getting myself healthy beyond fighting breast cancer. I have two Kadcyla treatments remaining (yay!). That will conclude my “active” cancer treatment. I still have years of estrogen-blocking medicine, but a pill a day is very different that multiple doctors appointments in a month, or week, and chemo fatigue. I am totally looking forward to it, but also worry that, without the constant business of treatment, I will be left feeling a little, “what now?”
To help me focus on my health, and give me some direction to all my new free time, I want to focus not just on diet, but things like aromatherapy, herbalism, yoga, meditation and journaling. These are all things I’ve thoroughly enjoyed in the past but have gotten put aside in all the chaos.
To keep me focused, I will be sharing some of that information here, both as informative articles and candid posts about my personal experiences. There will still be plenty of crafty tips and tutorials, because creating is something that I have to do. (Remembering to photograph the process and actually post about it is something I need to work on, lol.)
If you subscribe and would rather not get the new content, let me know and I will figure out how to organize my mailing list so that everyone gets the content they want. 🙂
Like this post? To make sure you never miss a future post, please sign up for my newsletter.
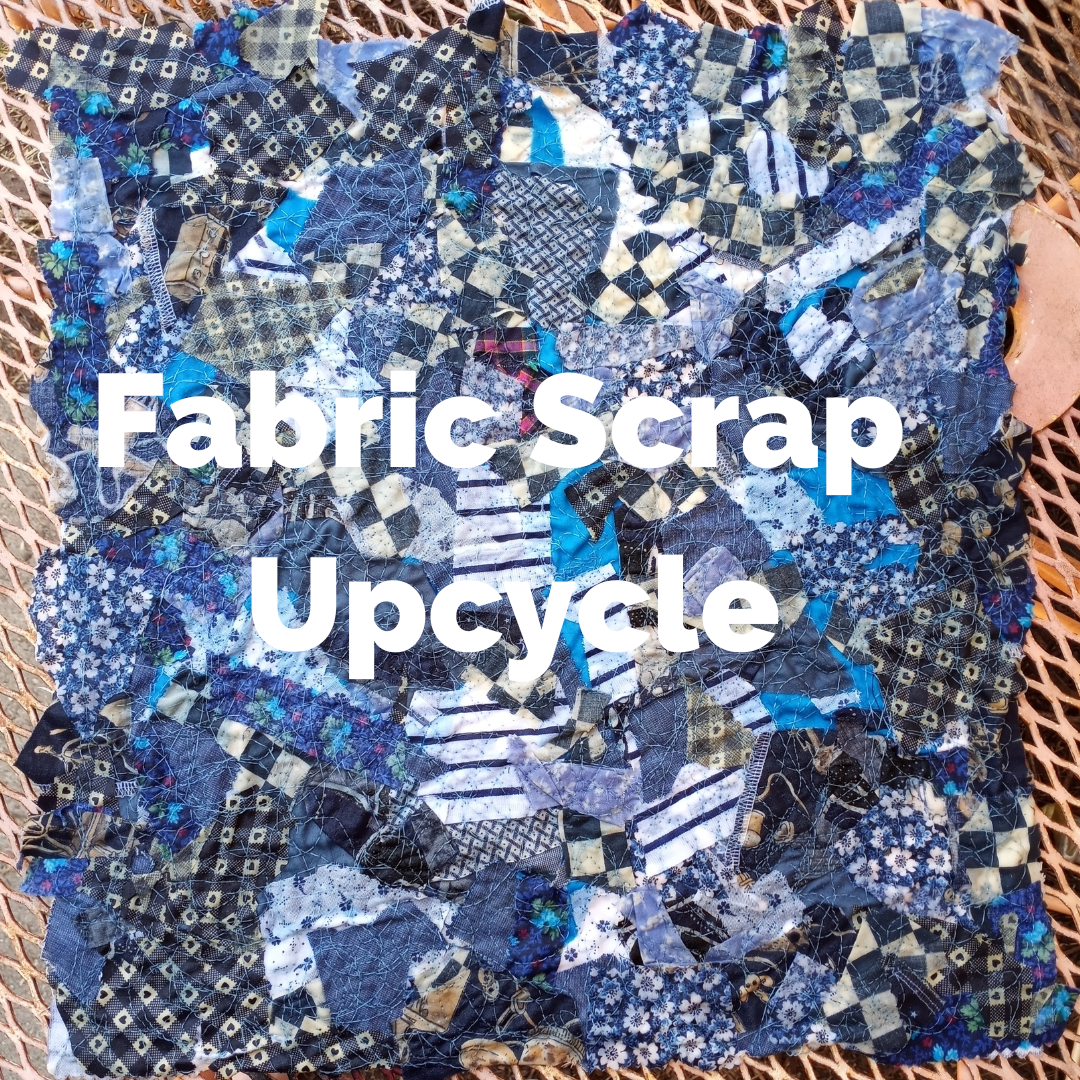
This isn’t going to be a full tutorial because I didn’t do a great job of documenting the process. If you’d like a full tutorial, please let me know. I will link to the page I learned it from here.
I saw this really cool way to make a bunch of fabric scraps into new, usable fabric that is really textured and cool. First, you need a backing piece of fabric. I used an upholstery sample square that I hadn’t found a use for yet. Then, you cover it in fabric scraps. I went with all pieces from my “blue” sorter bin and let them fall all over randomly. I did try to keep it all in one or two layers and moved pieces around to cover all the empty spots. I left some upside down to add more variety in the colors, and I didn’t worry about ironing the pieces first.
Once I had everything in place, I pressed it with my iron to smooth it down. Then I pinned water soluble stabilizer on top to help hold everything in place for the sewing machine. To sew, I lowered the feed dogs on my machine and crazy free motion quilted everything together. You can see that in the first video below.
That’s it. Now I have this really cool piece of fabric. I can’t decide what to do with it. It almost looks like it could hang on the wall like that as art. I also thought about making a couple of zipper pouches or sets of coasters out of it. It would also be fun to use as patches for clothing.
What would you make with it? Leave your suggestions below. 🙂
I, Charity Sloan, am a participant in the Amazon Services LLC Associates Program, an affiliate advertising program designed to provide a means for sites to earn advertising fees by advertising and linking to Amazon.com. Any purchases through those links will result in my receiving a small percentage in commission.
Prices are the same whether you click an affiliate link or a non-affiliate link, so you will not be charged more. Thank you for your support!