Making Kombucha using the continuous brewing method means you’ll always have plenty of Kombucha ready to drink or flavor in a second ferment. Here’s how to do it.
Supplies for continuous brewing
In addition to the basic Kombucha ingredients listed here, you’ll want to have a jar with a spigot. There’s some debate over the best materials for the jar and spigot. The biggest thing to watch for is something non-metallic, although I think I’ve heard stainless steel is okay. Most people like to avoid plastics to prevent any weird chemicals from leeching into the KT. I went with the cheapest, most available option of a glass sun tea pitcher with a plastic spigot.
Keep about half of the finished KT and the SCOBY in the jar and bottle the rest. Brew about half a gallon of tea. I use two black tea bags, one green tea bag and one half to one cup of sugar. Let it cool and add it to the jar with your finished KT and SCOBY. Since you replaced half of the KT, you’ll want to wait a couple of days before drinking from the new batch. After that, you can drink some fresh from the tap every day. Just replace what you drink with fresh sweet tea. Because you are only adding a small amount of fresh tea in relation to the KT, you can drink a little every day without the wait time. I like to keep a small pitcher of sweet tea in the refrigerator to replenish what gets taken out each day.
Like this post? To make sure you never miss a future post, please sign up for my newsletter.
For those who aren’t familiar with it, Kombucha Tea is tea that is fermented with a culture of beneficial bacteria and yeast (SCOBY). There are many claimed health benefits to it, although the most widely accepted is as a probiotic. It can be a bit fizzy, so many people use it as a soda replacement. It’s becoming much easier to find in mainstream supermarkets, but usually runs about $4 for a small bottle. Yikes! It’s really not that complicated to brew your own and the way to go IMO if you want to drink it daily.
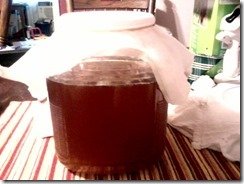
My first batch of Kombucha Tea brewing.
Ingredients to start 1 gallon of Kombucha:
3 Black tea bags 2 Green tea bags 1-2 cups Granulated white sugar 1 gallon Filtered water 1 Kombucha SCOBY (I got mine from here: https://www.etsy.com/shop/OKposeyMom) 2 cup Starter Kombucha tea (KT) or distilled vinegar
Supplies:
1 gallon glass jar (with spigot for continuous brew) tightly woven or knit cloth or coffee filter larger than the mouth of the jar rubber band or elastic big enough to securely fit around the mouth of the jar. Wooden or plastic spoon (metal is fine unless you need to stir after adding the SCOBY)
Make sure all jars and utensils are clean. Rinse everything really well to be sure there’s no soap residue. For the first batch, you’ll need a full gallon of tea. I use both black and green tea with three black and two green tea bags. As long as you are using unflavored, caffeinated tea, any ratio should work. Brew the tea like normal and add the sugar. Stir to dissolve. It needs to be plain white granulated sugar to make it easy for the SCOBY to break down. The sugar can be adjusted to taste, but for the first batch I like to use a full 2 cups. I’ve also found that in warmer months the brew gets strong really fast, so I add closer to the full 2 cups then to compensate. In cooler months, I can cut back on the sugar.
When the tea is cooled to about 80 degrees, add the SCOBY and starter Kombucha Tea (KT) and/or distilled vinegar. The temperature really isn’t that important as long as it’s cool enough to not kill the SCOBY. I usually just feel the jar. When it feels no more than a little warm, I add the SCOBY. If you don’t have enough starter KT you’ll use distilled vinegar to make up the difference. Do NOT use cider vinegar. Cider vinegar contains some of it’s own culture “mother”. If you use cider vinegar you’ll end up with some sort of hybrid culture.
Cover your jar with the cloth or filter and secure with a rubber band or knotted piece of elastic. This allows it to breathe while keeping dust and ickies out. Wait. and wait. and wait. lol. The KT usually takes about 7-10 days to develop. It brews faster in warmer weather, so keep that in mind. Starting around day seven, use a straw to siphon off a little from under the SCOBY. You want it to have a little bit of a vinegary zing to it, but other than that the taste is up to you. My first batch tasted like cider made from honey crisp apples-tart but still really sweet.
The longer it brews the less sweet and more vinegary it will taste. If you think it needs to brew longer, leave it for another day or two and taste again. If you like the taste, great! Time to bottle it and brew batch number two.
For batch brewing, you’ll basically be doing everything you did for your first batch. All but 2 cups of KT from your first batch can go in to bottles. I use Mason jars. If you want to add flavorings you’ll add them to the bottled KT. I’ll do a post about that later. The 2 cups you reserve and your SCOBY will stay in the jar to start the next batch. (Every few batches, you will want to transfer them to a non-metallic bowl so you can wash the jar. If you keep a second jar on hand, you can just switch jars every batch.)
Repeat the above steps including the wait time for each new batch.
With each new batch, you will grow a new SCOBY. Usually the new SCOBY will grow on top of the old SCOBY. Technically you can separate the new SCOBY each time to use in your new batch. I like to leave the SCOBYs alone until it gets to be about a half inch to an inch thick. After that, I’ll separate off a few layers by pulling it apart between two layers. One SCOBY keeps brewing while the other goes into a big jar with some KT and a lid, aka a SCOBY hotel. Many SCOBYs can live in a hotel as long as you have enough KT to keep them moist. It’s always a good idea to have an extra SCOBY or two on hand in case your batch gets contaminated. You can also give your extra SCOBYs to friends so they can start their own brew.
Next week I’ll cover how to move from batch brewing to continuous brewing.
Like this post? To make sure you never miss a future post, please sign up for my newsletter.
My electric pressure cooker is such a lifesaver when it comes to getting fast, healthy meals ready. It’s almost like having someone else do the cooking. With so many working from home with kids right now, those minutes saved in the kitchen are valuable. Here’s five of my favorite electric pressure cooker dinner recipes.
1
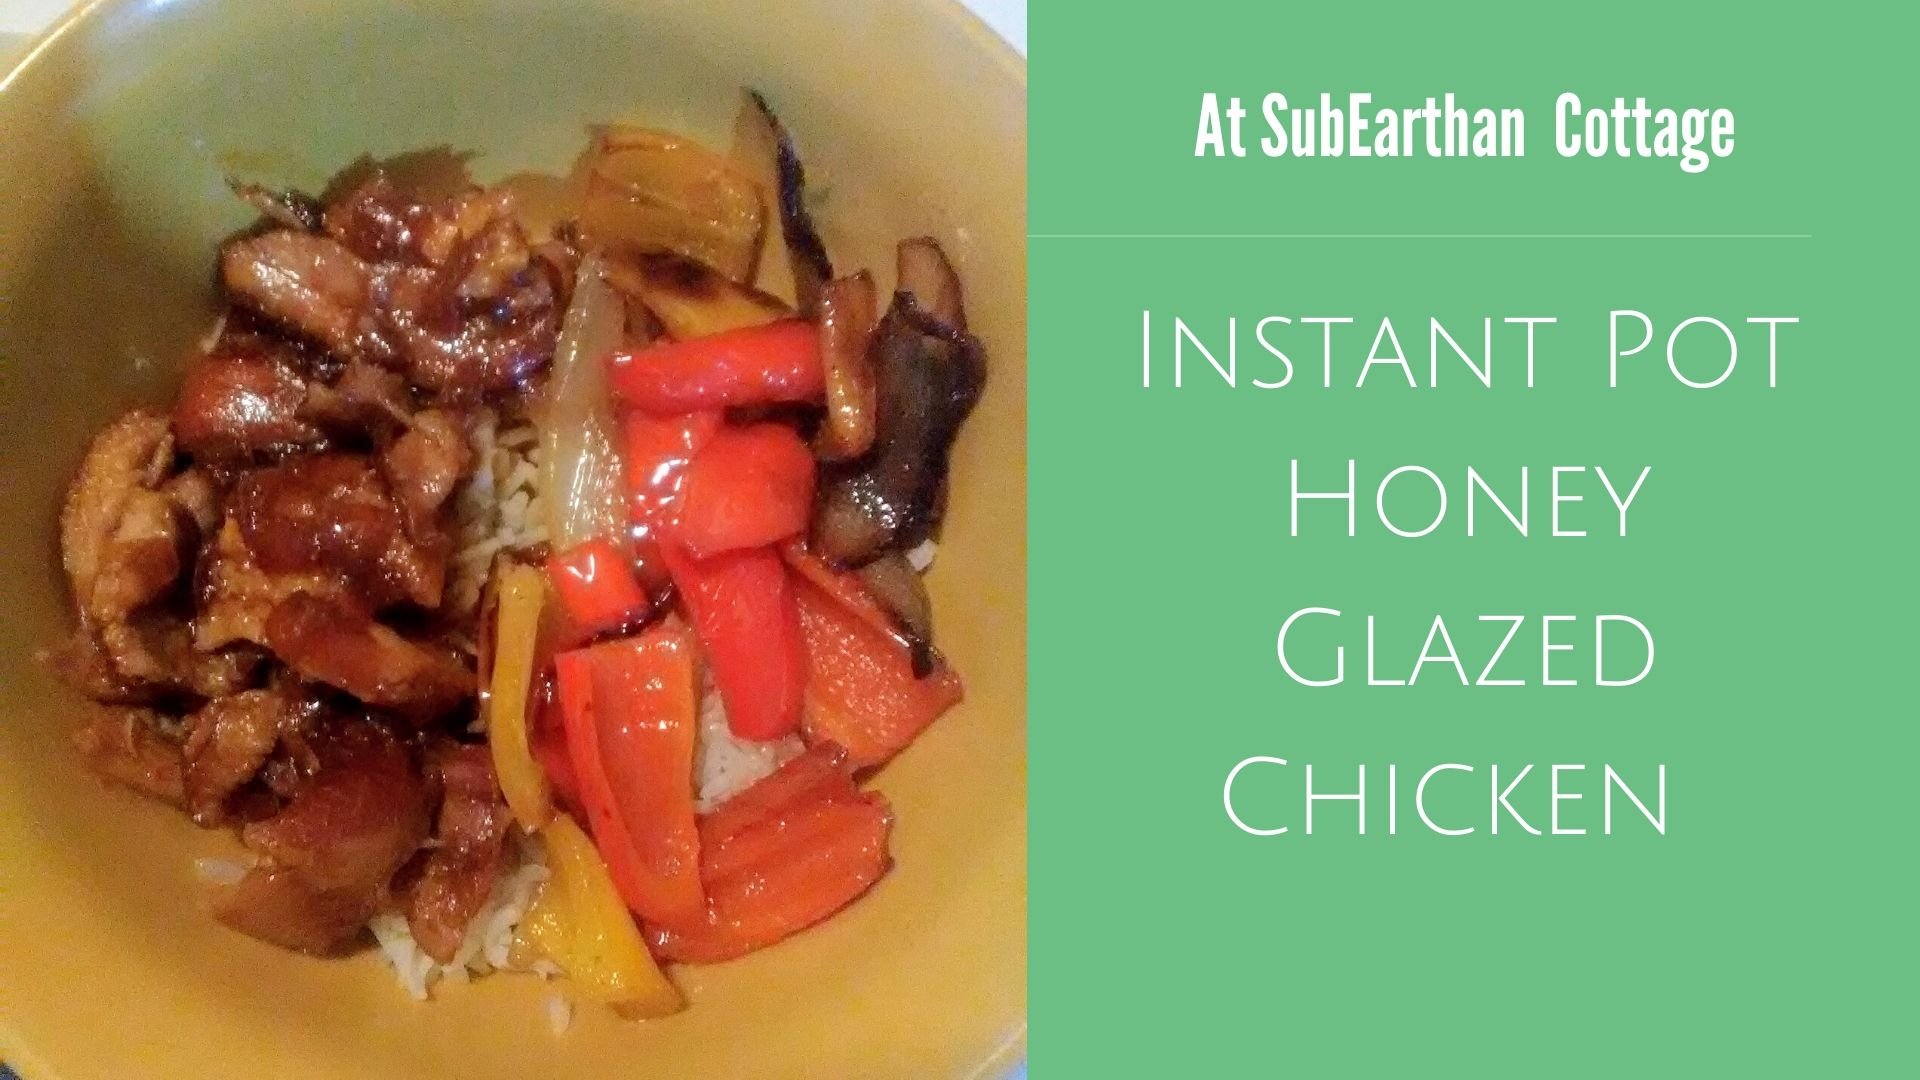
Honey Glazed Chicken for Electric Pressure Cookers like the Instant Pot
This honey glazed chicken is made in an electric pressure cooker with just minutes of prep. Sweet and juicy, it will satisfy even picky eaters.
Electric Pressure Cooker (Instant Pot) Whole Chicken and Potatoes
This is my method for cooking a flavorful whole chicken and potatoes in an electric pressure cooker. After a little prep work, you can walk away and let the pressure cooker do it's job without having to check on it or worry about overcooking. I'm using an 8 quart electric pressure cooker. If yours is smaller, you may need to adjust the size of the chicken and other ingredients accordingly.
Dairy and gluten free sausage potato soup inspired by Olive Garden's zuppa toscana. I prefer making it in my electric pressure cooker but it could easily be done in a slow cooker or on the stove top.
Instant Pot Chicken and Vegetable Quinoa is a quick, last minute dish that is great hot or cold. Customize it by swapping out the protein or vegetables depending on what you have on hand.
Knowing that so many are stuck at home right now needing distractions, I’ve decided to make all of my machine embroidery design files free until April 30. That’s the day my area’s shelter in place order expires. If it is extended, I’ll extend the embroidery design freebies, too. If you make something with one of my designs, I would love to see it.
My full shop is still open, and will be as long as everyone in my household is healthy. I’m using extra care with handwashing and using hand sanitizer before coming into contact with products and packaging as well.
All of my handmade soaps are currently on sale for 20% off. You can find them here.
Like this post? To make sure you never miss a future post, please sign up for my newsletter.
Today’s post is short and sweet because I’m celebrating my 40th birthday at home with my family. Birthday’s mean cake, so here is my favorite chocolate cake recipe to make from scratch. It’s dairy-free, egg-free and easy to make gluten-free as well. Enjoy!
This is a simple chocolate cake recipe that is super easy. It is dairy-free, egg-free, and if you swap the wheat flour for a gluten-free flour blend, it's gluten-free, too! To make it gluten free, I like Bob's Red Mill 1 to 1 gluten free blend because it already contains xanthan gum. If you use a different gluten-free flour without xanthan gum, I would add about 1-1.5 teaspoons of xanthan gum.To top, make a simple buttercream (with shortening and non-dairy milk to keep it non-dairy) or use your favorite store bought frosting. You could also sprinkle the warm cake with dairy-free chocolate chips, let them melt a little, then spread across the top for a rich, chocolaty treat.
Prep Time10 minutesmins
Cook Time35 minutesmins
Course: Dessert
Keyword: 9 x 13, cake, chocolate, dairy free, easy, egg free, gluten free, one bowl, simple
Servings: 292×2 inch servings
Equipment
9 x 13 rectangle pan
Ingredients
3CupsFlour see recipe summary for gluten-free adjustment
1teaspoonsalt
2teaspoonsbaking soda
2cups sugar
6tablespoonscocoa powder
2tablespoonsvinegarwhite or apple cider vinegar
1cup vegetable oilany light flavored liquid vegetable oil is fine
2cups cold water
2teaspoonsvanilla
Instructions
Preheat the oven to 375 degrees Fahrenheit
Grease the 9 x 13 inch pan, either with shortening, butter, or cooking spray
Combine the first five (dry) ingredients in a large mixing bowl and mix until evenly blended. Alternatively, sift them together into the bowl.
Add the remaining (wet) ingredients and mix until thoroughly blended. You can use a spoon or an electric mixer.
Pour the batter into the greased 9 x 13 inch pan.
Bake at 375 degrees Fahrenheit for 35 minutes or until a toothpick inserted near the middle comes out clean.
Notes
I frosted this cake with buttercream tinted blue, then used gel food coloring to paint the faces. I then piped buttercream for the eyes, facial features, outlines, writing and trim. I clearly am not a trained cake decorator, so I can’t really say which tips I used or any other details.
Like this post? To make sure you never miss a future post, please sign up for my newsletter.
If you need a quick and easy meal that is sure to please the whole family, this honey glazed chicken is it. All of the ingredients are things you probably keep on hand, so no hunting for some rare spices. It only takes about five minutes of prep time and fifteen minutes of cooking under high pressure. The end result is a sweet, glazed chicken that even most picky eaters will enjoy. Serve over rice with a side of veggies or a salad for a quick and easy meal.
For the photo, I sauteed onion and mini bell peppers separately and served them along with the honey glazed chicken over basmati rice.Some of my kiddos do not like a lot of spice, so instead of the red pepper flakes originally called for, I substituted a tiny bit of cayenne pepper.
Gluten and Dairy-free adjustments for honey glazed chicken
If you need to keep it gluten-free, be sure to check your soy sauce. La Choy soy sauce is gluten free, but most others are not. Bragg’s Liquid Aminos are also gluten free and a good substitute.
This recipe is already dairy free, so no substitutions are needed there.
1.5lbsboneless, skinless chicken thighsCan use any boneless, skinless chicken, but I prefer the juiciness of dark meat.
1.5 cupsonion, diced
3clovesgarlic, minced
0.5cupsoy sauceMake sure to use a gluten-free soy sauce, like La Choy if you need it to be gluten-free.
0.25cup ketchup
1cuphoney
1/8tspsalt
1/8tspblack pepper
1/3tbspred pepper flakesI used a dash of cayenne pepper instead to reduce the heat for my kiddos.
Instructions
Place everything in the pressure cooker and cook on high pressure for 15 minutes.
Release the pressure. I usually allow it to do a natural release, but you can do a quick release with this recipe.
Remove the chicken and slice. In the meantime, turn on the Saute function and allow the sauce to cook to thicken, stirring frequently for about 2-3 minutes.
Add the sliced chicken back to the pot and stir to coat.
Serve over rice.
Notes
For the photo, I sauteed onion and mini bell peppers separately and served them along with the honey glazed chicken over basmati rice.Some of my kiddos do not like a lot of spice, so instead of the red pepper flakes originally called for, I substituted a tiny bit of cayenne pepper.
While I try to write recipes as clearly as possible, it’s easy to miss a step or make assumptions. If anything is confusing, please don’t hesitate to comment with your questions. If you make this recipe, please let me know what you think.
Soap Sale!
On an unrelated note, all of my handmade soaps are on sale for 20% off their normal price. The sale ends on March 29. Find all of my soaps here.
Like this post? To make sure you never miss a future post, please sign up for my newsletter.
This post contains affiliate links. If you click through any of the Amazon links and make a purchase, I will receive a small commission. There is no added cost to you.
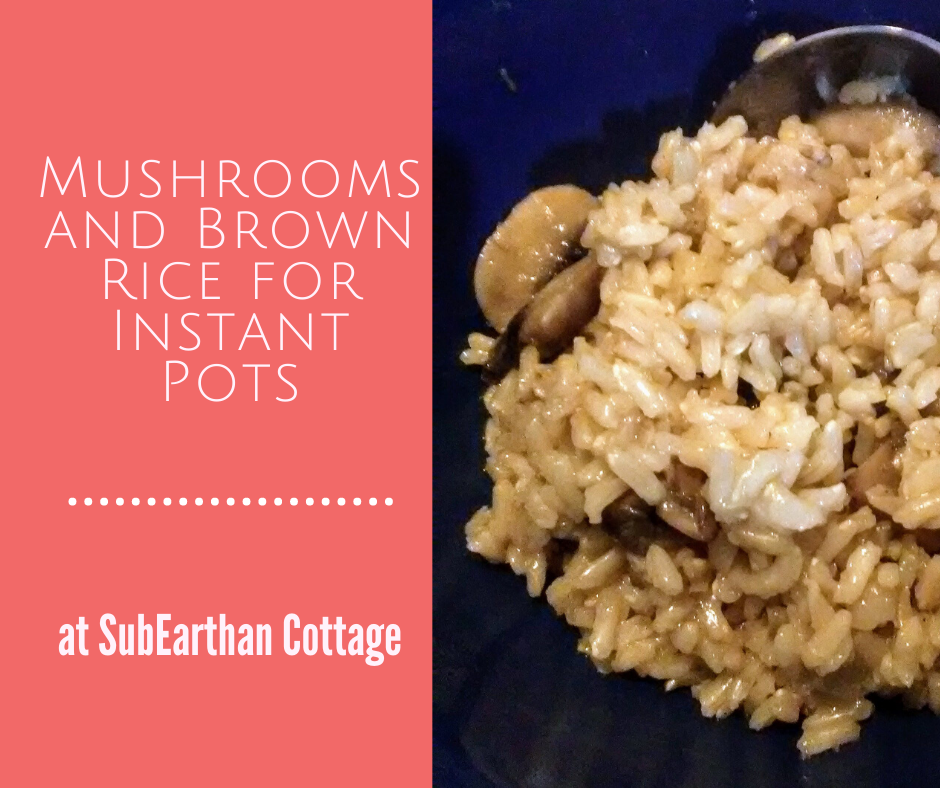
Mushrooms are one of those foods that you either love or hate. I love them and try to incorporate them into once in awhile in hopes of swaying my kids to the “love” side. Finn is already there and Thadd is interested but skeptical that something with that texture can be delicious. I’m not giving up on Beckett, but I think he may have inherited his dad’s and grandma’s mushroom dislike.
This mushroom brown rice dish is rich but mild, with the brown rice adding a little nutty flavor. Because the mushrooms are sliced and not chopped, they are large enough for little mushroom skeptics to remove them and eat the rice.
Not a fan of brown rice?
The brown rice adds to the flavor, but takes a lot longer to cook than white rice. With an electric pressure cooker, it’s only about 15 minutes of active prep time. After that, the pressure cooker does all the work. If you’re in a hurry to eat, though, swap it out in favor of a long grain white rice. I like basmati and jasmine rice the best for white rice.
Dietary Restrictions?
As written, this recipe is plant-based, gluten free and dairy free. If you choose to use broth instead of water, that could change depending on the type of broth you use.
One thing I like to keep on hand is a broth base called “Better than Bouillon“. It’s a paste that comes in a small jar. You mix a bit of the paste into water to make broth like you would with bouillon. To me, it really does have a better flavor, and a little goes a long way. I usually have the vegetable version on hand and would have added a bit to this recipe, but I used my last bit up yesterday. They also have a mushroom version that would compliment this recipe as well. Between the onion, garlic, mushrooms and brown rice, though, it’s really not necessary.
All electric pressure cookers welcome.
I’ve titled this post “Mushroom Brown Rice for Instant Pots” because Instant Pot has become the most popular brand and is now synonymous with electric pressure cooker. The recipe should work in any similar electric pressure cooker. Personally, I use a GoWise brand 8 quart electric pressure cooker.
Mushroom Brown Rice for Instant Pots or other Electric Pressure Cookers
Rich, earthy mushrooms in nutty brown rice make this work as a side dish or, serve with a salad to make it a meatless main course. Makes 6-8 servings.
Prep Time15 minutesmins
Cook Time22 minutesmins
Course: Main Course, Side Dish
Keyword: gluten free, mushroom, rice, vegan
Servings: 8people
Equipment
Electric pressure cooker, such as an Instant Pot
Ingredients
1Tcoconut or other oil
1smallonion, diced
3clovesgarlic, minced
3cupsmushrooms, slicedWhite, bella or similar.
1.5tspsaltCan use less if preferred.
3cupswater or broth
2cupslong grain brown rice
1squeezelemon juiceoptional
1dashblack pepperAdjust to taste.
Instructions
Select "Saute" on the pressure cooker and add the coconut oil.
Add the diced onion and saute until translucent.
Add the minced garlic and saute for about a minute more.
Add the mushrooms, salt and pepper. Continue to saute until onions are lightly browned and mushrooms begin to get some color.
Add about 1/2 cup of water or preferred broth and stir up any browned bits from the bottom of the pot. Let simmer for 1-2 minutes.
Add the rice, remaining 2 1/2 cups of water, lemon juice and pepper.
Turn off the "Saute" function and set the pressure cooker manually to 22 minutes or follow your pressure cooker's instructions for brown rice. Most require longer than the "Rice" setting allows.
Allow the pressure to release naturally for at least 10 minutes before doing a quick release. I think it's best to let it naturally release completely if you have the time.
Fluff rice and serve.
Notes
This recipe has tons of flavor with just water, but you can use broth (vegetable broth to keep it vegan) if you prefer. Unless the broth is low sodium, you probably want to reduce the amount of salt.I like coconut oil, but feel free to use olive or your preferred cooking oil.Brown rice adds an earthy, nutty flavor, but it takes a long time to cook compared to white rice. If you’re in a hurry, substitute a long grain white rice and reduce the cooking time to 8 minutes or use the “Rice” setting. Basmati is my favorite long grain white rice.
While I try to write recipes as clearly as possible, it’s easy to miss a step or make assumptions. If anything is confusing, please don’t hesitate to comment with your questions. If you make this recipe, please let me know what you think.
Like this post? To make sure you never miss a future post, please sign up for my newsletter.
This post contains affiliate links. If you click through any of the Amazon links and make a purchase, I will receive a small commission. There is no added cost to you.
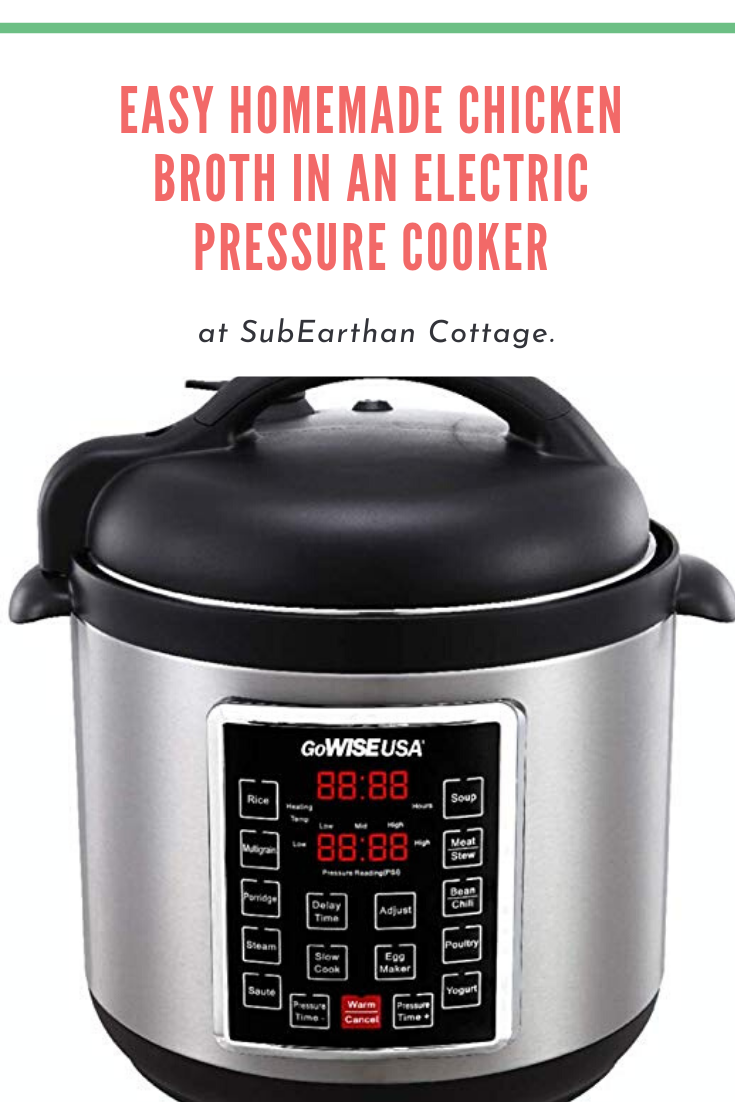
If you have an Instant Pot or other electric pressure cooker, delicious homemade chicken broth takes just a few minutes of prep. This technique can easily be applied to other types of broth as well.
The ingredients
When I make chicken broth, I prefer to use bones from a cooked chicken. It’s easy to cook a whole chicken in an electric pressure cooker, or use an oven-roasted or rotisserie chicken. Save the bones for broth to make a chicken stretch farther meal-wise. You can make the broth immediately after de-boning a cooked chicken. If you’re short on time, store the bones in the freezer until you’re ready.
To flavor the broth, I like to add some combination of carrots, celery, onion, garlic, salt and pepper. I usually use:
one onion peeled and cut into chunks
one or two carrots
two to three celery stalks broken into two or three pieces each
two to three cloves of peeled garlic
a few peppercorns
about 2 teaspoons of salt.
It’s easy to add salt and pepper to taste to the finished broth, so I lean toward adding less at the beginning.
Herbs like sage, bay leaf, parsley, basil and oregano are great additions, too. You could also add jalapeno to give it some spice.
Making the Chicken Broth
To make the chicken broth, put the bones, chosen vegetables and seasonings into the pot of your electric pressure cooker. Add enough water to cover the ingredients by 1-2 inches. Lock the lid and manually set the pressure cooker to cook on high pressure for 2 hours. When it’s done, depressurize naturally.
Once it’s cool enough to handle, I like to pour it through a mesh strainer to get all the small bones and vegetable remnants out. If not using the broth within a few days, it’s best to store it in the freezer.
That’s it. With a just few minutes of prep to assemble the ingredients, an electric pressure cooker makes flavorful chicken broth that tastes like it was simmered on the stove all day long. Unlike on the stovetop, though, there’s no worry about it boiling over, and the time is dramatically reduced.
Like this post? To make sure you never miss a future post, please sign up for my newsletter.
I, Charity Sloan, am a participant in the Amazon Services LLC Associates Program, an affiliate advertising program designed to provide a means for sites to earn advertising fees by advertising and linking to Amazon.com. Any purchases through those links will result in my receiving a small percentage in commission.
This only refers to Amazon links found in/on my blog pages. All products in my shop are 100% mine and not linked to Amazon.
Prices are the same whether you click an affiliate link or a non-affiliate link, so you will not be charged more. Thank you for your support!