Posted on Leave a comment

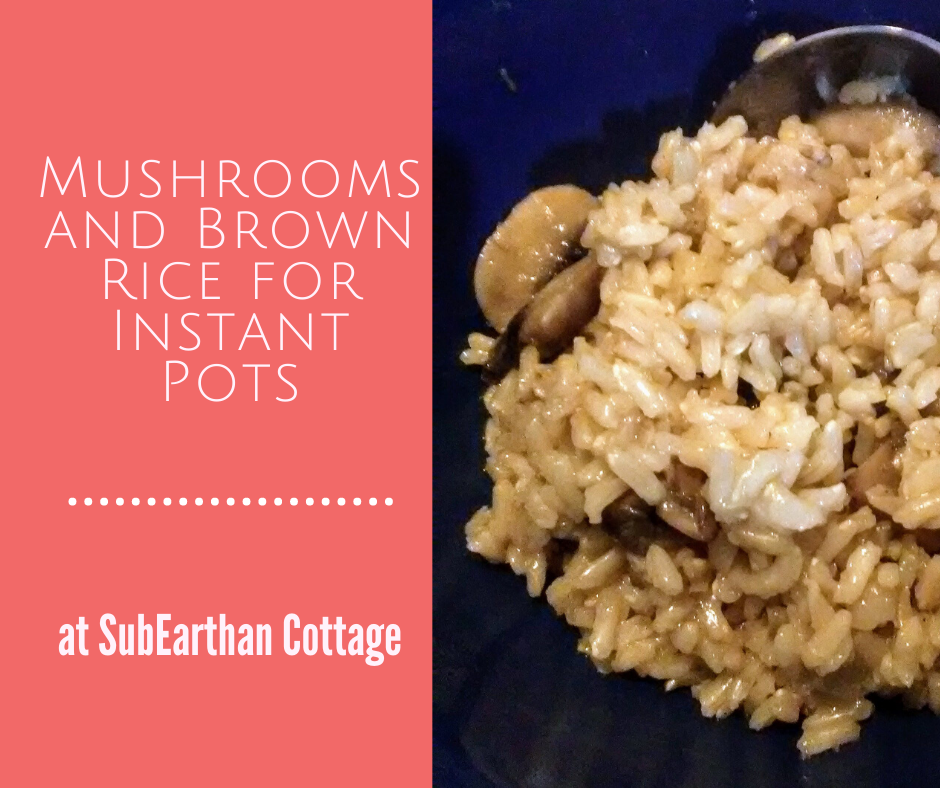
Mushroom Brown Rice for Instant Pots

Mushrooms are one of those foods that you either love or hate. I love them and try to incorporate them into once in awhile in hopes of swaying my kids to the “love” side. Finn is already there and Thadd is interested but skeptical that something with that texture can be delicious. I’m not giving up on Beckett, but I think he may have inherited his dad’s and grandma’s mushroom dislike. 

This mushroom brown rice dish is rich but mild, with the brown rice adding a little nutty flavor. Because the mushrooms are sliced and not chopped, they are large enough for little mushroom skeptics to remove them and eat the rice.

Not a fan of brown rice?

The brown rice adds to the flavor, but takes a lot longer to cook than white rice. With an electric pressure cooker, it’s only about 15 minutes of active prep time. After that, the pressure cooker does all the work. If you’re in a hurry to eat, though, swap it out in favor of a long grain white rice. I like basmati and jasmine rice the best for white rice. 

Dietary Restrictions?

As written, this recipe is plant-based, gluten free and dairy free. If you choose to use broth instead of water, that could change depending on the type of broth you use.

One thing I like to keep on hand is a broth base called “Better than Bouillon“.  It’s a paste that comes in a small jar. You mix a bit of the paste into water to make broth like you would with bouillon. To me, it really does have a better flavor, and a little goes a long way. I usually have the vegetable version on hand and would have added a bit to this recipe, but I used my last bit up yesterday. They also have a mushroom version that would compliment this recipe as well. Between the onion, garlic, mushrooms and brown rice, though, it’s really not necessary. 

All electric pressure cookers welcome.

I’ve titled this post “Mushroom Brown Rice for Instant Pots” because Instant Pot has become the most popular brand and is now synonymous with electric pressure cooker. The recipe should work in any similar electric pressure cooker. Personally, I use a GoWise brand 8 quart electric pressure cooker.

Mushroom Brown Rice for Instant Pots or other Electric Pressure Cookers

Rich, earthy mushrooms in nutty brown rice make this work as a side dish or, serve with a salad to make it a meatless main course. Makes 6-8 servings.
Prep Time15 minutes
Cook Time22 minutes
Course: Main Course, Side Dish
Keyword: gluten free, mushroom, rice, vegan
Servings: 8 people

Equipment

  • Electric pressure cooker, such as an Instant Pot

Ingredients

  • 1 T coconut or other oil
  • 1 small onion, diced
  • 3 cloves garlic, minced
  • 3 cups mushrooms, sliced White, bella or similar.
  • 1.5 tsp salt Can use less if preferred.
  • 3 cups water or broth
  • 2 cups long grain brown rice
  • 1 squeeze lemon juice optional
  • 1 dash black pepper Adjust to taste.

Instructions

  • Select "Saute" on the pressure cooker and add the coconut oil.
  • Add the diced onion and saute until translucent.
  • Add the minced garlic and saute for about a minute more.
  • Add the mushrooms, salt and pepper. Continue to saute until onions are lightly browned and mushrooms begin to get some color.
  • Add about 1/2 cup of water or preferred broth and stir up any browned bits from the bottom of the pot. Let simmer for 1-2 minutes.
  • Add the rice, remaining 2 1/2 cups of water, lemon juice and pepper.
  • Turn off the "Saute" function and set the pressure cooker manually to 22 minutes or follow your pressure cooker's instructions for brown rice. Most require longer than the "Rice" setting allows.
  • Allow the pressure to release naturally for at least 10 minutes before doing a quick release. I think it's best to let it naturally release completely if you have the time.
  • Fluff rice and serve.

Notes

This recipe has tons of flavor with just water, but you can use broth (vegetable broth to keep it vegan) if you prefer. Unless the broth is low sodium, you probably want to reduce the amount of salt.
I like coconut oil, but feel free to use olive or your preferred cooking oil.
Brown rice adds an earthy, nutty flavor, but it takes a long time to cook compared to white rice. If you’re in a hurry, substitute a long grain white rice and reduce the cooking time to 8 minutes or use the “Rice” setting. Basmati is my favorite long grain white rice.

While I try to write recipes as clearly as possible, it’s easy to miss a step or make assumptions. If anything is confusing, please don’t hesitate to comment with your questions. If you make this recipe, please let me know what you think.

Like this post? To make sure you never miss a future post, please sign up for my newsletter.

This post contains affiliate links. If you click through any of the Amazon links and make a purchase, I will receive a small commission. There is no added cost to you.

Mushroom brown rice
Posted on Leave a comment

Easy Three Ingredient Peanut Butter Cookies

Easy 3-ingredient Peanut Butter cookies

Sometimes you need cookies. Or maybe that’s just me. Chocolate chip cookies are my favorite, but sometimes those aren’t fast enough, or somebody has eaten all of the chocolate chips. You know who you are. Peanut butter cookies are a close second, and this three ingredient recipe is dangerously fast and easy.

Because it is a flourless recipe, it is perfect for people following a gluten-free diet.

I’ve only made this recipe with peanut butter, but it should work with other nut butters or nut butter substitutes. Typing that, I got the strong urge to try it with Nutella. Maybe some other time.

Three ingredient peanut butter cookie recipe

3 Ingredient Peanut Butter Cookies

Fast, easy peanut butter cookies. Great for anytime you need a little something sweet. The recipe calls for three basic ingredients. Because it doesn't call for flour, this is a great gluten free recipe. I usually add a bit of salt and vanilla just because, but they are totally optional.
Prep Time10 minutes
Cook Time6 minutes
Total Time16 minutes
Course: Dessert
Keyword: dairy free, easy, gluten free, one bowl, simple
Servings: 25 cookies

Equipment

  • Baking sheets either lined with parchment or silpat mats or greased.

Ingredients

  • 1 cup sugar
  • 1 cup peanut butter I usually use smooth because that's what I have on hand. Crunchy would work, too.
  • 1 large egg
  • 1 tsp vanilla extract Totally optional
  • 1 dash salt Totally optional

Instructions

  • Preheat the oven to 350 degrees.
  • Combine all of the ingredients in a large bowl and mix until smooth.
  • Drop by spoonfuls on the prepared baking sheet.
  • Bake for 6-8 minutes. You want them to just start turning golden at the edges.
  • Let cool to fully set before eating.

I don’t have a photo of the finished cookies because we tend to devour them. I just drop by spoonfuls on the prepared baking sheets, but you can do the crisscross pressing with a fork for a traditional peanut butter cookie look.

To make sure you never miss a post, please sign up for my newsletter.

Easy 3-ingredient Peanut Butter cookies

If you click through any of the Amazon links and make a purchase, I will receive a small commission. There is no added cost to you.

Posted on 1 Comment

Why I Love my Air Fryer

Another kitchen gadget I find myself using almost daily is my air fryer. Like my electric pressure cooker, my air fryer was a Christmas gift from my parents. This is the Gourmia model I own. It has a six quart basket and eight preset functions, or I can manually set the timing and temperature.

Unlike with my pressure cooker, I honestly wasn’t sure what to do with the air fryer at first. I don’t fry a lot of things, mainly because it’s messy. I also have the added challenge of making gluten free breading. Even before going gluten-free, I found it hard to get the breading to stick on things like chicken and have it cook all the way through without burning the outside. After some experimenting, though, I’ve found that the air fryer makes frying easier. I’ve also found that the air fryer does so much more than frying.

Ways I use my air fryer

  • Potatoes Whether it’s fresh home fries or frozen tater tots, the air fryer browns them all nicely. My air fryer has a french fry preset, so I just add the potatoes and start it. Every once in a while during the cooking, I give the basket a shake to keep them from clumping. This is especially important if the basket is fairly full. You can cook them completely without oil, but I do like to toss them lightly with a little olive oil. This seems most important with french fries. They’re okay without it, but I like the flavor better with it.
  • Sausage and bacon Both turn out beautifully in the air fryer. All the excess grease drains under the basket, leaving the bacon crisp and the sausage not greasy. I use the bacon setting on mine for both, but I reduce the time to nine minutes for sausage.
  • Reheating leftovers We got rid of our microwave a few years ago. We really only used it to reheat leftovers, which never tasted as good as if I heated them on the stove or in the oven, and it took up a lot of counter space. While I still use our stove and oven to reheat things for the whole family, if I’m just heating a plate of food or other small amount, I’ll use the air fryer. It’s quicker than the oven, and the food heats more evenly than it did in the microwave. The texture is better, too.
  • Frying I still don’t do this much, but I finally got gluten-free fried chicken to work, so that may change. I did cheat a little by quickly frying it on the stove first, just to lightly brown and set the breading. Then I added it all into the air fryer basket and let it finish it with the chicken preset function. While it’s not as low fat that way, the chicken turned out crisp and juicy but not at all greasy. That also freed up my skillet to make gravy while the chicken finished cooking so it was all hot and perfectly done at the same time.
  • Baking It is essentially a counter top convection oven, so it bakes as well as an oven. I don’t use this function as much, because, with a family of five, the oven is usually more convenient. If I’m only making a few cookies, though, it works really well. I’ve also baked cheesecake in it using the recipe that came with my air fryer. It turned out delicious and was super easy to make.

What are your tips?

I’m still learning new things to try in my air fryer. With just those five things, I already use it almost every day. I would love to hear more creative ways to use an air fryer. If you have one, please share your favorite tips and recipes in the comments.

To make sure you never miss a post, please sign up for our newsletter. Once you sign up, you’ll get a confirmation email. Sometimes it gets sent to the spam box. Please look for it, because you won’t be signed up until confirmation is complete.

Air Fryer

If you click through any of the Amazon links and make a purchase, I will receive a small commission. There is no added cost to you.

Posted on 2 Comments

Ridiculously Easy Gluten Free Tortillas

I have never been a huge fan of corn tortillas. They’re good for some things, like street tacos, but overall I love the soft, slightly chewy texture of flour tortillas. While there are flour gluten free tortillas on the market, they are pricey and hard to find. Which means that since eliminating gluten from our diets, I’ve had to stick to corn. Which is fine, because it’s better than no more tacos, but , I still miss flour.

After much searching, I finally found a recipe that mimics the soft, chewy texture of flour tortillas. They require no real prep work, so it’s easy to make them last minute, if needed. Basically, if you can make a pancake, you can make these gluten free tortillas.

You can also adjust the thickness to be more like a flatbread. I can see pairing them with curries or stews, or cut into chips , toast and serve with hummus.

Ridiculously Easy Gluten Free Flour Tortillas

Soft, chewy gluten free flour tortillas so easy you can make them last minute.
Prep Time5 minutes
Cook Time1 minute
Course: Side Dish

Ingredients

  • 1 Cup Chickpea based gluten free flour Can be straight chickpea flour, or a blend with a high amount of chickpea flour, such as Bob's Red Mill GF flour. (NOT the 1 to 1 flour)
  • 0.5 cup Tapioca flour
  • 1 tsp salt
  • 1 cup water
  • 1 tsp coconut or other oil If you use a non-stick skillet or griddle you may not need the oil.

Instructions

  • Mix the dry ingredients in a large bowl.
  • Add the water and stir until blended.
  • Oil a skillet or griddle as needed and heat to medium high.
  • Pour about 1/4 cup of the batter onto your prepared skillet or griddle.
  • Cook for 1-2 minutes over medium high heat.
  • Flip like a pancake and cook for another 1-2 minutes.
  • Repeat the cooking and flipping for the rest of the batter.

Notes

This recipe is very versatile. For thinner tortillas, add a little more water. For more of a flatbread, reduce the water to about 3/4 of a cup. 
Gluten Free tortillas
 

Find more of my gluten-free recipes here: https://subearthancottage.com/?s=gluten+free

Posted on Leave a comment

Cupcakes

Sometimes after binge watching baking shows, you just have to bake cupcakes.

Lots of cupcakes

I substituted a 1 to 1 gluten free flour blend for the flour in the yellow cake recipe out of my favorite Better Homes cookbook. The cupcakes turned out a little dense, but not bad. Most gluten free cakes are a little dense, so I’m not sure there’s a good solution.

My favorite part of any cake is the butter cream frosting.  A slightly dense cupcake doesn’t bother me, as long as the frosting is good. My frosting recipe also came from my Better Homes cookbook. Some of my family can’t have dairy, so I substituted shortening for the butter and almond milk for the milk.

My Sunbeam Mixmaster worked beautifully for both the cake batter and butter cream frosting. I’ve had it for over a year and a half now, and the only problem I’ve had was with the beaters.Those were cheap and easy to replace, and it’s been going strong ever since.

Frosting delivery device