A few days ago, I thought it would be fun to make Christmas cookies. Then I remembered that my Christmas cookie cutters had disappeared, we were out of any sort of sprinkles for the cookies and I really didn’t want to make decorator frosting or go to the store for supplies. My solution? DIY sugar sprinkles!
Ingredients
Granulated sugar
Food coloring
Supplies
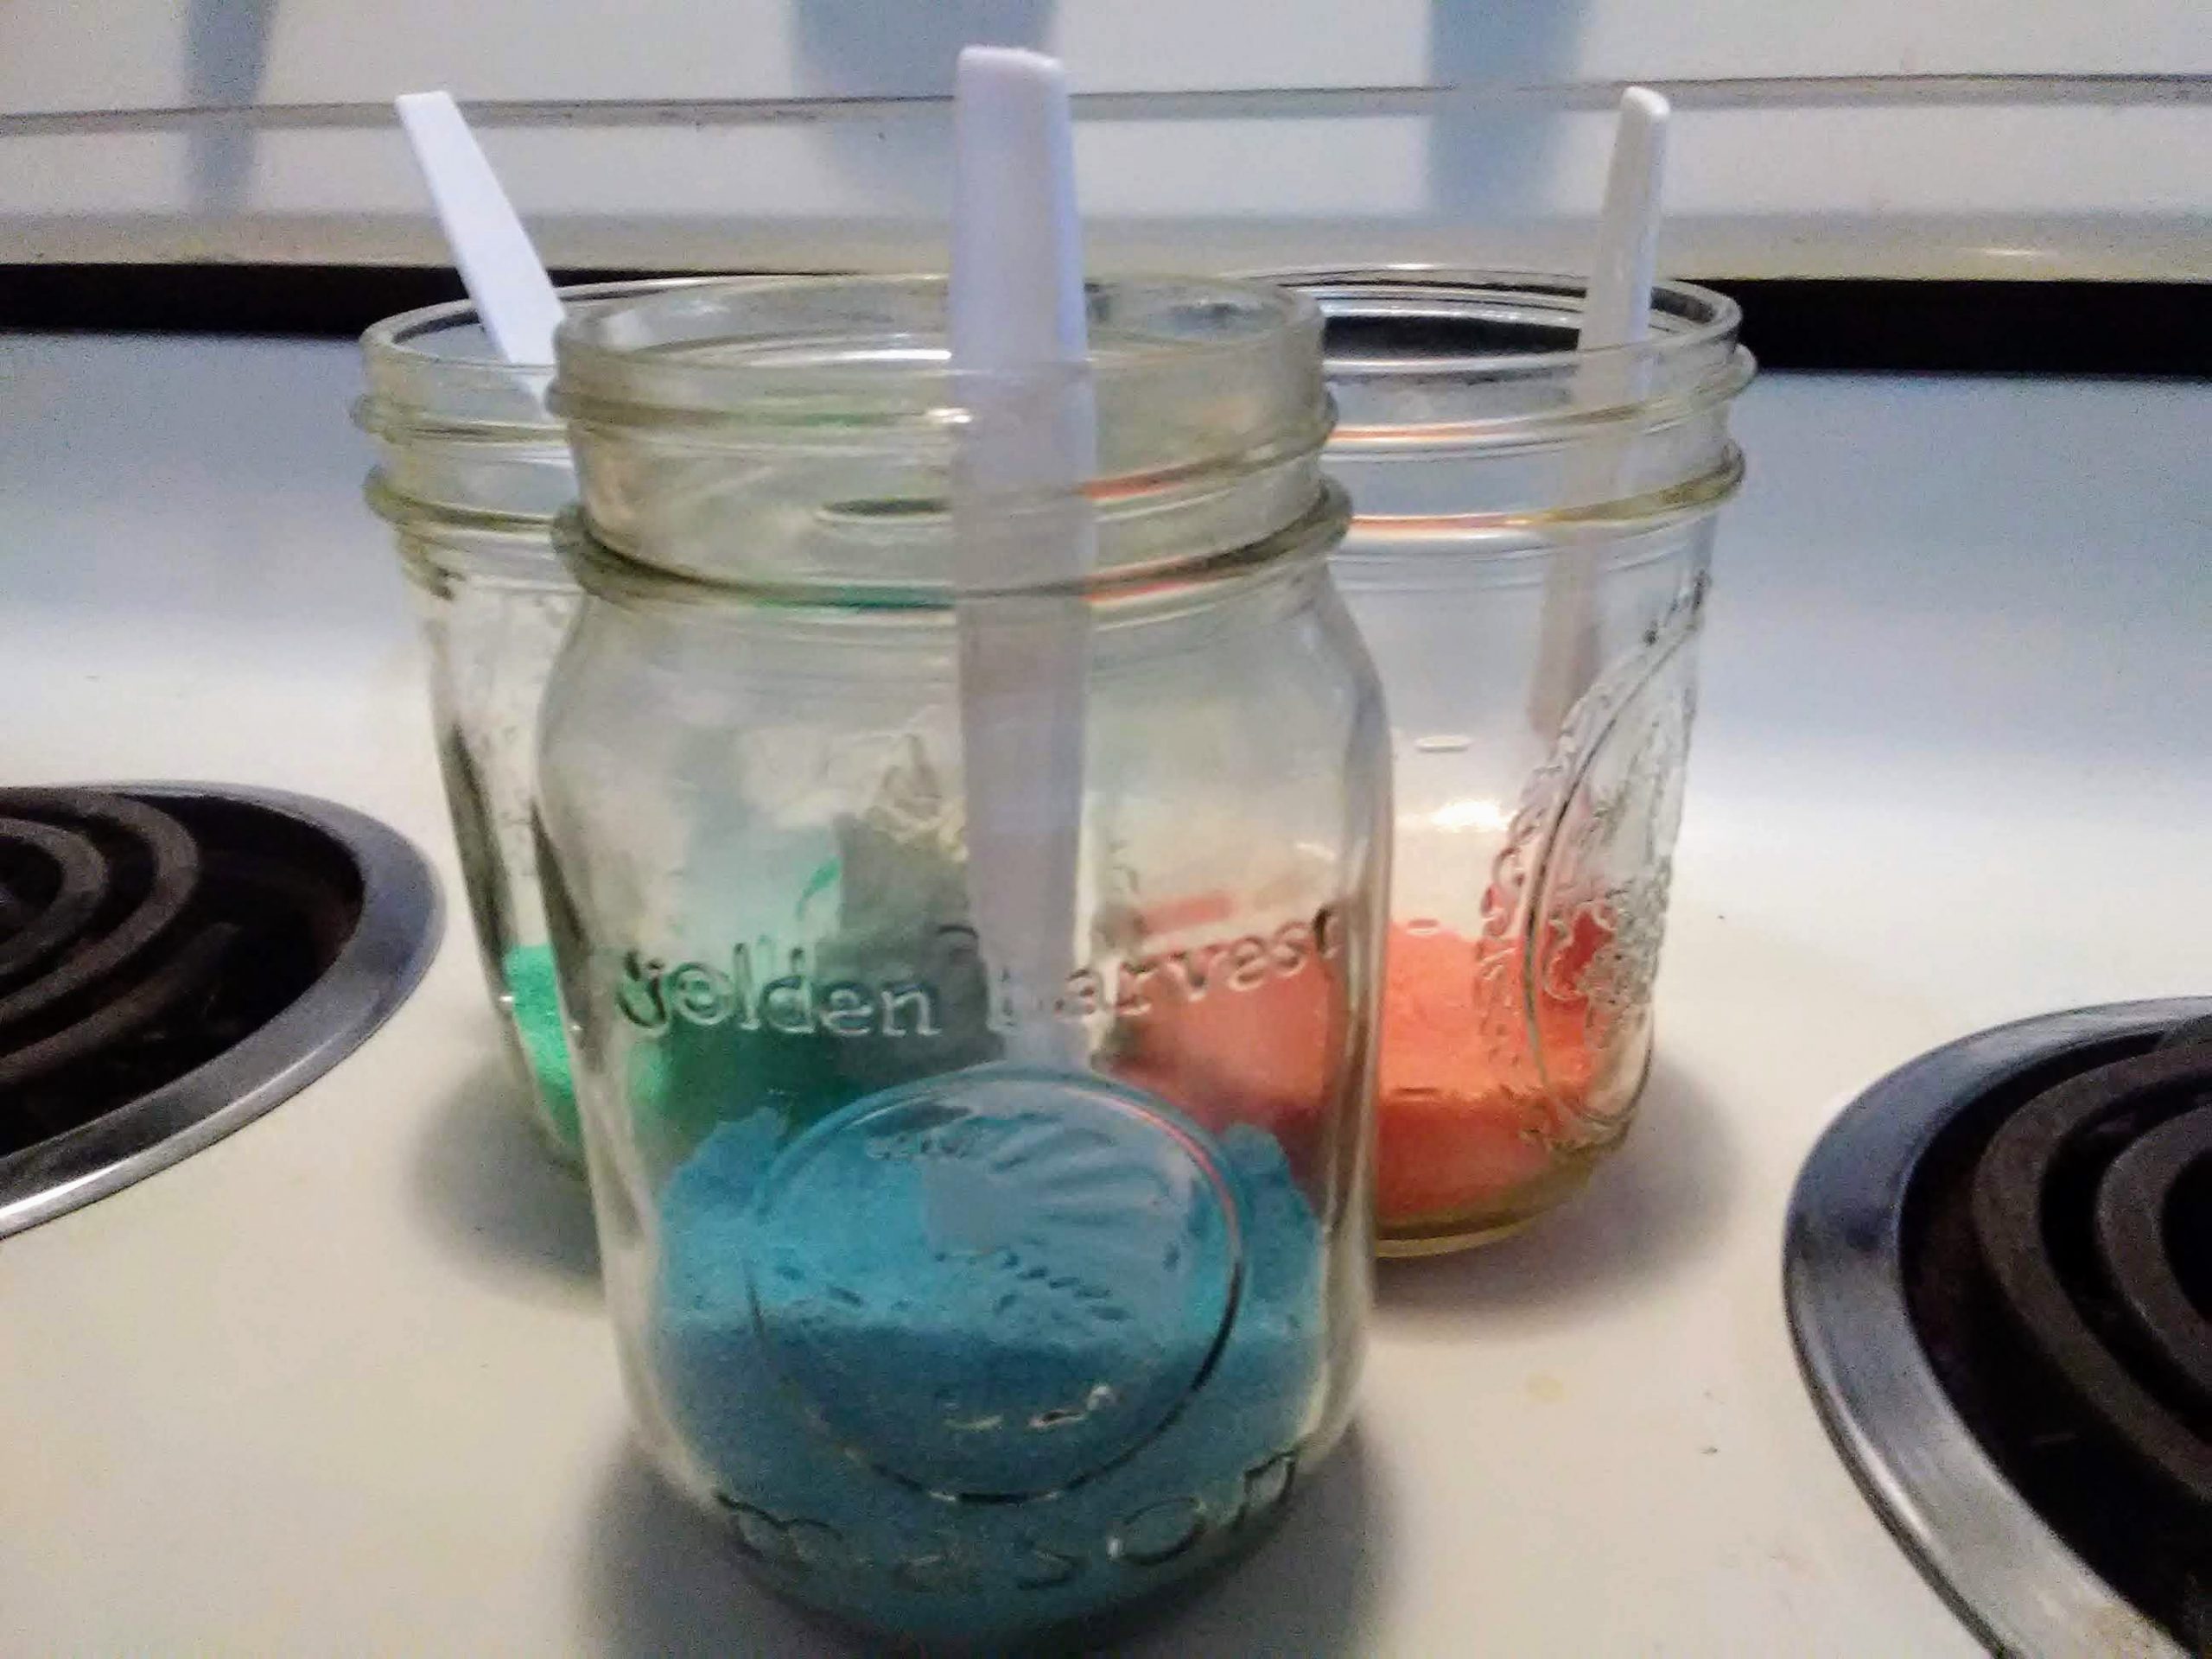
Jars, plastic containers or sandwich bags, one per color. (Ideally something with a shaker top, which I didn’t have)
Spoons or shakers
How to make the sugar sprinkles
Measure about 1/4 cup of sugar into each container.
Add 2-3 drops of food coloring to the sugar.
Shake or stir until the color is evenly distributed.
Let air dry. I just left the lids off the jars and set them on the stove while the cookies baked, stirring occasionally. If you use bags or plan to store it for a longer period of time, you may want to spread it on parchment or a cookie sheet to make sure it is super dry.
Mom tip: If your cookie decorating skills are not Pinterest-worthy, just let your kiddos do the decorating.
The recipe I used for the cookies was the sugar cookie cutout recipe from my trusty red and white Better Homes and Gardens cookbook. To make them gluten free, I substituted Bob’s Red Mill 1 to 1 gluten free flour. If you are new to gluten free baking, it is a great flour to start with. I have had lots of success making all my old recipes gluten free with just that simple substitution.
My solution for not having cookie cutters was to use a round glass to cut out “ornaments”. We dusted some of the cookies with the sprinkles prior to baking. For the rest, I made a simple icing that got dusted or caked with sprinkles, depending on who was doing the decorating.
No matter what our budget looks like, food is always a part of it. You have to eat, right? There are many thoughts on the best way to save on food. These are the things that work for me.
Eat at home
This one is probably the most important. If you eat out, regardless of whether it’s a dine-in or fast food restaurant, you are going to spend more than if you cook and eat at home. It’s fine to splurge once in a while, but if you’re looking to save, eating at home gives you the most bang for your buck.
Buy mostly ingredients
Prepackaged foods are sometimes quicker, but they are usually more expensive per serving. If it’s a choice between eating out and eating convenience foods from the grocery, it’s still usually cheaper than eating out, so if it’s a choice between KFC or a deli rotisserie chicken, bagged salad and prepackaged dinner rolls, the deli chicken is probably the cheaper and healthier option.
There are some convenience items that I find helpful, especially when life gets hectic. Jarred sauces, bouillon and frozen potatoes in various forms are things that I like to have on hand to help me get a meal on the table quickly. When there’s not time to make the sauce from scratch or I don’t have homemade broth on hand those can make it easy to still throw something together. They’re also usually fairly inexpensive, so I feel they are budget friendly convenience choices.
Buy in bulk where it makes sense
Don’t buy a ton of perishables like fresh fruit just because it’s on sale. If you have time to prep and freeze or can the fruit, then go for it. Things like canned goods, freezer staples and shelf stable items are great for buying in bulk, if you have the room. We have a small chest freezer, so I’m able to buy fruit on sale to freeze for smoothies or desserts and an extra ham or turkey when they are on sale for under $1 per pound around the holidays.
I also buy basmati rice in 20 lb bags because we prefer it over other types of rice and it is so much cheaper that way. To keep it fresh and manageable, I keep a small container of it in the cupboard and the rest goes into the freezer.
Shop creatively
It’s easy to have one or two grocery stores or box stores where you do all of your shopping. If you have farmer’s markets, discount groceries or ethnic groceries in your area, you may find better deals on some items.
For starters, if you have an Aldi nearby and haven’t given them a try, please do. I’ve found them to have a good selection of staples and they have a good guarantee on everything they sell. You won’t find many name-brands at Aldi, but with their guarantee, it’s worth trying and seeing if you like their store brands. They also carry a lot of gluten-free options, as well as dairy-free milk alternatives and a dairy-free mozarella cheese.
I also frequently shop a local Vietnamese grocery store. They have tons of fresh greens and other produce at really good prices. I also get a lot of specialty items, like things for making pho or sushi for sometimes half the cost or less of what I would pay at Kroger or Walmart. Bulk spices and rice are also cheaper there. For gluten-free pasta, rice noodles from there are cheaper than gluten-free options from Kroger and Walmart.
Find a method of meal planning that works for you.
Some people do really well with having every meal, every day planned out to every last detail. I prefer something more flexible that allows for changes based on last minute plans or whatever is on sale that week or whatever leftovers we need to eat. Regardless of the type of meal planner you are, have some sort of game plan in place.
Meal planning is one area where I need to improve, but I do have a basic game plan for meals that I’ll post on at a later date.
While you’re planning, don’t forget lunch. Leftovers are quick and easy lunches, so if you’re planning a dinner that reheats well, make enough for lunch the next day.
Keep staples for one or two quick meals on hand always
This is important in case you forget to plan, or something doesn’t work out with your plan. Whether it’s spaghetti and premade sauce, eggs, fruit and toast or some other meal you can throw together in under thirty minutes, keep the ingredients on hand for one or two backups that you like. Having a backup option makes it easier to eat at home when you might otherwise be tempted to eat out.
Eat real food
If you have to change your eating habits due to health or personal beliefs, it’s easy to try to substitute faux or “free” foods tailored to that diet. Price-wise though, it’s better to adapt your diet with real foods. Rather than faux meat burgers, try grilling portobello mushrooms or making your own patties with chickpeas. Instead of gluten free pasta, substitute rice or potatoes. Instead of diet drinks, flavor water, tea or soda water with fruit.
If you’re really craving cheese and you’re dairy free or bread and you’re gluten free, go ahead and splurge on the dairy or gluten free options. If you’re on a plant-based diet but desperately want something like a real burger, go for one of the faux meat patties. Just try to keep those splurges to a minimum and you’ll save money.
Find recipes for soups, stews and beans that you like
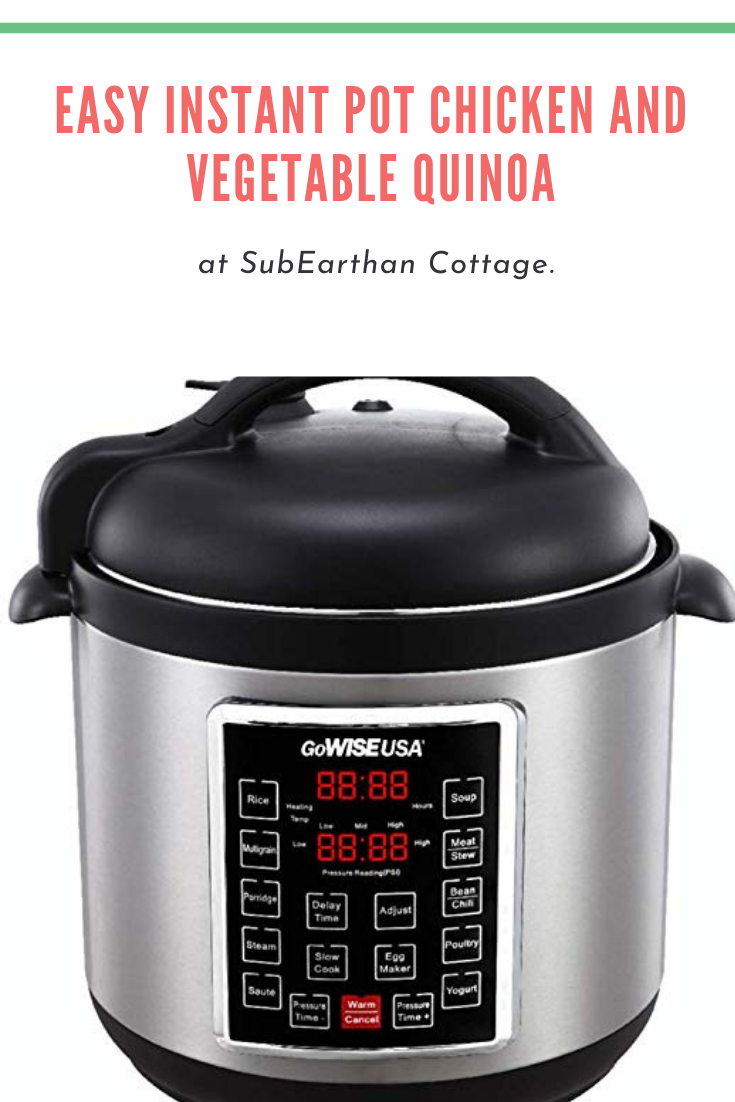
Soups, stews and beans are usually cheap, filling and can be a one pot meal. Having a few recipes you like and keeping the ingredients on hand can really help save money on food. They also are easy to make in bulk and usually freeze well, so making a bunch and having it for lunch or in the freezer for nights that dinner plans don’t work out helps prevent eating out. I love crock pots or pressure cookers for making soups and stews. It’s absolutely not necessary to run out and buy a slow cooker or pressure cooker, but if it’s something you’ve been considering, I love my electric pressure cooker for so many things.
Just because you might be at home more doesn’t mean you have more time to cook. Whether you’re working from home, helping virtual learners or homeschooling, it’s likely you’re just as busy as ever. I love using my electric pressure cooker for busy days. It’s like having someone cooking in the kitchen while I work on the million of other things needing done.
One of my favorite fast recipes is chicken and vegetable quinoa. It takes minutes to prepare, is super healthy and cooks fast, so it’s perfect for busy days. The basic recipe is really easy to customize, so it’s a good meal to use up odds and ends from the fridge.
Customizing your quinoa
Try it with beef, sausage, tofu, beans, eggs or skip the protein and add more vegetables. If you have leftover chicken, shred it and use it instead of raw chicken breasts.
If you have time to chop vegetables, clean out the produce drawer and use whatever you have on hand. Use up those veggies before they go bad!
Kale is another nice addition. Throw it on top before pressure cooking and stir it in at the end. Since it’s a hardier green, it holds up well to pressure cooking.
Change up the flavor by adding soy sauce, hot sauce or your favorite seasonings. For a mild dish, I like using poultry seasoning.
Don’t like quinoa? Use rice and adjust the cooking time based on your pressure cooker’s recommendations.
It’s easy to pack for lunches or take on picnics, too.
Instant Pot Chicken and Vegetable Quinoa is a quick, last minute dish that is great hot or cold. Customize it by swapping out the protein or vegetables depending on what you have on hand.
Prep Time15 minutesmins
Cook Time1 minutemin
Course: Main Course, Side Dish
Servings: 6people
Author: sophiecls418
Equipment
Electric pressure cooker, such as an Instant Pot
Ingredients
1tbspoilolive oil, coconut oil or preferred cooking oil
1 medium onion, diced
1cup chicken breast, cut into bite sized piecesCould also use pre-cooked, shredded chicken
1 cupfrozen mixed vegetables
2cupsquinoa
2cupschicken broth or water
salt and pepper to taste
Instructions
Turn the pressure cooker to "Saute" and add oil.
Add the onion and chicken if you are not using pre-cooked chicken.
Saute until the onion is translucent and chicken is browned.
Press "Cancel" to stop sauteing.
Add broth, quinoa and vegetables to pot and stir.
Add salt and pepper, if desired.
Lock the lid and set cooker to two minutes on high pressure.
Allow pressure to release naturally when done.
Fluff with fork and serve.
Notes
The great thing about this recipe is it is easy to customize. Try it with beef, sausage, tofu, or skip the protein and add more vegetables. If you have leftover chicken, shred it and use it instead of raw chicken breasts.Clean out the veggie drawer and use whatever you have on hand.Change up the flavor by adding soy sauce, hot sauce or your favorite seasonings.It’s easy to pack for lunches or take on picnics, too.
Like this post? To make sure you never miss a future post, please sign up for my newsletter.
Shop sales!
For the entire month of September, all of my handmade soaps are 20% off. Shop handmade soaps here.
My machine embroidery files are also on sale all month for just $1 each! Be sure to check out my latest Halloween designs. Shop embroidery designs here.
Even the best meal planners have days where things don’t go according to plan. Fast food is convenient, but usually more expensive and less healthy than what you can make at home. If you have any dietary restrictions, eating out safely can be extra challenging. For those nights, I like to keep a few staples on hand that make it easy to make a last minute meal that’s healthy and frugal.
Here’s my list of grocery staples I like to keep on hand for last minute meals, along with ideas for how to use them. Depending on your tastes, you may not find everything I use helpful. Since we eat gluten and dairy free, my list doesn’t include common staples like bread or cheese.
Grocery Staples for Last Minute Meals
Proteins
Flash Frozen Boneless, Skinless Chicken – I always have one or two bags of frozen chicken. Because they are individually frozen, it’s easy to separate out just what I need. The pieces don’t have to be thawed before cooking, so it’s perfect for a quick meal. I alternate between breasts, thighs and tenderloins.
Eggs – Eggs cook in minutes for when time is short.
Ground Beef – It’s easier to cook ground beef if it’s thawed, but it’s not impossible to cook it from frozen. I like using my electric pressure cooker if I need to cook it from frozen. Place it on a trivet, add about half of a cup of water to the pot and cook under high pressure for about 20 minutes. When it’s done, drain the water, remove the trivet and cook with the saute function with seasonings to remove excess moisture and finish it if it’s still a little pink in the middle.
Canned Beans – Dried beans are cheaper and don’t take that long with a pressure cooker, but sometimes you need something fast. Canned beans are a great plant-based protein for quick meals or for stretching left over meat in stews and chili.
Lentils – Dry lentils don’t have to be soaked and cook in about 20 minutes. I love this Coconut Lentil Curry from A Couple Cooks for a fast meal.
Vegetables
Frozen mixed vegetables – Perfect on their own as a side, or add to soups, rice dishes, scrambled eggs, curries, etc.
Onion – Sauteed onion adds lots of flavor to just about any meal.
Potatoes – Potatoes are great as an ingredient, a side or bake them and add toppings for a meal on their own.
Frozen greens – I like freezing chopped kale to add to soups and curries because it’s hardy and freezes well. Spinach or other greens work, too.
Grains
Rice – Nice to have as a side, with curry or stir-fry or to make a quick jambalaya or similar dish.
Quinoa – Cooks quickly in the pressure cooker and high in protein. Easy Instant Pot Chicken and Vegetable Quinoa is a quick quinoa based meal that is easy to customize and a great way to use up leftover meats and vegetables. You can also make it with rice with adjustments to the cooking time.
Pasta (I buy Aldi’s gluten free or Skinner brand gf at Kroger. ) – Cooks quickly and can be topped with a variety of sauces, tossed with sauteed vegetables and drizzled with olive oil or added to soups.
Tortillas or Taco Shells – These are especially handy because my kids love tacos. Putting anything in a taco shell increases the chances that they’ll eat it. Corn tortillas are also a cheap gluten free bread substitute.
Sauces and Seasonings
Simmer Sauces – These are the closest thing I use to hamburger helper. All you need is the sauce, a protein, a vegetable and rice for delicious last minute meals. Find a variety you like and turn it into an all in one meal if you have an electric pressure cooker if you’re super busy. This is one of my favorite places to use the frozen chicken. I cook it all together and cut up the chicken into bite sized pieces before serving. While it’s cooking in the pressure cooker, I’m free to catch up on housework or whatever else needs done.
Curry Paste – I love the flavor of curry, and adding curry paste to a dish is a way to add a ton of flavor.
Bouillon – Bouillon is another way to add flavor with little effort, or use it to make broth in a pinch.
Canned Coconut Milk – I can usually work around this ingredient with whatever milk or broth I have on hand, but I prefer it for curry.
Tomato Sauce and/or paste – Add to soup, stew or chili, or make a marinara sauce for pasta.
Salsa – serve as a condiment or add to chicken, ground beef or beans during cooking for flavor.
Commonly Used Herbs and Spices – My staples are salt, black pepper, chili powder, cayenne, cumin, basil, oregano, garlic powder, and poultry seasoning. There’s plenty of others I keep around as well, but those are the ones that I use almost daily.
Last Minute Meal Ideas
I’ve provided a few specific recipes above. Really, though, as long as I have one or two things from each category handy, I can combine them to come up with delicious last minute meals. Here’s a few more of my go-to combinations:
Season and oven bake the chicken. Serve with vegetables and rice.
Saute onion using whatever oil or butter I have available until translucent, then add chicken and a little broth. Simmer until the chicken is cooked through. Cut into bite sized pieces and add a spoonful of curry paste, vegetables and a can of coconut milk. Heat until the vegetables are done, being careful not to boil. Serve over rice.
Saute onion in a skillet and toss in a handful of frozen greens. Once the greens are thawed, add whisked eggs and scramble.
Brown ground beef (or pressure cook) add onion and cook until the onion is translucent. Add tomato sauce, basil, oregano, garlic and a little salt. If you like your sauce thicker, add some tomato paste. To cut the acidity, add a spoonful of brown sugar. Serve over pasta. You can also make it with chicken, canned white beans, or skip it and just have the sauce and pasta.
Pressure cook ground beef and season with salt, garlic powder, chili, cumin and cayenne. Make Mexican rice ( I use this recipe). Serve with canned black beans or refried beans and salsa. You can make tacos with the meat if you have tortillas or taco shells, or just have the meat on the side or atop the rice. Shredded lettuce, shredded cheese and diced onion all make it even yummier, but if you’re limited to what’s on hand, it’s still yummy without.
What are some of your favorite last minute meals? I’d love for you to share them in the comments.
Like this post? To make sure you never miss a future post, please sign up for my newsletter.
Biscuits are one of the hardest things to make gluten free. Most of my gluten free biscuit attempts turn out flat, hard and dry. After much searching, I finally found a recipe that yielded something like the fluffy biscuits we’ve craved since eliminating gluten.
You can find the recipe at Mama Knows Gluten Free here. Audrey at Mama Knows Gluten Free suggests using Pilsbury gluten free flour. I haven’t found it nearby, so I used my preferred Bob’s Red Mill 1 to 1 flour. It does result in a wetter dough, so I use a little different technique for shaping the biscuits. She also gives some info on different gluten free flours and how to make ahead and freeze.
Recipe adjustments for gluten free biscuits
Single biscuit
Xanthan gum
In the original recipe, it says to only add xanthan gum if your flour doesn’t already have it. Bob’s Red Mill 1 to 1 flour does have xanthan gum. Lately, though, I’ve noticed that for fluffier types of breads, it doesn’t seem to be enough. I want light, fluffy biscuits, so I added the full amount of xanthan gum anyway.
Dairy free
The original recipe gives instructions on how to make it dairy free, so I didn’t have to make my own adjustments. I used unsweetened almond milk and vinegar in place of the buttermilk as suggested. For the butter, I used vegetable shortening. If you have a kitchen scale, one trick to making shortening easier to measure is to use weight instead of measuring and scraping out one tablespoon of shortening at a time. One tablespoon of shortening is equal to 0.42 ounces or 11.94 grams. Multiply that number by the number of tablespoons you need to get the weight amount.
Shaping the dough
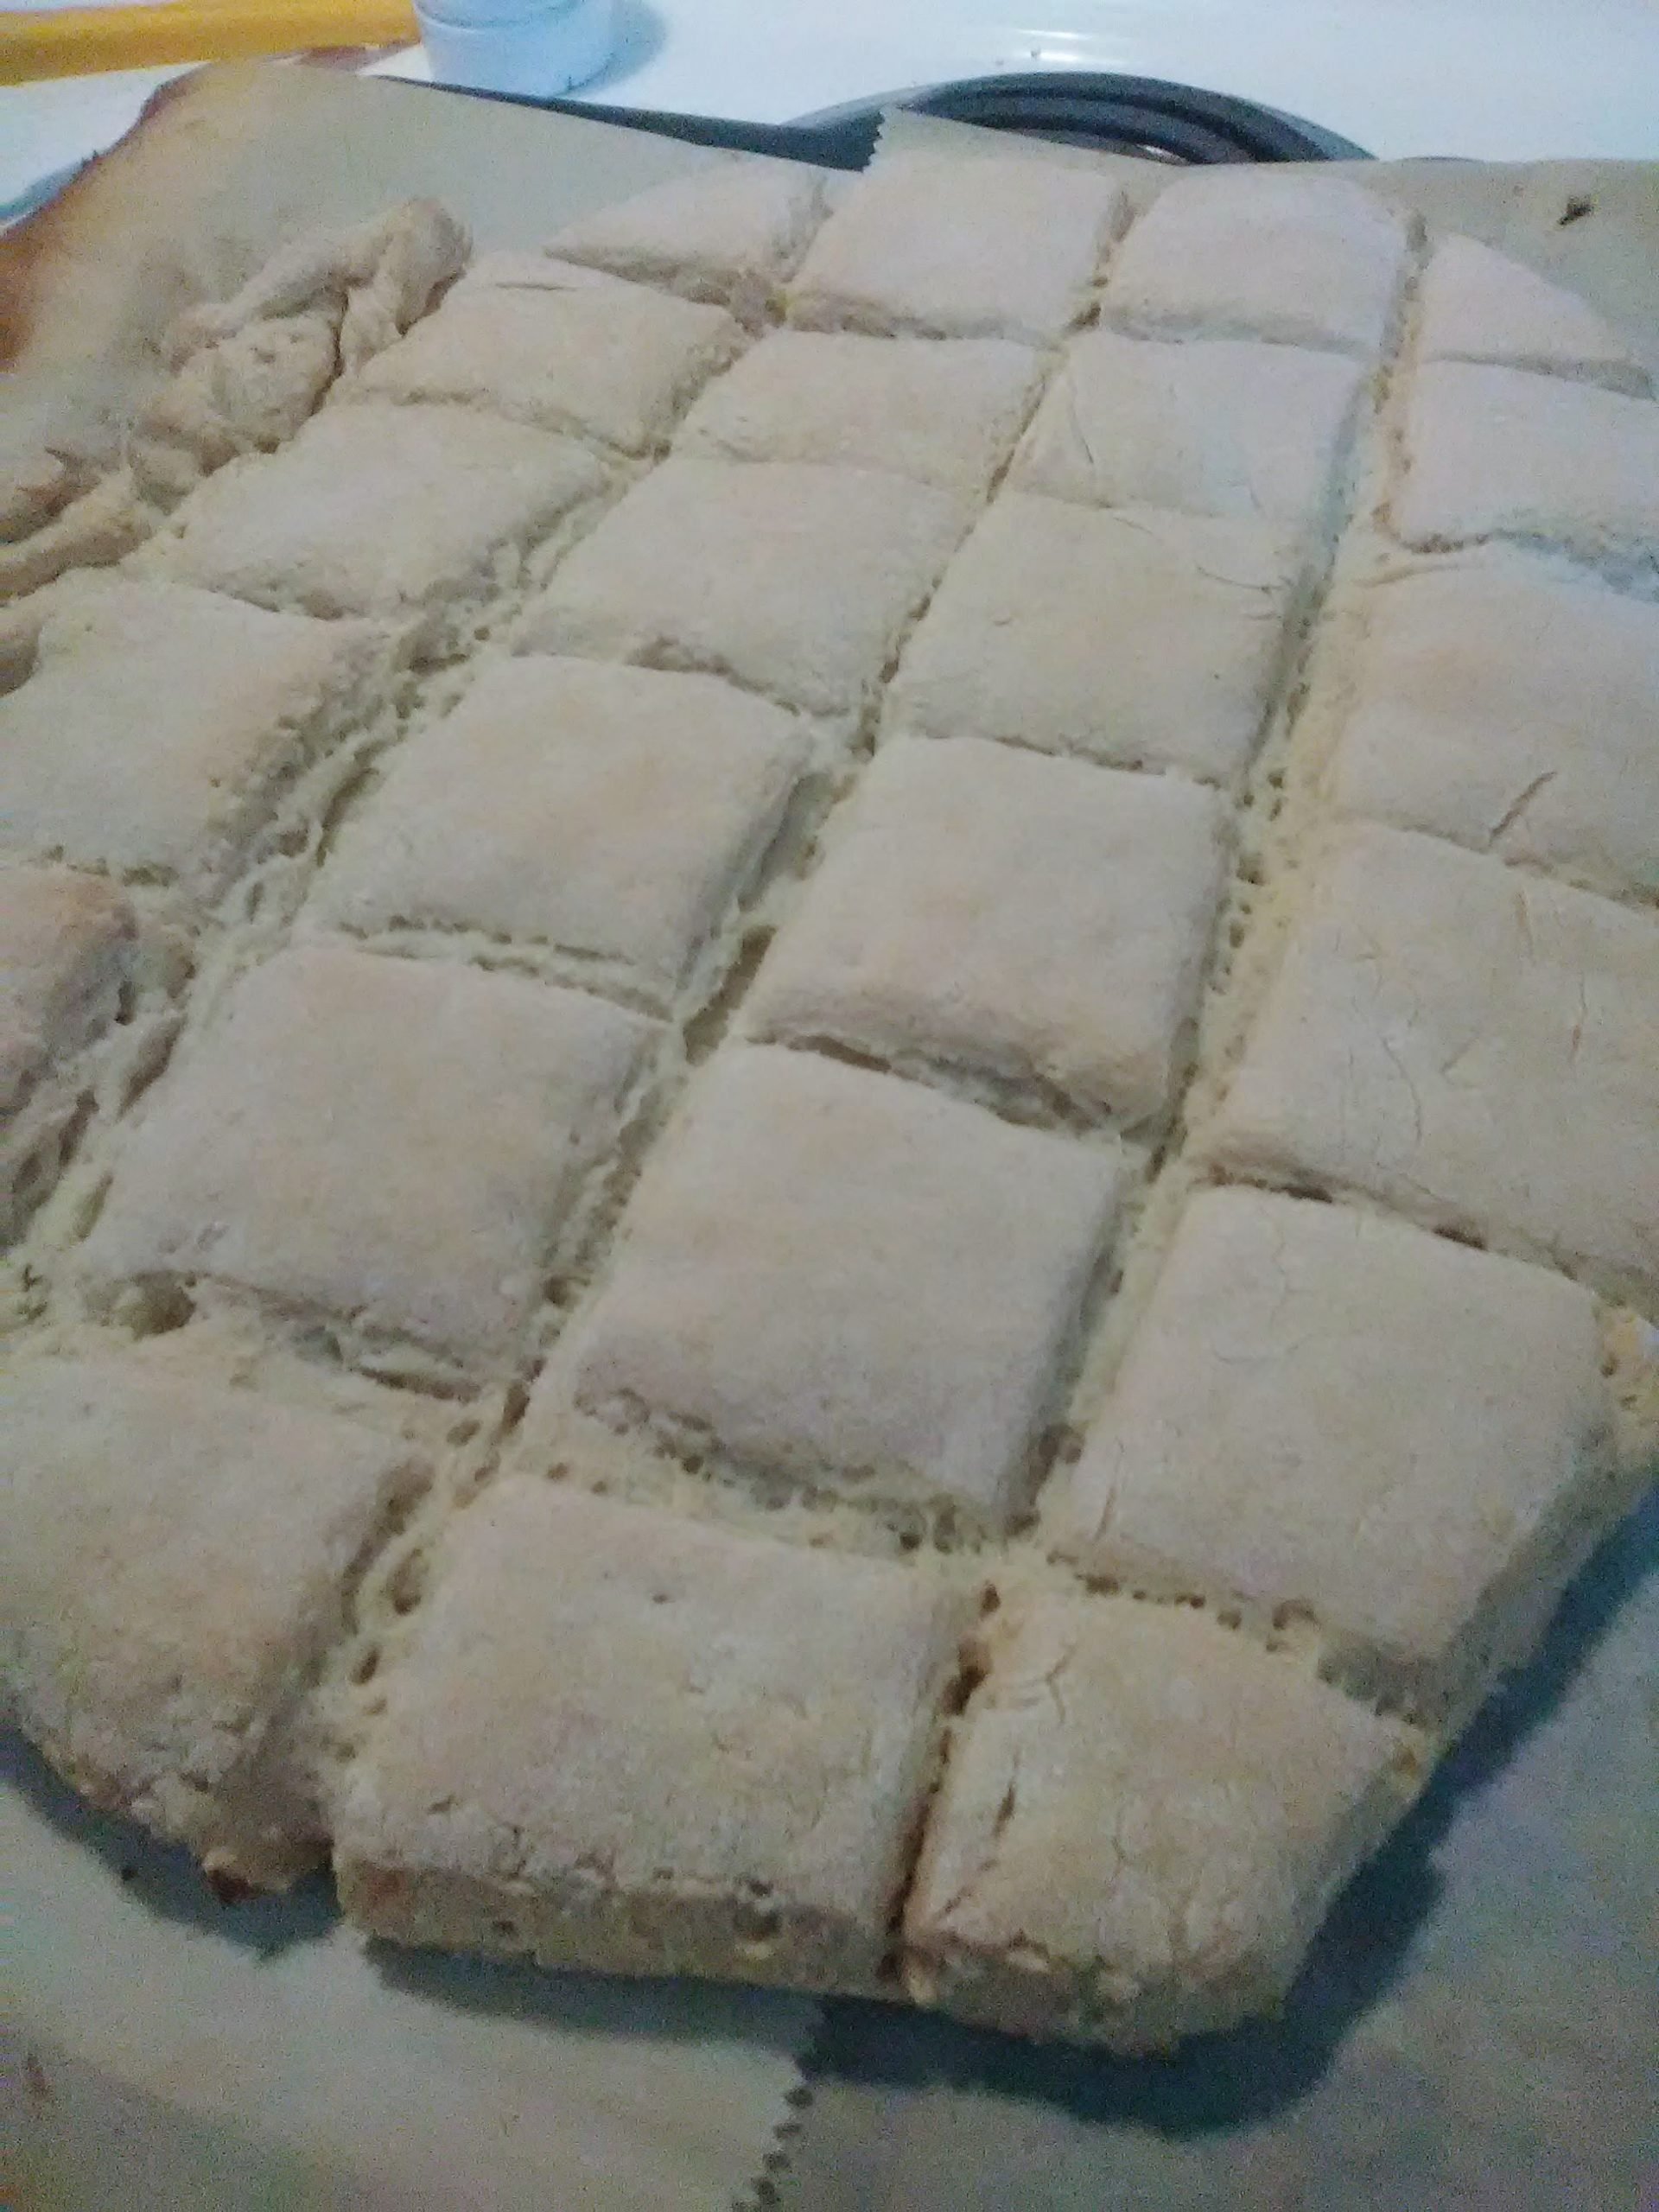
In order to limit handling the dough and overworking it, I shaped my dough on the parchment paper. Since my dough was pretty wet, I generously dusted the paper and my hands with flour. Like the original directions state, I patted and folded rather than rolled out the dough.
Instead of cutting with a biscuit cutter, I just cut straight lines with a sharp knife to form square biscuits. That way, I wouldn’t have to reshape the dough to cut more biscuits. Less handling is better. I also trimmed a tiny amount from the edges so that all the edges were cut like they would be with a biscuit cutter. This allows the biscuits to rise evenly. If you do it this way, the trick is to cut with a straight up and down motion, not a sliding motion. Sliding the knife would seal the edges and prevent them from rising.
Double batch of gluten free biscuits before I separated them.
Baking
Rather than move the biscuits by hand to a greased pan, I slid the whole parchment paper with the biscuits onto a baking sheet. The parchment provides a nonstick surface. If you’ve cut through the dough completely, they will bake perfectly like that. I had a little healper this morning, so I can tell that we didn’t quite cut all the way through in some areas and the biscuits stayed a little doughier in those areas. To help with that, I separated them when they were almost done and baked them for a few minutes longer.
My biscuits did take a about 25 minutes to bake, so just a bit longer than the original. I’m not sure if that is because of how close together they were or just my oven. I usually set my oven a notch lower than the suggested temperature because it bakes hotter than it says. Sometimes I overcompensate, though.
All in all, these biscuits satisfy our biscuit cravings and are good enough to serve to my non-gluten free friends and family. Give it a try and let me know what you think.
Like this post? To make sure you never miss a future post, please sign up for my newsletter.
We were running low on flour but wanted something for dessert. Luckily we have lots of eggs, so I thought I’d give angel food cake a try because it uses lots of egg whites and very little flour. I’ve never made angel food cake before, gluten free or otherwise. I think it turned out pretty well for a first attempt.
Recipes that call for beaten egg whites used to be intimidating to me. Seeing how easily my Sunbeam stand mixer handles the task took the fear out of it. It doesn’t have a whisk, only beater and bread hook attachments, so I wasn’t sure if it would work. It is possible to whip egg whites by hand or with an electric hand mixer, but a stand mixer makes it so. much. easier.
Since the egg whites provide most of the structure in an angel food cake, it makes it a good candidate to make gluten free. It was slightly denser than other angel food cakes I’ve eaten. I’m not sure if that’s due to using gluten free flour or if I over mixed it. Even so, it was still light and fluffy.
I don’t have a proper angel food tube pan, so I improvised with a bundt pan. That made it a little harder to get out, but not impossible. I’m always nervous any time a recipe calls for an ungreased pan. It’s important for angel food, though, otherwise you risk it falling as it cools.
To use the left over egg yolks, puddings are another dessert option. You could also try egg coffee or mix with whole eggs in scrambled eggs.
This Angel Food Cake recipe is adapted from my favorite vintage Better Homes and Gardens New Cookbook. This version uses gluten free 1 to 1 all purpose flour instead of regular wheat cake flour.
Prep Time20 minutesmins
Cook Time35 minutesmins
Course: Dessert
Keyword: cake, gluten free
Servings: 16servings
Equipment
Angel Food Tube Pan or Bundt Pan
Electric Mixer
Ingredients
0.88cups1 to 1 gluten free all purpose flour0.88 cups is equal to 1 cup minus 2 tablespoons. I like Bob's Red Mill or Krusteaz brand 1 to 1 gluten free flour.
1.5cups sugar, divided in half
12egg whites
1.5tspcream of tartar
0.25tspsalt
1.5tspvanilla
Instructions
Sift flour with 3/4 cup of sugar. Set aside.
Beat egg whites, cream of tartar, salt and vanilla until stiff enough to form soft peaks. I lift the beaters and look at the little mounds that form. For soft peaks, they should stand up with just the tops of the peaks folding over, kind of like the top of a soft-serve ice cream cone.
Add the remaining 3/4 cup of sugar a little at a time while continuing to beat until stiff peaks form. For stiff peaks, the peaks should be standing up completely.
Sift about 1/4 cup of the flour mixture over the egg whites and gently fold in. Repeat about four more times until all the flour mixture is added, folding in each addition gently.
Bake in a ungreased 10 inch tube pan (I don't have a tube pan, so I used a bundt pan) and bake at 375 degrees for 35 to 40 minutes.
Invert cake in pan to cool completely before removing the cake. Some angel food tube pans have feet that allow them to rest inverted (cake side down) without setting it directly on a plate. This prevents steam from forming and making the cake soggy. If your pan doesn't have the feet, invert it on a bottle with the neck of the bottle fitting in the center hole. You can also use four soup or similar cans or cups spaced so that the rim of the pan rests on the cans/cups.
Once it has cooled completely, remove from the pan by gently running a thin spatula or knife around the edge of the pan and around the tube, being careful not to cut the cake. Invert over a plate and it should come out. If you used a bundt pan like I did, it may take a few tries and possibly gently pulling the cake away from the sides of the pan.
Like this post? To make sure you never miss a future post, please sign up for my newsletter.
Embroidery freebies
Knowing that so many are stuck at home right now needing distractions, I’ve decided to make all of my machine embroidery design files free until April 30. That’s the day my area’s shelter in place order expires. If it is extended, I’ll extend the embroidery design freebies, too. If you make something with one of my designs, I would love to see it.
My electric pressure cooker is such a lifesaver when it comes to getting fast, healthy meals ready. It’s almost like having someone else do the cooking. With so many working from home with kids right now, those minutes saved in the kitchen are valuable. Here’s five of my favorite electric pressure cooker dinner recipes.
1
Honey Glazed Chicken for Electric Pressure Cookers like the Instant Pot
This honey glazed chicken is made in an electric pressure cooker with just minutes of prep. Sweet and juicy, it will satisfy even picky eaters.
Electric Pressure Cooker (Instant Pot) Whole Chicken and Potatoes
This is my method for cooking a flavorful whole chicken and potatoes in an electric pressure cooker. After a little prep work, you can walk away and let the pressure cooker do it's job without having to check on it or worry about overcooking. I'm using an 8 quart electric pressure cooker. If yours is smaller, you may need to adjust the size of the chicken and other ingredients accordingly.
Dairy and gluten free sausage potato soup inspired by Olive Garden's zuppa toscana. I prefer making it in my electric pressure cooker but it could easily be done in a slow cooker or on the stove top.
Instant Pot Chicken and Vegetable Quinoa is a quick, last minute dish that is great hot or cold. Customize it by swapping out the protein or vegetables depending on what you have on hand.
Knowing that so many are stuck at home right now needing distractions, I’ve decided to make all of my machine embroidery design files free until April 30. That’s the day my area’s shelter in place order expires. If it is extended, I’ll extend the embroidery design freebies, too. If you make something with one of my designs, I would love to see it.
My full shop is still open, and will be as long as everyone in my household is healthy. I’m using extra care with handwashing and using hand sanitizer before coming into contact with products and packaging as well.
All of my handmade soaps are currently on sale for 20% off. You can find them here.
Like this post? To make sure you never miss a future post, please sign up for my newsletter.
I, Charity Sloan, am a participant in the Amazon Services LLC Associates Program, an affiliate advertising program designed to provide a means for sites to earn advertising fees by advertising and linking to Amazon.com. Any purchases through those links will result in my receiving a small percentage in commission.
This only refers to Amazon links found in/on my blog pages. All products in my shop are 100% mine and not linked to Amazon.
Prices are the same whether you click an affiliate link or a non-affiliate link, so you will not be charged more. Thank you for your support!