I have quite a bit of finished wood furniture that I love, except when it comes to polishing. There’s always some sticky fingerprints or a glob of something unidentifiable (thank you, Thaddeus). Most commercial polishes do okay on relatively clean surfaces, but don’t do a great job on the really messy stuff. Sometimes I’d spray some polish right on the spots, polish the rest and hope the globs loosened up enough to wipe away. Once in a while it worked. Other times it resulted in a ring around the spot while the sticky may or may not have loosened at all.
I finally did a little research on homemade furniture polish recipes. Here’s the one I use.
DIY Natural Furniture Polish
Ingredients:
3 parts olive oil 1 part vinegar Splash lemon juice (optional)
Combine everything in a spray bottle and shake to mix. Some recommend storing it in the refrigerator or only making what you’ll use in a day. I make about 1-2 cups worth at a time and keep it at room temperature. So far I haven’t had problems with it spoiling.
For light polishing, I spray the rag and wipe. For heavier cleaning, I spray directly where needed. I have never had it leave a ring, and it buffs nicely without leaving a residue. It works equally well on furniture with a matte stain and pieces with a high gloss varnish.
I love that this recipe uses things I have around the house and costs less than even the cheap commercial polishes. I also like knowing that it is completely nontoxic. I can let Thadd help without worrying that it might hurt him if he sprays it in his face. Or my face. Seriously, you never know with this kid.
You could probably customize it with a few drops of essential oils, too. I think something citrus-y would be nice. Also, if you don’t have olive oil, you could try swapping it with whatever you have on hand.
Give it a try and tell me what you think. If you’d like more “green” cleaning options check out my recipe for soft scrub and my all purpose cleaner recipe.
For my handmade home and laundry products, click the link below.
Home and Laundry
SubEarthan Cottage offers handmade laundry products, scented wax tart melts and reusable products for your home to reduce waste and synthetic chemical exposures in your home.
With freezing temperatures and possible snow in the forecast, it seemed like the perfect time to revisit this delicious sausage potato soup recipe.
I love the slightly spicy, creamy Zuppa Toscana soup from Olive Garden. Since going gluten-free and dairy-free, Zuppa Toscana and pretty much anything Olive Garden are out of the question. With the cold weather, though, I really crave soups. I made some potato soup a few days ago that was yummy, but just not the same. Today I realized I happened to have everything I needed to attempt a sausage and potato soup very much like Zuppa Toscana.
It doesn’t have quite the same creaminess due to substituting almond milk. Cashew milk is a creamier substitute, but I didn’t have any on hand. For a first dairy-free attempt, it turned out pretty darn close.
I made my sausage potato soup in my electric pressure cooker. You could easily make it in a slow cooker or on the stove top, but I like how the pressure cooker really develops the flavors, similar to cooking in a slow cooker but without the long cook time. I also love that I can use the saute function on my pressure cooker to brown the sausage. This prevents having to dirty a skillet, like I would if I used a slow cooker.
Dairy and gluten free sausage potato soup inspired by Olive Garden's zuppa toscana. I prefer making it in my electric pressure cooker but it could easily be done in a slow cooker or on the stove top.
Electric Pressure Cooker, unless cooking on stove top or slow cooker.
Ingredients
1lb Ground Sausage
3-4 Largish potatoes, sliced
1medium Onion, dicedWhite or yellow.
2-3 cups Kale, torn or chopped.Could substitute spinach or other greens.
6-8 cups Chicken broth (gluten-free if desired)You want enough to cover the rest of the ingredients in the pot without too much over.
2cups Almond or Cashew milk
Salt to taste
Crushed red pepper to taste
1tbspolive oil
Instructions
Select the "Saute" function on the pressure cooker.
Add the olive oil and brown the sausage.
Add the onion a few minutes before the sausage finishes browning to soften.
When the sausage is browned, turn off the "Saute" function.
Add the potatoes, kale, broth and seasonings. Do not add the almond or cashew milk yet.
Lock the pressure cooker's lid in place and select the "Soup" function. I used the 30 minute function.
After the cooking is complete, either wait for pressure to naturally release or CAREFULLY do a manual release. Soups spray and spatter if you immediately try to release the pressure, so I recommend waiting at least ten minutes if you are going to manually release the pressure.
Add the almond/cashew milk and stir. The soup should be hot enough to heat the milk addition without additional cooking.
Enjoy!
Notes
I don’t really measure recipes like this, so most measurements are approximate.The stove top instructions are basically the same. Brown the sausage in a big soup pot, add the ingredients except the milk and simmer for around thirty minutes. Add the milk and serve. For the slow cooker, brown the meat on the stove, add everything but the milk to the slow cooker and cook on low for 4-6 hours. Add the milk and serve.
Please leave a comment if you try this and let me know how it turns out. If any of my instructions need clarification, don’t hesitate to ask in the comments, too.
For more electric pressure cooker recipes and tips, click here. To stay up to date on SubEarthan Cottage happenings, please sign up for my newsletter.
At least from what I’ve tasted, most store bought gluten free chocolate chip cookies are very dry and either too sweet or lacking in flavor. Chocolate chip cookies are practically a staple food, so I hacked my grandma’s cookies recipe. The results are definitely not dry, lacking in flavor or too sweet.
The biggest change I made, of course, is using gluten free flour. My preferred flour is Bob’s Red Mill 1 to 1 gluten free flour. Others will work, but if it’s not one that is blended to be a direct substitute for wheat flour, you will probably want to add about one half teaspoon of xanthan gum.
Even with the 1 to 1 blends, sometimes the cookies spread more than I like. The original recipe calls for one cup and two tablespoons of flour. If I have it on hand, I’ll replace the two tablespoons of flour with a generous one tablespoon of coconut flour. That prevents them from spreading too much. Chilling the dough for a few hours or overnight helps, too, but who has time for that? Besides, the sooner they go in the oven, the less cookie dough I’ll eat.
The original recipe calls for shortening. I would much rather use butter, but one of my boys is lactose intolerant. Straight coconut oil adds to the spreading problem, so I compromise and use half shortening and half coconut oil. The small amount of milk in most chocolate chips isn’t a problem for my son, but using for dairy-free chips would make these completely dairy-free, too! If dairy isn’t a problem, feel free to swap all the fats with butter.
The final change happened after staying up late watching Martha Stewart bake cookies. She mentioned that brown sugar helps make the cookies be moist. The original recipe calls for more white sugar than brown. I tried a few different ratios before settling on using equal amounts of brown and white sugars.
The final result is a yummy, gluten free cookie that isn’t dry and crumbly.
Gluten free chocolate chip cookies
1/2 cup shortening
1/2 cup coconut oil
3/4 cup granulated sugar
3/4 cup brown sugar
1 teaspoon vanilla
2 well beaten eggs
2 cups 1 to 1 gluten free flour plus 2 generous tablespoons of coconut flour (or 2 cups plus 4 tablespoons 1 to 1 gluten free flour)
1 teaspoon baking soda
1 teaspoon salt
1 generous cup of chocolate chips
Preheat the oven to 375° F.
Cream together the shortening, coconut oil, sugars and vanilla. I usually use a mixer for everything, but you can do it by hand, too.
Fold in the eggs and mix well.
In another bowl, sift (or just mix really well) the dry ingredients.
Add the dry ingredients a little at a time to the wet ingredients and mix well.
Stir in the chocolate chips. If you are patient, chill the dough for a few hours or overnight.
Otherwise, grease your cookie sheets or line with parchment paper or silicone liners. Greasing is what the original recipe calls for, but I prefer the results from lining the sheets.
Form your cookies (I use a 2 tablespoon sized scoop, but you can make them bigger or smaller) and place them two inches apart on the sheets.
Bake for about 8-10 minutes, keeping a close eye on them during the last few minutes. You want them to be golden and not doughy in the middle.
Cool for a few minutes on the sheets before removing them.
A few notes on the recipe: My recipe is actually double the original. I almost never made a single batch because it’s not really any more effort. If you want, you can save some of the dough in the fridge for a few days.
I also don’t have an accurate cookie count, mainly because cookie dough is delicious. I think I can usually get about 36 cookies with my 2 tablespoon scoop, but that is a a very rough guess.
2tbspcoconut flourOr 4 more tablespoons gluten free flour
1tspbaking soda
1tspsalt
1cupchocolate chipsMake sure these are gluten and dairy free!
Instructions
Preheat the oven to 375° F.
Cream together the shortening, coconut oil, sugars and vanilla. I usually use a mixer for everything, but you can do it by hand, too.
Fold in the eggs and mix well.
In another bowl, sift (or just mix really well) the dry ingredients.
Add the dry ingredients a little at a time to the wet ingredients and mix well.
Stir in the chocolate chips. If you are patient, chill the dough for a few hours or overnight. This helps prevent spreading. I am not patient, lol.
To bake, grease your cookie sheets or line with parchment paper or silicone liners. Greasing is what the original recipe calls for, but I prefer the results from lining the sheets.
Form your cookies (I use a 2 tablespoon sized scoop, but you can make them bigger or smaller) and place them two inches apart on the sheets.
Bake for about 8-10 minutes, keeping a close eye on them during the last few minutes. You want them to be golden and not doughy in the middle.
Cool for a few minutes on the sheets before removing them.
Notes
A few notes on the recipe: My recipe is actually double the original. I almost never made a single batch because it’s not really any more effort. If you want, you can save some of the dough in the fridge for a few days.You can use all shortening instead of half shortening and half coconut oil, or use all butter or butter substitute. I also don’t have an accurate cookie count, mainly because cookie dough is delicious. I think I can usually get about 36 cookies with my 2 tablespoon scoop, but that is a a very rough guess.
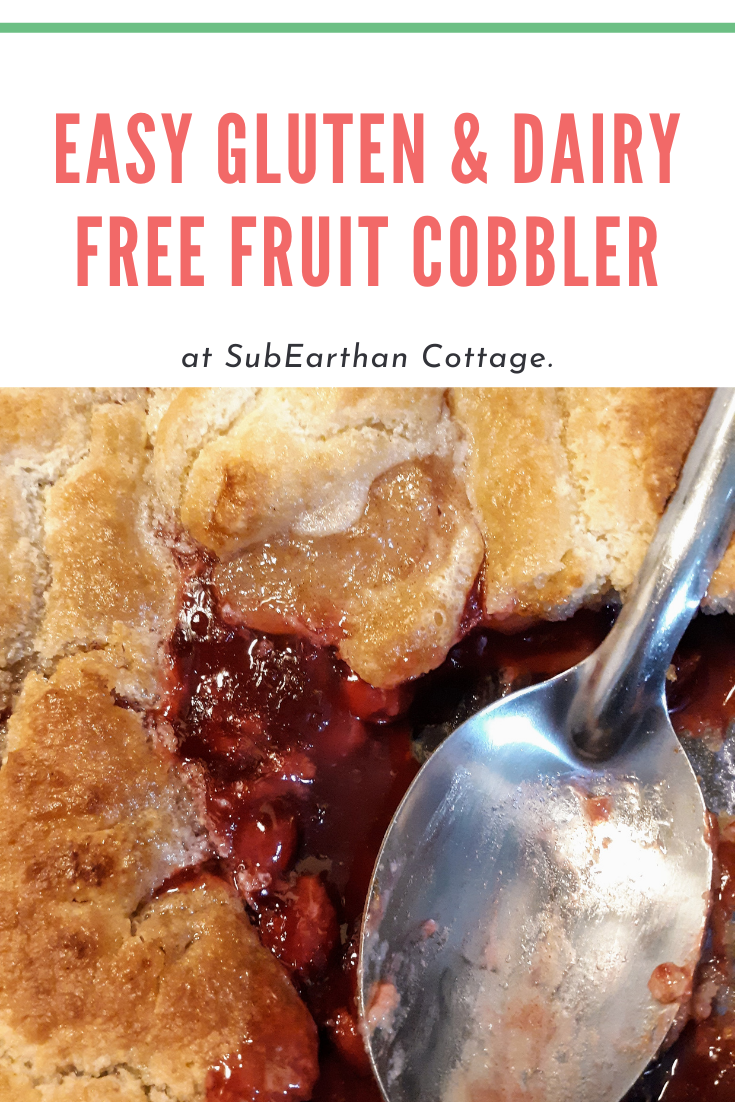
This fruit cobbler is easy to make and uses mostly pantry staples. From start to finish, you’ll have a delicious cobbler in under an hour. If you aren’t gluten or dairy free, I’ve included the ingredients for that, too!
Bob’s Red Mill 1 to 1 Gluten Free flour blend* is my favorite for baking, but I’ve used others with success, too. If you use a blend that doesn’t have xanthan gum or something similar, I do recommend adding probably about 1/4 of a teaspoon of xanthan gum as well.
The assembly and not stirring part seems a little weird, but trust the process. My oven runs hot, so I start checking it after about 40 minutes. Sometimes different flour blends can make a difference, too, so the first time you make it, I recommend checking it early. When the top is golden and just starting to brown around the edges, it’s done. Enjoy!
This fruit cobbler is easy to make and uses mostly pantry staples. From start to finish, you'll have a delicious cobbler in under an hour. If you aren't gluten or dairy free, I've included the ingredients for that, too!
0.25cupcoconut oilOr your preferred butter substitute, or just butter if you eat dairy.
1cup gluten free flour blend I like Bob's Red Mill 1 to 1 Gluten Free flour blend. Use regular flour if you're not gluten free.
1cupalmond milkOr your preferred plant milk, or just milk if you eat dairy.
1tspbaking powderI accidentally used a tablespoon once and it came out a little fluffier. I haven't decided which I prefer, so experiment and see what you like.
1 cup sugar
1canfruit pie filling (20 oz)Cherry is my favorite, but apple and blueberry are really good, too.
1 tspvanilla extractOptional, but I add vanilla to just about everything sweet.
Instructions
Heat oven to 350 degrees F.
Add coconut oil or substitute to a 2 quart baking dish and place in the oven to melt. I do this even if the oil is already liquid to warm it up.
Meanwhile, combine the dry ingredients in a mixing bowl.
Add the milk and vanilla (if using) to the dry ingredients and mix thoroughly.
When the oil or butter is melted, add the batter to the baking dish. DO NOT STIR.
Pour the fruit pie filling on top of the batter. Again, DO NOT STIR.
Bake for about 50 minutes at 350 degrees.
Notes
The assembly and not stirring part seems a little weird, but trust the process. My oven runs hot, so I start checking it after about 40 minutes. Sometimes different flour blends can make a difference, too, so the first time you make it, I recommend checking it early. When the top is golden and just starting to brown around the edges, it’s done. Enjoy!
Like this post? To make sure you never miss a future post, please sign up for my newsletter.
*Note: If you make a purchase through this Amazon link, I will receive a small commission. It doesn’t change the cost to you.
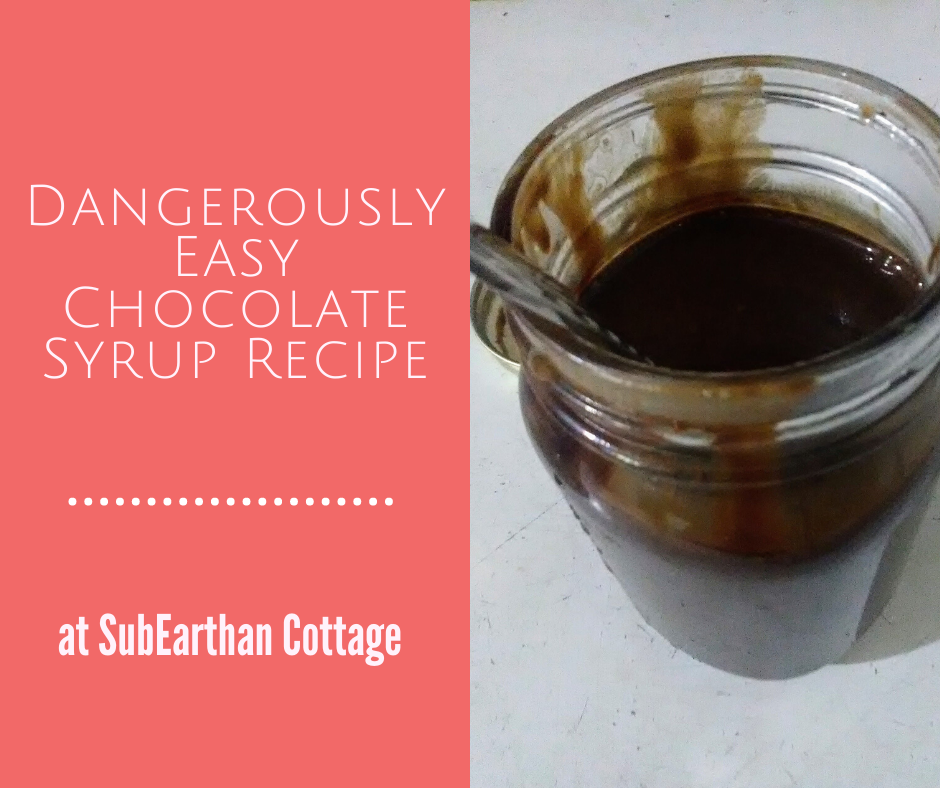
Chocolate syrup is deliciously versatile. Stir it in hot or cold milk or coffee for a treat or pour over ice cream to make it even more decadent. Then there’s old fashioned sodas and baked goods made with chocolate syrup. With this chocolate syrup recipe, you can make delicious chocolate syrup with just a few basic pantry staples whenever you need it.
Sure, it’s easy to pick up a bottle from the supermarket, but with this easy chocolate syrup recipe, you can make it for a fraction of the cost and without a trip to the store. By making it, you also have control over the ingredients. Use your favorite cocoa powder, experiment with the type and amount of sugar or swap out the vanilla extract for something a little more creative to make it your own. I can totally see using peppermint extract to mimic the flavor of Andes mints. Or, if you’re a fan of Terry’s Chocolate Orange chocolates, add orange extract.
Like most of my recipes, this chocolate syrup is gluten free and dairy free.
This chocolate syrup recipe is so easy and delicious. With only a few pantry-staple ingredients needed, you'll never have an excuse not to make it. Should be good for at least a month when stored properly. I usually find plenty of ways to use it up before then.
Prep Time2 minutesmins
Cook Time5 minutesmins
Course: Dessert
Ingredients
1cup cocoa powder
1 cup sugar
1 cupwater
1/2teaspoonsaltor to taste
1teaspoon vanilla extractor to taste
Instructions
Mix the sugar and cocoa together in a saucepan until thoroughly combined.
Add the water and half of the salt (1/4 teaspoon). Bring to a boil over medium heat, stirring constantly.
Continue to boil while constantly stirring until the mixture thickens a little. (It will thicken more as it cools) This should take around 3 or 4 minutes.
Carefully taste and add the rest of the salt, if desired.
Remove from heat and add vanilla extract.
Cool and store in an airtight container in the refrigerator. I like using a glass jar.
Notes
The vanilla extract and salt amount can be adjusted according to taste. I can also see swapping out the vanilla for peppermint or orange extract.
While I try to write recipes as clearly as possible, it’s easy to miss a step or make assumptions. If anything is confusing, please don’t hesitate to comment with your questions. If you make this recipe, please let me know what you think.
Like this post? To make sure you never miss a future post, please sign up for my newsletter.
This post contains affiliate links. If you click through any of the Amazon links and make a purchase, I will receive a small commission. There is no added cost to you.
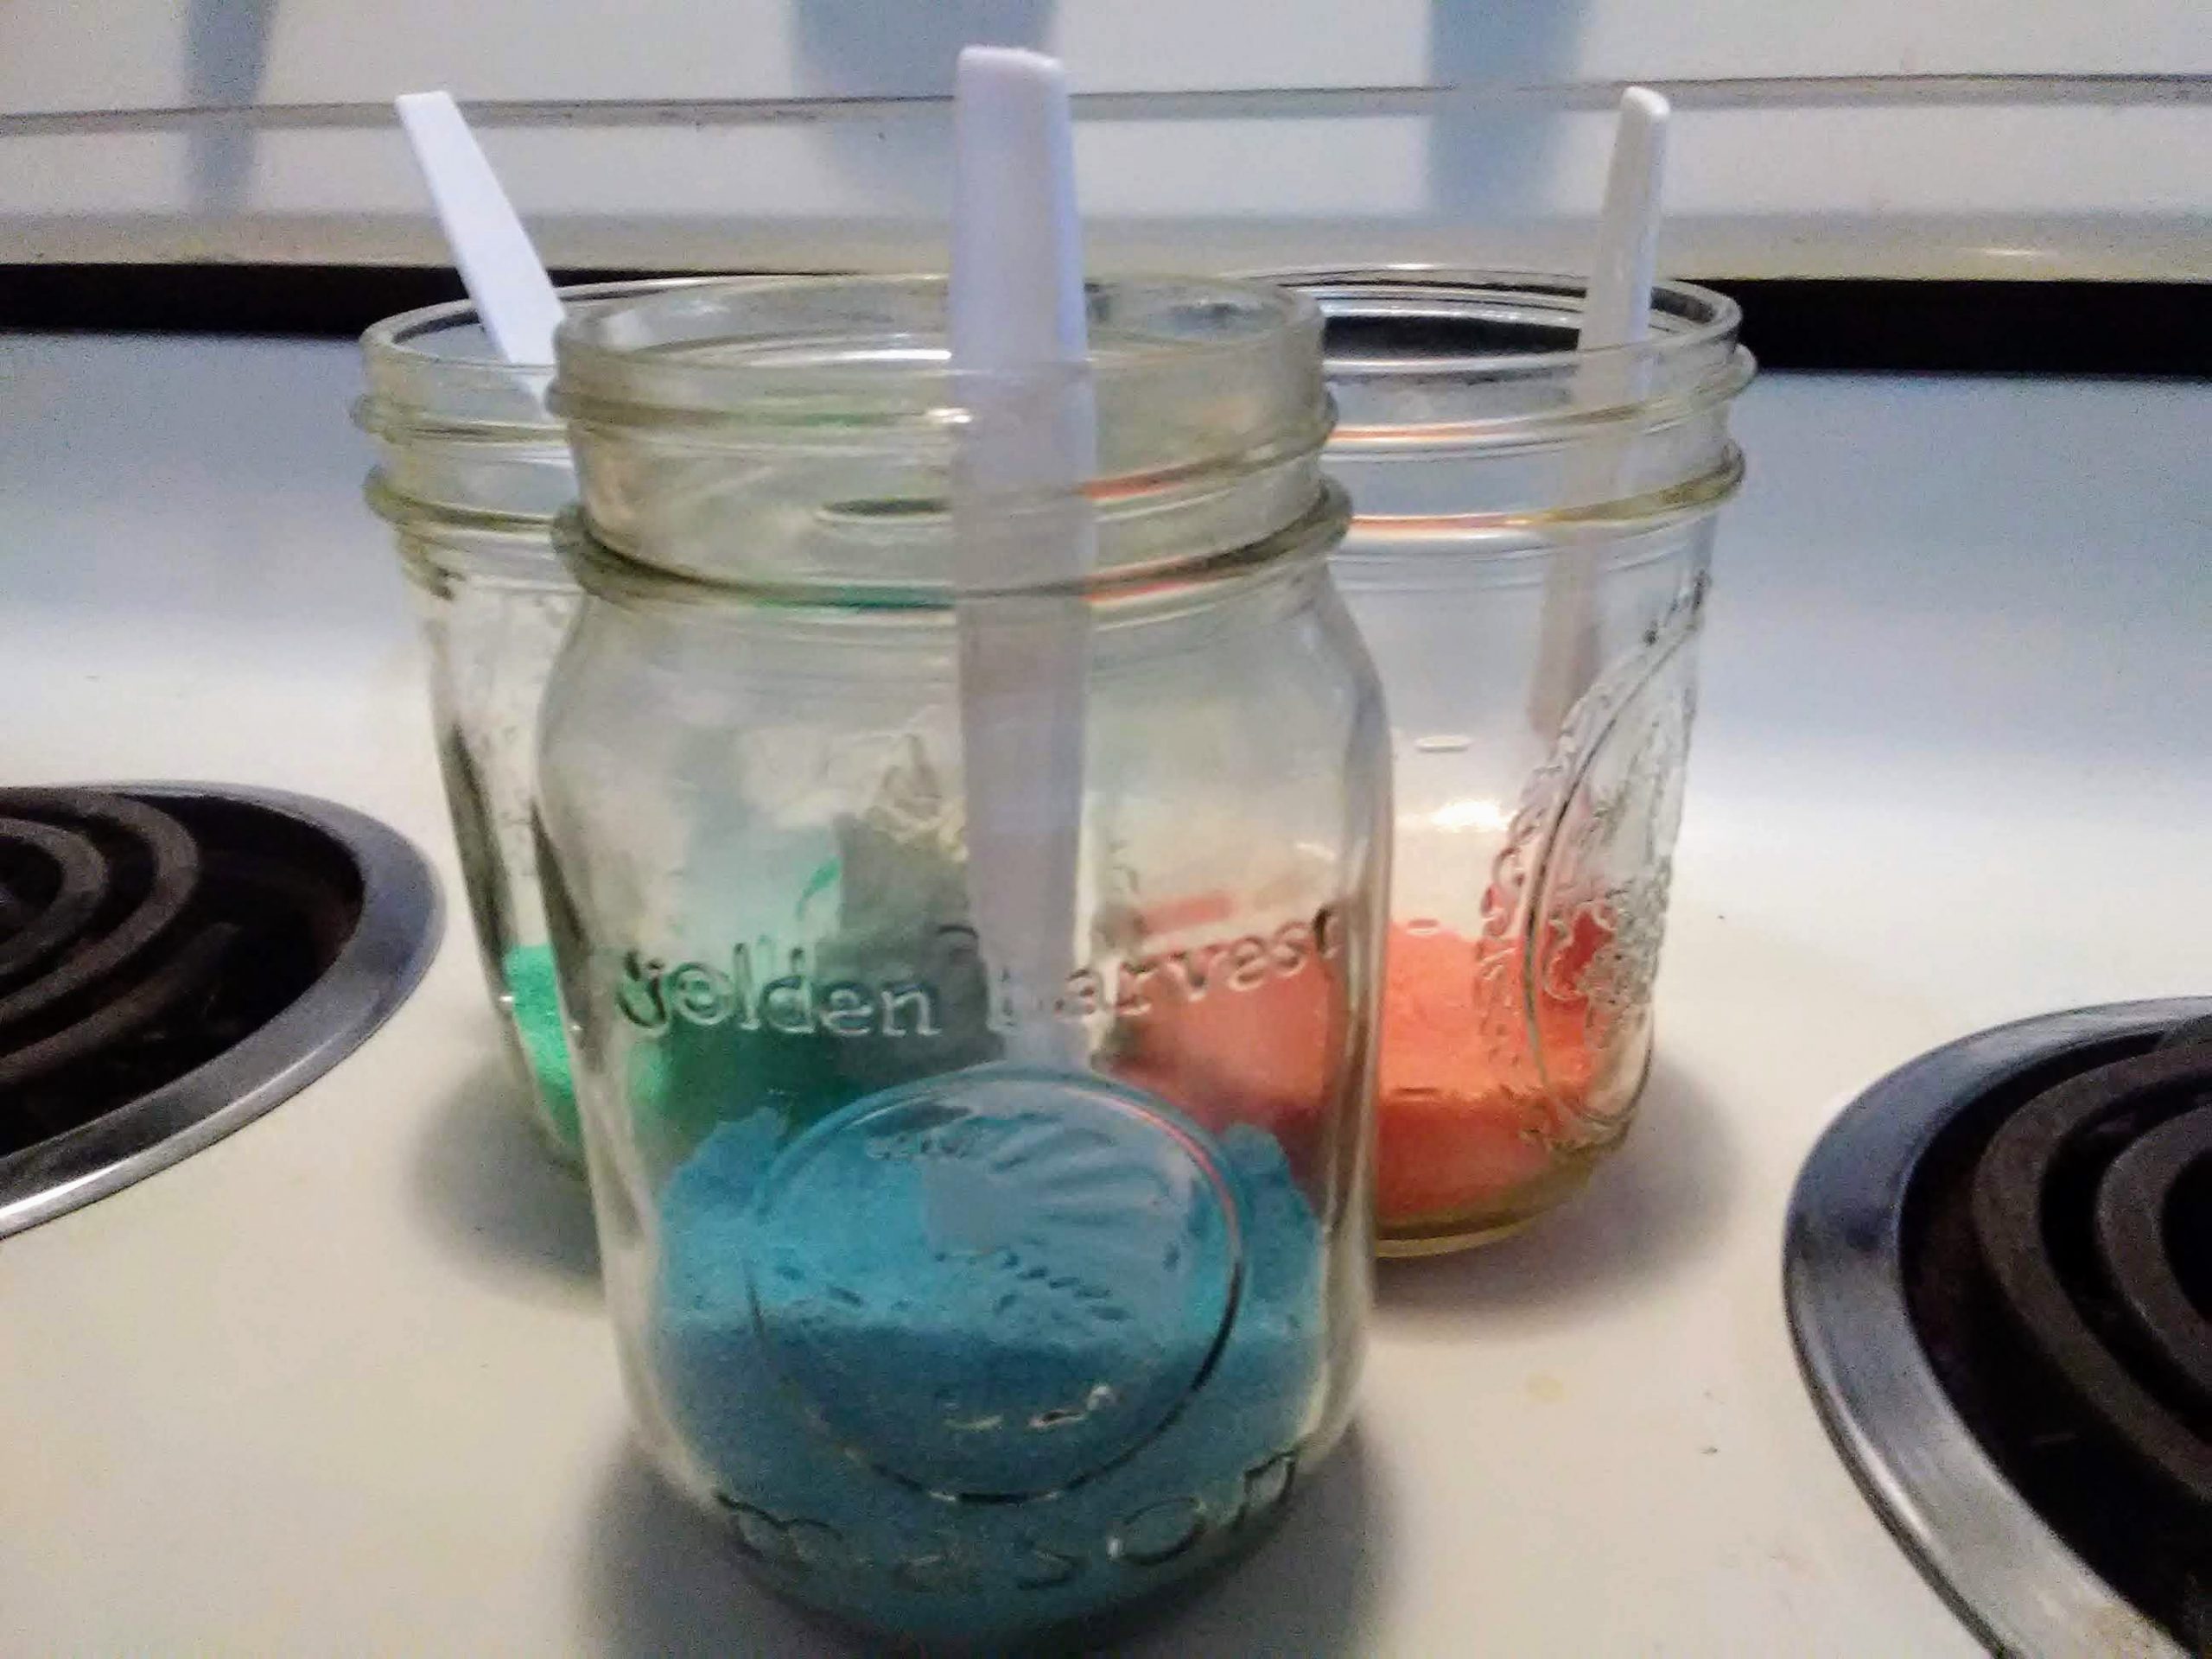
A few days ago, I thought it would be fun to make Christmas cookies. Then I remembered that my Christmas cookie cutters had disappeared, we were out of any sort of sprinkles for the cookies and I really didn’t want to make decorator frosting or go to the store for supplies. My solution? DIY sugar sprinkles!
Ingredients
Granulated sugar
Food coloring
Supplies
Jars, plastic containers or sandwich bags, one per color. (Ideally something with a shaker top, which I didn’t have)
Spoons or shakers
How to make the sugar sprinkles
Measure about 1/4 cup of sugar into each container.
Add 2-3 drops of food coloring to the sugar.
Shake or stir until the color is evenly distributed.
Let air dry. I just left the lids off the jars and set them on the stove while the cookies baked, stirring occasionally. If you use bags or plan to store it for a longer period of time, you may want to spread it on parchment or a cookie sheet to make sure it is super dry.
Mom tip: If your cookie decorating skills are not Pinterest-worthy, just let your kiddos do the decorating.
The recipe I used for the cookies was the sugar cookie cutout recipe from my trusty red and white Better Homes and Gardens cookbook. To make them gluten free, I substituted Bob’s Red Mill 1 to 1 gluten free flour. If you are new to gluten free baking, it is a great flour to start with. I have had lots of success making all my old recipes gluten free with just that simple substitution.
My solution for not having cookie cutters was to use a round glass to cut out “ornaments”. We dusted some of the cookies with the sprinkles prior to baking. For the rest, I made a simple icing that got dusted or caked with sprinkles, depending on who was doing the decorating.
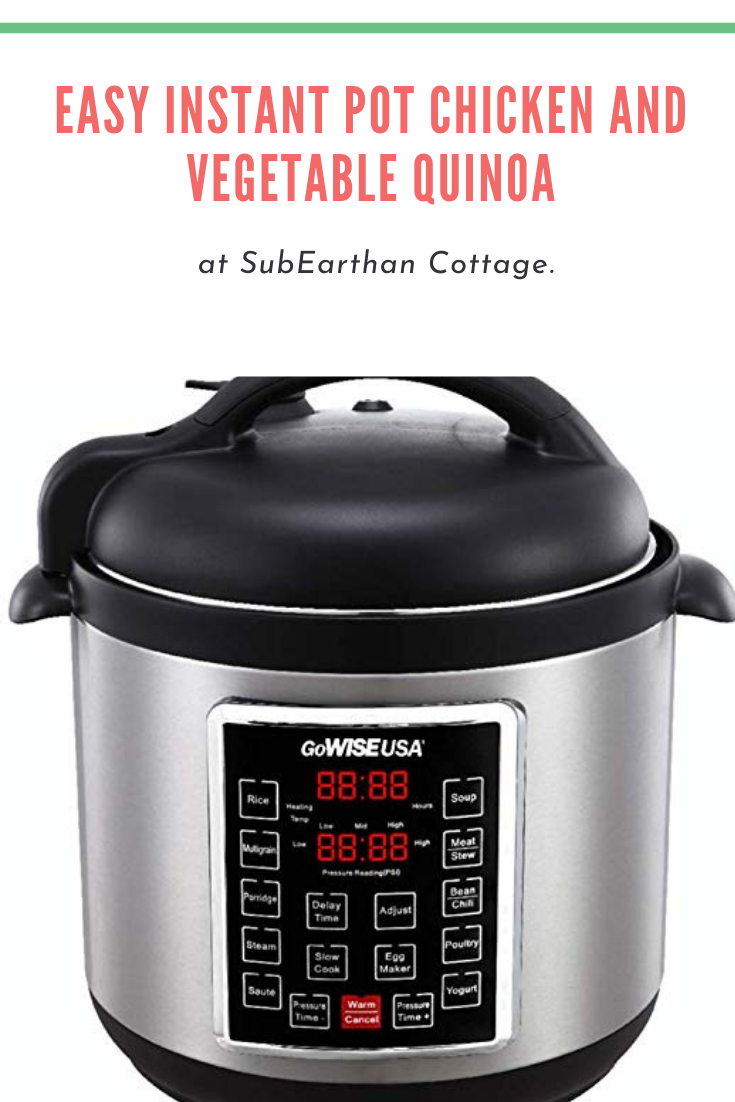
Just because you might be at home more doesn’t mean you have more time to cook. Whether you’re working from home, helping virtual learners or homeschooling, it’s likely you’re just as busy as ever. I love using my electric pressure cooker for busy days. It’s like having someone cooking in the kitchen while I work on the million of other things needing done.
One of my favorite fast recipes is chicken and vegetable quinoa. It takes minutes to prepare, is super healthy and cooks fast, so it’s perfect for busy days. The basic recipe is really easy to customize, so it’s a good meal to use up odds and ends from the fridge.
Customizing your quinoa
Try it with beef, sausage, tofu, beans, eggs or skip the protein and add more vegetables. If you have leftover chicken, shred it and use it instead of raw chicken breasts.
If you have time to chop vegetables, clean out the produce drawer and use whatever you have on hand. Use up those veggies before they go bad!
Kale is another nice addition. Throw it on top before pressure cooking and stir it in at the end. Since it’s a hardier green, it holds up well to pressure cooking.
Change up the flavor by adding soy sauce, hot sauce or your favorite seasonings. For a mild dish, I like using poultry seasoning.
Don’t like quinoa? Use rice and adjust the cooking time based on your pressure cooker’s recommendations.
It’s easy to pack for lunches or take on picnics, too.
Instant Pot Chicken and Vegetable Quinoa is a quick, last minute dish that is great hot or cold. Customize it by swapping out the protein or vegetables depending on what you have on hand.
Prep Time15 minutesmins
Cook Time1 minutemin
Course: Main Course, Side Dish
Servings: 6people
Author: sophiecls418
Equipment
Electric pressure cooker, such as an Instant Pot
Ingredients
1tbspoilolive oil, coconut oil or preferred cooking oil
1 medium onion, diced
1cup chicken breast, cut into bite sized piecesCould also use pre-cooked, shredded chicken
1 cupfrozen mixed vegetables
2cupsquinoa
2cupschicken broth or water
salt and pepper to taste
Instructions
Turn the pressure cooker to "Saute" and add oil.
Add the onion and chicken if you are not using pre-cooked chicken.
Saute until the onion is translucent and chicken is browned.
Press "Cancel" to stop sauteing.
Add broth, quinoa and vegetables to pot and stir.
Add salt and pepper, if desired.
Lock the lid and set cooker to two minutes on high pressure.
Allow pressure to release naturally when done.
Fluff with fork and serve.
Notes
The great thing about this recipe is it is easy to customize. Try it with beef, sausage, tofu, or skip the protein and add more vegetables. If you have leftover chicken, shred it and use it instead of raw chicken breasts.Clean out the veggie drawer and use whatever you have on hand.Change up the flavor by adding soy sauce, hot sauce or your favorite seasonings.It’s easy to pack for lunches or take on picnics, too.
Like this post? To make sure you never miss a future post, please sign up for my newsletter.
Shop sales!
For the entire month of September, all of my handmade soaps are 20% off. Shop handmade soaps here.
My machine embroidery files are also on sale all month for just $1 each! Be sure to check out my latest Halloween designs. Shop embroidery designs here.
I, Charity Sloan, am a participant in the Amazon Services LLC Associates Program, an affiliate advertising program designed to provide a means for sites to earn advertising fees by advertising and linking to Amazon.com. Any purchases through those links will result in my receiving a small percentage in commission.
This only refers to Amazon links found in/on my blog pages. All products in my shop are 100% mine and not linked to Amazon.
Prices are the same whether you click an affiliate link or a non-affiliate link, so you will not be charged more. Thank you for your support!