Last week, I showed you how to upcycle a t shirt into a shopping bag with a little basic sewing. Now, I’m going to show you a few ways to upgrade your t shirt bag design.
Bottom hem
In last week’s tutorial, the bottom hem was double stitched but otherwise left raw. Since knits don’t unravel, it is fine to leave it that way. I prefer to finish the raw edge, either with a serger or by enclosing the cut edge.

The top seam is finished by serging the raw edge. If you don’t have a serger/overlock machine, you can use a zig-zag or overcast stitch on a regular sewing machine.
The bottom seam is enclosed. Do do this, when following the first tutorial (found here) do NOT turn the shirt inside out when sewing the first bottom seam. Instead, sew it with the shirt right side out. Once it is sewn, trim any excess material from below the stitch line, leaving about 1/8-1/4 of an inch.
Now, turn the shirt inside out and smooth the bottom seam flat, like in this photo:

Once it is all smooth (ironing helps) sew a seam at least 1/2 inch to 5/8 inch from the bottom. This stitch line encloses the raw edge. Since it is the bottom seam that will get the most stress, I still stitch it twice. Turn it right side out, and you’re done, unless you’d like to add a little shape to your bag.
Boxing the bottom
Boxing the bottom of the bag basically squares off the bottom, similar to a paper bag. I rarely do this with t shirt bags. They are too floppy for it to make much difference without adding a ton of interfacing for support. I also like these bags because they are easy to fold and stash in the car or my purse. Boxing the bottom complicates that a little. Even so, sometimes a boxed bottom can help things like cereal boxes or egg cartons fit neatly, so having one or two is nice.
Step 1
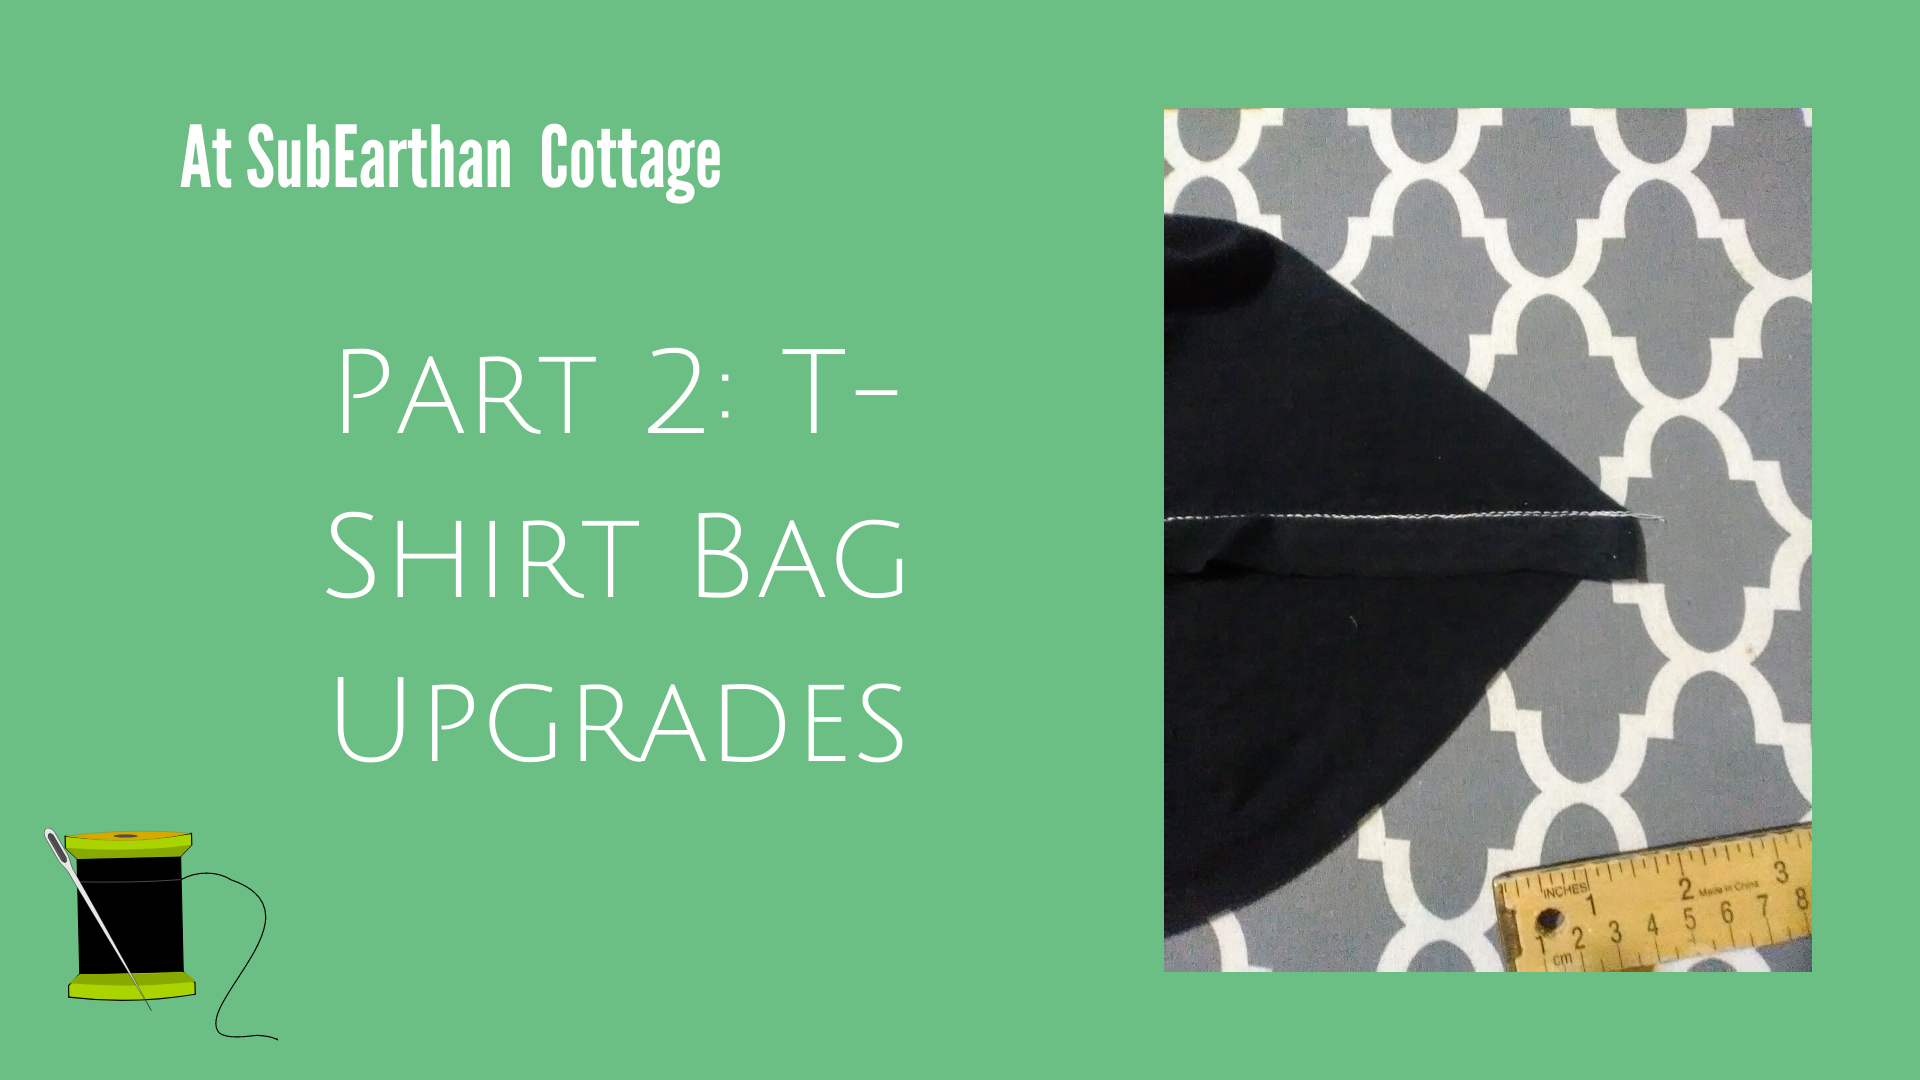
With your bag inside out, flatten the bottom seam so that it forms a triangle. That is a horrible description, so hopefully you can see what I mean from this photo:

The white stitching is the bottom hem of the bag. It should be in the middle, cutting the triangle in half.
Step 2
Measure about 3 inches down from the point of the triangle and draw a straight line perpendicular to the hem stitching.

Step 3
Sew along the line you drew twice to make it a strong seam. This photo shows my stitching in red and my chalk line.
Repeat steps 1-3 on the other side.

Step 4
To finish, you could cut the excess part of the triangles and leave them raw or overcast/zig-zag stitch the cut edges. If you want to add strength and more structure to the bag, leave the triangles intact. Fold them down flat into the bottom of the bag and either tack in place with a few stitches at the point or sew along the loose sides of the triangles.