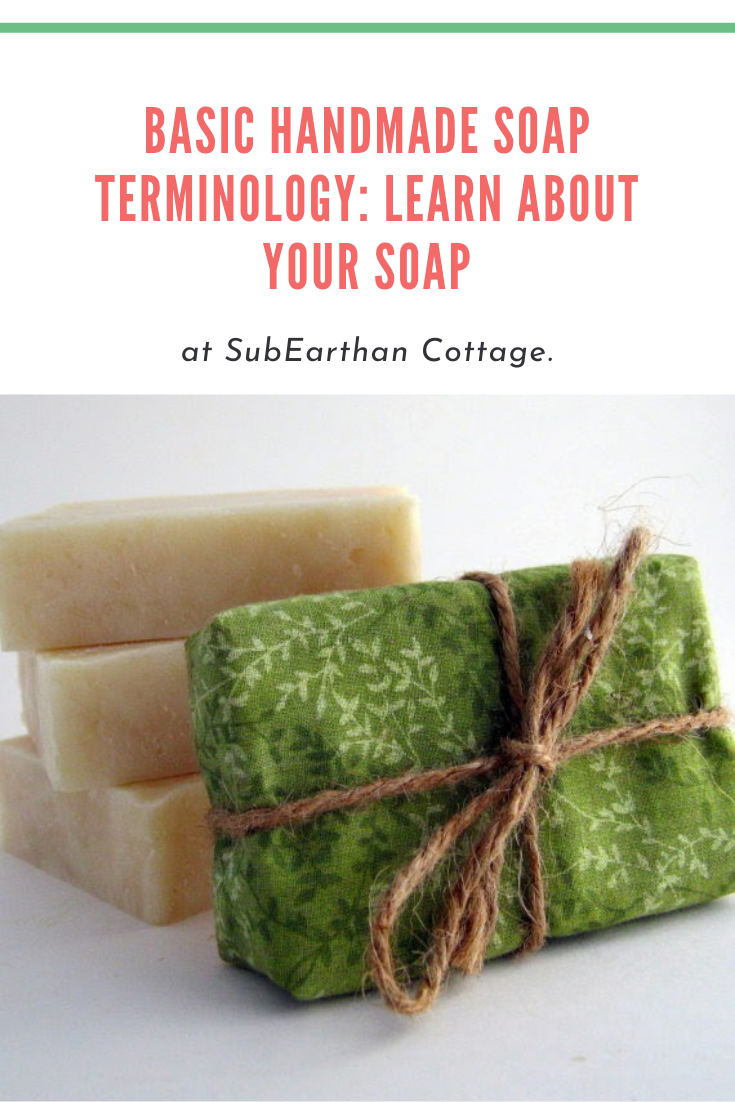
Posted on 1 Comment

15 Awesome Uses for Coconut Oil

If I had to pick only one oil to keep around, it would be coconut oil. This versatile oil has many applications in and out of the kitchen. Here’s fifteen of my favorite uses for coconut oil.

Coconut Oil in the Kitchen

High Heat Cooking

Coconut oil is a stable oil, unlike olive oil. It doesn’t break down at high temperatures, making it great for frying, sautéing and other high-heat cooking applications.

Dairy and Animal Fat Substitute

Coconut oil is also a great butter substitute for those avoiding dairy. It also makes a great substitution for tallow or lard.

Cooking Popcorn

If you like cooking popcorn on the stove the “old-fashioned” way, coconut oil is the best. It adds a wonderful flavor to the popcorn, and holds up to the high temperature. My favorite way to eat popcorn is cooked in coconut oil and topped with salt and fresh cracked black pepper. It’s so simple and yet so yummy!

Season Cast Iron Skillets with Coconut Oil

I love my cast iron skillets. Whenever I need to re-season them, coconut oil is my go-to oil.

Coconut Oil for Cleaning

Natural Furniture Polish

The natural furniture polish recipe I use calls for olive oil, but coconut oil is a suitable substitute. It’s a little lighter and less greasy than olive oil, so it polishes out nicely. It also has a longer shelf-life, so there’s little worry about using it up before it goes rancid.

Stuck on Stickers

Rubbing a little coconut oil on sticker residue helps remove the residue without harming the surface underneath. I like to coat the sticker residue with oil and let it sit for a few minutes. Wipe in a circular motion with a rag or gentle scrubber until the residue is gone.

Coconut Oil for Hair

Protect and Treat Your Hair

I’ve seen it recommended to coat your hair in coconut oil and leave it in overnight before lightening your hair with bleach. While I personally haven’t tried that, since lightening my hair, I put a small amount of oil on my hair almost every day. I especially focus on drier or damaged areas. Since I started doing this, I’ve noticed a huge difference in my hair. It’s definitely stronger and smoother.

Deep Condition with Coconut Oil

Even if you haven’t tortured your hair with bleach, a deep conditioning treatment is good from time to time. Apply the oil to your hair and cover with a shower cap. Leave it in for a few hours or overnight and then wash out. A couple of drops of essential oil added to the oil makes the conditioning treatment even more luxurious.

Frizz Fighter

Rub a couple of drops of coconut oil in your hands and then smooth over the ends of your hair to keep frizz away.

Coconut Oil for Skin

Moisturize Your Skin

Coconut oil is great as a moisturizer. Start with a little and massage in to moisturize or to soothe dry, irritated skin. It even helps some eczema!

Diaper Ointment

Coconut oil provides a gentle, moisturizing barrier to soothe and protect babies’ bottoms. Unlike many commercial diaper creams, it is considered safe for cloth diapers. Do check with the manufacturer for their recommendations first, as using unapproved products can void any warranties.

Makeup Remover

A little coconut oil easily takes off eye makeup. I like to put it on a cotton square and gently swipe away makeup. As a bonus, it moisturizes your skin as it removes the makeup.

Shaving Cream

Shaving with coconut oil leaves my legs feeling soft, smooth and moisturized. I don’t even need to use lotion afterwards.

Handmade Soap

I use coconut oil in all of my soap recipes. It helps to create a firm bar that produces lots of fluffy lather.

Pumpkin lavender roll on

Essential Oil Carrier

Coconut oil is my favorite carrier oil for essential oils. It’s not too heavy and absorbs nicely into the skin. If you use the refined oil, there’s no real coconut scent to compete with the essential oils.

15 Awesome Uses for Coconut Oil
Image by moho01 from Pixabay

Like this post? To make sure you never miss a future post, please sign up for my newsletter.

Through Friday, everything in my shop is 15% off. Shop now.

Posted on Leave a comment

Garden Tour: Bell Peppers, Tomatoes, Jalapenos, Beans, Wild Amaranth and a Sale

Bell peppers in the garden

After years of living here, we finally planted an actual garden this year. These aren’t all of the plants, but they’re the ones that are doing the best so far. In the future, I’ll have to update as the others get more interesting, and share about all of my container plants, too.

Bell Peppers

I honestly have no idea how big I should let these get before harvesting. I know they will change color, so while I do enjoy green peppers, I figure letting at least a few turn red will let me know when they’re ready.

Bell peppers in the garden
Green bell peppers

Tomatoes

We planted a couple of varieties of tomato plants, then a neighbor gave us a few more, so we should have lots of tomatoes this year.

Huge green tomato
Green tomatoes

Those lovely tomatoes on the bottom got so big that they started to break the plant. Chris harvested them, and I did the yummiest thing I could think to do with green tomatoes: fry them.

Jalapenos

We have one jalapeno plant, and it’s an overachiever. We’ve already harvested four peppers and there’s about a dozen more currently on the plant.

Jalapeno plant
Jalapenos

You can see a few in the photo. There’s more hiding behind the leaves.

Pumpkin

The pumpkin was kind of an accident. We left an uncarved pumpkin sitting out front all winter. After the freeze in February it split and all the seeds were exposed. I through some soil on it and ignored it. Before long, we had about a million little pumpkin plants. I transplanted a few to the garden area and they’ve taken off.

Pumpkin plants
Pumpkin plants.

Some of the pumpkin plants left in the front were huge, but they took over the walkway and started getting damaged from the dogs walking through them, so we removed them. Hopefully these will continue to grow. It would be so cool to have pumpkins from our own garden this fall.

Beans

A few months ago, my clumsy self picked up a bag of pinto beans the wrong way and spilled a bunch on the floor. I decided to try to sprout them by soaking. When they sprouted, I planted them in the garden. These three plants are the survivors.

Pinto beans
Three little bean plants.

I have no idea if they need more support than just being allowed to climb the fence. I guess we’ll see.

Amaranth

The last major plant that’s taking off is, unsurprisingly, the amaranth. Amaranth literally grows as a weed around here, and we actually started our amaranth patch from weeds. The leaves are an awesome spinach replacement, and the seeds can be cooked or ground into flour. So far we’ve never harvested the seeds, but we do use the greens. It is important to note that they do contain a lot of oxalic acid, so you have to be careful of that. I’ve heard blanching helps to reduce the amount of oxalic acid, so I do that when cooking with amaranth.

Here’s a video of Chris harvesting some of our amaranth, filmed by Beckett.

What are your favorite things to plant? If you’ve been gardening this year, I would love to see.

Like this post? To make sure you never miss a future post, please sign up for my newsletter.

Shop Sale!

All items in my shop are 15% off until Friday, July 16, so please, check it out. Here’s just a few of the things you’ll find.

Posted on Leave a comment

Fascinating Hummingbird Moth Hemaris thysbe Sighting

Hummingbird moth

Have you ever heard of a hummingbird moth? I hadn’t, until one day I saw this little creature that looked like a cross between a bee and a hummingbird buzzing around our Chaste tree. Luckily it didn’t mind me at all, so I was able to get a few pictures of them.

Hummingbird moth
It’s in the bottom right corner, if the business of the Chaste flowers make it hard to find.

I really wasn’t sure what to think at first. It’s size and tail made me think of a hummingbird, but it had antennae. In person, the wings moved so fast that they were hard to see, just like a hummingbird, and it hovered more like a hummingbird than a bee. Fortunately, a quick Google search of “bee hummingbird” was all it took to find out more about this fascinating creature.

I’m a little surprised that I haven’t seen one before now. They are a bit rare, but tend to love honeysuckle, and our yard has lots of honeysuckle. I guess this one prefers the colorful purple blossoms of the chaste tree.

Hummingbird Moth 2

I’m pretty sure the one I saw is a Hemaris thysbe, or hummingbird clearwing sphinx moth. I am a little concerned, as hornworms are the larval stage for the hummingbird moth, and hornworms love tomatoes. All of our tomato plants are in the back yard while most of the big flowering plants are in the front, so hopefully that will help keep them away from the tomatoes. So far I haven’t seen any of the hornworm caterpillars near the tomatoes.

Photo by icon0.com from Pexels

We absolutely saw a few of these huge caterpillars in the front yard earlier this spring, though. They’re kind of hard to miss. If I had known the awesomeness they turn into, I might have attempted to watch the process somehow.

Like this post? To make sure you never miss a future post, please sign up for my newsletter.

Posted on 1 Comment

Dangerously Easy Chocolate Syrup Recipe

Chocolate syrup is deliciously versatile. Stir it in hot or cold milk or coffee for a treat or pour over ice cream to make it even more decadent. Then there’s old fashioned sodas and baked goods made with chocolate syrup. With this chocolate syrup recipe, you can make delicious chocolate syrup with just a few basic pantry staples whenever you need it.

Sure, it’s easy to pick up a bottle from the supermarket, but with this easy chocolate syrup recipe, you can make it for a fraction of the cost and without a trip to the store. By making it, you also have control over the ingredients. Use your favorite cocoa powder, experiment with the type and amount of sugar or swap out the vanilla extract for something a little more creative to make it your own. I can totally see using peppermint extract to mimic the flavor of Andes mints. Or, if you’re a fan of Terry’s Chocolate Orange chocolates, add orange extract.

Like most of my recipes, this chocolate syrup is gluten free and dairy free.

Dangerously Easy Chocolate Syrup Recipe

This chocolate syrup recipe is so easy and delicious. With only a few pantry-staple ingredients needed, you'll never have an excuse not to make it. Should be good for at least a month when stored properly. I usually find plenty of ways to use it up before then.
Prep Time2 minutes
Cook Time5 minutes
Course: Dessert

Ingredients

  • 1 cup cocoa powder
  • 1 cup sugar
  • 1 cup water
  • 1/2 teaspoon salt or to taste
  • 1 teaspoon vanilla extract or to taste

Instructions

  • Mix the sugar and cocoa together in a saucepan until thoroughly combined.
  • Add the water and half of the salt (1/4 teaspoon). Bring to a boil over medium heat, stirring constantly.
  • Continue to boil while constantly stirring until the mixture thickens a little. (It will thicken more as it cools) This should take around 3 or 4 minutes.
  • Carefully taste and add the rest of the salt, if desired.
  • Remove from heat and add vanilla extract.
  • Cool and store in an airtight container in the refrigerator. I like using a glass jar.

Notes

The vanilla extract and salt amount can be adjusted according to taste. I can also see swapping out the vanilla for peppermint or orange extract.

While I try to write recipes as clearly as possible, it’s easy to miss a step or make assumptions. If anything is confusing, please don’t hesitate to comment with your questions. If you make this recipe, please let me know what you think.

Like this post? To make sure you never miss a future post, please sign up for my newsletter.

This post contains affiliate links. If you click through any of the Amazon links and make a purchase, I will receive a small commission. There is no added cost to you.

chocolate syrup recipe
Posted on 2 Comments

Easy fix for worn out denim jeans

Denim jeans don’t have to be tossed or cut up for crafts when they start to wear out. With a little effort, you can easily get some more wear out of your favorite jeans. For this tutorial, I’m using a pair of denim blue jeans that are still in good shape except for where my thighs touch. There they are really worn on one side and there is a hole on the other. Because of where the hole was located, I wasn’t comfortable even wearing them around the house, so I decided to try a simple fix.

Interfacing for support

First, I ironed lightweight fusible interfacing on the inside of the worn areas, making sure to completely cover all the worn out spots with the interfacing.

Reinforce with stitching

Once it fused and cooled down, I turned them right side out. Using a narrow zig-zag, I stitched back and forth over the hole and worn areas. This serves to secure the interfacing and add strength.

If you can, drop or cover the feed dogs on your sewing machine so you can move the jeans freely under the needle. The machine I used doesn’t have a way to drop them and I don’t have the special foot plate to cover them. Instead, I used a combination of repositioning and forward and reverse stitching to make it work.

Denim Jeans Fix

Depending on the location, you could use contrasting thread and decorative stitches to turn the repair into an embellishment.

Lengthening a slightly short pair of jeans

I also have a pair of jeans I love, but they needed a button sewn back on. They were also a little short, so I replaced the button and let out the hem while watching TV one evening. These heavy denim jeans are now ready for the coming colder months.

Buttons!

These have an obvious line where the hem was. They’re really cute so I don’t care.

Like this tutorial? To make sure you don’t miss out on future tutorial posts, sign up for my newsletter.

Easy denim jeans fix.
 

Posted on Leave a comment

Scrap Busting: Organization for Zero Waste Sewing

If you sew, you have a stash of fabric scraps. No matter how carefully you plan and lay out your patterns, there is almost always going to be some little extra bit. With some creativity, even the smallest scraps are useful in other projects. In order for that to happen, though, you need to be able to know what you have and find what you need. Here’s some simple suggestions to make the most of your fabric scraps.

Decide what makes sense.

I sort my scrap stash primarily by color. Most of it consists of quilting cottons, so sorting by color makes sense. For other types of fabric, I sort by fabric type more than color. For example, all flannel scraps go together.

Think about how you craft or how you naturally group things to find what will work best for you. If you focus more on prints than color family, then try group by prints. If you use a large variety of fabric weights and textures, use that to determine your groupings.

Out of sight, out of mind.

For me, being able to see what I have is the most important. I have a clear plastic sorter bin, similar to what you’d find at a hardware store, that I keep near my cutting table. I put scraps that aren’t really big enough to fold practically into the bins, sorted by color family. The front of the bins are clear, so it’s easy for me to see colors and prints at a glance.

Plastic shoe bins or similar containers would also work. You could upcycle shoe boxes or shipping boxes, but you lose the visibility with something that isn’t clear. In that case I would clearly label the outside with the color family.

Scrap organization
This garage sale find keeps my scraps organized and visible.

Don’t forget the tiniest scraps.

Even the tiniest scraps can be used for stuffing, to strengthen handmade paper or in textile art. I keep a small bin next to my sewing machines and sergers to collect threads, clipped corners, trimmed seam allowances, etc.

Have a plan for other types of scraps.

Little bits of lace, trim and buttons from refashioned clothing get stored in glass jars. I find the variety of colors and shapes pretty, so I like having them sit on a shelf where I can see them. If I need a button or bit of embellishment I know what I have. In the meantime, it’s art.

Scrap jars

Stabilizer scraps go into a drawer under my embroidery machine. If I’m embroidering something that needs a little extra support in an area, I use a suitable scrap instead of a whole new piece. Stabilizer scraps can also be used to reinforce buttons and button holes.

I store most of my interfacing in a shoebox. Small scraps go back into the box to use similarly to how I use stabilizer scraps.

Don’t get overwhelmed.

If you find that your scrap stash is growing larger than what you can use, sort through and pull out anything you don’t love or just don’t see yourself using and donate them. Schools, libraries, scouting groups and similar organizations will often take fabric scraps and other craft materials to use for art projects. You can also list them for free on craigslist or Facebook. As a little girl, I used scraps from my grandma to fashion clothes for my Barbies and My Little Ponies. If you have know of anyone with children, they might like the scraps to play with, too. By donating them, they still get put to use and you’re better able to see and use what you still have.

Put those scraps to use!

Once you know what scraps you have, make it a goal to use them up. If you’re stuck for ideas, Pinterest is a great place to turn for ideas. I have a board dedicated to scrap busting projects that I add to frequently. You can find it here.

I’ll be posting creative ways to use fabric scraps soon. To make sure you don’t miss it, sign up for my newsletter here. When you sign up, be sure to check your spam folder for the confirmation if it doesn’t go straight to your inbox.

Posted on Leave a comment

OMG! There’s lye in handmade soap!

For those unfamiliar with making soap, seeing lye, aka sodium hydroxide or potassium hydroxide as an ingredient in handmade soap can be a little scary. Today I thought I’d share why it’s in there and why it’s nothing to scare you away from handmade soap.

The basic chemistry of soapmaking

From the Wikipedia page on Saponification:
Saponification is the hydrolysis of an ester under basic conditions to form an alcohol and the salt of a carboxylic acid (carboxylates). Saponification is commonly used to refer to the reaction of a metallic alkali (base) with a fat or oil to form soap. Saponifiable substances are those that can be converted into soap. http://en.wikipedia.org/wiki/Saponification

The basic soapmaking process involves adding a solution of lye and water or some other liquid to oils. The lye reacts with the oils to make soap (saponification). Lye is necessary for saponification to occur and is therefore used in making all soap. In other words, if there wasn’t sodium hydroxide (potassium hydroxide for liquid soap) , aka. lye involved in making a product, it’s not soap.

Is there lye in the finished soap?

Short answer: No, absolutely not. Assuming the maker’s calculations are correct, all of the lye reacts with the oil, thus leaving no trace of the lye in the final product. Because of this, you will often see terms such as “Saponified Coconut Oil” or “Sodium Cocoate”. Both terms refer to coconut oil that has reacted with lye to saponify.

Many soap makers, including myself, also take a small discount in the amount of lye used. This adds a cushion to further ensure that there are no traces of lye in the final product. It also produces a milder bar without sacrificing the cleaning properties of the soap.

tea tree oil soap: no more lye

A word about labeling

When labeling soap, you can either list the starting ingredients or list the end products. So, some soapmakers’ labels will list things like “lye (or sodium hydroxide), olive oil, coconut oil,” etc. Some will list “saponified coconut oil, saponified olive oil,” etc. Others choose to list ingredients as “Sodium Olivate, Sodium Cocoate,” etc. All mean the same thing.

Personally, I find listing the starting ingredients simpler and more easily understandable. It does mean that my labels list lye or sodium hydroxide, which might seem scary if you don’t know that there are no longer traces of it in the finished product.

Like this post? To make sure you never miss a future post, please sign up for my newsletter.