Posted on 2 Comments

T-Shirt Market Bag Tutorial

One of my lovely nieces is learning to sew with a sewing machine. To help, I thought I would do a series of beginning sewing project tutorials. Today’s tutorial turns an old t-shirt into a market bag. I’m keeping it simple today, but in the future I’ll do a post on how to make it with and enclosed bottom seam and how to box the bottom. It’s a great way to turn t-shirts that you no longer wear into something useful. If you don’t have a sewing machine, you could even sew it by hand.

Materials:

  • T-shirt
    • T-shirts with a high cotton content and no side seams work the best.
  • Thread in your choice of color.
  • Fabric scissors
  • Sewing machine set up with appropriate needle and bobbin threaded in your color choice.
    • Note: Ball point needles are generally the best for sewing with knits. This project does fine with an all-purpose needle, though, so use what you have.

Preparing the shirt:

Lay the shirt out flat and smooth out any wrinkles. Since this one is just to add to my Aldi bag stash, I didn’t worry too much about wrinkles.

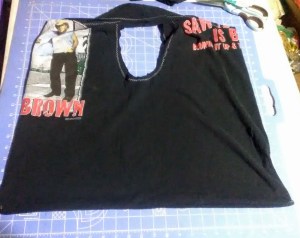
T-shirt laid flat
T-shirt. I’m not sure where I got this one. Also, forgive the grainy photos. Lighting in my craft room wasn’t great that day.

Cut off the arms including the armhole seams.

Cut off the neck about 2-3 inches below the neckband. My shirt is pretty big, so I went three inches below the neckband. With smaller shirts you can do less.

Cutting off sleeves and neck.
I like to fold it in half before cutting to keep everything even. If your scissors aren’t sharp enough to go through all the layers, cut one side and then fold it in half to use as a template for the other side.

Cut straight across the bottom of the shirt to remove the hem. The hemline is often uneven on t-shirts, so focus on keeping the shoulder seams lined up, the shirt smooth and cutting a straight line that removes all of the hem.

Cut off the bottom hem.
Bottom hem removed.

At this point, you should basically have turned the t-shirt into a tank top. Now, decide if you want your bag to look like plastic grocery sacks that have the handles at the top sides (so, your tank top with the bottom sewn closed), or if you want the handles at the top middle, like a purse or market tote.

Looks like a tank top.
Looks like a tank top. For a grocery style bag, turn it inside out and lay it back flat in this position.

For the grocery sack-style, turn your shirt inside out and lay it flat, just like a tank top again. For the purse/market tote, turn it inside out and match the shoulder seams and armholes together, then lay it flat. I’m making a market style tote, so you can see it in the photos.

Laying flat for a purse/market tote.
For a purse/market tote turn it inside out and lay it flat with the shoulder seams at the top, as shown here. I find this style easier to carry on my shoulder.

Once everything is lined up, pin along the bottom to hold it in place.

Pinned hem.
Pinned hem.

Sewing the bag:

Many sewing machines have an assortment of stitches to use with knit fabric. They are useful for keeping the thread from breaking when the fabric stretches. On my machine, they are labeled “stretch” and shown in brown. Zig-zag stitches also work well on knits.

Stitch assortment on my Kenmore sewing machine.
Normal stitches are in red. Stretch stitches are in brown.

You could use a stretch or zig-zag stitch for the bottom of the bag. Since it really shouldn’t be stretching much, I usually stick with a regular straight stitch set to a long-ish length of 3.

Regardless of the type of stitch you choose, I recommend sewing across the bottom twice to make it nice and strong.

The seam allowance, or distance between the edge of the fabric and the stitches, doesn’t really matter that much as long as you keep it the same all the way across. For this bag, I used a 5/8 inch allowance, marked on the footplate of my machine. To keep a straight line, focus on keeping the fabric lined up with the guideline for the seam allowance rather than watching the needle.

Edge of fabric lined up on 5/8 mark.

At the start , sew about 2-3 stitches then backstitch to secure the stitching before continuing to sew to the end. At the end, backstitch another 2-3 stitches, then sew to the end and cut the threads. Repeat the seam as close to the original line of sewing as possible to make it nice and strong.

Turn the bag right side out. Since knit doesn’t unravel, you could stop there and be done. I like to sew around the arm and neck holes to reinforce the t-shirts original shoulder seams and give it a more finished look.

Finishing around the t-shirt arm and neck hole handles:

I usually use a serger for this, but it’s not necessary. On a sewing machine, I do like to use either a zig-zag or stretch stitch since there is going to be more stretch on the handles so a straight stitch might break.

Zig-zag setting on my Kenmore.
Zig-zag setting.

This time, I’m using a zig-zag stitch, keeping the stitch length set at 3 and using about a 1/2 inch seam allowance. If your sewing machine has a free-arm, it can make it easier to sew around the armholes if you use it. Sew around each arm hole and the neck hole separately.

Messy zig-zag backstitching.

To start and finish the zig-zag, I backstitched like normal. It looks a little messy that way. You could leave extra thread at the beginning and end, pull the threads to the back side and tie knots to secure them if you want a cleaner look.

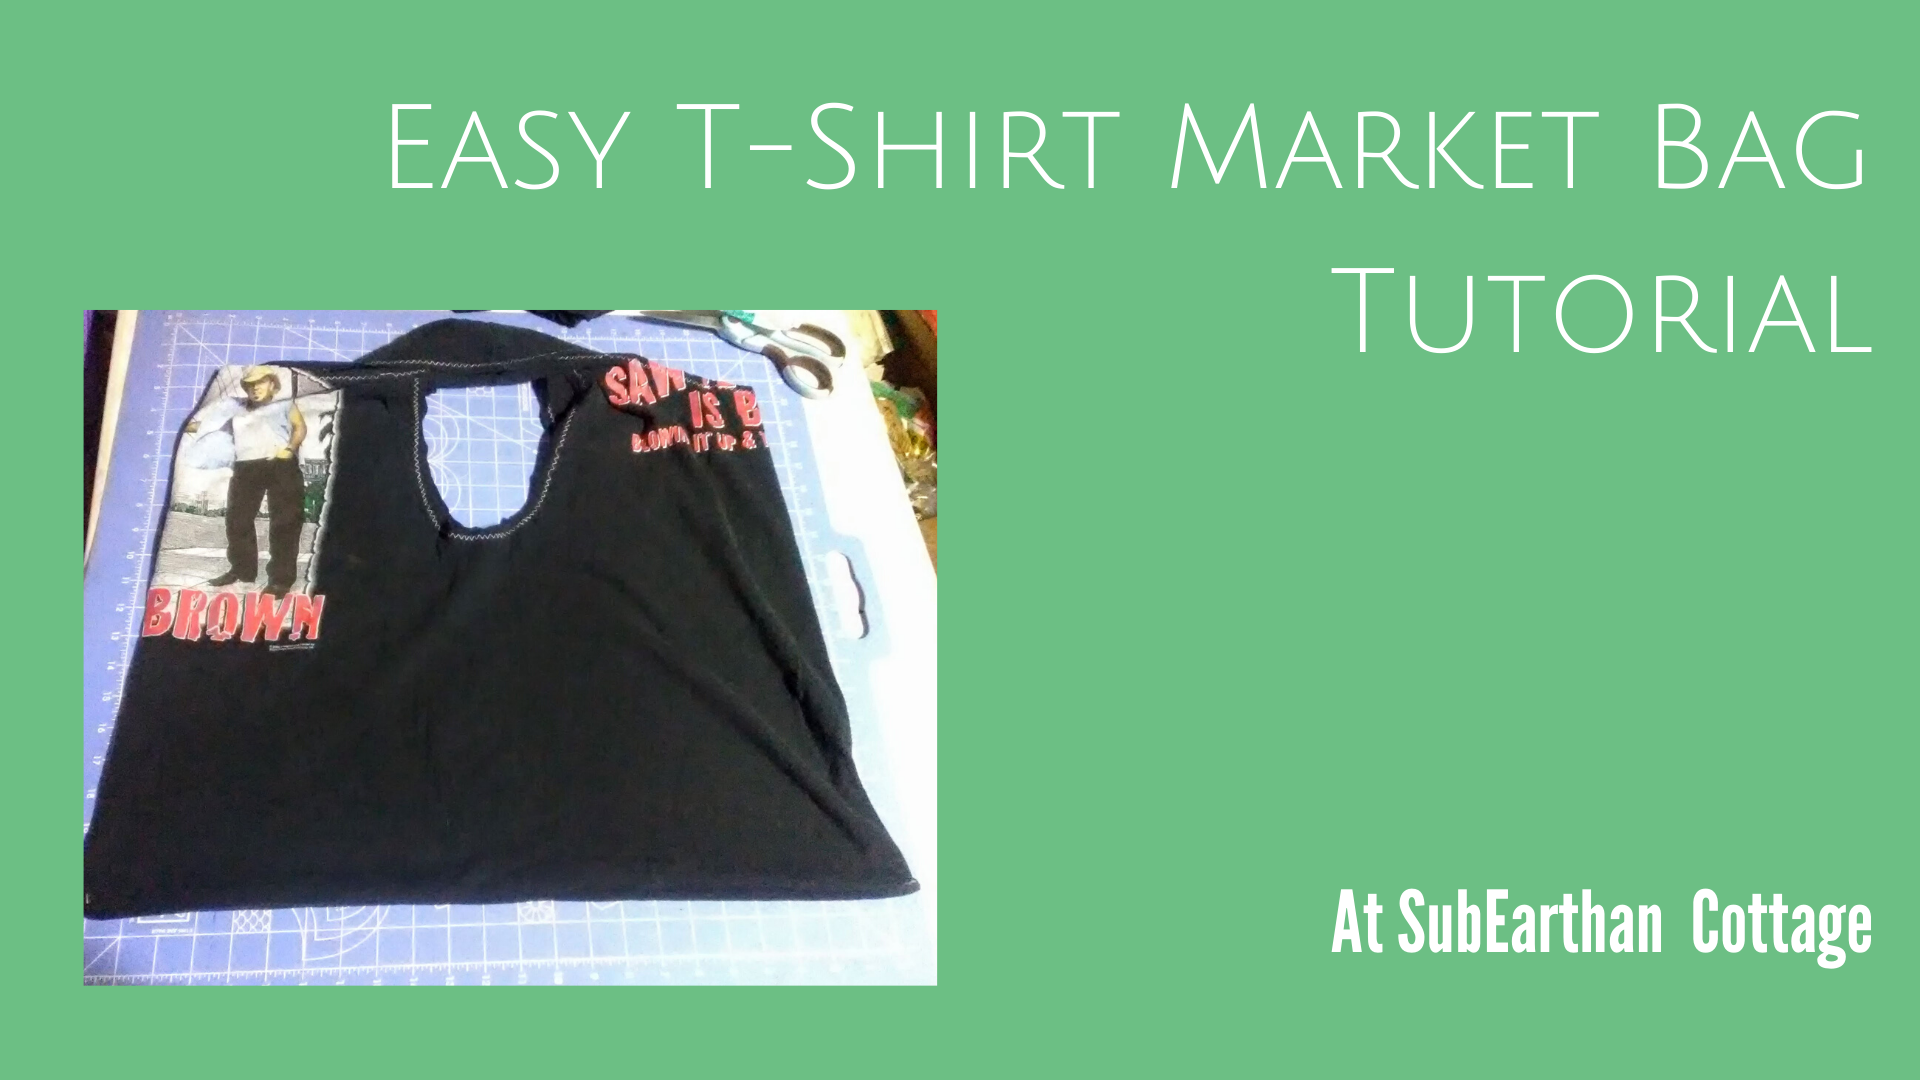
Finished t-shirt bag.

That’s it. You now have a purse or reusable bag from what used to be an old t-shirt. Don’t throw the t-shirt scraps away. I’ll post some creative uses for them soon! To learn how to make this bag a little more polished, read my t-shirt bag upgrades post.

If you read through the tutorial and like the concept but don’t want to diy, I still have a few left in my shop on clearance here.

Like this tutorial? To make sure you don’t miss out on future tutorial posts, sign up for my newsletter.

Posted on 2 Comments

New Embroidery Design Files and Freebies

While I love my Brother SE400, it didn’t take long for me to get bored with the built in embroidery designs. I found many cute designs online to buy. That helped, but  even that was somewhat limiting as my machine only has a 4×4 hoop capability. Besides, I’m a diy, hands-on person. Of course, that all led to learning how to digitize designs myself.  

The digitizing process is fun but time consuming. When I spend that much time on something, I want to share it with others. So, I am offering my embroidery designs in my shop under Embroidery Files and Freebies.  Each design is scaled to fit in a 4×4 hoop and come with the .CSD, .DST, .EXP, .HUS .JEF, .PCS, .PES .SHV, .VIP, or .XXX file types to work on most embroidery machines. New designs are listed for free for a limited time. 

You can find all of the above designs in my shop under Embroidery Files and Freebies. I would love to see what you create with the embroidery designs. If you’d like, share them here in the comments or on our social media channels. I also appreciate any feedback, especially if you have a different machine.

Tomorrow I should have a tutorial posted for using my Peppermint Candy design to create cute, in the hoop coasters. They’re an easy beginner project and make great gifts. You could also use a similar technique to create Christmas ornaments, or swap out the design in the middle to make them less seasonal.

Peppermint Candy Coaster almost complete
Sneak Peak of a Peppermint Candy Coaster in progress

If you’re not familiar with the term “in the hoop” it refers to an item that is completely or almost completely made by the embroidery machine in the hoop. I like in the hoop designs for things I’m making in sets because it’s easy to get nearly identical results. 

Posted on 2 Comments

Ridiculously Easy Gluten Free Tortillas

I have never been a huge fan of corn tortillas. They’re good for some things, like street tacos, but overall I love the soft, slightly chewy texture of flour tortillas. While there are flour gluten free tortillas on the market, they are pricey and hard to find. Which means that since eliminating gluten from our diets, I’ve had to stick to corn. Which is fine, because it’s better than no more tacos, but , I still miss flour.

After much searching, I finally found a recipe that mimics the soft, chewy texture of flour tortillas. They require no real prep work, so it’s easy to make them last minute, if needed. Basically, if you can make a pancake, you can make these gluten free tortillas.

You can also adjust the thickness to be more like a flatbread. I can see pairing them with curries or stews, or cut into chips , toast and serve with hummus.

Ridiculously Easy Gluten Free Flour Tortillas

Soft, chewy gluten free flour tortillas so easy you can make them last minute.
Prep Time5 minutes
Cook Time1 minute
Course: Side Dish

Ingredients

  • 1 Cup Chickpea based gluten free flour Can be straight chickpea flour, or a blend with a high amount of chickpea flour, such as Bob's Red Mill GF flour. (NOT the 1 to 1 flour)
  • 0.5 cup Tapioca flour
  • 1 tsp salt
  • 1 cup water
  • 1 tsp coconut or other oil If you use a non-stick skillet or griddle you may not need the oil.

Instructions

  • Mix the dry ingredients in a large bowl.
  • Add the water and stir until blended.
  • Oil a skillet or griddle as needed and heat to medium high.
  • Pour about 1/4 cup of the batter onto your prepared skillet or griddle.
  • Cook for 1-2 minutes over medium high heat.
  • Flip like a pancake and cook for another 1-2 minutes.
  • Repeat the cooking and flipping for the rest of the batter.

Notes

This recipe is very versatile. For thinner tortillas, add a little more water. For more of a flatbread, reduce the water to about 3/4 of a cup. 
Gluten Free tortillas
 

Find more of my gluten-free recipes here: http://s696056323.onlinehome.us/?s=gluten+free

Posted on Leave a comment

Easy! 5 Steps to Clean Small Felt Toys.

Making felt toys and accessories has been a bit of an obsession for me lately. They’re cute and easily customized with my Brother embroidery machine.

Felt finger puppet toys
Dog, daughter and mother finger puppets waiting to be cut out.

I was concerned that I didn’t know the best way to clean them so I could share that information with my customers. Luckily (HA!) it didn’t take Thaddeus long to soak the finger puppet set I gave him for his birthday in a smoothie.

Washing them in the washing machine on cold and air drying was a possibility. I think that would work, but I worried about them getting distorted, fuzzy or lost with all the socks that go missing. Plus, Thadd was very anxious to see that they weren’t ruined, so the quicker I got them clean, the better.

Here’s the steps I used to clean his felt finger puppets:

  1. Fill a large bowl about halfway with lukewarm water.
  2. Add a drop of dish soap.
  3. Place the felt finger puppets into the water and gently swish. Heavily soiled items may need to soak for 5-10 minutes.
  4. Rinse with lukewarm water to remove any soap residue.
  5. Press the excess water out between towels and lay flat to air dry.

This method should work well for any small toys without a lot of stuffing, as well as for my felt snap clip covers. I would remove the metal barrette for the snap clips first. In general, I think the keys to keeping them looking like new after washing are making sure the water isn’t hot, minimal friction and air drying.

Finger puppets

All of the finger puppets seen below can be found here: http://s696056323.onlinehome.us/?s=finger+puppets&post_type=product Felt and thread colors are customizable. Purchases of five or more come with a random print drawstring bag for storage.

Felt snap clips

All of my felt snap clips are found here: http://s696056323.onlinehome.us/?s=snap+clips&post_type=product


Posted on Leave a comment

Cupcakes

Sometimes after binge watching baking shows, you just have to bake cupcakes.

Lots of cupcakes

I substituted a 1 to 1 gluten free flour blend for the flour in the yellow cake recipe out of my favorite Better Homes cookbook. The cupcakes turned out a little dense, but not bad. Most gluten free cakes are a little dense, so I’m not sure there’s a good solution.

My favorite part of any cake is the butter cream frosting.  A slightly dense cupcake doesn’t bother me, as long as the frosting is good. My frosting recipe also came from my Better Homes cookbook. Some of my family can’t have dairy, so I substituted shortening for the butter and almond milk for the milk.

My Sunbeam Mixmaster worked beautifully for both the cake batter and butter cream frosting. I’ve had it for over a year and a half now, and the only problem I’ve had was with the beaters.Those were cheap and easy to replace, and it’s been going strong ever since.

Frosting delivery device

Posted on Leave a comment

Goodwill Finds and Refashion Ideas

Pink tunic after removing the lining.

This weekend, we visited a local Goodwill store. Unlike the other Goodwill’s in our area, this one has everything in big bins and they charge a flat, by-the-pound fee. Thrift stores always have unique items, but this one seems to have some really good finds, if you’re willing to dig.

In addition to a few household odds and ends, I found a couple of dresses and a shirt that need a little bit of refashioning, and a pair of skinny boyfriend cut jeans that are like new and fit perfectly. I also found a pretty floral vintage bed sheet. Vintage linens are somewhat in demand among crafters, and I rarely have luck finding them, so it was a nice surprise. 


Vintage Pink and Purple Floral Bed Sheet

Green Dress

The first dress is a casual, green knit dress with interesting cutwork and stitching at the neckline and hem.

Green knit dress
Green knit dress

Pros: It’s comfortable, easy to wear and chase after kiddos, and I like the color and detailing. Cons: It’s a size or two too big. This makes the underarms gappy and the waistline droopy. It’s too short to be a maxi dress, but not short enough to not be frumpy. I could wear it as is around the house, but I think I can make it into something better.

My plan: Separate it at the waist into the bodice and skirt. Tighten the bodice at the side seams. Reattach the skirt to the bodice after removing a few inches from the top of the skirt to make it somewhere between tunic and knee length. Add new, tighter elastic at the waist.

Long, Floral Shirtdress

The pretty blue and floral pattern is what caught my attention with this dress.

Blue, long floral shirtdress

Pros: The print is very pretty, and there is a lot of fabric to work with. Cons: The fabric is a stiff, non-breathing 100% polyester. It’s a size too small through the middle.

My plan: I have a few ideas for this one. The top (bodice) fits pretty well. The only fit issue is right through the middle. I could separate the bodice from the skirt, raise the skirt so that a wider section that fits me better is at the waist and reattach. Factoring in the button placket might make it tricky, but not that difficult.

I’m not sure I would wear it enough to go through that trouble, though. Option two is to use the skirt portion to make a slip-style nightgown by shaping a neckline and cutouts for armholes, then adding bias tape trim and snaps. I would probably use it more this way, but I still worry about the feel of the fabric. I usually avoid things without at least some natural fiber content. Texas is hot and I need my clothes to breathe.

My final idea is to salvage the buttons and use the fabric for things like bag linings, makeup pouches or other accessories. I will probably try one of my first two ideas before this one. I can always use option three if one or two don’t work out.

Pink Tunic Shirt

I think the flowiness of the outer layer and the stitching around the neckline is what made me grab this tunic shirt from the bin.

Flowy Pink Tunic Shirt

Pros: Flowy, comfortable fit. Detailing at the neckline keeps it from being too plain. Nice, bright color. Cons: The top layer seems to have shrunk, exposing the lining layer. The lining is 100% polyester knit, which is stretchy and comfortable, but doesn’t breathe.

My plan: This one was so simple, I actually did it in about five minutes this morning. I thought about shortening the lining by a few inches. The top, gauzy layer didn’t really have to have a lining, though, so I decided to remove the lining altogether by simply cutting it out. This made it super easy, and now the tunic is lighter and more suitable to Texas summers.

Pink tunic after removing the lining.

It’s not the most dramatic refashion, but it fixed a problem and made it so much more comfortable to wear. I wore it Sunday over my new-to-me Goodwill blue jeans to The Modern art museum and then to Central Market with the family for a treat and playtime on their playground. Without the lining, the tunic was lightweight, and the drapiness of the fabric kept it from feeling frumpy. I totally see it becoming one of my new favorites.

Speaking of The Modern, if you’re on Instagram, I’ve shared a video to @subearthancottage of Thadd and Beckett having fun with the crazy acoustics inside the Vortex sculpture out front. It was so much fun to watch them play, as well as just about anyone walking by. Few people passed without stepping inside to stomp their feet or shout.

Posted on Leave a comment

Electric Pressure Cooker Update

In the interest of being totally transparent regarding the things I recommend, I think it’s only fair that I post an update to my Why I Love my Electric Pressure Cooker, aka Knockoff Instant Pot post.

GoWise Electric Pressure Cooker, Take One

My first GoWise electric pressure cooker worked beautifully for almost a year and a half. Then, one day while mid-cooking cycle it just died. There was no warning, no error codes, no lights on, nothing. I gave it time to cool off to make sure it hadn’t overheated, but still nothing. Luckily, when my parents bought it for me as a Christmas present, purchased the extended warranty, so I was able to ship the broken pressure cooker back in exchange for an Amazon gift card.

Pardon the messiness. I literally took the photo as soon as I transferred the half cooked bean soup out so I would have it for the warranty process.

Even though my first GoWise electric pressure cooker broke, I chose to repurchase the same model. I also bought the extended warranty. Until it died, I hadn’t had any trouble whatsoever, even with almost daily use, so I thought it was worth giving it another try.

GoWise Electric Pressure Cooker, Take Two

After almost a year, my second GoWise electric pressure died in exactly the same way as my first one. I do use my electric pressure cooker almost daily, so I might be legitimately wearing them out. I did, however, have a friend say her GoWise died in the same manner. Because it’s a common malfunction, this time I planned to pay the little bit more and get an Instant Pot.

Unfortunately, because it lasted less than a year, the manufacturer’s warranty still covered my second GoWise. That means my extended warranty won’t cover it yet. Since the manufacturer’s warranty covers an exact replacement, I’m expecting my third GoWise electric pressure cooker in the mail. I’m sure it will still be awesome for about a year, and maybe the third time is a charm.

Backup for Number Three

In the meantime, I’ve actually been considering getting a second electric pressure cooker so I can have one for the main dish and sides. I like how rice turns out in the pressure cooker compared to other rice cookers, and I frequently burn it on the stove top. Having two would work nicely for when I’m making beans or curry in the pressure cooker and need rice to go along. If I find a good deal on an Instant Pot, I may go ahead and splurge on it as my second. That way, I’ll have a backup in case this GoWise breaks mid-cooking and I can do a real comparison of the two.