So, in the dressing rooms at radiation, ladies leave post it notes with encouraging messages, cards for the next person, little trinkets, just little happy things.
I’m planning to use the three day weekend to make some little lace embroidery hearts or butterflies or bookmarks (haven’t decided which yet) and leave them in the rooms. I want to attach little notes with positive quotes to them. So, if you want to help me out, comment with your favorite positive, encouraging quote, mantra, whatever. ❤
My local Kroger frequently has bags of kale, spinach and other greens on sale because it’s nearing its “best by” date. I love picking up a few whenever I see them. If I don’t plan to use them right away, I either toss the whole bag into the freezer (this works best with sturdy greens like kale or collard greens) or I dehydrate them for future use.
To dehydrate the greens without a dehydrator, I set my oven to it’s lowest setting (150-200 degrees Fahrenheit) , spread the greens on a baking sheet, and bake until they are dry. I check them about every 10-15 minutes to prevent them from burning.
Once they are done, I crumble them to the consistency of a dried herb and store in a canning jar. The dried greens are great to add to sauces, soups, stews or smoothies. Add a little if you need to hide the taste or a lot to really boost the nutrients.
It’s quick, easy and doesn’t result in a gross bag of kale forgotten in the back of the fridge. Plus, it may help picky eaters get a little more nutrition.
Like this post? Sign up for our newsletter to get post notifications and updates.
This isn’t going to be a full tutorial because I didn’t do a great job of documenting the process. If you’d like a full tutorial, please let me know. I will link to the page I learned it from here.
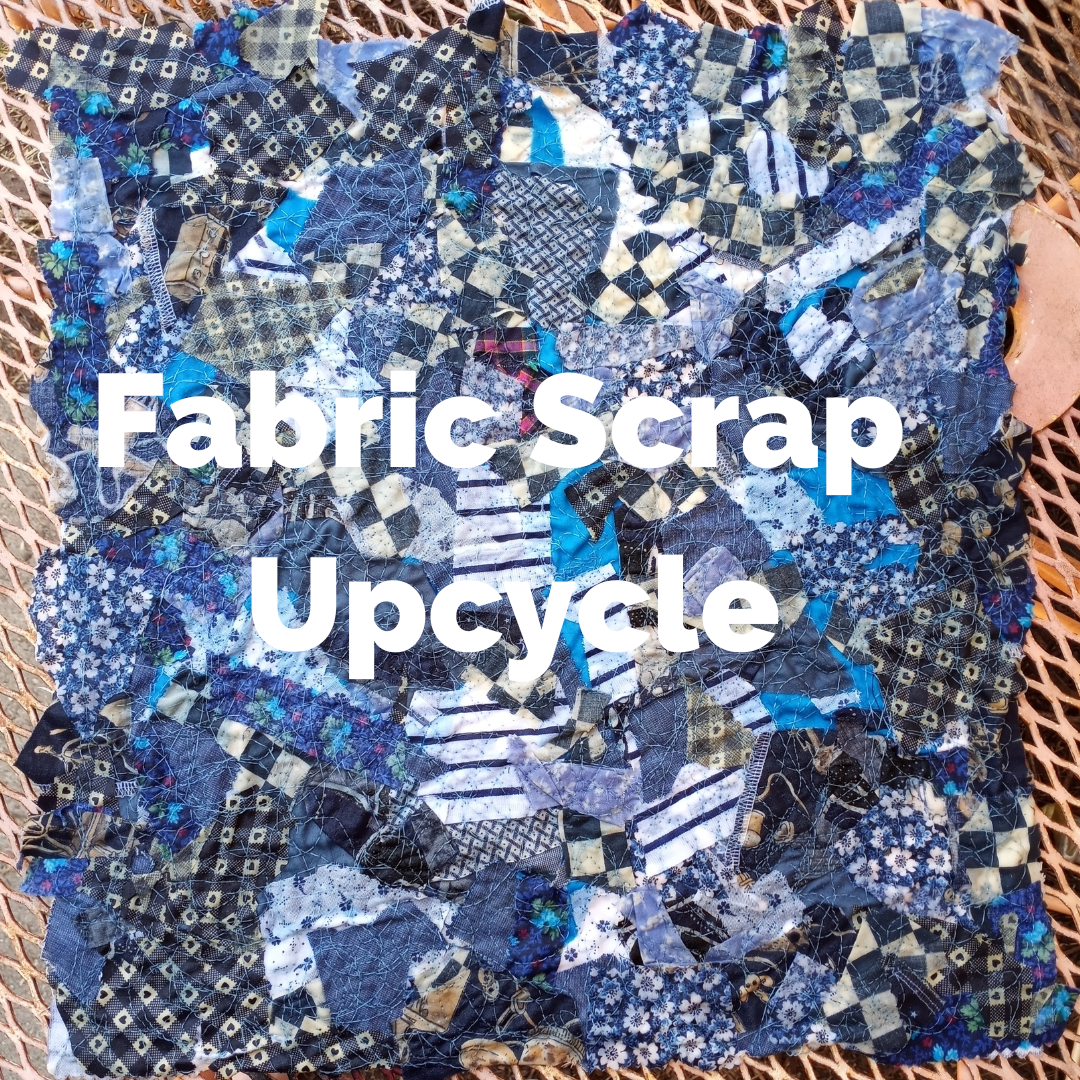
I saw this really cool way to make a bunch of fabric scraps into new, usable fabric that is really textured and cool. First, you need a backing piece of fabric. I used an upholstery sample square that I hadn’t found a use for yet. Then, you cover it in fabric scraps. I went with all pieces from my “blue” sorter bin and let them fall all over randomly. I did try to keep it all in one or two layers and moved pieces around to cover all the empty spots. I left some upside down to add more variety in the colors, and I didn’t worry about ironing the pieces first.
Once I had everything in place, I pressed it with my iron to smooth it down. Then I pinned water soluble stabilizer on top to help hold everything in place for the sewing machine. To sew, I lowered the feed dogs on my machine and crazy free motion quilted everything together. You can see that in the first video below.
That’s it. Now I have this really cool piece of fabric. I can’t decide what to do with it. It almost looks like it could hang on the wall like that as art. I also thought about making a couple of zipper pouches or sets of coasters out of it. It would also be fun to use as patches for clothing.
What would you make with it? Leave your suggestions below. 🙂
I like getting my kiddos involved in housecleaning. Not just because they are highly involved in making messes, but because it is important that they know how to take care of themselves as adults. I’m pretty choosy as to what cleaning products I will let them use. So many cleaners are irritating to the skin, eyes and lungs.
Not only do I want my cleaning products to be safe, I like things that multitask and don’t cost an arm and a leg. Often, I’ve found the best way to achieve this is to make them myself, like with my natural furniture polish. With a few simple ingredients I keep around the house anyway, I find I can cover most cleaning needs.
My most recent cleaning concoction is soft scrub. It works well for when I need a little extra scrubbing power than I get with my usual all-purpose water, vinegar and dish soap mix.
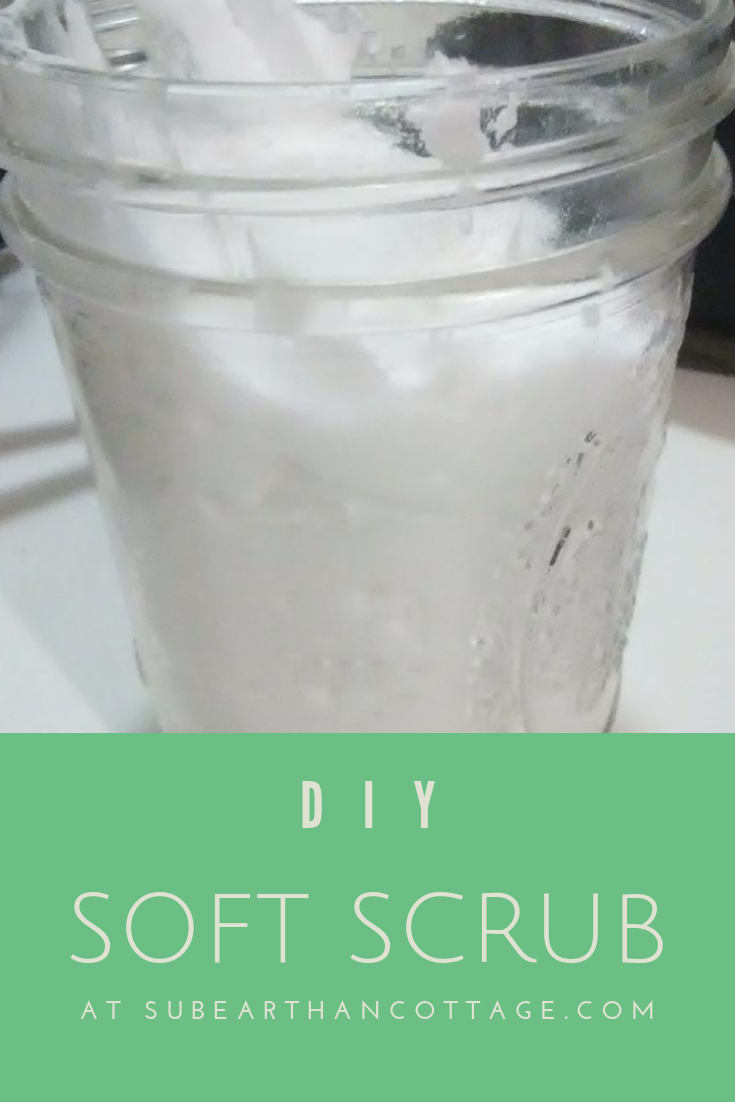
Soft scrub in a jar
Soft Scrub Ingredients
1 cup of baking soda
1/4 cup of liquid soap
1 tablespoon of hydrogen peroxide
Optional: 2-3 drops of essential oil
Instructions
Place all the ingredients into a big bowl and mix until a uniform paste forms. To store, I like to scoop it into a wide mouth canning jar, but any lidded container will work. The mix will expand, so use a container that allows for at least double the amount to be safe.
Mixing the soft scrub
Variations
Type of Soap
Liquid castile soap will work, but for extra cleaning power I prefer a detergent soap, like Dr. Bronner’s Sal Suds or even Dawn dish soap. You could probably get away with any liquid hand soap or liquefied bar soap, but I haven’t tried those yet. The only time I haven’t liked it was when I made it with Ajax dish soap because that is what I had on hand. I think there was something in the Ajax that reacted badly with the baking soda or hydrogen peroxide. That mixture was fluffier and had an odd smell. I’m not quite sure what it was that caused it, but because of that, I recommend staying away from any dish soap that advertise extra cleaning additives. For the soap, basic is better.
Scent
I rarely add any essential oils for fragrance. Usually the soap I have is already scented, so I don’t see the need. Really, unscented is fine, too, unless you just prefer a scent to signal that something is clean. If I were to add an essential oil, though, I would probably use either peppermint, lemon or tea tree oil. If you choose to use an essential oil, please be aware of safety guidelines for using them around children, pregnant women, pets, and other sensitive individuals.
How to use
To use, I scoop out a dollop of the soft scrub and apply a layer to the area I’m cleaning. I usually let it sit for a minute or two then buff it off with a rag. If there’s a residue left, I’ll either wipe it down with a damp rag or mist it with my all purpose vinegar, dish soap and water solution and wipe it clean.
Results
I almost forgot to take a before photo. This is an embarrassing photo of tomato sauce splatter left on my stove overnight.
Before using soft scrub to clean last night’s spaghetti sauce.
This is a photo of what it looks like after using my soft scrub and minimal elbow grease.
Shiny stovetop
I do apologize for the blurry photos. Lighting in my kitchen isn’t the greatest, and also I was in the middle of cleaning.
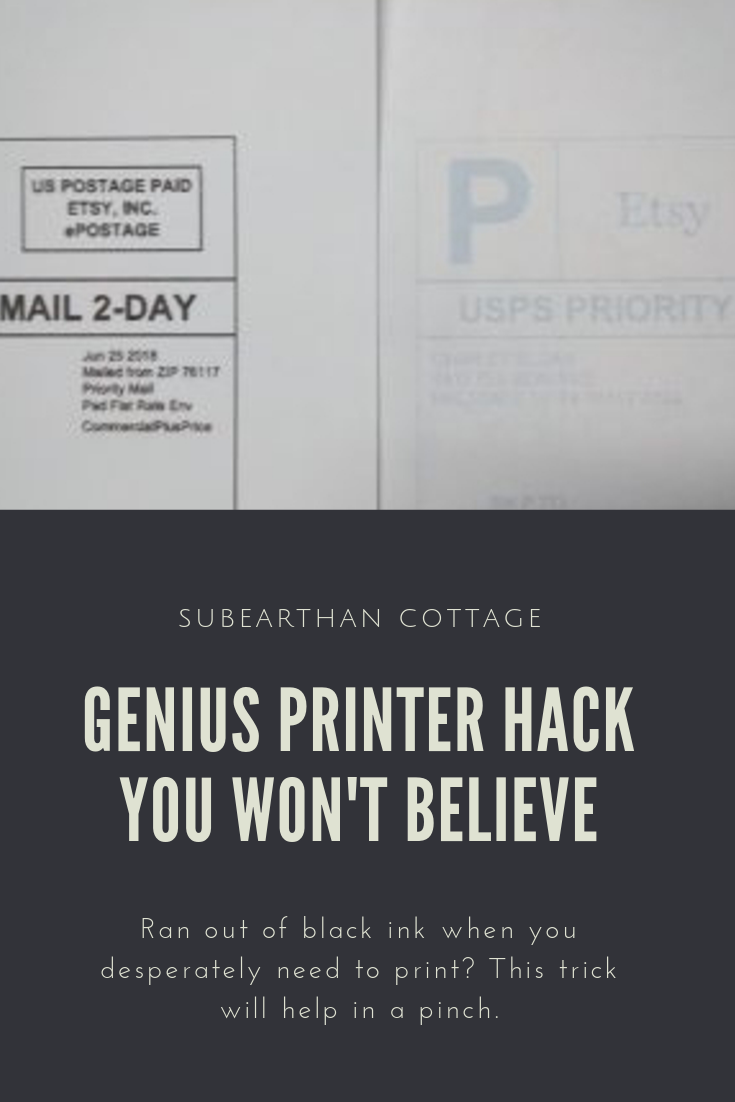
Have you ever had to print a paper or mailing label NOW and realized your black ink cartridge is out of ink? As much as I try to keep an extra on hand, sometimes I run out without a backup. Something I’ve found that works in a pinch is to simply remove the black ink cartridge. This forces the printer to use the color cartridge to print the document instead.
With and without the empty black ink cartridge removed.
The label on the right was my first attempt at printing a mailing label before realizing that I was overdue for a new black cartridge. The label on the right was printed with the black cartridge removed.
My printer will usually print one or two jobs this way without complaining, then I may have to put the old cartridge back in for a bit then remove it again if I need to print something else. Usually by that time I have been able to get a replacement cartridge.
It’s always better to be prepared, but in a pinch this trick works like magic. It has certainly saved me a rushed trip to buy ink on more than one occasion.
Even if you love sewing, there’s some parts that can be a chore. Ignoring those tasks or leaving them for later can result in wasted sewing time and money. Here’s a list of chores I try to tackle when I have a few minutes so that my real sewing time is spent actually sewing.
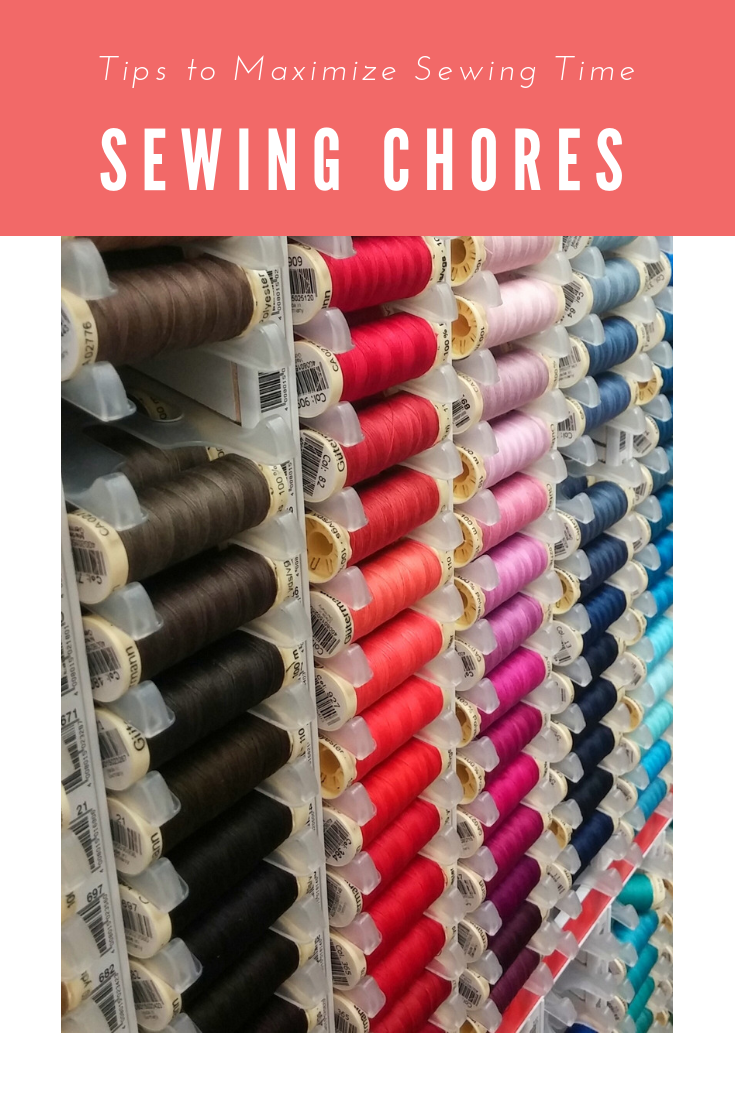
Bobbin winding
If you have a Side Winder, bobbin thread running out mid-project might not be a big hassle. If you rely on your machine to wind bobbins, though, running out means stopping your work, re-threading your machine to wind a bobbin and then setting it back up to sew. To prevent this headache, when you have a few spare moments, wind a few bobbins in your most commonly used colors. If you have a project in mind, wind a couple of bobbins in the needed colors. Keep extra bobbins on hand and wind at least one for every different thread color you have.
Pre-winding extra bobbins makes this notice less annoying.
Clean your machine
Lint, threads and dust build up over time and can cause poor stitch quality or even damage your machine. It’s a good idea to make a habit of brushing the debris out at the end of each project, or during projects with linty fabrics.
If the inside of your machine looks like this, you should probably clean it more often.
Periodically you’ll want to vacuum out your machine to really clean it. Vacuum attachments made for cleaning computers work well for this. Some people use canned air, but that’s not recommended. It pushes some of the debris deeper into your machine.
Oil your machine
Once your machine is thoroughly clean, take a moment to oil it according to your manual. This will keep it running smoothly and reduce the need for costly repairs. If you don’t have the manual, you can usually find one online.
After oiling, always sew a few rows on scrap fabric to soak up excess oil. That way, you won’t risk ruining a project with oil spots.
Tidy up
The best practice is to put away tools and excess fabric as you go. It’s easy to get distracted and forget, though. Taking a moment here and there to run through your sewing area to tidy up when you aren’t working on a project can save sewing time later.
Keep a shopping list
Nothing is more annoying than having to stop work because you ran out of a necessary supply. Make note of supplies that are low or that have run out on a notepad to take on your next shopping trip.
Prewash fabric
Unless you know your final project will never be washed, you should always prewash your fabric. One way to make sure this happens is to wash it as soon as you bring it home from the store. You could also work it into your usual laundry schedule. Having a prewashing routine prevents delaying a project or worse, giving in to the temptation to make something and have your final product ruined in the wash.
These are the chores that, for me, are the biggest sewing time-wasters when neglected. Please share your dreaded sewing chores and tips to keep them from becoming time-wasters in the comments.
I, Charity Sloan, am a participant in the Amazon Services LLC Associates Program, an affiliate advertising program designed to provide a means for sites to earn advertising fees by advertising and linking to Amazon.com. Any purchases through those links will result in my receiving a small percentage in commission.
This only refers to Amazon links found in/on my blog pages. All products in my shop are 100% mine and not linked to Amazon.
Prices are the same whether you click an affiliate link or a non-affiliate link, so you will not be charged more. Thank you for your support!