Posted on 1 Comment

Flavoring Your Kombucha Tea

When you get your homebrew timing right, kombucha is pretty yummy on it’s own. Sometimes you want something a little different, though. Or maybe straight kombucha just isn’t your thing but you still want the probiotic benefits. Luckily you can easily change the taste of your kombucha to make it more palatable or fix a soda craving. Here’s my tips for flavoring your Kombucha tea.


Mixing with juice


The simplest way to flavor kombucha is to mix it with juice or another beverage. This is a great way to get started drinking kombucha. To start, add 1-2 ounces of kombucha to a glass of your favorite juice. As your body and tastes adjust to drinking kombucha you can increase the kombucha to juice ratio.


I like to dilute 3-4 ounces kombucha with sparkling or still water, add a splash of lemon or lime juice and a bit of stevia. This makes a refreshing summer drink when served over ice.

Kombucha is also nice as an add in for smoothies. It can be fizzy on it’s own, though, so make sure to account for that when adding it to blended drinks. Leaving a little extra headspace in the blender is a good idea. Or, stir it in after everything else is blended.

Flavoring your Kombucha Tea
Flavored with peach and cherry teas in a second ferment.

Flavoring your Kombucha with a second ferment

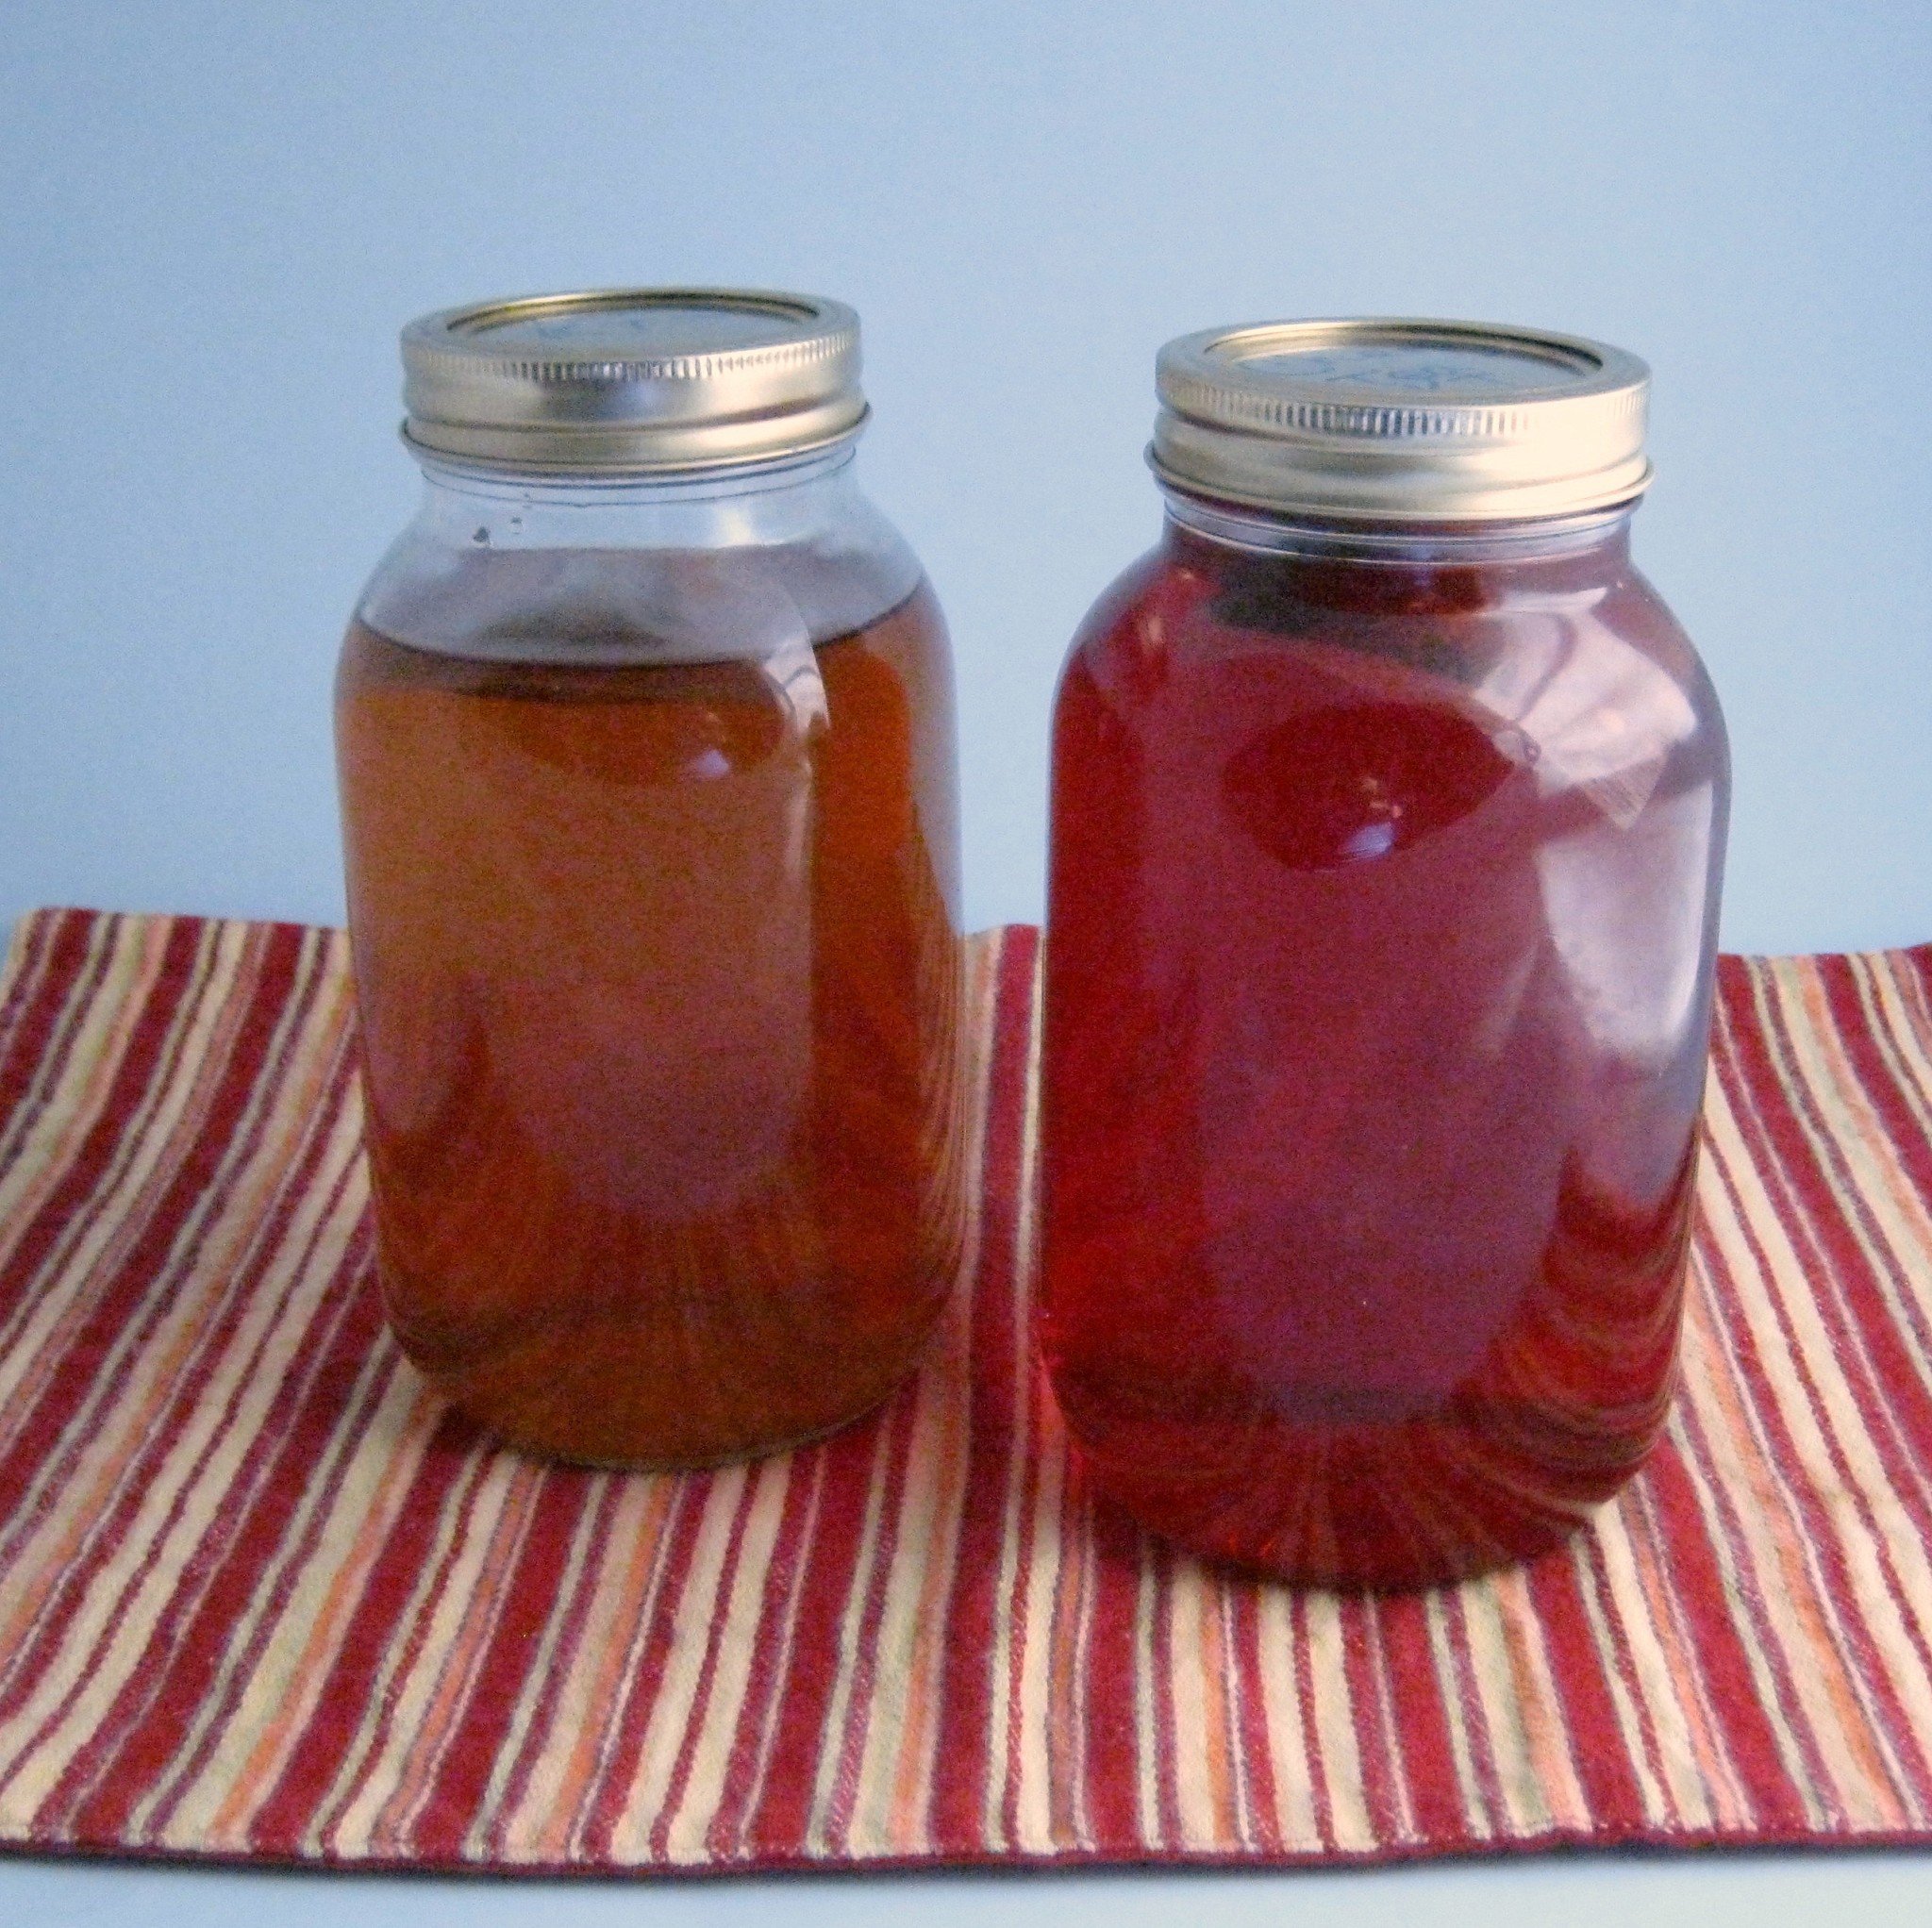
You can also add flavoring in a second, shorter ferment. Basically you’ll put your flavorings in a bottle or jar (I like canning jars), fill almost to the top with your brewed kombucha and cap the jar. Leave at room temperature for 2-4 days and then refrigerate or drink.


The second ferment can increase the carbonation in your kombucha, so it’s a good idea to be cautious when opening and storing the jars. I’ve never had a jar break from the pressure, but I have had the metal disks on canning jar lids pop up in the middle. If I think too much pressure is building up, I “burp” the jars by opening them just enough to release some of the pressure and recap.

There’s a variety of things you can add for the second ferment. Really, any herbs, spices or fruits can be added. If you want to increase the carbonation, add a little bit of sugar, honey, raisins or a sweet fruit. My favorite thing to do is put enough orange peel to fill the jar halfway, add a teaspoon of sugar or honey, top with kombucha and let it sit for two days. It makes a kind of healthier orange soda and uses something that would normally have been tossed.

Flavoring your Kombucha orange and honey
Orange peel and honey Kombucha

Other flavorings I’ve tried:

  • Lemons and limes cut into wedges, sliced or just the peels. You can also use a lemon or lime half after juicing it for another recipe.
  • Fresh sliced ginger, plain or with a dash of chai spice and squirt of honey.
  • Fruit flavored herbal teas, one bag per quart jar.
  • Blueberries.

If you brew your own Kombucha tea, I would love to hear your tips for flavoring your Kombucha. Please share them in the comments below.

Next week I plan to do a FAQ/kombucha myths post. If you have any questions please share them in the comments and I’ll do my best to answer them.

Like this post? To make sure you never miss a future post, please sign up for my newsletter.


Posted on 3 Comments

Kenmore 385 Sewing Machine Hook Timing Part 2 with Video

I finally got my Kenmore 385 sewing machine’s hook timing adjusted and working properly again. This time, I figured out that there is a plate on the bottom of my machine that allows me to access the necessary set screw without taking the case off. I do think it’s a little more difficult to see what I’m doing that way, but it’s much less scary.

This time, once I got it adjusted, I decided to make a quick (awkward, one handed) video while I still had it open. Hopefully the video and my previous post will help others tackle this simple sewing machine repair.

Adjusting the Hook Timing on a Kenmore 385 Sewing Machine

Shop update: Freebies and a sale

Knowing that so many are stuck at home right now needing distractions, I’ve decided to make all of my machine embroidery design files free until April 30. That’s the day my area’s shelter in place order expires. If it is extended, I’ll extend the embroidery design freebies, too. If you make something with one of my designs, I would love to see it.

My full shop is still open, and will be as long as everyone in my household is healthy. I’m using extra care with handwashing and using hand sanitizer before coming into contact with products and packaging as well.

All of my handmade soaps are currently on sale for 20% off. You can find them here.

Like this post? To make sure you never miss a future post, please sign up for my newsletter.

Kenmore 385 Sewing Machine Hook Timing Part 2 with Video
Posted on 4 Comments

Sewing machine repair: Hook timing

I’ve been sewing lots of masks lately. Apparently my sewing machine needed a break, so it decided to skip time again. Thankfully I’ve done it a few times now, so I should have it up and running soon.

Hook timing is a fairly common problem that sends many sewers running to the repair shop. When it happened the first time on my older Kenmore, I decided to try to repair it myself first. My thinking was, since it’s a mechanical machine with mostly metal parts, as long as I was careful, I couldn’t really hurt anything. I probably would have thought twice before attempting it on a computerized machine.

All machines are a little different, so what worked on mine may not work on yours. Something I recommend to everyone who wants to work on their own sewing machine, is getting a copy of the service manual. Honestly, I still need to do this. There’s tons of info online, but having the actual service manual is even better. You should have an owner’s manual on hand, too. It  covers basic care and maintenance. For repairs, though, the service manual will give you technical instructions and confidence. 

Hook Timing?

Before taking things apart, determine if hook timing is causing the problem. If the needle (top) thread isn’t picking up the bobbin (bottom) thread, hook timing is a prime suspect. It’s always a good idea to rule out simple problems first, though. Try swapping the needle, rethread the machine and sew on some scrap fabric. If it’s been a while since you’ve dusted the lint out of the bobbin case or you’ve been sewing on linty material, give it a good cleaning.

Once you’ve tried the easy fixes, if it still isn’t working right, look at how the needle and the bobbin hook intersect. This page, https://tv-sewingcenter.com/general/sewing-machine-timing-hook-timing, has illustrations, photos and descriptions for where they should meet on both rotary and oscillating machines. 

Taking a look at my oscillating hook.

My machine is an oscillating machine, so the hook tip should pass just above the eye of the needle. Mine was passing below the needle’s eye, so clearly the hook timing needed adjustment.

Open it up

The first and honestly the hardest step was figuring out where all the screws were that I needed to remove to take off the casing. (Actually, the first step was to turn off and unplug the machine. If you’re attempting this at home, do not skip this step!) On my Kenmore, I have to take off the side by the hand wheel, a plate on the bottom, and the front panel. 

More cleaning

While I have my machine open, I like to take the opportunity to clean it out and oil it. Oiling a linty machine, using the wrong oil or putting it in the wrong places can cause tons of problems, though, so if you’re not sure, stick to dusting only.

Find and adjust

Next, I tilted the machine on to it’s back so I could get a good look at the mechanism that rotates the hook. Once I had isolated that, I found a hex head set screw. Loosening that allowed me to gently adjust the hook position so that the tip passed just above the needle’s eye.

About in the middle, just above the motor is a silver piece with a round, black screw near the top. That is the set screw I loosened to adjust the hook timing.

When I was sure I had it properly positioned, I tightened the set screw. I turned the hand wheel a few more times, making sure everything still looked good before I put the casing back. A quick test run showed everything was working properly again.

Done!

It’s so satisfying to be able to make simple repairs to my machines myself, especially when most repair shops start around $75 and go up from there, depending on what needs to be done. 

Hook timing

Posted on Leave a comment

Easy Paper Towel Replacement with Upcycled Reusable Cloths

Relying on paper towels to clean up spill after spill stinks. Sure, it’s not so eco-friendly, but, even more immediately distressing to me, at least, is it’s practically throwing money away. Plus, a paper towel is usually not as good at cleaning up a mess.

There’s always the option of buying a huge supply of kitchen towels and cloth napkins, but the initial cost of buying enough to keep up with a toddler’s destructive capabilities is off-putting to say the least. Retiring old clothes, sheets, etc. to rags is a viable and frugal option, not to mention you’re upcycling (or is it recycling? or repurposing?). I don’t really mind just using scraps as rags, but I prefer something a little more aesthetically pleasing, especially if guests are involved.

There’s also the convenience factor to consider. I have limited storage space, so devoting a kitchen drawer or part of a cabinet to hold all the towels isn’t practical. Neither is a basket on the counter, because counter space is even more limited.

My reusable paper towel solution

Here’s my solution. First, I cut up any appropriate worn fabric (t-shirts, flannel sheets, old bath towels, anything soft and absorbent) to whatever size I want. I started with something close to paper towel size but then started cutting some smaller to make more use of the fabric. Then I serged the edges to make them pretty. You could also do a zig-zag, overcast stitch or even just a straight stitch a little in from the edge on a sewing machine. If you are really ambitious you could do a real hem. I’m going for nice but quick to do in bulk. Any edge finishing is unnecessary for t-shirt knits, but they will be more durable being finished. Wovens like flannel will need something to keep them from fraying.

Easy storage with limited counter space

For the storage, I made a hanging tube similar to a plastic bag dispenser. If you have one of those around it will probably work perfectly. If not, there are tons of tutorials for them floating around. The basic design is a tube of fabric with a handle at the top and elastic at the bottom. The elastic tightens the opening enough to keep the towels/bags from falling out. This solves my lack of space problem because I can hang it anywhere and it’s as easy as pulling a paper towel off a roll. They stay in and dispense better if I just shove them in the top without folding them, so no extra laundry folding time.

Un-paper towel dispenser
IMG_4535

This was my quick nap-time prototype. I made it out of half a t-shirt. You can easily make one out of any fabric to match your décor.

I also made a little tote bag to hang in the kitchen to put the dirty towels in. Unless they are really gross or soaking wet, there’s no reason to keep them separate from the rest of the laundry.

Since making these, I have almost eliminated my need for paper towels. I do try to keep a roll on hand in case the cats do something gross because eww. I have to hide it, though, to keep other people from reaching for them out of habit.

If you need some heavier cleaning cloths, double up the fabric. To use up smaller scraps of flannel, finish the edges of small squares to use in place of cotton balls.

Like this post? To make sure you never miss a future post, please sign up for my newsletter.

Posted on Leave a comment

T-Shirt to Yoga Shorts Refashion

If you’re new to refashioning or sewing clothing in general, loungewear is a great place to start. It’s less intimidating because, since you’ll only be wearing it at home, it doesn’t have to be perfect. This refashion project is perfect for a beginner because you only need two t-shirts to make it, and it’s mostly straight lines or slight curves.

I originally shared this tutorial a few years ago, before Thaddeus. The weather is beginning to warm up , so it’s a great time to sew some shorts.


I went on a little Pinterest binge a couple days ago looking for ideas to help clear my refashion stash. Saturday night I decided to make a pair of yoga pants out of a t-shirt using this tutorial. I wear a size eight on average, and used an XL adult t-shirt.

Adaptations from the original refashion project

I did make a few changes to the design. First, instead of cutting the shirt down the middle, I cut it down the sides from the middle of the underarm to the hem. This also means you’ll have an inseam and no side seams. That keeps any design on the front or back intact and moves them to the hips.

For the waistband, I cut the underarm seam from the sleeves and squared them up to be two equal rectangles, leaving the hem intact. I sewed the short sides together making a big, short tube from the sleeves. I then put the tube inside the waist of the pants with the pants right side out and the right side of the tube facing the inside of the pants. The raw edge of the tube lines up with the raw edge of the pants. I serged the top together like that. This made it so when the tube is folded down to the outside, the seam is covered.

T-shirt yoga pants refashion
IMG_4452
IMG_4459
Sorry for the awkward pictures. No one was around to take the pictures and Doctor Who was about to start.

I sewed it all on my serger. The entire refashion project took less than ten minutes. I probably should have added two minutes and switched from white to black thread. Or not.

If you don’t have a serger, you can use a zig-zag stitch to prevent breakage. Many sewing machines have specialty stitches for sewing knits, too, so check your machine to see if that is an option. This DIY T-Shirt Bag Tutorial has more information on stitch selection for knits.

Final verdict

They are a little loose at the waist. If I were planning to actually do yoga or wear them in public I should probably add some elastic at the seam. Since they will probably be used mainly for watching Doctor Who while sitting on the sofa, I probably won’t bother.

I personally don’t mind the length, but you could easily make them shorter by cutting them off to the length you prefer. Knit doesn’t unravel, so you can leave the edges raw, or turn them under and hem.

To make sure you never miss a post, please sign up for my newsletter.

T-shirt to yoga pants refashion

If you click through any of the Amazon links and make a purchase, I will receive a small commissionThere is no added cost to you.

Posted on 3 Comments

Easy All in One Electric Pressure Cooker Meal

For busy weeknights, there’s nothing better than an all in one meal that practically cooks itself. Prepare everything the night before and keep it in the refrigerator until it’s time to cook for even more time in the evening. You could even prep the vegetables and meat and store in the freezer for last minute meals.

The basics

This is more of a how-to than a recipe. You can really use however much of the ingredients based on how much food you need and your pressure cooker’s size. For my family of five with two little appetites, I used about four chicken breasts, three cups of rice and water, one jar of sauce and all the broccoli I could squeeze in and around everything.

You can easily swap out the protein for whatever you prefer. Ideally, it should be cut into small, bite sized pieces prior to cooking. With the chicken breasts, I’ve been able to cook them from frozen first and cut them later, but it’s not ideal.

This time, I used broccoli, but it was a little overdone for my liking. Root vegetables cut into bite sized pieces or frozen peas or green beans are probably better for all in one meals like this.

The sauce

To make it super easy, I started with a jar of Korma simmer sauce from Aldi. You could easily substitute any store bought or homemade sauce. Canned soup, salsa, tomato sauce or even just broth are all options. Tailor it to your family’s tastes.

Assemble the ingredients

I used an old rice cooker pot for the rice. Any heatproof container that is big enough to hold the rice and cooking liquid but small enough to fit in your pressure cooker’s cooking pot would work.

I put the chicken and broccoli under and around the rice pot. Then I filled the rice pot with appropriate amounts of rice, water and salt.

The Korma went on top of the broccoli and chicken, and I added about half a cup of water just to make sure there was plenty of liquid. If you use broth or a thinner, liquid sauce, the water isn’t necessary.

Cooking

Finally, I set the whole thing in my pressure cooker and cooked it with the “Rice” setting. My electric pressure cooker is a GoWISE USA brand. Recipes for the Instant Pot brand usually work as written for mine, so I assume that setting would work for the Instant Pot and other similar pressure cookers.

Here is a terrible picture of the end result. I promise it tasted better than it looks. A homemade sauce would have been healthier, I’m sure. When you are strapped for time or having to make do without a fully functioning kitchen, though, it’s lots better than having to rely on fast food.

Like this recipe? Sign up for my newsletter to never miss future tips, tutorials and recipes.

All in one Electric Pressure Cooker Meal
Posted on Leave a comment

Easy! 5 Steps to Clean Small Felt Toys.

Making felt toys and accessories has been a bit of an obsession for me lately. They’re cute and easily customized with my Brother embroidery machine.

Felt finger puppet toys
Dog, daughter and mother finger puppets waiting to be cut out.

I was concerned that I didn’t know the best way to clean them so I could share that information with my customers. Luckily (HA!) it didn’t take Thaddeus long to soak the finger puppet set I gave him for his birthday in a smoothie.

Washing them in the washing machine on cold and air drying was a possibility. I think that would work, but I worried about them getting distorted, fuzzy or lost with all the socks that go missing. Plus, Thadd was very anxious to see that they weren’t ruined, so the quicker I got them clean, the better.

Here’s the steps I used to clean his felt finger puppets:

  1. Fill a large bowl about halfway with lukewarm water.
  2. Add a drop of dish soap.
  3. Place the felt finger puppets into the water and gently swish. Heavily soiled items may need to soak for 5-10 minutes.
  4. Rinse with lukewarm water to remove any soap residue.
  5. Press the excess water out between towels and lay flat to air dry.

This method should work well for any small toys without a lot of stuffing, as well as for my felt snap clip covers. I would remove the metal barrette for the snap clips first. In general, I think the keys to keeping them looking like new after washing are making sure the water isn’t hot, minimal friction and air drying.

Finger puppets

All of the finger puppets seen below can be found here: https://subearthancottage.com/?s=finger+puppets&post_type=product Felt and thread colors are customizable. Purchases of five or more come with a random print drawstring bag for storage.

Felt snap clips

All of my felt snap clips are found here: https://subearthancottage.com/?s=snap+clips&post_type=product