When you get your homebrew timing right, kombucha is pretty yummy on it’s own. Sometimes you want something a little different, though. Or maybe straight kombucha just isn’t your thing but you still want the probiotic benefits. Luckily you can easily change the taste of your kombucha to make it more palatable or fix a soda craving. Here’s my tips for flavoring your Kombucha tea.
Mixing with juice
The simplest way to flavor kombucha is to mix it with juice or another beverage. This is a great way to get started drinking kombucha. To start, add 1-2 ounces of kombucha to a glass of your favorite juice. As your body and tastes adjust to drinking kombucha you can increase the kombucha to juice ratio.
I like to dilute 3-4 ounces kombucha with sparkling or still water, add a splash of lemon or lime juice and a bit of stevia. This makes a refreshing summer drink when served over ice.
Kombucha is also nice as an add in for smoothies. It can be fizzy on it’s own, though, so make sure to account for that when adding it to blended drinks. Leaving a little extra headspace in the blender is a good idea. Or, stir it in after everything else is blended.
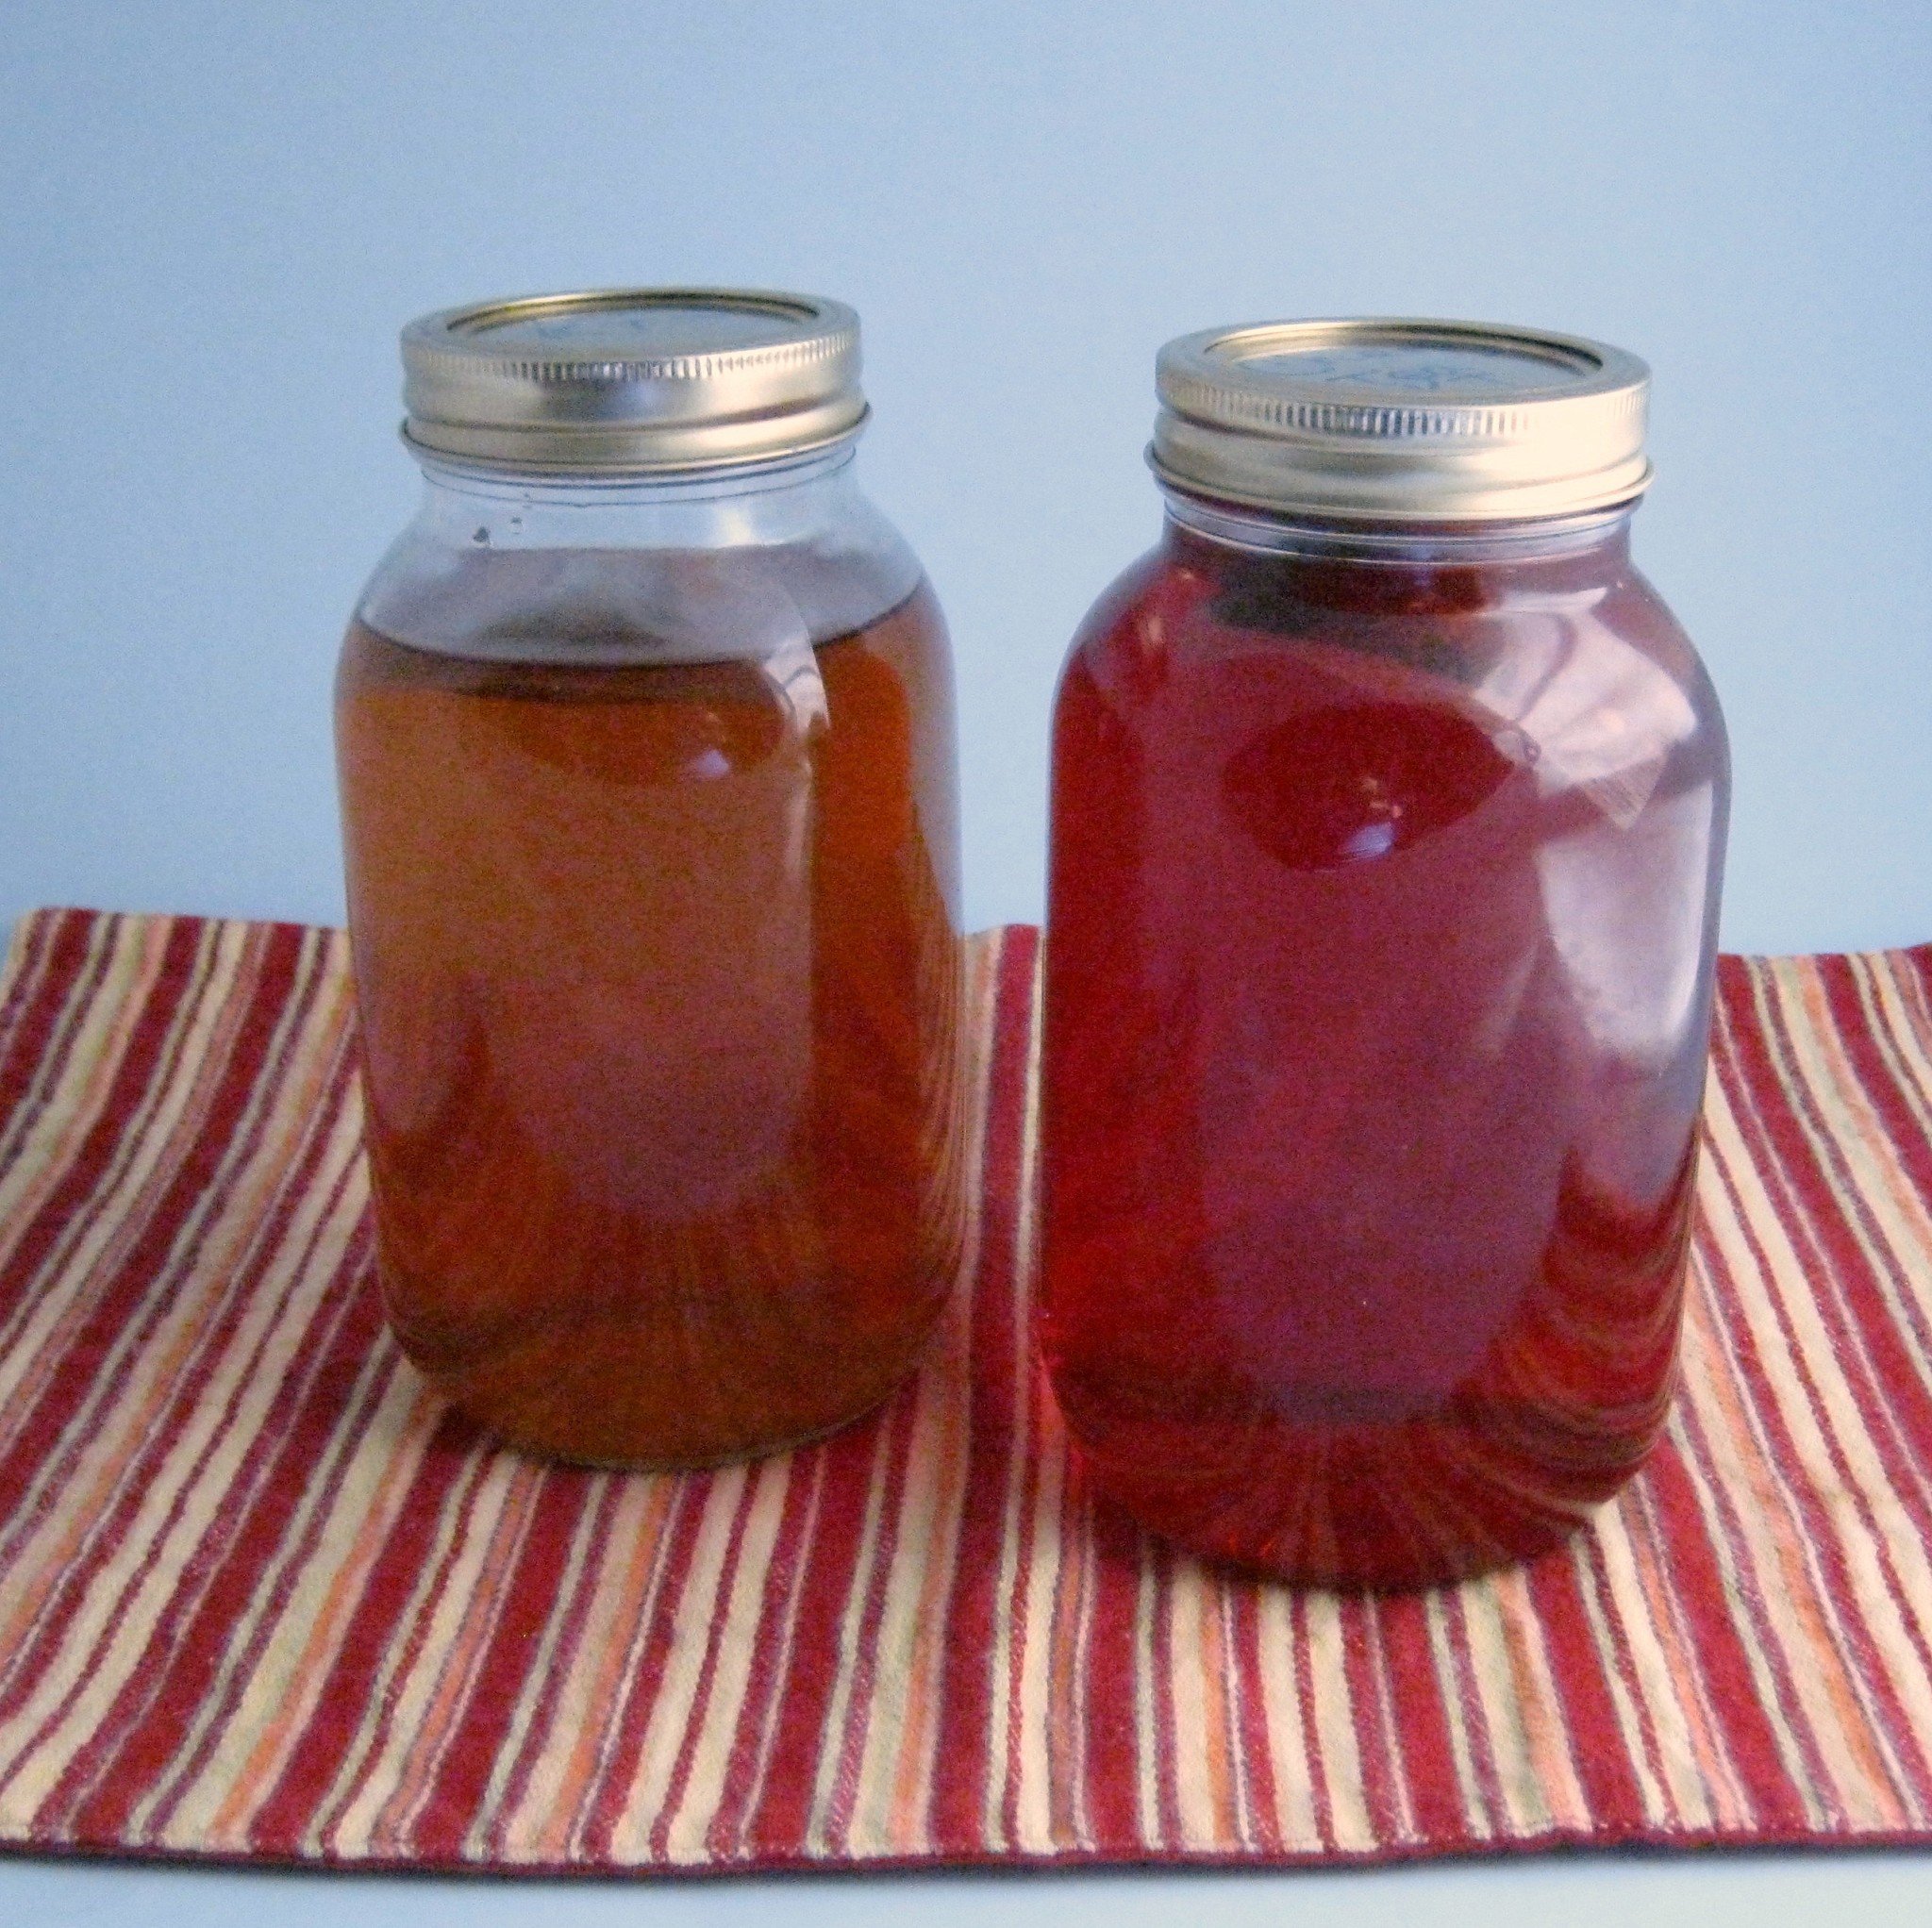
Flavored with peach and cherry teas in a second ferment.
Flavoring your Kombucha with a second ferment
You can also add flavoring in a second, shorter ferment. Basically you’ll put your flavorings in a bottle or jar (I like canning jars), fill almost to the top with your brewed kombucha and cap the jar. Leave at room temperature for 2-4 days and then refrigerate or drink.
The second ferment can increase the carbonation in your kombucha, so it’s a good idea to be cautious when opening and storing the jars. I’ve never had a jar break from the pressure, but I have had the metal disks on canning jar lids pop up in the middle. If I think too much pressure is building up, I “burp” the jars by opening them just enough to release some of the pressure and recap.
There’s a variety of things you can add for the second ferment. Really, any herbs, spices or fruits can be added. If you want to increase the carbonation, add a little bit of sugar, honey, raisins or a sweet fruit. My favorite thing to do is put enough orange peel to fill the jar halfway, add a teaspoon of sugar or honey, top with kombucha and let it sit for two days. It makes a kind of healthier orange soda and uses something that would normally have been tossed.
Orange peel and honey Kombucha
Other flavorings I’ve tried:
Lemons and limes cut into wedges, sliced or just the peels. You can also use a lemon or lime half after juicing it for another recipe.
Fresh sliced ginger, plain or with a dash of chai spice and squirt of honey.
Fruit flavored herbal teas, one bag per quart jar.
Blueberries.
If you brew your own Kombucha tea, I would love to hear your tips for flavoring your Kombucha. Please share them in the comments below.
Next week I plan to do a FAQ/kombucha myths post. If you have any questions please share them in the comments and I’ll do my best to answer them.
Like this post? To make sure you never miss a future post, please sign up for my newsletter.
I finally got my Kenmore 385 sewing machine’s hook timing adjusted and working properly again. This time, I figured out that there is a plate on the bottom of my machine that allows me to access the necessary set screw without taking the case off. I do think it’s a little more difficult to see what I’m doing that way, but it’s much less scary.
This time, once I got it adjusted, I decided to make a quick (awkward, one handed) video while I still had it open. Hopefully the video and my previous post will help others tackle this simple sewing machine repair.
Adjusting the Hook Timing on a Kenmore 385 Sewing Machine
Shop update: Freebies and a sale
Knowing that so many are stuck at home right now needing distractions, I’ve decided to make all of my machine embroidery design files free until April 30. That’s the day my area’s shelter in place order expires. If it is extended, I’ll extend the embroidery design freebies, too. If you make something with one of my designs, I would love to see it.
My full shop is still open, and will be as long as everyone in my household is healthy. I’m using extra care with handwashing and using hand sanitizer before coming into contact with products and packaging as well.
All of my handmade soaps are currently on sale for 20% off. You can find them here.
Like this post? To make sure you never miss a future post, please sign up for my newsletter.
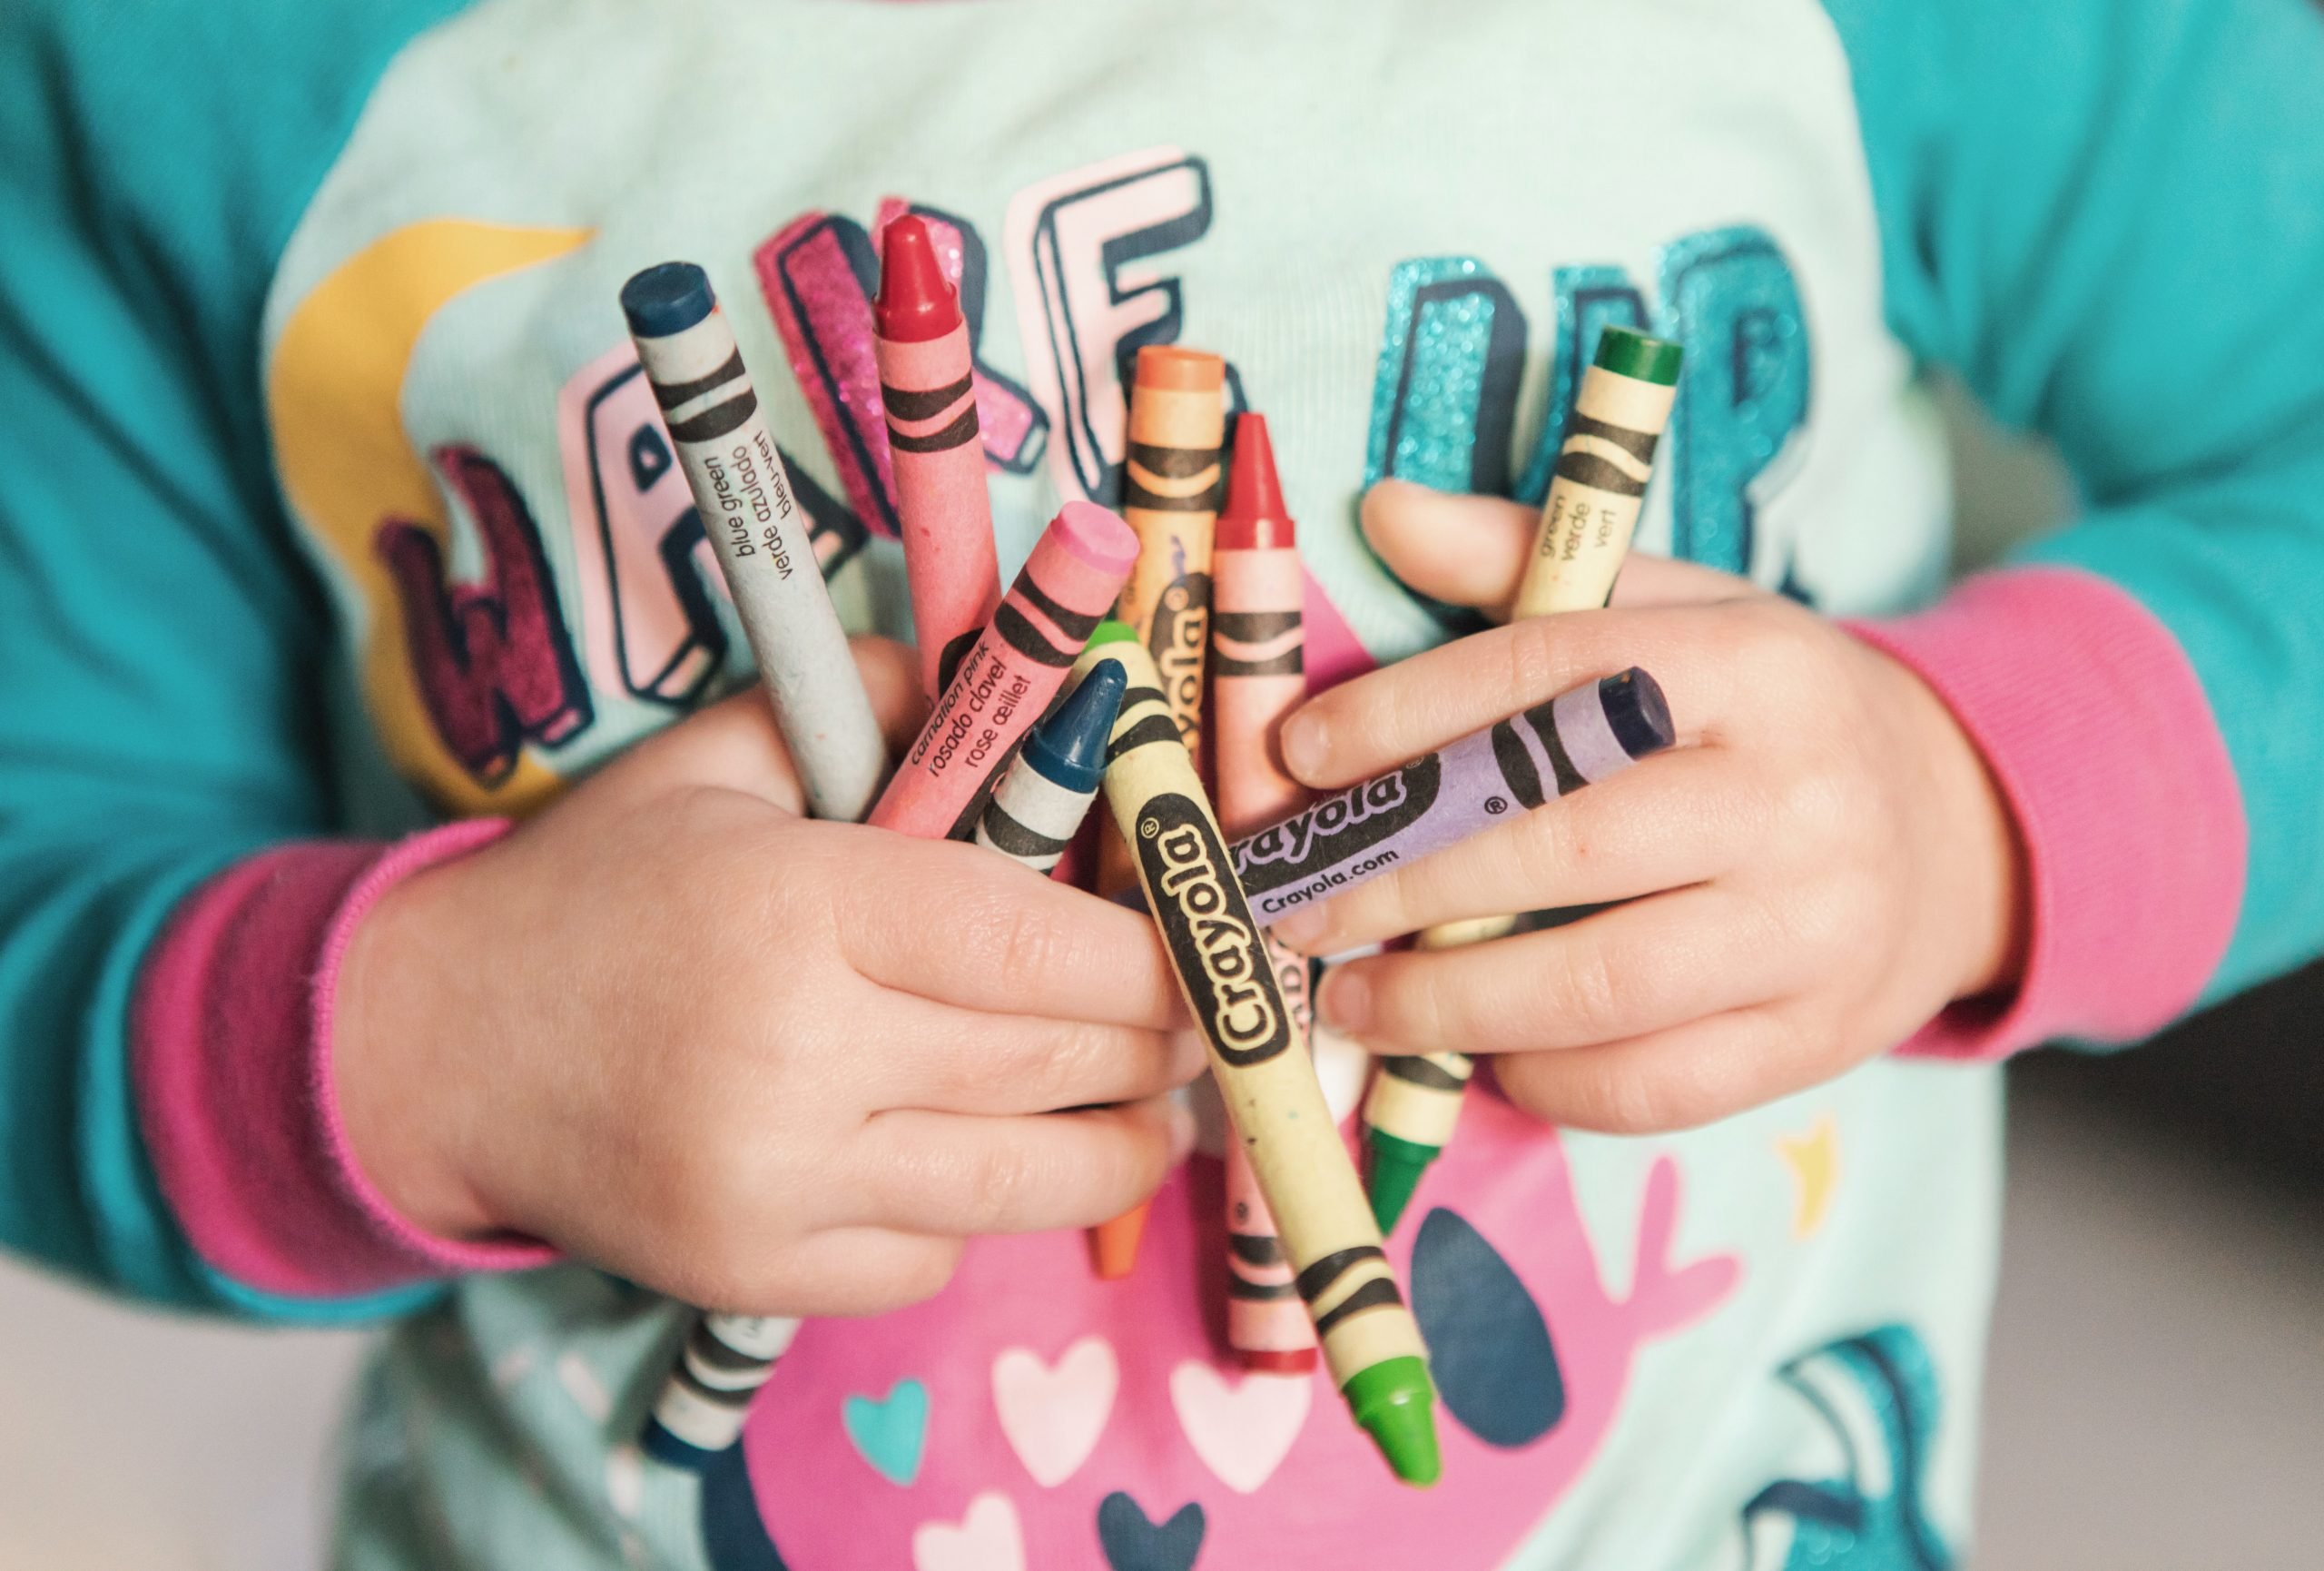
I originally shared this tutorial for rainbow cupcake crayons almost ten years ago when Finn was my little preschooler and I made rainbow cupcake crayons for him using all of our broken crayons. It’s easy, and you can get little ones to help with peeling the paper off of the broken crayons, and they get fun new crayons to play with once they have cooled.
Unfortunately my photos of our project got lost, but a quick Etsy search shows lots of examples of similar multicolored crayons in fun shapes. If you like the idea but don’t have tons of broken crayons around, consider supporting one of the shops on Etsy by purchasing from them.
Photo by Kristin Brown on Unsplash
DIY Rainbow Cupcake Crayons Tutorial
Line a muffin pan with foil or a double thickness of cupcake liners. (Note: The wax will likely melt through, so you probably want to use a pan that you reserve for non-food projects.)
Remove all the paper from your crayons.
Break into smaller pieces if needed. I just broke them as small as I could with my fingers. Most pieces were about an inch long or smaller.
Sort the pieces into the lined cups. I sorted by color, but you could also mix for super swirly crayons.
Fill the cups to the top but don’t overfill.
Melt in the oven at about 200-250 degrees F. I recommend setting a baking sheet under the muffin pan. You really don’t want to have to scrape melted crayon off your oven.
Check about every 10-15 minutes. I let them cook until there were just a few solid chunks in the middle. Then I gently swirled them with toothpicks to sink the chunks and blend the colors.
When they are sufficiently melted, turn off the oven. You can carefully remove them at this point or let them cool in the oven. I didn’t need my oven, so I let them cool in there overnight.
Once they’ve cooled completely you can remove the papers and color away.
Mask Update
I made a few of the fitted masks I mentioned in Wednesday’s post. Overall, I think they fit well, but they are a little tedious to make, particularly if you have lots of interruptions.
Awkward photo of me modeling a fitted mask.
I looked into it a little more and found that it seems more hospitals are asking for a more simplified mask, so I’m switching to ones made by this tutorial. With batch cutting and then sewing two or three assembly line style, I can make 3-4 in a hour, even with interruptions.
Shop update: Freebies and a sale
Knowing that so many are stuck at home right now needing distractions, I’ve decided to make all of my machine embroidery design files free until April 7. That’s the day my area’s shelter in place order expires. If it is extended, I’ll extend the embroidery design freebies, too. If you make something with one of my designs, I would love to see it.
My full shop is still open, and will be as long as everyone in my household is healthy. I’m using extra care with handwashing and using hand sanitizer before coming into contact with products and packaging as well.
All of my handmade soaps are currently on sale for 20% off. You can find them here.
Like this post? To make sure you never miss a future post, please sign up for my newsletter.
Several weeks ago, I got an email talking about DIY cloth face masks. It provided a link to a free pattern. Honestly, I thought it was kind of silly. From what I’d heard, N95 masks were the only masks able to do anything against COVID-19.
A few days ago, I saw posts about people making masks and donating them to healthcare providers and nursing homes. Again, I was skeptical. If N95 masks were the only masks able to filter COVID-19, surely making cloth masks was just something that made people feel like they were doing something productive with little actual value. Still, I decided to look into it. As it turns out, cloth masks, while not as good as N95 masks, do offer some protection.
What protection can a DIY cloth face mask offer?
During my research, I frequently saw a Cambridge University study referenced. This page at smartairfilters.com gives a good overview of the study. In a nutshell, various household materials and fabrics offer protection ranging from 49%-86% against particles smaller than the coronavirus. At the top end are vacuum cleaner bags, but they are difficult to breathe through.
The more common types of materials used in DIY masks, such as cotton fabric, t-shirt blends and dish towels offer 57%-73% protection in a single layer. Using two or more layers increases the protection, but the increased protection varies by fabric.
Overall, it’s clearly not as much protection as an N95 mask, but a DIY cloth face mask does offer some protection. Any reduction in exposure will reduce your chances of getting sick, from COVID-19 or any other bugs out there. I’ve also heard that first responders and healthcare providers are using cloth masks over the N95 masks. This allows them to change the cloth mask and reuse the N95 masks longer. Different hospitals and healthcare providers have different needs and preferences, so if you decide to make some to donate, check first.
What I’m doing.
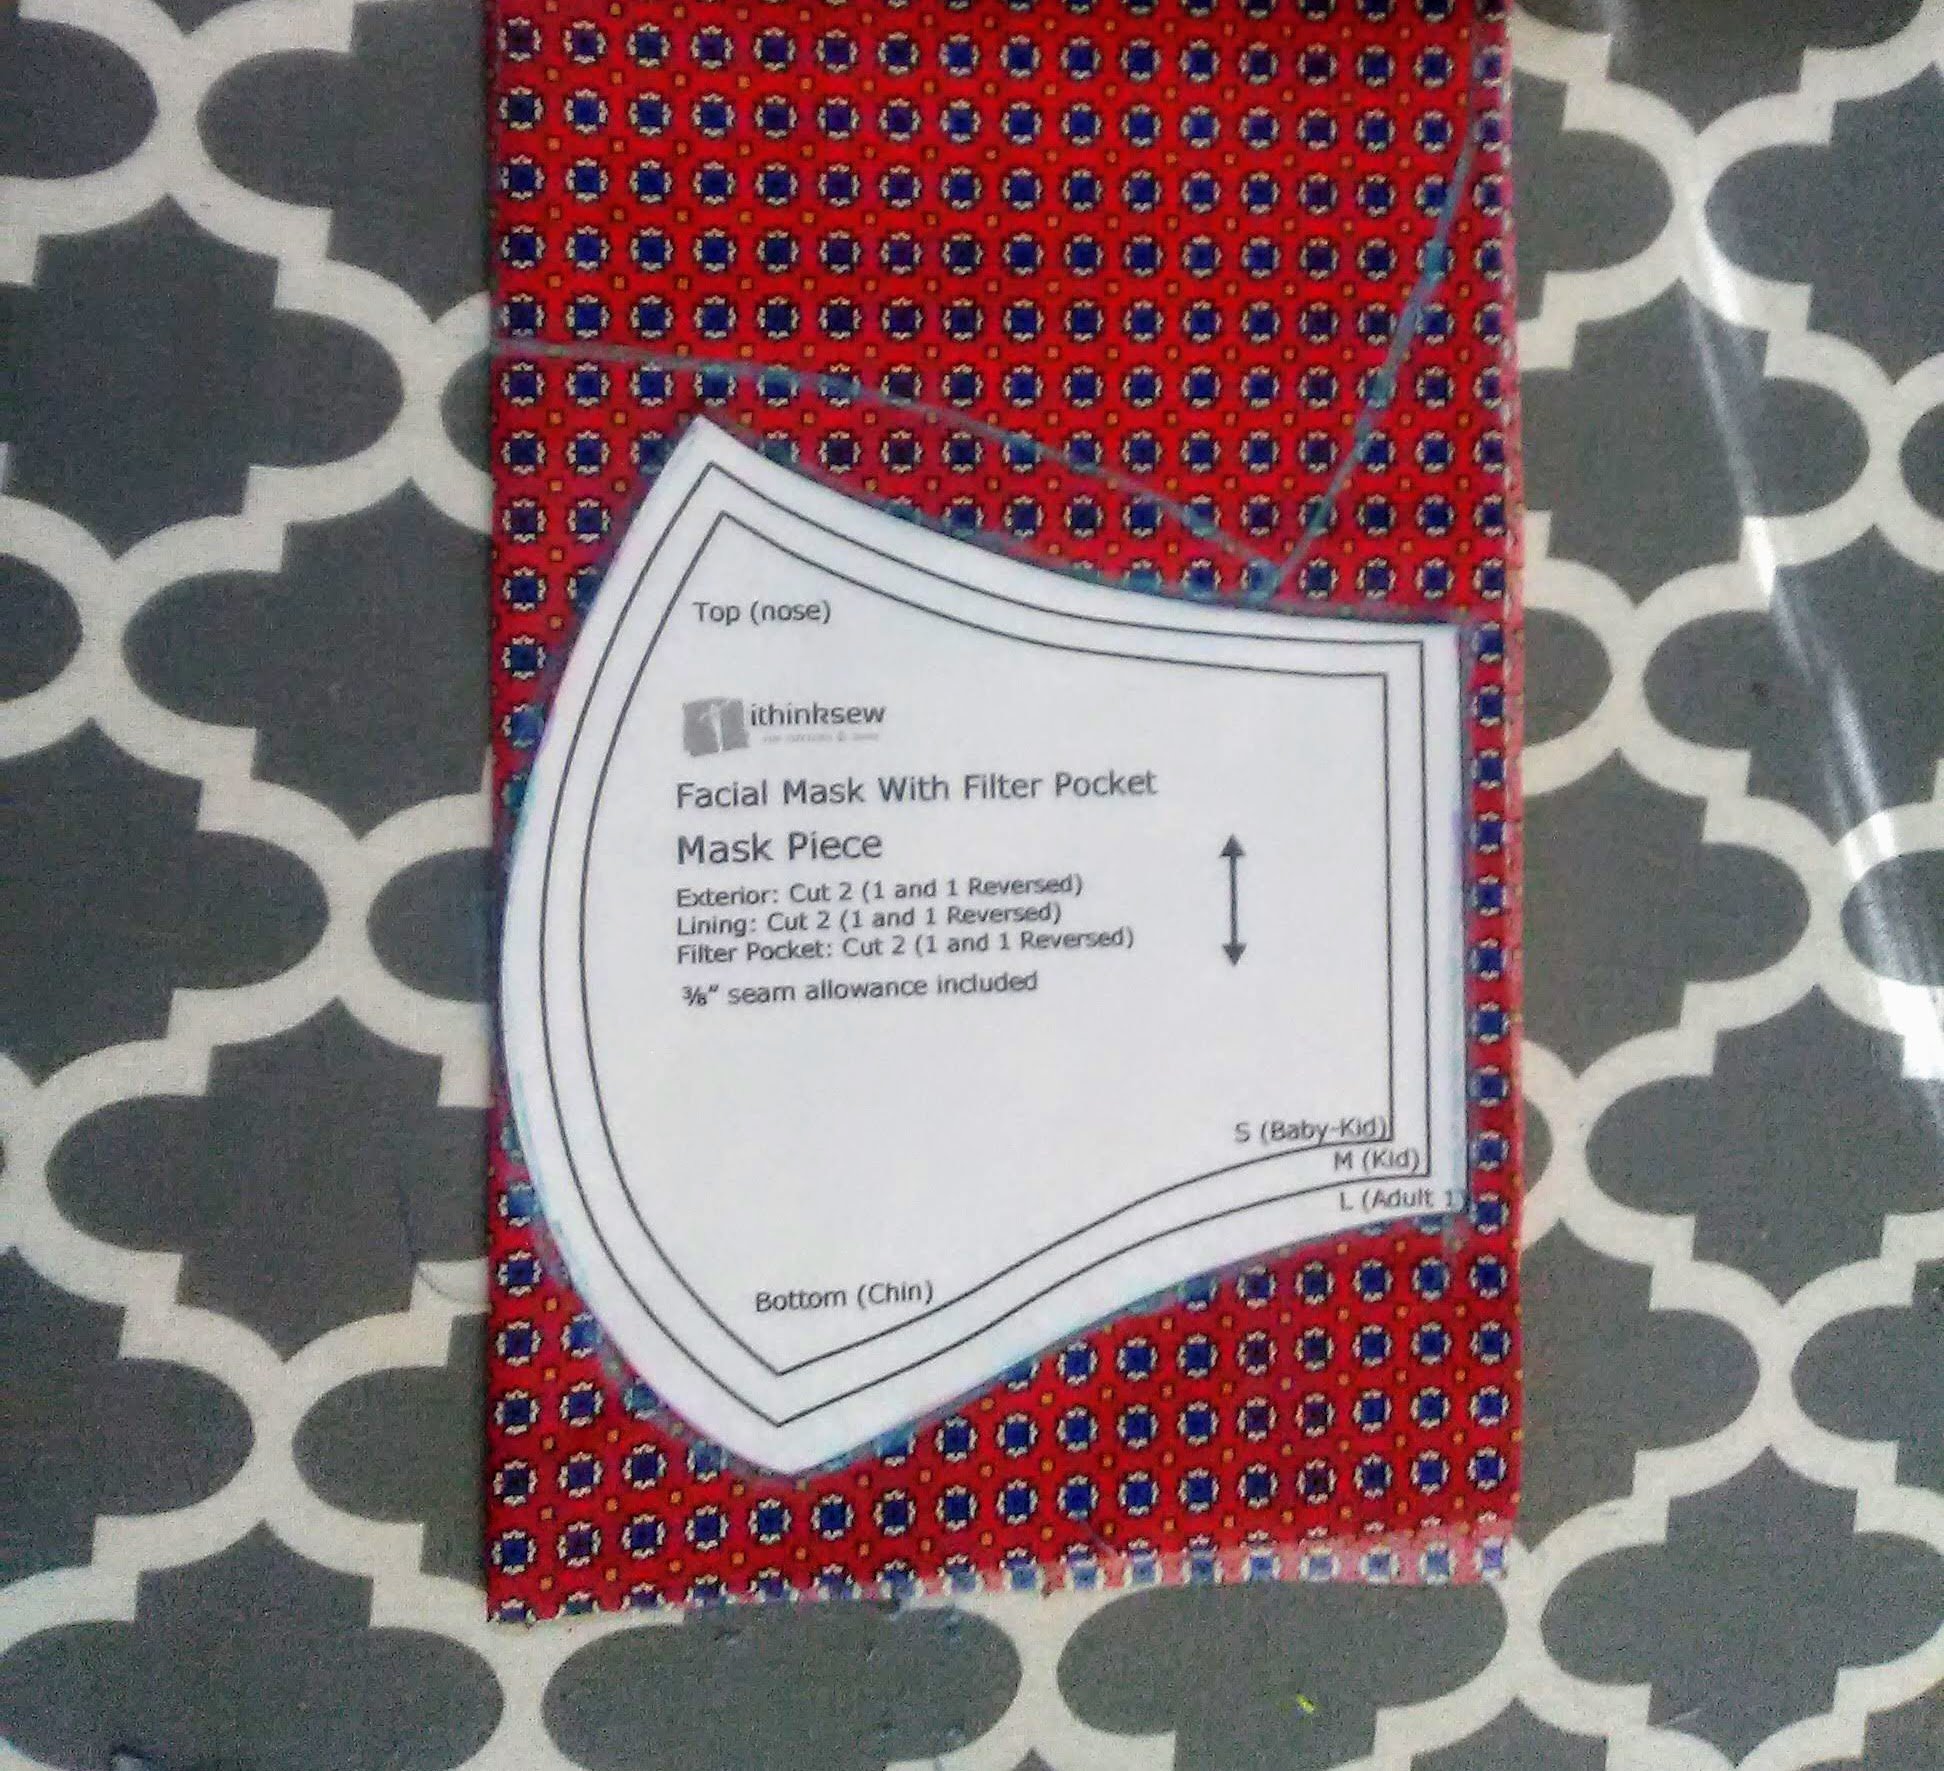
After debating and seeing interest among friends and family, I’ve decided to make a few to start. I’m using the more finished mask design from IThinkSew’s free patterns as my starting point. They also have a simplified pattern designed to be easy enough to sew by hand.
I am planning to swap the ear elastics for ties that go behind the head. I’m making that change based on seeing complaints that ear elastics are uncomfortable if used for long periods and can dislodge hearing aids. Cloth is also able to withstand higher heat than elastic, so swapping the elastic for ties allows the masks to be washed at higher temperatures. Elastic can also wear out quickly if it’s being put on, taken off and washed frequently, so cloth ties should prolong the usefulness of the mask.
The pattern I’m using has two layers and a filter pocket, making it three layers in total. Alone, it should offer some protection. For added protection, though, I’ve been looking at different filter materials. The one that seems most readily available to me is embroidery stabilizer. It has similar properties to other filter materials and is washable. There isn’t a ton of information on it as a filter substance, but I am seeing other people using it as well. It’s similar to but lighter than vacuum bags (if using cut away or tear away), and the content is the same or similar to what is used in surgical masks.
I’m not sure how many masks I’ll make. I plan to start with the people I know that have shown interest and go from there.
The IThinkSew mask patterns don’t have written instructions, but they do have fairly detailed videos for both mask designs. If you’re making masks using that pattern and having problems, please comment with your questions and I’ll try to help. I’ll try to help with other patterns, too, but I might be less helpful without my own hands-on experience.
Other sewing projects.
Knowing that so many are stuck at home right now needing distractions, I’ve decided to make all of my machine embroidery design files free until April 7. That’s the day my area’s shelter in place order expires. If it is extended, I’ll extend the embroidery design freebies, too. If you make something with one of my designs, I would love to see it.
Like this post? To make sure you never miss a future post, please sign up for my newsletter.
Embroidery Files
Embroidery design files and freebies from SubEarthan Cottage. All designs are scaled to fit 4×4 hoops common on home embroidery machines.
Whether you want to make your own clothes or home decor or just be able to mend and tailor the things you already have, a sewing machine makes it much easier. If you don’t have much experience with sewing on a machine, though, it can be daunting looking at all of the choices out there. While it really is up to personal preference, there are a few guidelines that will help you to find a solid sewing machine that meets your needs.
Determine your stitch needs
What are you planning to do with your sewing machine? For most sewing, you really don’t need a huge variety of stitches. Almost everything can be done with a machine that sews straight and zig-zag stitches, and has a button hole option. A blind hem stitch, an overedge stitch and a smocking stitch round it out nicely for garments and decor construction. If you plan to do decorative top stitching, then look for a sewing machine with decorative stitches you like.
Computerized sewing machine?
Honestly, I avoid computerized machines. A sewing and embroidery combo machine like my Brother SE400 (this is the updated version) is the exception. If you really want to do machine embroidery you will need a computerized embroidery machine. Otherwise, a purely mechanical machine is my recommendation. Even though my embroidery machine is also a regular sewing machine, I prefer to keep my embroidery machine for embroidery only and use another sewing machine for standard sewing. Computerized machines have more things that can go wrong, and I like to keep things simple.
This is my model of embroidery machine. It is computerized and scary, lol.
Presser feet
To me, having a variety of presser feet is more valuable than having a variety of stitches. While most things can be done with a standard zig-zag foot, a zipper foot makes sewing in zippers a lot easier. A rolled hem foot makes it easier to sew tiny narrow hems. Button hole and button feet round out the basic feet that make sewing garments easier and with more professional looking results. Those are many other presser feet available, and, while usually not required, they each make their specific task easier.
Most new sewing machines use a universal snap-on presser foot system, so it’s not hard to add more presser feet to your collection. Older machines use a thumb screw to attach the feet, but you can usually screw on a snap on adapter and use snap on feet on them, too. This page gives a good rundown on how to know if a presser foot works for your machine.
Vintage foot. I think it is a knit foot.
Construction
For a long-lasting machine, the less plastic the better. I prefer vintage machines for this reason. A good metal vintage machine will last forever if maintained properly, whereas machines with internal plastic gears and other mechanisms is more likely to break. If you buy a new machine, it’s more likely to have a lot of plastic components, but you can still look for quality. Check out the display model, if possible. Is there anything already broken just while on display? While the break may have just been a previous too-rough customer, it’s also likely a weak point. Do the knobs, levers and buttons operate smoothly and feel solid? How heavy is the machine? I personally would lean toward a heavier machine.
Used or vintage sewing machine
It’s not hard to find used sewing machines at thrift stores, garage sales or on sites like craigslist in the $20-$75 range. If shopping for a used machine, see if you can test it before buying. If not, gently turn the hand wheel to see if it moves smoothly. They usually turn towards the front. Don’t force it if it feels stiff or resistant. If it turns, are there any weird sounds like something hitting or rubbing that shouldn’t. Are the plug and visible wiring in good shape? Does it pass the construction tests previously mentioned?
With a used machine, you may not have the manual or attachments for the machine. Most manuals can be found online, but if you can, do a quick search for it before buying it. Things like presser feet and bobbins are easy to replace, unless it is a really old machine. Even then, there are still parts out there on ebay and similar sites, but try to check first.
It’s a good idea to get a used machine tuned up at a repair shop, especially if you’re not familiar with sewing machine maintenance. On average, a tune up runs $75-$100. If it turns out further repair is needed, then that will add to the cost. Depending on the purchase price and the solidness of the machine, though, even with the tune up cost, you may spend about the same as a lower end new model, but the machine will last a lot longer.
A word about Singer sewing machines
I personally haven’t owned a Singer. All of mine are either Signatures (Montgomery Ward brand), a Kenmore (Sears brand) or my new Brother embroidery machine. They all are low shank machines, so the feet are interchangeable, and, except for the Brother, the bobbins are the same. Older Singers have either a Singer-exclusive slant shank or, if I’m not mistaken, a high shank, which has deterred me from owning one. The older Singers are good, solid machines, though, so if you aren’t worried about being able to use the same feet on another machine, they are a good choice.
Newer Singers are another matter. I’ve had friends purchase a brand new Singer that had it break just after the warranty ran out. The cost of repair made it better to replace the machine. Looking online, the general consensus is that Singers aren’t made to last anymore. For low-cost, entry-level machines, Brother tends to have a better reputation. Again, I haven’t owned a Singer, but, from what I’ve heard, I would stick with vintage models and avoid the new ones.
Questions?
These are just a few basic guidelines. If you have any other questions relating to sewing machines, ask in the comments and I will answer them as best as I can. If you have your own guidelines to add, feel free to comment those as well.
Like this post? To make sure you never miss a future post, please sign up for my newsletter.
This post contains affiliate links. If you click through any of the Amazon links and make a purchase, I will receive a small commission. There is no added cost to you.
This post contains affiliate links. If you click through any of the Amazon links and make a purchase, I will receive a small commission. There is no added cost to you.
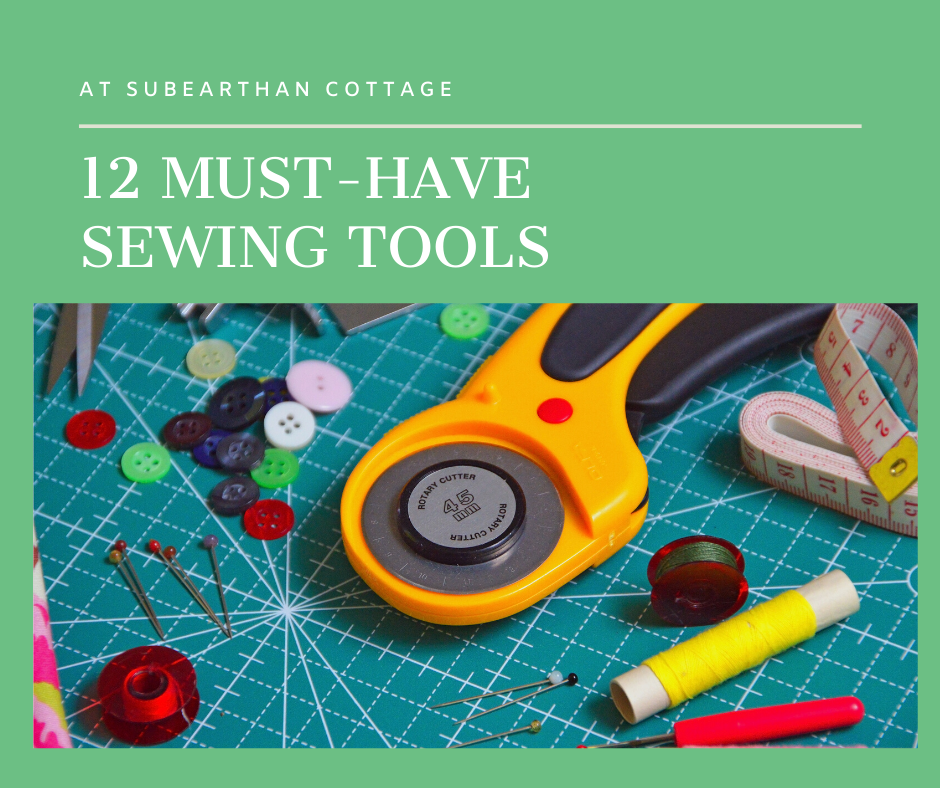
If you’re just starting to sew, it can be daunting to figure out which sewing tools are nice to have, which are absolutely necessary and which are just a fancy waste of money. Everyone’s preferences are different, but there’s a few tools that I use almost every time I break out my sewing machine.
This list assumes you have the absolute basics of needles, thread and sewing machine. I plan to do an article next week on my sewing machine preferences, so if you’re still in the market for a sewing machine, stay tuned. Many of these items are handy for hand sewing, too, if that is your preference.
My Must-Have Sewing Tools
Cutting
Fabric Scissors. While you can get by with a good pair of craft scissors, fabric scissors cut much cleaner. I have two pairs. One is an all metal pair similar to these, although I’m not sure if mine are Gingher brand. My other pair are like these Singer brand scissors. Both of these have a bent handle that make it easier to cut fabric lying flat on a surface and have a minimum blade length of 8 inches. Remember, to keep them sharp, fabric scissors should only be used on fabric.
Embroidery Scissors. Clipping threads with bigger fabric scissors is tricky. It’s hard to trim threads as close as needed and it’s easier to accidentally snip the fabric. Embroidery scissors or similar scissors are a lifesaver when it comes to keeping threads neat and tidy. For these, the biggest things to look for is that they are small, sharp and have a sharp point. I currently have these Fiskars brand, which come with a handy place to store bobbins and pins. I would love to get a pair of stork embroidery scissors like these, but mainly because I think they are adorable.
Pinking Shears. Pinking shears cut in a zig-zag pattern that prevents fabric from fraying. It’s an easy way to finish raw seam allowances without a serger (overlock machine), zig-zag stitching or using a more time consuming method of finishing seams. My pinking shears are unmarked, so I’m not sure of the brand, but they are similar to these.
Rotary Cutter and Mat. These are more of a want than a need, but for cutting smooth, long, straight lines, a rotary cutter is extremely handy. To properly use a rotary cutter, you’ll also need a self healing cutting mat. These come in various sizes. Unless you’re only working on small projects, bigger is usually better. I use a Fiskars 45mm rotary cutter. This is an example of a cutting mat. Mine biggest one currently is 24 inches square, and I really wish it was bigger.
Seam Rippers. I find seam rippers much easier to use than scissors when ripping out stitches. They also work well for making button holes. I recommend having a couple on hand. I got a multi-pack like this because I’m always misplacing mine.
Measuring and marking
Measuring tape. A soft, flexible measuring tape like this one is a necessity for taking measurements for clothing. I recommend having more than one, because they seem to disappear, at least at my house.
Straight edge ruler or yardstick. These are especially useful for using as a guide for rotary cutters. Really, though, for measuring flat lengths, a rigid yardstick/meter stick is easier to use than a measuring tape. A smaller ruler is handy for measuring hems, seam allowances and quilt pieces. Neither has to be fancy. My yardstick came from a hardware store and my rulers are leftover school supplies. Grid-type rulers do come in handy sometimes, but I recommend starting simple to get an idea of the sizes you would use the most.
Tailor’s chalk. For marking, I’ve tried water and air soluble marking pens, but I always come back to simple tailor’s chalk. It’s inexpensive, it works well, and it lasts longer than markers.
Securing
Straight pins. I personally prefer long, thin quilting pins, but any straight pins will get the job done. You want to make sure the pins are sharp and smooth so they glide well through the fabric.
Clips. Sometimes you need to secure fabric that is either too thick or too delicate to pin. For those items, you’ll want some sort of clip. You could use something like these, use binder clips, or even clothespins, depending on the fabric.
Safety pins. Safety pins are great for securing a big quilt for basting, or securing a project that needs to be stored for a bit before you can finish it. They are also perfect to help threading drawstrings.
Pin storage. Pincushions are cute, available to purchase and easy to make. While I do have a couple I use regularly, I really prefer small containers that I can just drop the pins into. Altoid mint tins are my go-to, but any small container that is easy to reach in and grab a pin will work.
What are your must-haves?
Everyone has their own style, so something I use all the time might not get used at all by someone else. What sewing tools do you use all the time? Leave a comment letting me know what you like, what I missed or what I included that you never use.
Like this post? To make sure you never miss a future post, please sign up for my newsletter.
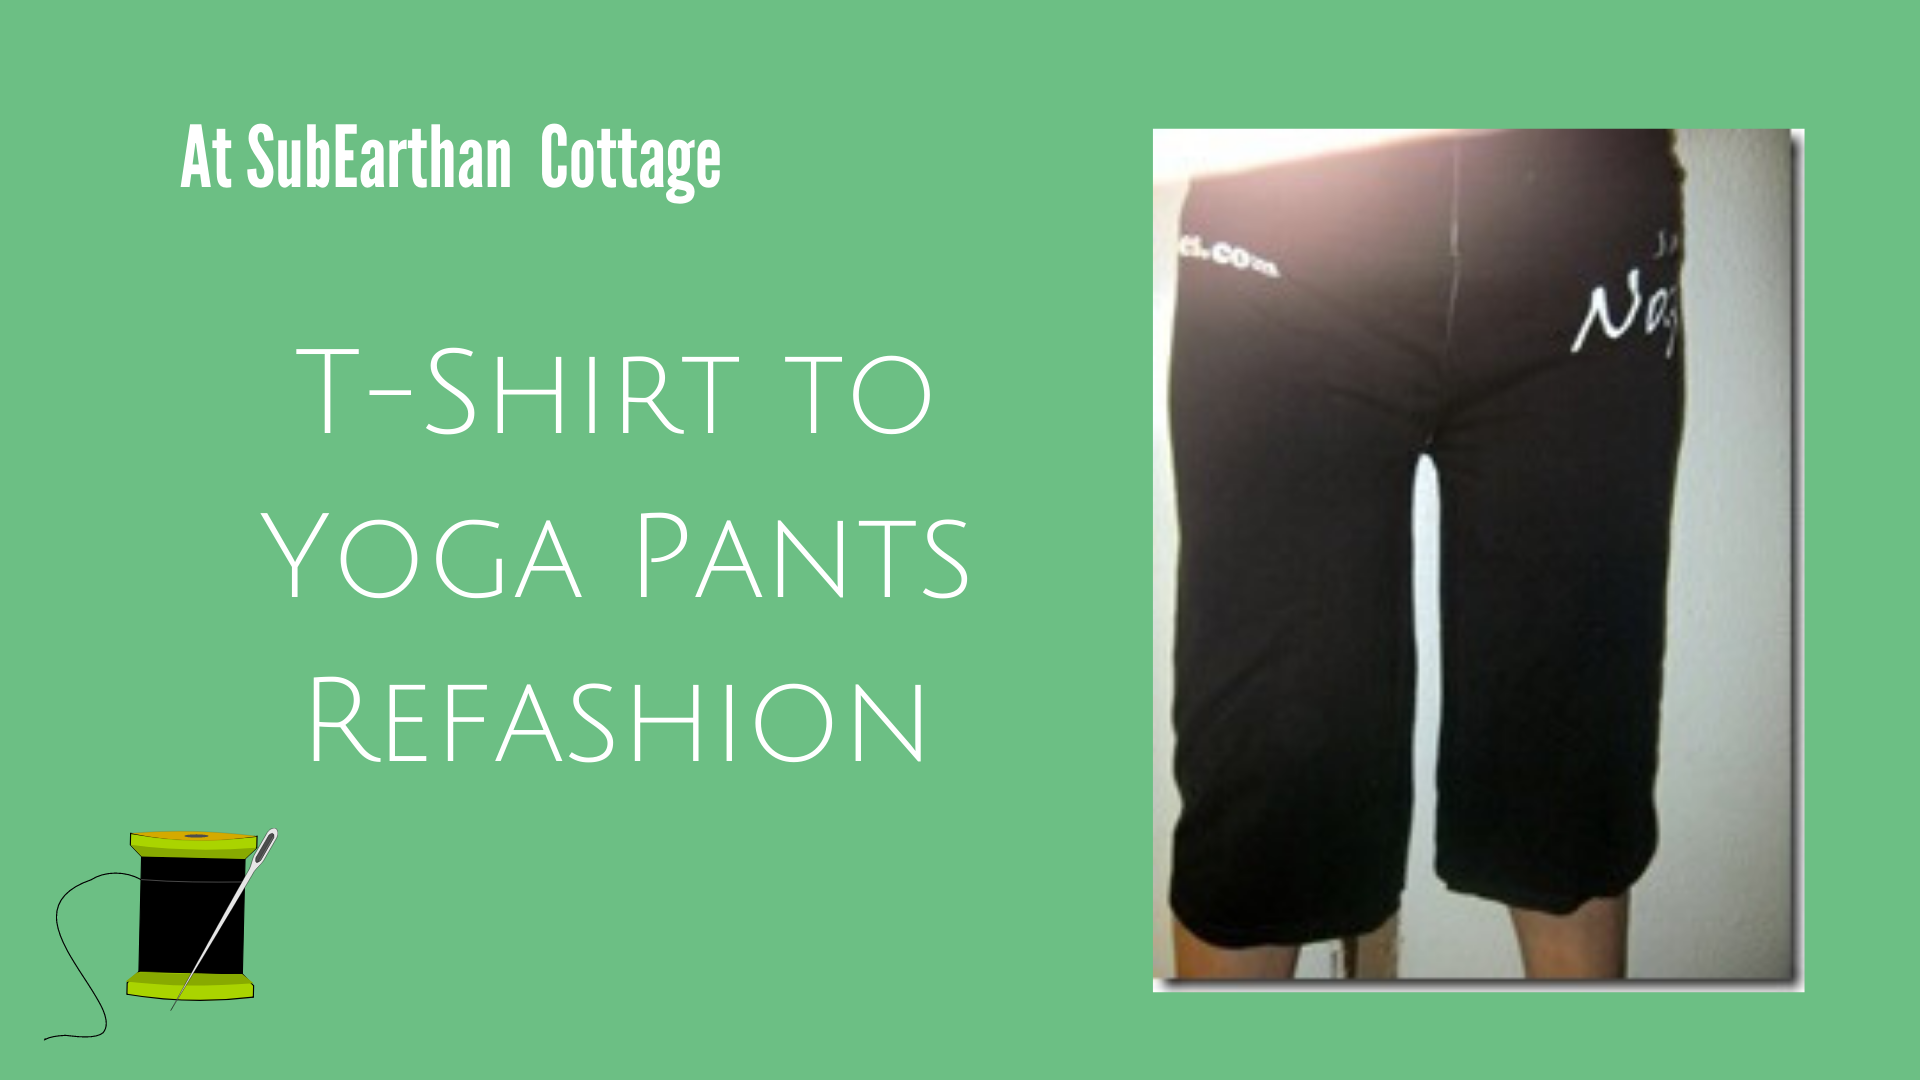
If you’re new to refashioning or sewing clothing in general, loungewear is a great place to start. It’s less intimidating because, since you’ll only be wearing it at home, it doesn’t have to be perfect. This refashion project is perfect for a beginner because you only need two t-shirts to make it, and it’s mostly straight lines or slight curves.
I originally shared this tutorial a few years ago, before Thaddeus. The weather is beginning to warm up , so it’s a great time to sew some shorts.
I went on a little Pinterest binge a couple days ago looking for ideas to help clear my refashion stash. Saturday night I decided to make a pair of yoga pants out of a t-shirt using this tutorial. I wear a size eight on average, and used an XL adult t-shirt.
Adaptations from the original refashion project
I did make a few changes to the design. First, instead of cutting the shirt down the middle, I cut it down the sides from the middle of the underarm to the hem. This also means you’ll have an inseam and no side seams. That keeps any design on the front or back intact and moves them to the hips.
For the waistband, I cut the underarm seam from the sleeves and squared them up to be two equal rectangles, leaving the hem intact. I sewed the short sides together making a big, short tube from the sleeves. I then put the tube inside the waist of the pants with the pants right side out and the right side of the tube facing the inside of the pants. The raw edge of the tube lines up with the raw edge of the pants. I serged the top together like that. This made it so when the tube is folded down to the outside, the seam is covered.
Sorry for the awkward pictures. No one was around to take the pictures and Doctor Who was about to start.
I sewed it all on my serger. The entire refashion project took less than ten minutes. I probably should have added two minutes and switched from white to black thread. Or not.
If you don’t have a serger, you can use a zig-zag stitch to prevent breakage. Many sewing machines have specialty stitches for sewing knits, too, so check your machine to see if that is an option. This DIY T-Shirt Bag Tutorial has more information on stitch selection for knits.
Final verdict
They are a little loose at the waist. If I were planning to actually do yoga or wear them in public I should probably add some elastic at the seam. Since they will probably be used mainly for watching Doctor Who while sitting on the sofa, I probably won’t bother.
I personally don’t mind the length, but you could easily make them shorter by cutting them off to the length you prefer. Knit doesn’t unravel, so you can leave the edges raw, or turn them under and hem.
To make sure you never miss a post, please sign up for my newsletter.
If you click through any of the Amazon links and make a purchase, I will receive a small commission. There is no added cost to you.
I, Charity Sloan, am a participant in the Amazon Services LLC Associates Program, an affiliate advertising program designed to provide a means for sites to earn advertising fees by advertising and linking to Amazon.com. Any purchases through those links will result in my receiving a small percentage in commission.
This only refers to Amazon links found in/on my blog pages. All products in my shop are 100% mine and not linked to Amazon.
Prices are the same whether you click an affiliate link or a non-affiliate link, so you will not be charged more. Thank you for your support!