Posted on 4 Comments

Heating a Rice Pack Without a Microwave

Hot rice packs are wonderful tools for easing muscle aches, cramps, and just comforting to use in cold weather. I prefer using a rice pack to an electric heating pad because you’re not tied to an electrical outlet.

A few years ago, though, I got rid of our microwave. I have some concerns about whether they are healthy, and we rarely used it anyway. Even if the potential health risks are exaggerated or non-existent, I don’t like having things that don’t get used taking up space. At the time, it was summer in Texas, I didn’t really miss my rice packs. Now that it’s cold, I wanted to find a way to heat them without caving and getting another microwave.

Please be cautious. I’ve seen some things that say anything other than a microwave is a fire-risk, so if you try to heat a rice pack in an oven, please never leave it unattended and use extreme caution. All appliances are different, so what works with mine may not work with yours.

Basic oven method

When researching, I found many people say to use an oven set to about 200 degrees Fahrenheit for thirty minutes. They also said to put the rice pack on a metal tray or roasting pan, and to have a pan or oven-safe dish of water alongside it to keep it from getting too dry.

My method

I was a little concerned that I may forget about it, and my oven doesn’t have a window so keeping an eye on it would be difficult. I do have a counter-top convection oven, so  that is what use. Because the door is glass, I can see in and keep an eye on things. It also has a timer that turns the unit off once time is up, so even if I get distracted I don’t have to worry about it over-heating. 

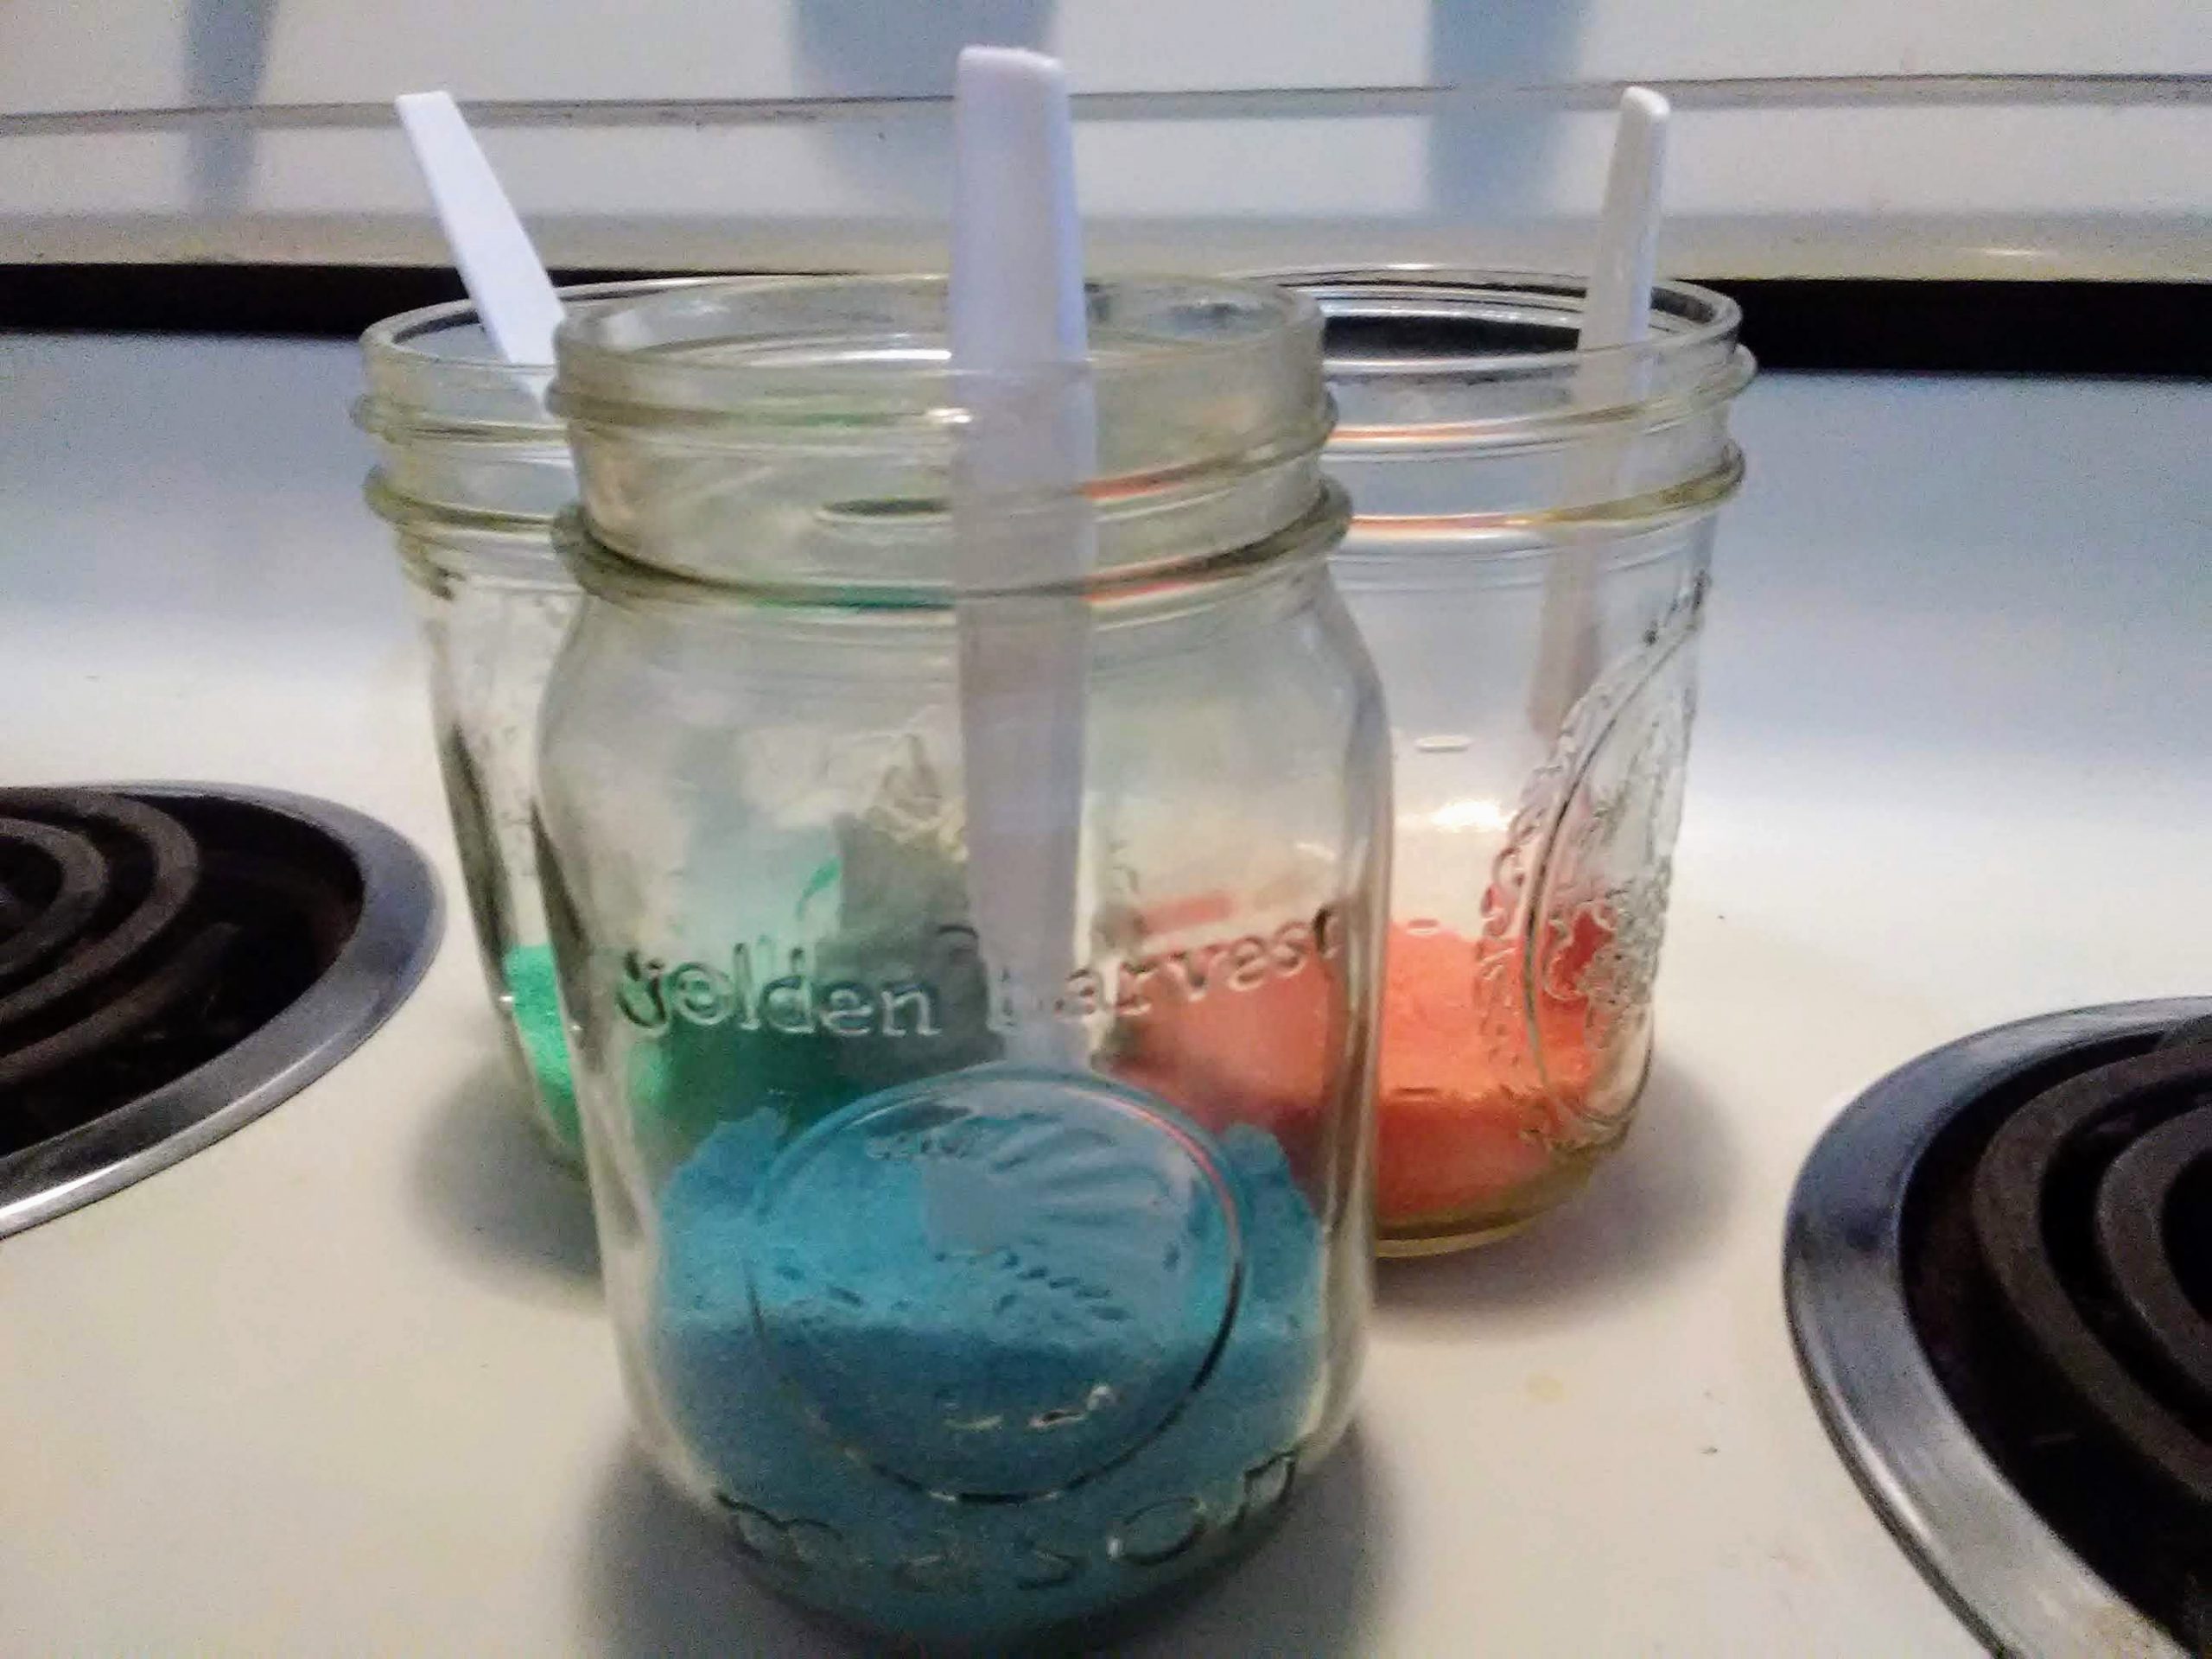
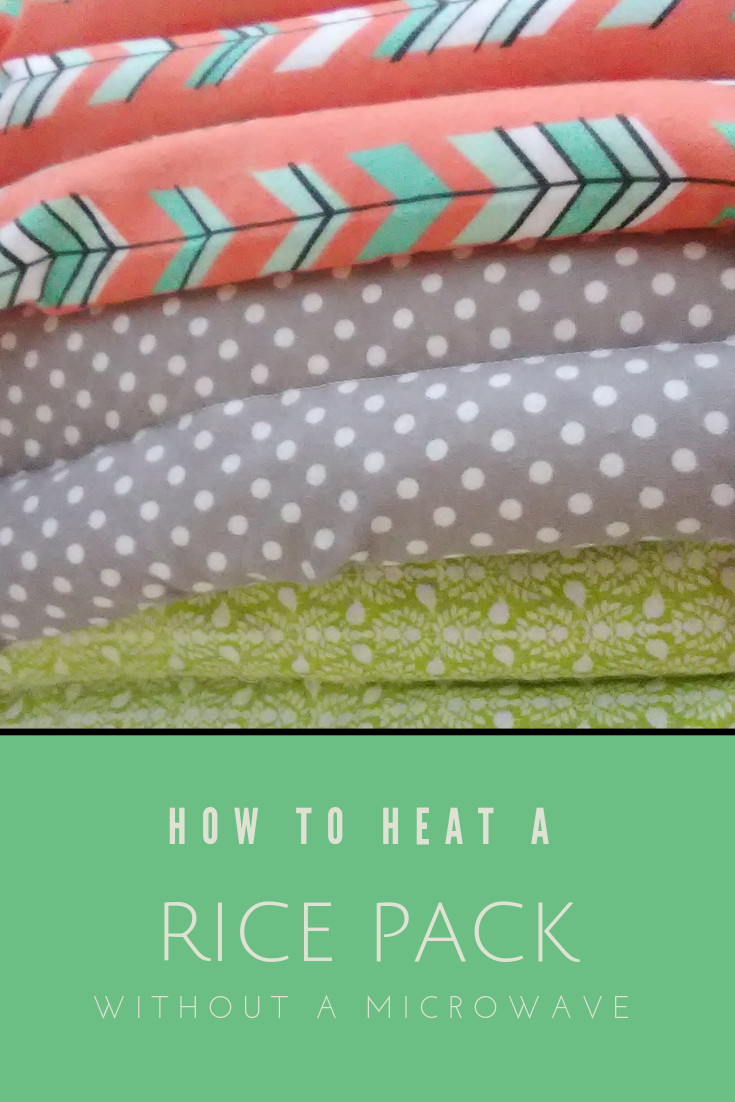
I always place the rice pack on a tray and put a dish of water in with it as others have suggested. Any rice packs I heat in the oven are made with 100% cotton fabric and thread. Synthetics melt easier and burn faster, whereas cotton can withstand a pretty high heat and burns slower, so cotton seems like a safer choice. 

I started with 200 degrees Fahrenheit for 20-30 minutes. It worked, but I needed it hotter. I upped it to 300-325 degrees for 15-20 minutes. At that temperature, sometimes I have to let it cool for a minute or wrap it in a towel, but it works better for me than the lower temperature. I tend to push the limit with heat, though, so 200 degrees for thirty minutes is probably plenty for most.

Probably safer method

One other method I’ve seen is to preheat the oven to 350 degrees Fahrenheit, TURN IT OFF, and place the rice pack (on a tray with heatproof dish of water next to it) in the preheated oven. I haven’t tried this yet, but having the oven hot but turned off seems like it would minimize any risk of the rice pack overheating and burning. If I didn’t have the convection oven, I would probably use this method. 

The standard microwave method

Using a microwave is still the recommended method. To heat rice packs in the microwave, warm it in the microwave in 15 second intervals until you reach the desired temperature. Some people recommend placing a cup of water in the microwave as well.

Basic safety

Whether you use a microwave or an oven, be mindful that they can vary in power. ALWAYS test the temperature of the rice pack before using and never leave the microwave or oven unattended while heating. You should never use heat packs on individuals who are unable to let you know if it feels too warm on their skin.

Lavender rice packs at SubEarthan Cottage

SubEarthan Cottage now offers large 100% cotton flannel rice packs. These are filled with a blend of rice and lavender buds for a pleasant hint of lavender. I sewed channels in the flannel to help keep the rice evenly distributed. They can be heated as described above, or kept in the freezer to use cold. Find all of my rice packs here.


Lavender rice packs at SubEarthan Cottage.

Like this post? To make sure you don’t miss out on future posts, sign up for my newsletter.

Posted on 1 Comment

15 Awesome Uses for Coconut Oil

If I had to pick only one oil to keep around, it would be coconut oil. This versatile oil has many applications in and out of the kitchen. Here’s fifteen of my favorite uses for coconut oil.

Coconut Oil in the Kitchen

High Heat Cooking

Coconut oil is a stable oil, unlike olive oil. It doesn’t break down at high temperatures, making it great for frying, sautéing and other high-heat cooking applications.

Dairy and Animal Fat Substitute

Coconut oil is also a great butter substitute for those avoiding dairy. It also makes a great substitution for tallow or lard.

Cooking Popcorn

If you like cooking popcorn on the stove the “old-fashioned” way, coconut oil is the best. It adds a wonderful flavor to the popcorn, and holds up to the high temperature. My favorite way to eat popcorn is cooked in coconut oil and topped with salt and fresh cracked black pepper. It’s so simple and yet so yummy!

Season Cast Iron Skillets with Coconut Oil

I love my cast iron skillets. Whenever I need to re-season them, coconut oil is my go-to oil.

Coconut Oil for Cleaning

Natural Furniture Polish

The natural furniture polish recipe I use calls for olive oil, but coconut oil is a suitable substitute. It’s a little lighter and less greasy than olive oil, so it polishes out nicely. It also has a longer shelf-life, so there’s little worry about using it up before it goes rancid.

Stuck on Stickers

Rubbing a little coconut oil on sticker residue helps remove the residue without harming the surface underneath. I like to coat the sticker residue with oil and let it sit for a few minutes. Wipe in a circular motion with a rag or gentle scrubber until the residue is gone.

Coconut Oil for Hair

Protect and Treat Your Hair

I’ve seen it recommended to coat your hair in coconut oil and leave it in overnight before lightening your hair with bleach. While I personally haven’t tried that, since lightening my hair, I put a small amount of oil on my hair almost every day. I especially focus on drier or damaged areas. Since I started doing this, I’ve noticed a huge difference in my hair. It’s definitely stronger and smoother.

Deep Condition with Coconut Oil

Even if you haven’t tortured your hair with bleach, a deep conditioning treatment is good from time to time. Apply the oil to your hair and cover with a shower cap. Leave it in for a few hours or overnight and then wash out. A couple of drops of essential oil added to the oil makes the conditioning treatment even more luxurious.

Frizz Fighter

Rub a couple of drops of coconut oil in your hands and then smooth over the ends of your hair to keep frizz away.

Coconut Oil for Skin

Moisturize Your Skin

Coconut oil is great as a moisturizer. Start with a little and massage in to moisturize or to soothe dry, irritated skin. It even helps some eczema!

Diaper Ointment

Coconut oil provides a gentle, moisturizing barrier to soothe and protect babies’ bottoms. Unlike many commercial diaper creams, it is considered safe for cloth diapers. Do check with the manufacturer for their recommendations first, as using unapproved products can void any warranties.

Makeup Remover

A little coconut oil easily takes off eye makeup. I like to put it on a cotton square and gently swipe away makeup. As a bonus, it moisturizes your skin as it removes the makeup.

Shaving Cream

Shaving with coconut oil leaves my legs feeling soft, smooth and moisturized. I don’t even need to use lotion afterwards.

Handmade Soap

I use coconut oil in all of my soap recipes. It helps to create a firm bar that produces lots of fluffy lather.

Pumpkin lavender roll on

Essential Oil Carrier

Coconut oil is my favorite carrier oil for essential oils. It’s not too heavy and absorbs nicely into the skin. If you use the refined oil, there’s no real coconut scent to compete with the essential oils.

15 Awesome Uses for Coconut Oil
Image by moho01 from Pixabay

Like this post? To make sure you never miss a future post, please sign up for my newsletter.

Through Friday, everything in my shop is 15% off. Shop now.

Posted on Leave a comment

DIY Colorful Sugar Sprinkles

DIY sugar sprinkles side view

A few days ago, I thought it would be fun to make Christmas cookies. Then I remembered that my Christmas cookie cutters had disappeared, we were out of any sort of sprinkles for the cookies and I really didn’t want to make decorator frosting or go to the store for supplies. My solution? DIY sugar sprinkles!

DIY sugar sprinkles side view

Ingredients

  • Granulated sugar
  • Food coloring

Supplies

  • Jars, plastic containers or sandwich bags, one per color. (Ideally something with a shaker top, which I didn’t have)
  • Spoons or shakers
DIY sugar sprinkles top view

How to make the sugar sprinkles

  • Measure about 1/4 cup of sugar into each container. 
  • Add 2-3 drops of food coloring to the sugar. 
  • Shake or stir until the color is evenly distributed. 
  • Let air dry. I just left the lids off the jars and set them on the stove while the cookies baked, stirring occasionally. If you use bags or plan to store it for a longer period of time, you may want to spread it on parchment or a cookie sheet to make sure it is super dry.  
sugar cookies
Mom tip: If your cookie decorating skills are not Pinterest-worthy, just let your kiddos do the decorating.

The recipe I used for the cookies was the sugar cookie cutout recipe from my trusty red and white Better Homes and Gardens cookbook. To make them gluten free, I substituted Bob’s Red Mill 1 to 1 gluten free flour. If you are new to gluten free baking, it is a great flour to start with. I have had lots of success making all my old recipes gluten free with just that simple substitution.

My solution for not having cookie cutters was to use a round glass to cut out “ornaments”. We dusted some of the cookies with the sprinkles prior to baking. For the rest, I made a simple icing that got dusted or caked with sprinkles, depending on who was doing the decorating.

Posted on 4 Comments

Tips for Saving Money on Food

No matter what our budget looks like, food is always a part of it. You have to eat, right? There are many thoughts on the best way to save on food. These are the things that work for me.

Eat at home

This one is probably the most important. If you eat out, regardless of whether it’s a dine-in or fast food restaurant, you are going to spend more than if you cook and eat at home. It’s fine to splurge once in a while, but if you’re looking to save, eating at home gives you the most bang for your buck.

Buy mostly ingredients

Prepackaged foods are sometimes quicker, but they are usually more expensive per serving. If it’s a choice between eating out and eating convenience foods from the grocery, it’s still usually cheaper than eating out, so if it’s a choice between KFC or a deli rotisserie chicken, bagged salad and prepackaged dinner rolls, the deli chicken is probably the cheaper and healthier option.

There are some convenience items that I find helpful, especially when life gets hectic. Jarred sauces, bouillon and frozen potatoes in various forms are things that I like to have on hand to help me get a meal on the table quickly. When there’s not time to make the sauce from scratch or I don’t have homemade broth on hand those can make it easy to still throw something together. They’re also usually fairly inexpensive, so I feel they are budget friendly convenience choices.

Buy in bulk where it makes sense

Don’t buy a ton of perishables like fresh fruit just because it’s on sale. If you have time to prep and freeze or can the fruit, then go for it. Things like canned goods, freezer staples and shelf stable items are great for buying in bulk, if you have the room. We have a small chest freezer, so I’m able to buy fruit on sale to freeze for smoothies or desserts and an extra ham or turkey when they are on sale for under $1 per pound around the holidays.

I also buy basmati rice in 20 lb bags because we prefer it over other types of rice and it is so much cheaper that way. To keep it fresh and manageable, I keep a small container of it in the cupboard and the rest goes into the freezer.

Shop creatively

It’s easy to have one or two grocery stores or box stores where you do all of your shopping. If you have farmer’s markets, discount groceries or ethnic groceries in your area, you may find better deals on some items.

For starters, if you have an Aldi nearby and haven’t given them a try, please do. I’ve found them to have a good selection of staples and they have a good guarantee on everything they sell. You won’t find many name-brands at Aldi, but with their guarantee, it’s worth trying and seeing if you like their store brands. They also carry a lot of gluten-free options, as well as dairy-free milk alternatives and a dairy-free mozarella cheese.

I also frequently shop a local Vietnamese grocery store. They have tons of fresh greens and other produce at really good prices. I also get a lot of specialty items, like things for making pho or sushi for sometimes half the cost or less of what I would pay at Kroger or Walmart. Bulk spices and rice are also cheaper there. For gluten-free pasta, rice noodles from there are cheaper than gluten-free options from Kroger and Walmart.

Find a method of meal planning that works for you.

Some people do really well with having every meal, every day planned out to every last detail. I prefer something more flexible that allows for changes based on last minute plans or whatever is on sale that week or whatever leftovers we need to eat. Regardless of the type of meal planner you are, have some sort of game plan in place.

Meal planning is one area where I need to improve, but I do have a basic game plan for meals that I’ll post on at a later date.

While you’re planning, don’t forget lunch. Leftovers are quick and easy lunches, so if you’re planning a dinner that reheats well, make enough for lunch the next day.

Keep staples for one or two quick meals on hand always

This is important in case you forget to plan, or something doesn’t work out with your plan. Whether it’s spaghetti and premade sauce, eggs, fruit and toast or some other meal you can throw together in under thirty minutes, keep the ingredients on hand for one or two backups that you like. Having a backup option makes it easier to eat at home when you might otherwise be tempted to eat out.

Eat real food

If you have to change your eating habits due to health or personal beliefs, it’s easy to try to substitute faux or “free” foods tailored to that diet. Price-wise though, it’s better to adapt your diet with real foods. Rather than faux meat burgers, try grilling portobello mushrooms or making your own patties with chickpeas. Instead of gluten free pasta, substitute rice or potatoes. Instead of diet drinks, flavor water, tea or soda water with fruit.

If you’re really craving cheese and you’re dairy free or bread and you’re gluten free, go ahead and splurge on the dairy or gluten free options. If you’re on a plant-based diet but desperately want something like a real burger, go for one of the faux meat patties. Just try to keep those splurges to a minimum and you’ll save money.

Find recipes for soups, stews and beans that you like

Soups, stews and beans are usually cheap, filling and can be a one pot meal. Having a few recipes you like and keeping the ingredients on hand can really help save money on food. They also are easy to make in bulk and usually freeze well, so making a bunch and having it for lunch or in the freezer for nights that dinner plans don’t work out helps prevent eating out. I love crock pots or pressure cookers for making soups and stews. It’s absolutely not necessary to run out and buy a slow cooker or pressure cooker, but if it’s something you’ve been considering, I love my electric pressure cooker for so many things.

Saving money on food.
Ultimate Homemaking Bundle 2020
Posted on 1 Comment

Feeling Stuck and Overwhelmed? 10 Tips to Get Moving Again

Feeling Stuck and Overwhelmed? 10 Tips to Get Moving Again

Whether it’s a new project, work, or just daily life, sometimes it’s easy to get overwhelmed. Maybe you’re struggling to find balance while juggling work, home life and new schooling situations. Maybe a task seems too huge or unpleasant to tackle. It could be that you’re unsure of how a project will turn out, so fear keeps you from making the first move. Maybe there’s just so many other things on your plate that you find yourself too mentally or physically exhausted to tackle that one thing. Here’s a few ideas to get unstuck and moving forward again.

Overwhelmed? These 10 tips will help

Brain dump

When you’re really anxious or don’t know where to begin, doing a brain dump helps. Grab a pen and paper and just write out everything on your mind. Don’t think about it, don’t worry about complete sentences or cohesive ideas, just get everything out on paper. When your done, look it over. Is there a theme to what you wrote, some repeated word or idea or area of focus? Use that to help you determine your next move.

Image by congerdesign from Pixabay

Make a list

Making a list of what needs to be done creates focus. It also takes the pressure off of yourself to remember everything. Once it’s written down, you’re free to focus on one task at a time. Because it’s all written down, you don’t have to keep a running list of everything in your head. As you complete a task, mark it off. Focus on your list getting shorter, not how much is still left to do.

Break it down

If a task seems too big, it’s easy to get overwhelmed. Breaking it down into smaller tasks makes it more manageable. For example, if you need to clean the house for company, don’t look at the whole task of cleaning the house. Take it room by room. If that still seems too big, list specific tasks within each room. Don’t say “Clean the kitchen”, have individual tasks like wiping down counters, sweeping the floor, mopping the floor, etc. listed separately.

Prioritize

Some tasks come with a deadline or are more important than others. If there’s a deadline, make a note of that deadline on your list and mark it somehow to make it stand out. If it’s something that is high priority, regardless of a specific deadline, make note of that, too. I like to draw a star next to high priority tasks, and highlight or double star things with a deadline.

Set goals

Be realistic about what you can accomplish in a day and set goals accordingly. If there are specific tasks that have to be done first, then set your goals around those. Otherwise, your goals could be something like marking off five tasks each day. If you meet your goal, good for you! Do you have the time, energy and desire to mark off a few more? Go for it! Didn’t meet your goal? See if you need to re-evaluate your expectations so as not to get overwhelmed and discouraged. If it was simply a case of other obligations taking too much time, try again tomorrow.

Set alarms

If you have something that needs to be done at a certain time, like an appointment at noon or starting dinner at five pm, set an alarm in plenty of time to stop and get ready. When I have an appointment or event coming up later in the day, it’s hard for me to focus on other tasks, even when I have plenty of time. Knowing that I have an alarm to remind me when I need to stop makes it a little easier.

Image by congerdesign from Pixabay

Set a timer

Setting a timer is useful in a few ways. First, if you find yourself completely unmotivated, pick a task and set a timer for five, ten or fifteen minutes, whatever seems manageable. You can do anything for five minutes. Pick a task and see how much you can accomplish in that time. When the timer goes off, give yourself permission to stop for a break or switch to a a different task. I often find that when the time is up, I’m so close to finishing that task that I want to keep working.

You can also use a timer to break up a bigger task into smaller chunks of time. Give yourself thirty minutes or an hour to work on a bigger job. When your time is up, stop and take a break or give yourself a five to fifteen minute window to knock out a few quick tasks. This helps you keep the little things from snowballing while you work on a big project.

Finally, setting a timer helps with time management. Everyone needs a break now and then, but it’s easy to allow a quick break to turn into an hour of getting off task. Decide how long of a break you want, set a timer and stick to it.

If timers work for you, you may want to checkout Flylady. I’ve used that method of home organization in the past and found it really helpful. It’s particularly helpful with establishing routines and taking everything in “baby steps” so you don’t get overwhelmed with the process.

Stop waiting

Do you ever find yourself doing nothing just waiting for something. Things like waiting tem minutes for dinner in the oven or sitting on hold on a phone call. Use waiting time that’s often wasted to knock easy tasks off your list.

Just do it

Sometimes there’s a task that I put off because I find it really unpleasant. Usually that leads to putting off other things, because that task is hanging over my head. Often it’s something simple like making a phone call to set up an appointment. There’s no way around getting some things done, so give yourself a minute to stress if you need and jump in. Once it’s done, you can mark it off your list and wonder why you put it off for so long. If it really was that bad, at least it’s done.

Reward yourself

Sometimes your accomplishments are their own reward, and sometimes not so much. Give yourself little incentives, even if it’s just ten minutes of playing a game, or a cup of tea and your favorite show. Knowing that something enjoyable comes after something unpleasant is motivating, especially after a “Just do it” task.

Not everything is as easy as just make a list and do it, but when you’re feeling overwhelmed, using these strategies where they do apply can help free up energy for dealing with the more difficult problems life throws at you.

Bulletin board image by Gerd Altmann from Pixabay

Like this post? To make sure you never miss a future post, please sign up for my newsletter.

Posted on 1 Comment

Easy Leggings Hack for Summer

If you or your kiddos wear leggings, you’ll love this easy leggings hack for summer. While you can use any leggings, it’s perfect for turning leggings that have worn out at the knees or ended up being a little too see-through into something usable, especially when the weather turns hot. This hack is so simple, I feel a bit silly making a post about it. It’s really one of those “Why didn’t I think of that?” things.

How to do it.

All you need is a pair of leggings you want to make shorter and some good scissors. Fold them in half so that the legs lay on top of each other. Make sure the fabric is smooth and the legs match up at the hem. Decide how much shorter you want them and cut them at that length, keeping the line parallel to the hem. My scissors cut through both legs easily, but you can always cut one and use it as a guide to cut the other.

Here’s what I cut off. I like leaving mine either just above or just below the knee.

Because knit doesn’t fray, you don’t have to hem the raw edge. When stretched, the edge will roll a tiny bit and hide the edge. You may want to seal the seam that you cut through with a little fabric glue or a few stitches. I have some I cut last summer without doing anything to the seams and they’ve held up through many wearings and washings without coming apart.

How I like to wear my shortened leggings

I like wearing dresses or skirts in the summer because Texas is hot, lol. With little kids, though, I’m constantly up and down or bending to pick things up off the floor. Cropped leggings underneath give me enough coverage to make dresses practical for everyday. Leggings under my dresses also prevents uncomfortable chafing from being a bit, um, curvy in the thighs. For this purpose, I really like using this hack for leggings that I wouldn’t feel comfortable wearing without a long tunic or dress. Instead of taking up space at the back of my closet, they get used and make my other clothes more wearable.

Ways to repurpose the cut off section

The cut off sections can be repurposed, too. A really simple thing to do is make hair bands by cutting them in one inch strips parallel to the hem. Be sure to keep the seam intact so they’re a circle.

You can also make a pocket for your leggings out of the cut off section. Decide how big you want your pocket to be and add a half inch or so seam allowance to each side and the bottom. Use the existing hem as the top of your pocket to save time. Fold the seam allowance under and stitch in place on your leggings where you want the pocket. You’ll want to use a narrow zig-zag or stretch stitch to prevent the thread from breaking. A ball point needle is ideal for sewing knits, so if you have one, use it.

Leggings hack pocket
Here’s one pocket I’ve added.

Like this post? To make sure you never miss a future post, please sign up for my newsletter.

Posted on Leave a comment

Kombucha Frequently Asked Questions

Here’s a few common questions about Kombucha. I’ve answered them based on my research and personal experience.

Kombucha questions

How much should I drink?

If you’ve never had Kombucha before, you’ll want to start slowly. Kombucha can have a detoxifying effect that can be unpleasant if you rush it. It is recommended to start with about an ounce per day at first and gradually increase until you reach a comfortable level for you. If you notice any ill effects cut back or stop for a few days to let your body catch up. Drinking lots of water can help, too.

Of course, you should always listen to your body. If you feel like you can’t tolerate kombucha don’t push it. There are plenty of other ways to get probiotics. Also, I’m not a doctor, and the above might not apply to everyone depending on your personal health. If you have any concerns, definitely consult your doctor.

Can I use metal utensils when making Kombucha?

Metal tea kettles for boiling the water are fine. It’s fine to stir the tea and sugar together with a metal spoon before adding the SCOBY. What you want to avoid is the SCOBY coming into contact with metal as that can damage the SCOBY. Even then, I have heard very brief contact is ok, such as when cutting up a giant SCOBY. I prefer to peel apart the layers and avoid metal touching my SCOBYs, though.

Can I use honey/stevia/coconut sugar/some other sweetener?

The sugar is food for the SCOBY and plain white sugar is recommended because it is easy for the SCOBY to digest. I have heard of some people having success with other sugars, but I haven’t tried it myself. If you want to try another form of sugar, I would start with a small batch and keep another SCOBY in a tea/white sugar brew as backup.

Stevia or other zero calorie sweeteners will not work because they don’t provide food for the SCOBY.

Can I use flavored teas?

Not for the main brew. You can use flavored teas to add flavor in a second ferment.

Can I use decaf teas?

This is another one where I’ve heard conflicting information. Most say not to use decaf tea. If you want to try decaf, as with different sugars, I would start with a small batch and keep another SCOBY in a regular tea/white sugar brew as backup.

My SCOBY looks funny. Is it bad?

Most SCOBYs look funny. They can be smooth and creamy colored or have air pockets and brown spots. The bottoms usually have brown stringy tentacle things hanging down. New SCOBYs grow on top of older ones until they look like a stack of slimy pancakes. (Eww.) All of this is normal, and there’s probably a million variations I haven’t described.

There are two main things to watch for: mold and black. If your SCOBY molds, it will look like blue-green dusty mold, just like what grows on bread. If you get mold, throw it all out and start over.

Black means the SCOBY is dead or dying. Toss it.

My Kombucha tastes like vinegar. What happened?

Kombucha is supposed to taste vinegary, but if it’s too strong you can always mix it with something like juice to make it more palatable. You can also use super-vinegary Kombucha in place of apple cider vinegar in recipes. If it’s straight vinegar with no sugariness left, you could use it as a hair rinse or for household cleaning where you would use ACV.

To make future batches less vinegary, there’s a couple of things to try.

1. Kombucha brews faster in warmer weather. If it’s been hot, try a shorter brew time and/or increasing the amount of sugar in the brew.

2. If your SCOBY is getting super thick, split off some layers. More SCOBY = shorter brew time.

My Kombucha is too sweet. What happened?

The easiest fix is to let it brew longer. If it’s cold, moving your jar to a warmer location may help. I think the ideal range is somewhere around 70-80 degrees Fahrenheit.

You should also check the condition of your SCOBY. If it is turning black, you’ll want to replace it.

Should I store my SCOBYs in the refrigerator?

No. You want to avoid extreme temperatures because they can damage the SCOBYs. The best range is between 70-80 degrees Fahrenheit.

To store your extra SCOBYs, place them in a lidded jar with at least enough Kombucha for them to float and store in a cool-ish location, such as a pantry or shelf out of direct sunlight and away from heat sources.

Find more of my kombucha posts here:  https://subearthancottage.com/search/label/Kombucha

Like this post? To make sure you never miss a future post, please sign up for my newsletter.