Posted on Leave a comment

Creative Ways to Upcycle Promotional Mugs

It seems like everyone has at least a couple of promotional mugs hanging out in the back of their cupboards. If you don’t, there’s hundreds at any thrift store. On the one hand, they’re actually pretty useful, as far as promo swag goes. even if you’re not a coffee or tea drinker, they’ll hold any beverage. Or, you could use them to hold pens or random desk stuff, makeup brushes, or toothbrushes. You could even use them as little planters. (Tip: plant in a nursery pot and put that inside the mug. No need to drill holes, and the mug catches the drainage. )

The problem is that the designs usually aren’t very cute, and who really wants advertisements with their morning cuppa? 

Take this mug. I like the shape. It’s a nice size and a lovely bright orange.  I could use it as-is, but the orange reminds me of the orange VW my husband drove way back when, and I don’t even know what idstc is. So, I decided to cover it with vinyl.

My Mug Upcycle Method

First, I measured the height and width of the logo. Then, I used Cricut Design Space to create my design, a VW bug, of course. (If you don’t have a cutting machine, don’t worry. I have ideas for you, too.) I made sure that my Bug was a little bigger than the logo. After that, It was just cut out the design in permanent vinyl and apply. Voila!

(Or, rather, cut it out, realizing after the first cut that you had the wrong color loaded, so you end up making a set in your original color scheme and one in the inverse. Then mess up applying one side so you do one side of the mug in the original, and the other side in the inverse colors only to decide you actually like the inverse better. But you leave it as is because you don’t want to risk messing it up trying to change it. )

Other Methods 

Now, if you don’t have a cutting machine, you could use a big sticker. Clear contact paper does an excellent job making them water-resistant. I did that to cover a graduation logo on a water tumbler that worked well. You could also cut a heart or other simple shape out of adhesive vinyl or contact paper. I find lots of it at thrift stores. Dollar Tree also sells vinyl as well as sticker paper. 

Another option that I haven’t tried is adhesive chalkboard paper. I think it would be so cute to be able to write little notes on a coffee cup. I’m not sure how well it would hold up to moisture, though.

So far, I’ve only hand washed any of the mugs and tumblers I’ve decorated with vinyl. I don’t think putting them in the dishwasher is the best idea. I really hate handwashing dishes, though, so at some point it will probably happen. When it does, I’ll let you know how it holds up. 

Share Your Upcycles

Share your upcycled mugs in the comments or on our Facebook page. 

Don’t Forget!

On a different note, don’t forget my digital and printable planners are all only $0.99 through August 22, as well as all of my single machine embroidery files. I’ve also made some more of my older machine embroidery designs freebies, so be sure to check them out. 

Posted on 4 Comments

Easy DIY Talc-Free Body Powder

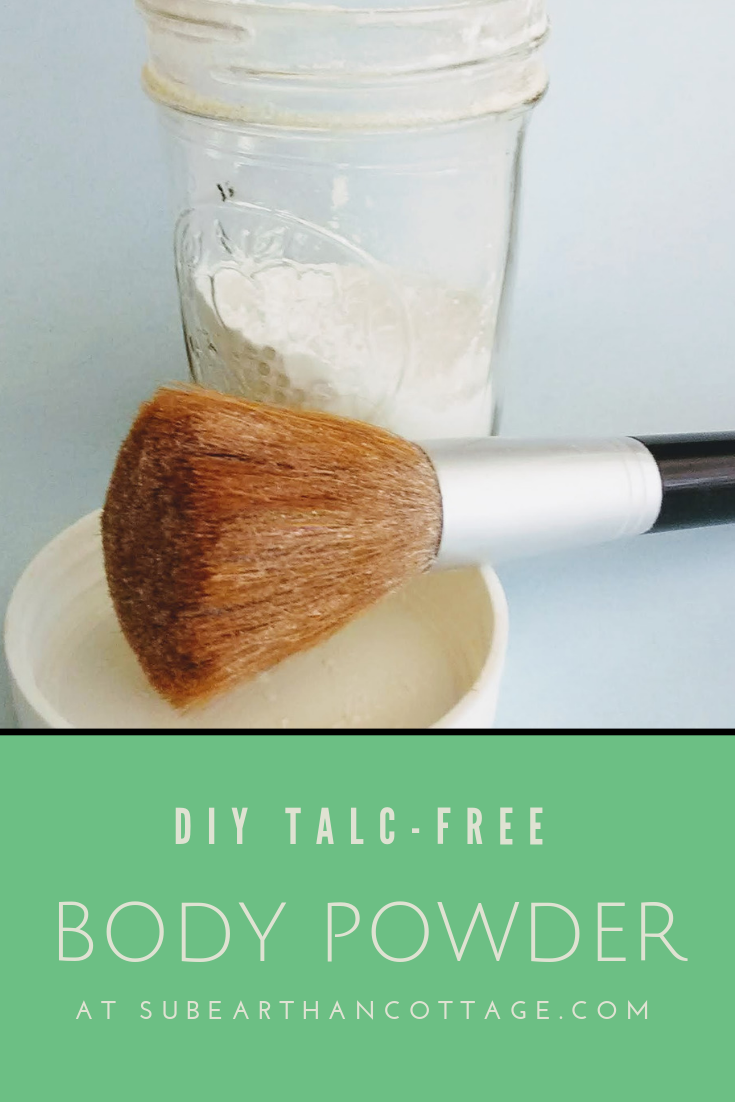
DIY Body Powder SubEarthan Cottage

It’s hot outside. Like really sticky, sweaty hot. If you’re looking for a talc-free body powder to help you through it, I’ve got a recipe for you.

While you can purchase talc-free powder, making it yourself is simple, allows you to customize it, and is super inexpensive. Better yet, you probably already have everything you need.

Body Powder Recipe

Ingredients:

3/4 cup of Cornstarch

1/4 cup of Baking Soda

10-ish Drops of essential oil (optional)

Make it:

Combine the cornstarch and baking soda in a bowl or jar. Give it a stir or shake to mix. If you’re using an essential oil, add it now, then stir or shake some more to distribute.

Use it:

I keep mine in a jar and use a fluffy makeup brush to dust it where I need it. It works great as an all-over dusting powder, deodorant and shoe deodorizer. You can also dust a little in your hair in place of dry shampoo. For that, I like to put it in my hair at night and then brush it out in the morning.

Customize it:

The basic recipe is 3 parts cornstarch to 1 part baking soda, so you can use that 3:1 ratio to make as much or as little as you need. 

Add more or less essential oil based on your preference. You can also use your favorite perfume to make a coordinating dusting powder.

If you find this formula too drying, reduce the amount of baking soda, or omit it all together.

Not a fan of cornstarch? Try using arrowroot. I personally haven’t tried it, so if you do, let me know how it works.

For babies, I recommend just plain cornstarch as baking soda might be too harsh. If you want to scent it, add a couple of drops of lavender essential oil. Essential oils aren’t generally recommended for babies under six months, so take that into consideration. 

If you like using this as a dry shampoo and have dark hair, you can add a little bit of cocoa powder to the mix to make it less noticeable if you don’t get it brushed out completely.

Re-purpose a shaker jar, such as a spice or Parmesan cheese jar, rather than using a brush or puff to dispense.


Find more of my tutorials here: Tutorials.

Posted on 3 Comments

How I Patched My Denim Jeans And Added an Embroidery Embellishment

Another way to patch denim jeans

My mom gave me several pairs of worn out denim jeans for me to play with several months ago.  A few just happened to be my favorite style from Old Navy and in my size. Rather than cut them up for other projects, I decided to make them cute with patches and a little embroidery. Here’s the method I used for patching denim jeans.

Another way to patch denim jeans
First, the knees.

Patching the knees

Prepping the denim jeans

In order to sew at the knees, you have to carefully rip out the stitches along one leg seam. You don’t have to rip out the entire seam, but you need to give yourself plenty of room above and below the knee to work. One seam is usually top-stitched. To make it easier all around, do NOT rip out the top-stitched seam.

After ripping out the seam, press the denim as smooth as possible with an iron.

Prepping the fabric

To patch the denim jeans, I chose to go underneath the rips and leave the torn edges visible. For the patches, I used cotton quilting material left over from sewing masks . I cut the fabric into squares a few inches bigger than I needed to patch. In the future, I will probably interface the fabric at this time. I knew I planned to interface everything at a later step, though, so I didn’t.

I pinned the fabric to the inside of the denim jeans.

Sewing the patches

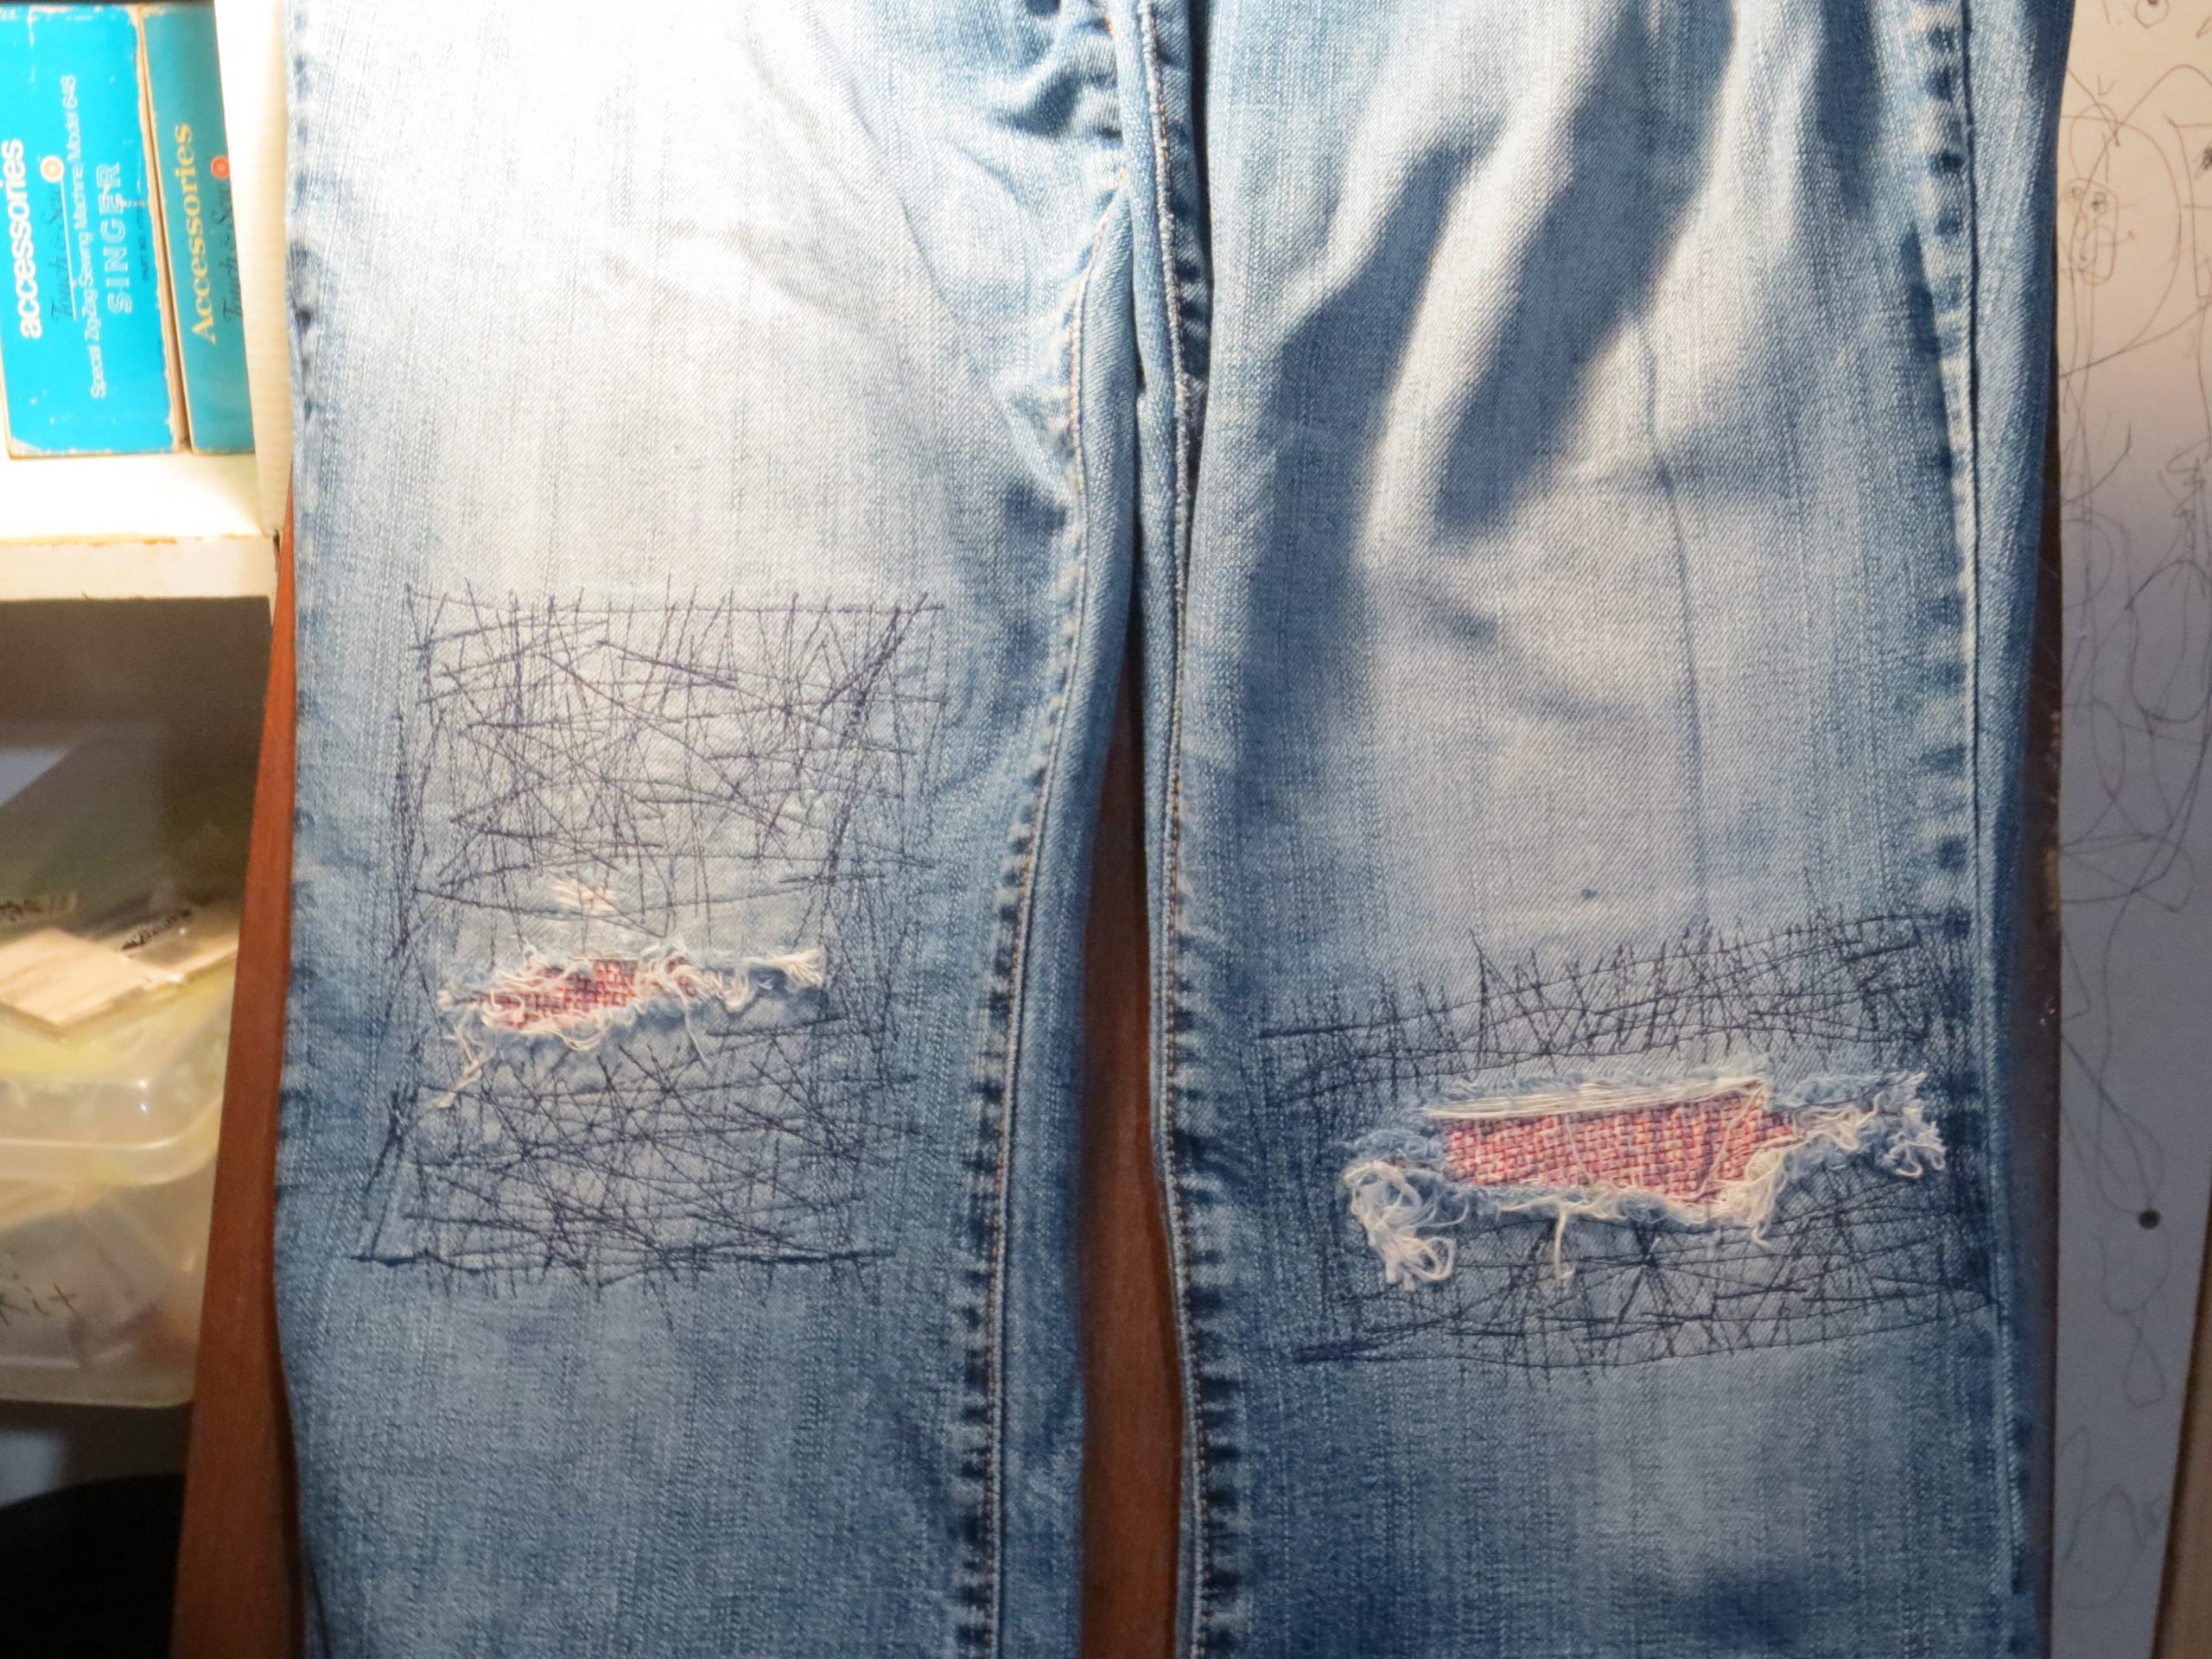
Before sewing the crazy stitches shown in the photos, I sewed a single line of stitching all around the patch about a quarter of an inch inside the edge of the quilting fabric. This kept it in place while I did the crazy reinforcing stitches. After it was secure, I stitched in all different directions between the edge of the tear and slightly overlapping the first single line of stitching.

This side was more worn out, so it got more reinforcement stitching.

When jeans rip, usually the material around the tear is worn thin as well. In the past, I often left too much of the worn area without reinforcement. This results in new rips soon after the first repair. This time I reinforced at least an inch and a half around the tears.

Reinforcing the patched denim jeans with interfacing

After I was done stitching, I ironed interfacing to the inside. I did the interfacing last to act as a soft layer between my knees and the stitching. In retrospect, I probably should have interfaced the quilting cotton first, and then interfaced again at this step if I felt it was necessary. So far my jeans are holding up with the way I did it, though.

Sew it up

With the patches done, all that’s left is resewing the side seams. I just pinned it closed and sewed it back along the original stitching line. For the overcasting to finish the raw edges, I was lazy and used the overedge stitch on my sewing machine instead of switching to my serger. Zig-zag stitching along the edge to finish it would also work.

Embroidering the pocket

To embroider the pocket, I first removed the pocket from my jeans. Since it’s too small to hoop, I hooped tear away stabilizer alone and secured the pocket to the stabilizer with a glue stick. I used my Damask Rose embroidery pattern for the embellishment.

After the embroidery machine was done working its magic, I removed the stabilizer and replaced the pocket on my jeans using a heavy denim thread in a close shade to the original thread.

Simple, right? Actually, I tried to do that, messed up the hook timing on my Kenmore sewing machine AGAIN within the first few stitches and had to move to my backup vintage Montgomery Ward Signature machine. It took a few minutes of fiddling with the settings, but once I got it set up correctly it sewed through the heavy denim layers like butter.

In all fairness to my Kenmore, I did probably deserve it this time, between the crazy reinforcement stitches and then trying to sew through multiple layers of denim with thick thread. At least this time it let me reset the hook timing without much fuss.

Have you gotten more acquainted with your sewing machine lately? I’d love to see your projects in the comments.

Like this post? To make sure you never miss a future post, please sign up for my newsletter.

Posted on 1 Comment

Simple Way to Patch the Back Pocket of Denim Jeans

The back pockets of denim jeans are prone to wearing out at the top corners with use. If that’s where you carry your phone or wallet, you’ll almost certainly develop holes at those stress points long before the rest of the jeans are worn out. Luckily, repairing a back pocket is a pretty simple fix.

Pocket with hole

These are my husband’s work jeans. You can see the inside corner of the right pocket has a small hole and another one is forming on the inside corner of the left pocket. These are the steps I used to repair and reinforce the pockets.

Choosing your patch material

The first thing you’ll want to do is add material to patch the hole. The material should extend past the edges of the hole, overlapping onto the good fabric by about a centimeter or so. I like to use the iron-on denim patches, but fusible webbing or strong interfacing works, too. This product is similar to the one I used. You can also just use a scrap of fabric a bit larger than the hole, but I prefer the added strength of an iron-on product. An iron-on product is also easier in that it won’t shift while you sew it in.

Iron-on patch
denim iron-on patch for pocket repair
Wrong side of iron-on patch

Securing the patch to the pocket

If you’re using an iron-on product, iron it on to cover the hole from the inside according to the manufacturer’s instructions. For sewn-in patches, baste in patch to keep it from shifting.

Ironed on patches
Patches ironed in place on the inside of the jeans.

Reinforce the patch

Regardless of whether you chose an iron-on or sew-in patch, you need to reinforce the patch by sewing a strong row of stitches around the edges. For a less visible patch, I like to sew a square of stitching around the hole, making sure to include the corner of the pocket in the square. I sew over the square a few times to reinforce. Choosing a thread that matches the denim or is slightly darker makes the patch less noticeable.

Reinforcement stitching from the inside.

For the actual hole, I like to sew back and forth over the hole in a matching thread. This secures the area to the patch, hides the frayed edges and prevents further ripping.

For a more visible patch, you can get creative with the patch material and choose a contrasting thread. You can also crazy stitch over the area, similar to what I did here.

Preventing the problem

Whenever I patch one pocket rip, I take the time to reinforce all the corners with iron-on patches and a square of reinforced stitching. It doesn’t take much extra time, and keeps the rest of the corners from needing repair in the near future. You could even do this to new jeans as a preventative measure if you have this problem frequently.

Final result

Here’s the finished patches. I’m pretty satisfied with the results. The work isn’t that noticeable and matches the variations in blue on the rest of the jeans. It’s definitely better than holes that will continue to rip in a revealing location.

Like this post? To make sure you never miss a future post, please sign up for my newsletter.

Shop sales!

For the entire month of September, all of my handmade soaps are 20% off. Shop handmade soaps here.

My machine embroidery files are also on sale all month for just $1 each! Be sure to check out my latest Halloween designs. Shop embroidery designs here.

Posted on 3 Comments

DIY Soft Scrub Cleaner

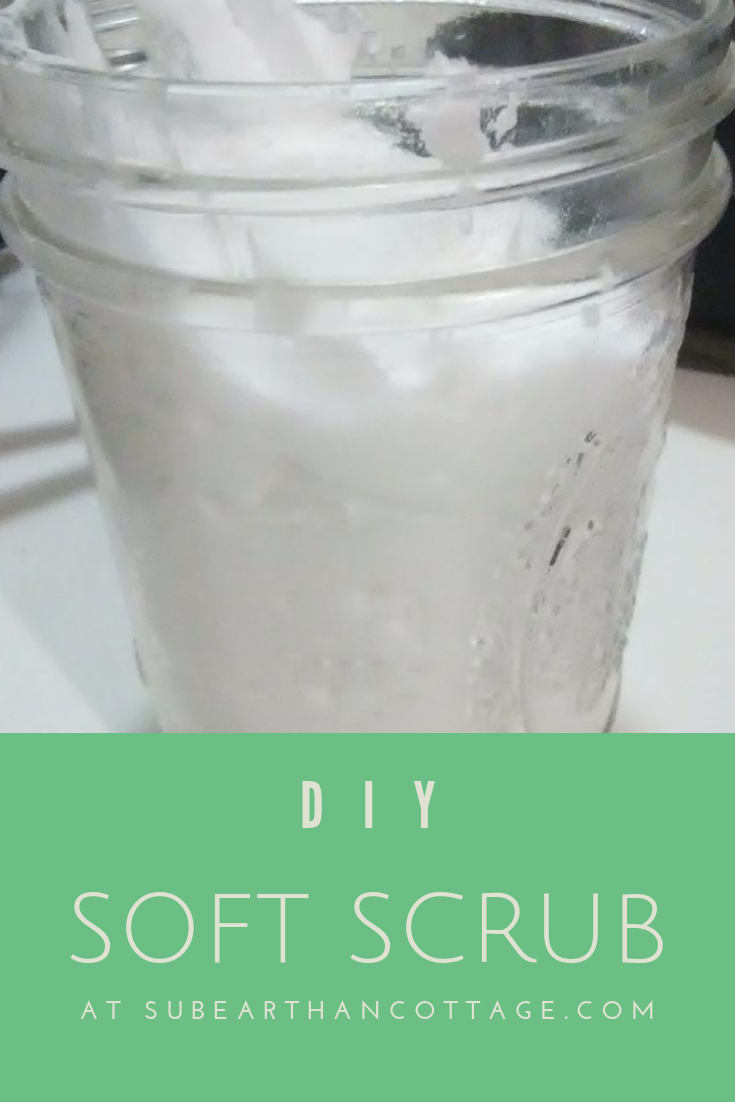
DIY Soft Scrub

I like getting my kiddos involved in housecleaning. Not just because they are highly involved in making messes, but because it is important that they know how to take care of themselves as adults. I’m pretty choosy as to what cleaning products I will let them use. So many cleaners are irritating to the skin, eyes and lungs.

Not only do I want my cleaning products to be safe, I like things that multitask and don’t cost an arm and a leg. Often, I’ve found the best way to achieve this is to make them myself, like with my natural furniture polish. With a few simple ingredients I keep around the house anyway, I find I can cover most cleaning needs.

My most recent cleaning concoction is soft scrub. It works well for when I need a little extra scrubbing power than I get with my usual all-purpose water, vinegar and dish soap mix.

Soft scrub in a jar
Soft scrub in a jar

Soft Scrub Ingredients

  • 1 cup of baking soda
  • 1/4 cup of liquid soap
  • 1 tablespoon of hydrogen peroxide
  • Optional: 2-3 drops of essential oil

Instructions

Place all the ingredients into a big bowl and mix until a uniform paste forms. To store, I like to scoop it into a wide mouth canning jar, but any lidded container will work. The mix will expand, so use a container that allows for at least double the amount to be safe.

Mixing the soft scrub

Variations

Type of Soap

Liquid castile soap will work, but for extra cleaning power I prefer a detergent soap, like Dr. Bronner’s Sal Suds or even Dawn dish soap. You could probably get away with any liquid hand soap or liquefied bar soap, but I haven’t tried those yet. The only time I haven’t liked it was when I made it with Ajax dish soap because that is what I had on hand. I think there was something in the Ajax that reacted badly with the baking soda or hydrogen peroxide. That mixture was fluffier and had an odd smell. I’m not quite sure what it was that caused it, but because of that, I recommend staying away from any dish soap that advertise extra cleaning additives. For the soap, basic is better.

Scent

I rarely add any essential oils for fragrance. Usually the soap I have is already scented, so I don’t see the need. Really, unscented is fine, too, unless you just prefer a scent to signal that something is clean. If I were to add an essential oil, though, I would probably use either peppermint, lemon or tea tree oil. If you choose to use an essential oil, please be aware of safety guidelines for using them around children, pregnant women, pets, and other sensitive individuals.

How to use

To use, I scoop out a dollop of the soft scrub and apply a layer to the area I’m cleaning. I usually let it sit for a minute or two then buff it off with a rag. If there’s a residue left, I’ll either wipe it down with a damp rag or mist it with my all purpose vinegar, dish soap and water solution and wipe it clean.

Results

I almost forgot to take a before photo. This is an embarrassing photo of tomato sauce splatter left on my stove overnight.

Before using soft scrub to clean last night's spaghetti sauce.
Before using soft scrub to clean last night’s spaghetti sauce.

This is a photo of what it looks like after using my soft scrub and minimal elbow grease.

Shiny stovetop
Shiny stovetop

I do apologize for the blurry photos. Lighting in my kitchen isn’t the greatest, and also I was in the middle of cleaning.

Posted on 3 Comments

Quick Drawstring Bag Tutorial or How to Reuse Your SubEarthan Cottage Soap Wrapping

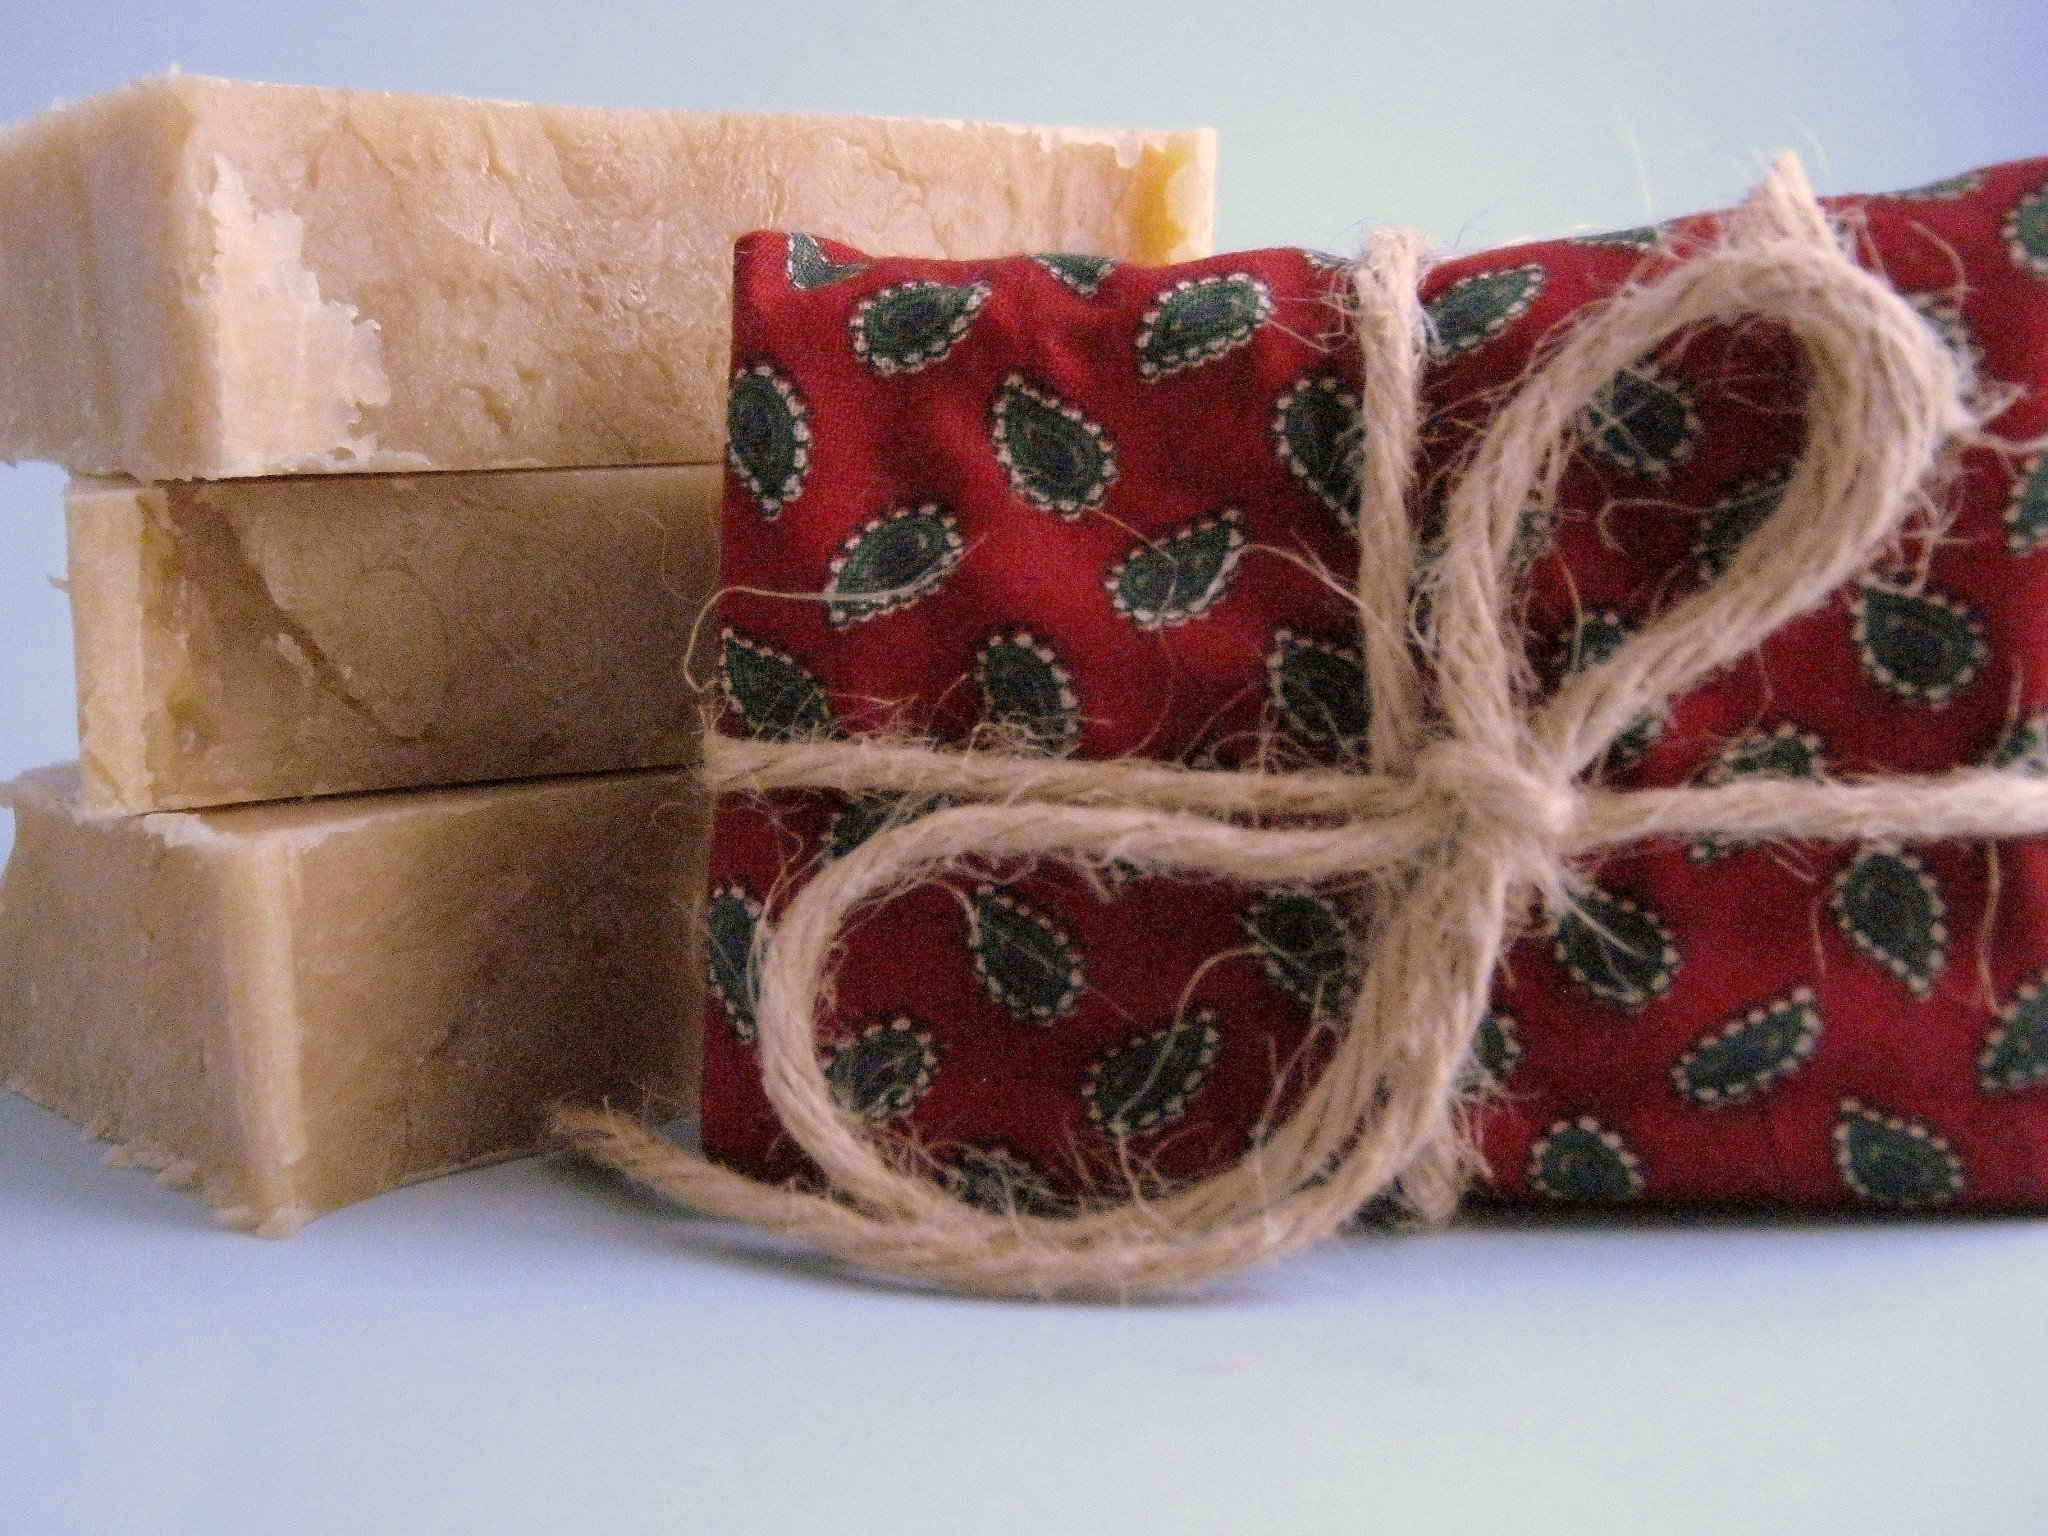
I wrap my soaps in fabric because it looks nice, it allows the soap to breathe (read here for why), and because it feels better than plastic. I often wonder what happens to the wrapping. I’m sure there are some that toss it. I know of one person who collects the fabric for quilts. For those of you who, like me, don’t want to throw away something that could be useful but don’t know what to do with it, I have a tutorial for a drawstring pouch, just for you.

This is done with the wrapping from one of my soaps, but you could make it in any size you like.

Materials
Cloth wrapper from soap (roughly 8×11 inches)
Jute string from soap (about 29 inches)
Thread

Tools
Needle or Sewing machine
Safety pin or Bodkin
Scissors
Iron

First, iron your fabric flat. Then, fold down a long edge about 3/4 of an inch to one inch and press. This is for the casing. It doesn’t have to be super precise.

Sew a straight seam along the bottom of the flap to form the casing. All the sewing can be done by hand or machine. I have no time or patience, so I choose machine. Fold your material in half with right sides together like a book.

The fold is at the bottom of this photo.

Next, starting just below the casing seam, sew down the side and across the bottom. I use anywhere from a 1/4 to 1/2 inch seam allowance for this. Again, it doesn’t have to be precise.

With scissors, clip the bottom corners, being careful not to cut your stitching. You could probably skip this step, but it helps the corners look square and crisp. Turn your bag right side out.

Now it’s time to thread the string. Tie one end of the string to a safety pin, large paper clip, or attach a small bodkin. This makes it easier to work it through the casing. Thread it through the casing, safety pin first.

Once you get the string to the other side, remove your safety pin or other tool and adjust the string so that the ends are even.

Knot the ends together once or twice to keep it from coming out.

Ta-da! It’s done! Perfect for organizing your purse, storing jewelry or other small items, or as a small gift bag.

Or holding your favorite bar of soap.

Tutorials are always a little complicated to write because it’s easy to overlook small steps in things you do frequently. If something is unclear, please ask. 🙂

If you have any other creative uses for a SubEarthan Cottage soap wrapper, I would love to hear it!

Posted on 4 Comments

All Purpose Cleaner Recipe

We are all becoming more aware of the types of products we use everyday. Whether it’s a concern for the environmental impact, the effect they have on our health or the safety for our pets and children, we want to know we aren’t inadvertently introducing harmful things into our homes. Something I do to feel confident in the safety of cleaning products I use around my family is to make my own where possible. One such product is a simple all purpose cleaner I use for cleaning hard surfaces, such as kitchen and bathroom counters and walls. It only uses a few ingredients, all of which you probably already have on hand.

Photo by Daiga Ellaby on Unsplash

All Purpose Cleaner Recipe

Ingredients:

  • Liquid soap, either dish soap or something like Dr. Bronner’s castile soap
  • Distilled white vinegar
  • Water
  • Optional: Essential oil of your choice

Supplies:

  • Clean, empty spray bottle
  • Liquid measuring supplies if you aren’t comfortable just eyeballing it
  • Optional: A funnel might make it easier to fill the bottle.

How to make it:

Measure about 2 tablespoons of soap, one cup of vinegar and one cup of water into the spray bottle. It doesn’t have to be exact. I usually just eyeball it. If you would like to use an essential oil, add 3-5 drops as well. Do be aware of safety guidelines regarding any essential oils you use, especially around pregnant women, children and pets. Tea tree oil or lavender are nice for cleaning and generally safe for most people. If the soap you use is scented or if you or your family members are sensitive to scents, you may want to skip the essential oil.

Swirl the bottle to mix everything without making the soap foam up too much. 

That’s it. Now you have an all purpose cleaner that works as well as any other I’ve tried, with the added benefit of being safe enough that kiddos can help with the cleaning. 

If you like this cleaning recipe, you’ll also like my DIY soft scrub for tougher cleaning jobs. To make sure you don’t miss out on future posts, sign up for my newsletter.