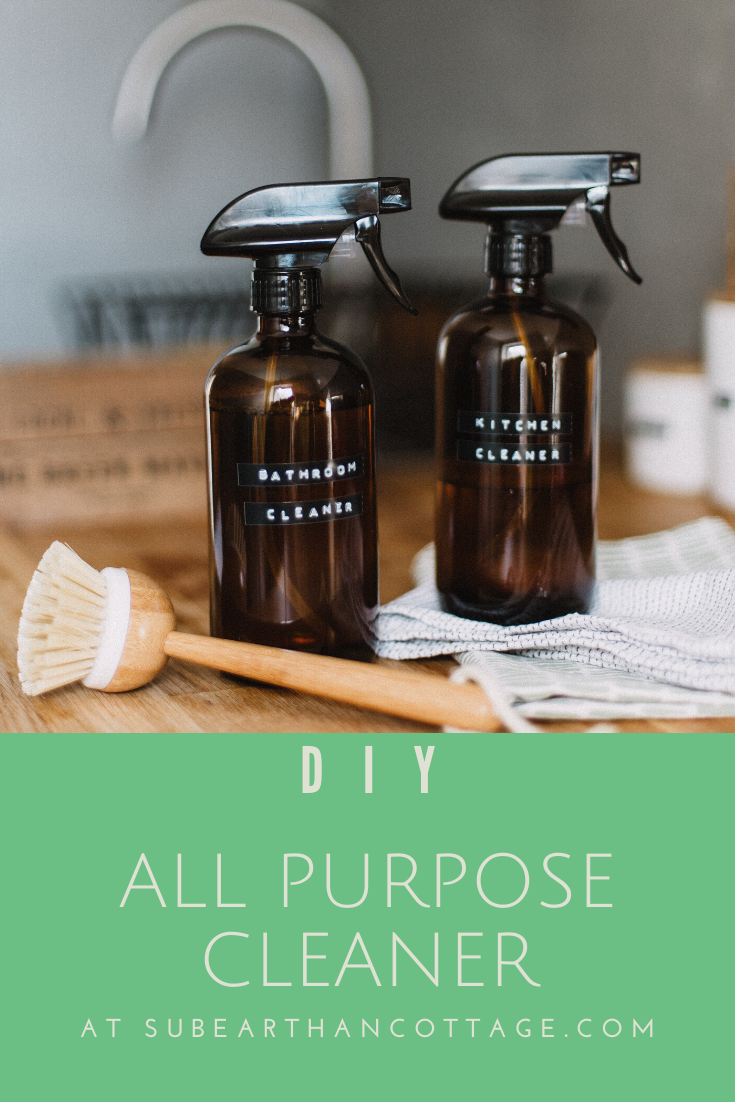
We are all becoming more aware of the types of products we use everyday. Whether it’s a concern for the environmental impact, the effect they have on our health or the safety for our pets and children, we want to know we aren’t inadvertently introducing harmful things into our homes. Something I do to feel confident in the safety of cleaning products I use around my family is to make my own where possible. One such product is a simple all purpose cleaner I use for cleaning hard surfaces, such as kitchen and bathroom counters and walls. It only uses a few ingredients, all of which you probably already have on hand.
Photo by Daiga Ellaby on Unsplash
All Purpose Cleaner Recipe
Ingredients:
Liquid soap, either dish soap or something like Dr. Bronner’s castile soap
Distilled white vinegar
Water
Optional: Essential oil of your choice
Supplies:
Clean, empty spray bottle
Liquid measuring supplies if you aren’t comfortable just eyeballing it
Optional: A funnel might make it easier to fill the bottle.
How to make it:
Measure about 2 tablespoons of soap, one cup of vinegar and one cup of water into the spray bottle. It doesn’t have to be exact. I usually just eyeball it. If you would like to use an essential oil, add 3-5 drops as well. Do be aware of safety guidelines regarding any essential oils you use, especially around pregnant women, children and pets. Tea tree oil or lavender are nice for cleaning and generally safe for most people. If the soap you use is scented or if you or your family members are sensitive to scents, you may want to skip the essential oil.
Swirl the bottle to mix everything without making the soap foam up too much.
That’s it. Now you have an all purpose cleaner that works as well as any other I’ve tried, with the added benefit of being safe enough that kiddos can help with the cleaning.
If you like this cleaning recipe, you’ll also like my DIY soft scrub for tougher cleaning jobs. To make sure you don’t miss out on future posts, sign up for my newsletter.
I love wearing denim blue jeans, but chasing my boys and taking care of my small zoo, they get lots of wear and tear. One of the worst things is having to scrap a favorite pair because of one too many rips. I’ve repaired rips in a utilitarian way in the past. This time I thought I’d try patching denim using my embroidery machine. I haven’t done much applique, so I learned some things along the way.
This tutorial makes use of an embroidery machine and serger. You could also adapt it to use a sewing machine or applique by hand and embellishing with hand embroidery.
Items needed
Denim jeans or other item to repair
Interfacing
Thread in colors of choice
Seam ripper or similar tool
Scrap of fabric at least 4 in x 4 inches
Stabilizers: Cut away or tear away, water soluble optional
Since I’m repairing a ripped knee, I needed to take out one of the side leg seams on my jeans. Using a seam ripper made this easy, but you could use small scissors, too. I left the seam intact at the hip and ankle, only removing what was necessary to lay the ripped area flat in the hoop without risking sewing it to the back. Leaving a little intact makes it easier to resew the seam at the end.
Step 2: Prepare the rip.
Iron the area around the rip so it’s smooth and flat. If there’s a lot of loose threads around the rip, trim them. I caught this rip before it frayed too badly, so no trimming was needed.
Side seam removed and jeans ironed flat.
I wanted the embroidered area to be solid, so I applied some interfacing to the back of the rip. I used some medium weight interfacing, but any should work, since it’s job is just to hold it together while the jeans are embroidered. This is a perfect project for using whatever scraps are handy.
Back of rip with interfacing applied.
Step 3: Hooping.
For denim, tear away or cutaway stabilizer is best. I chose cutaway for the most stability. It’s stiff, but it should soften in the wash. If not, I’ll switch to tear away next time.
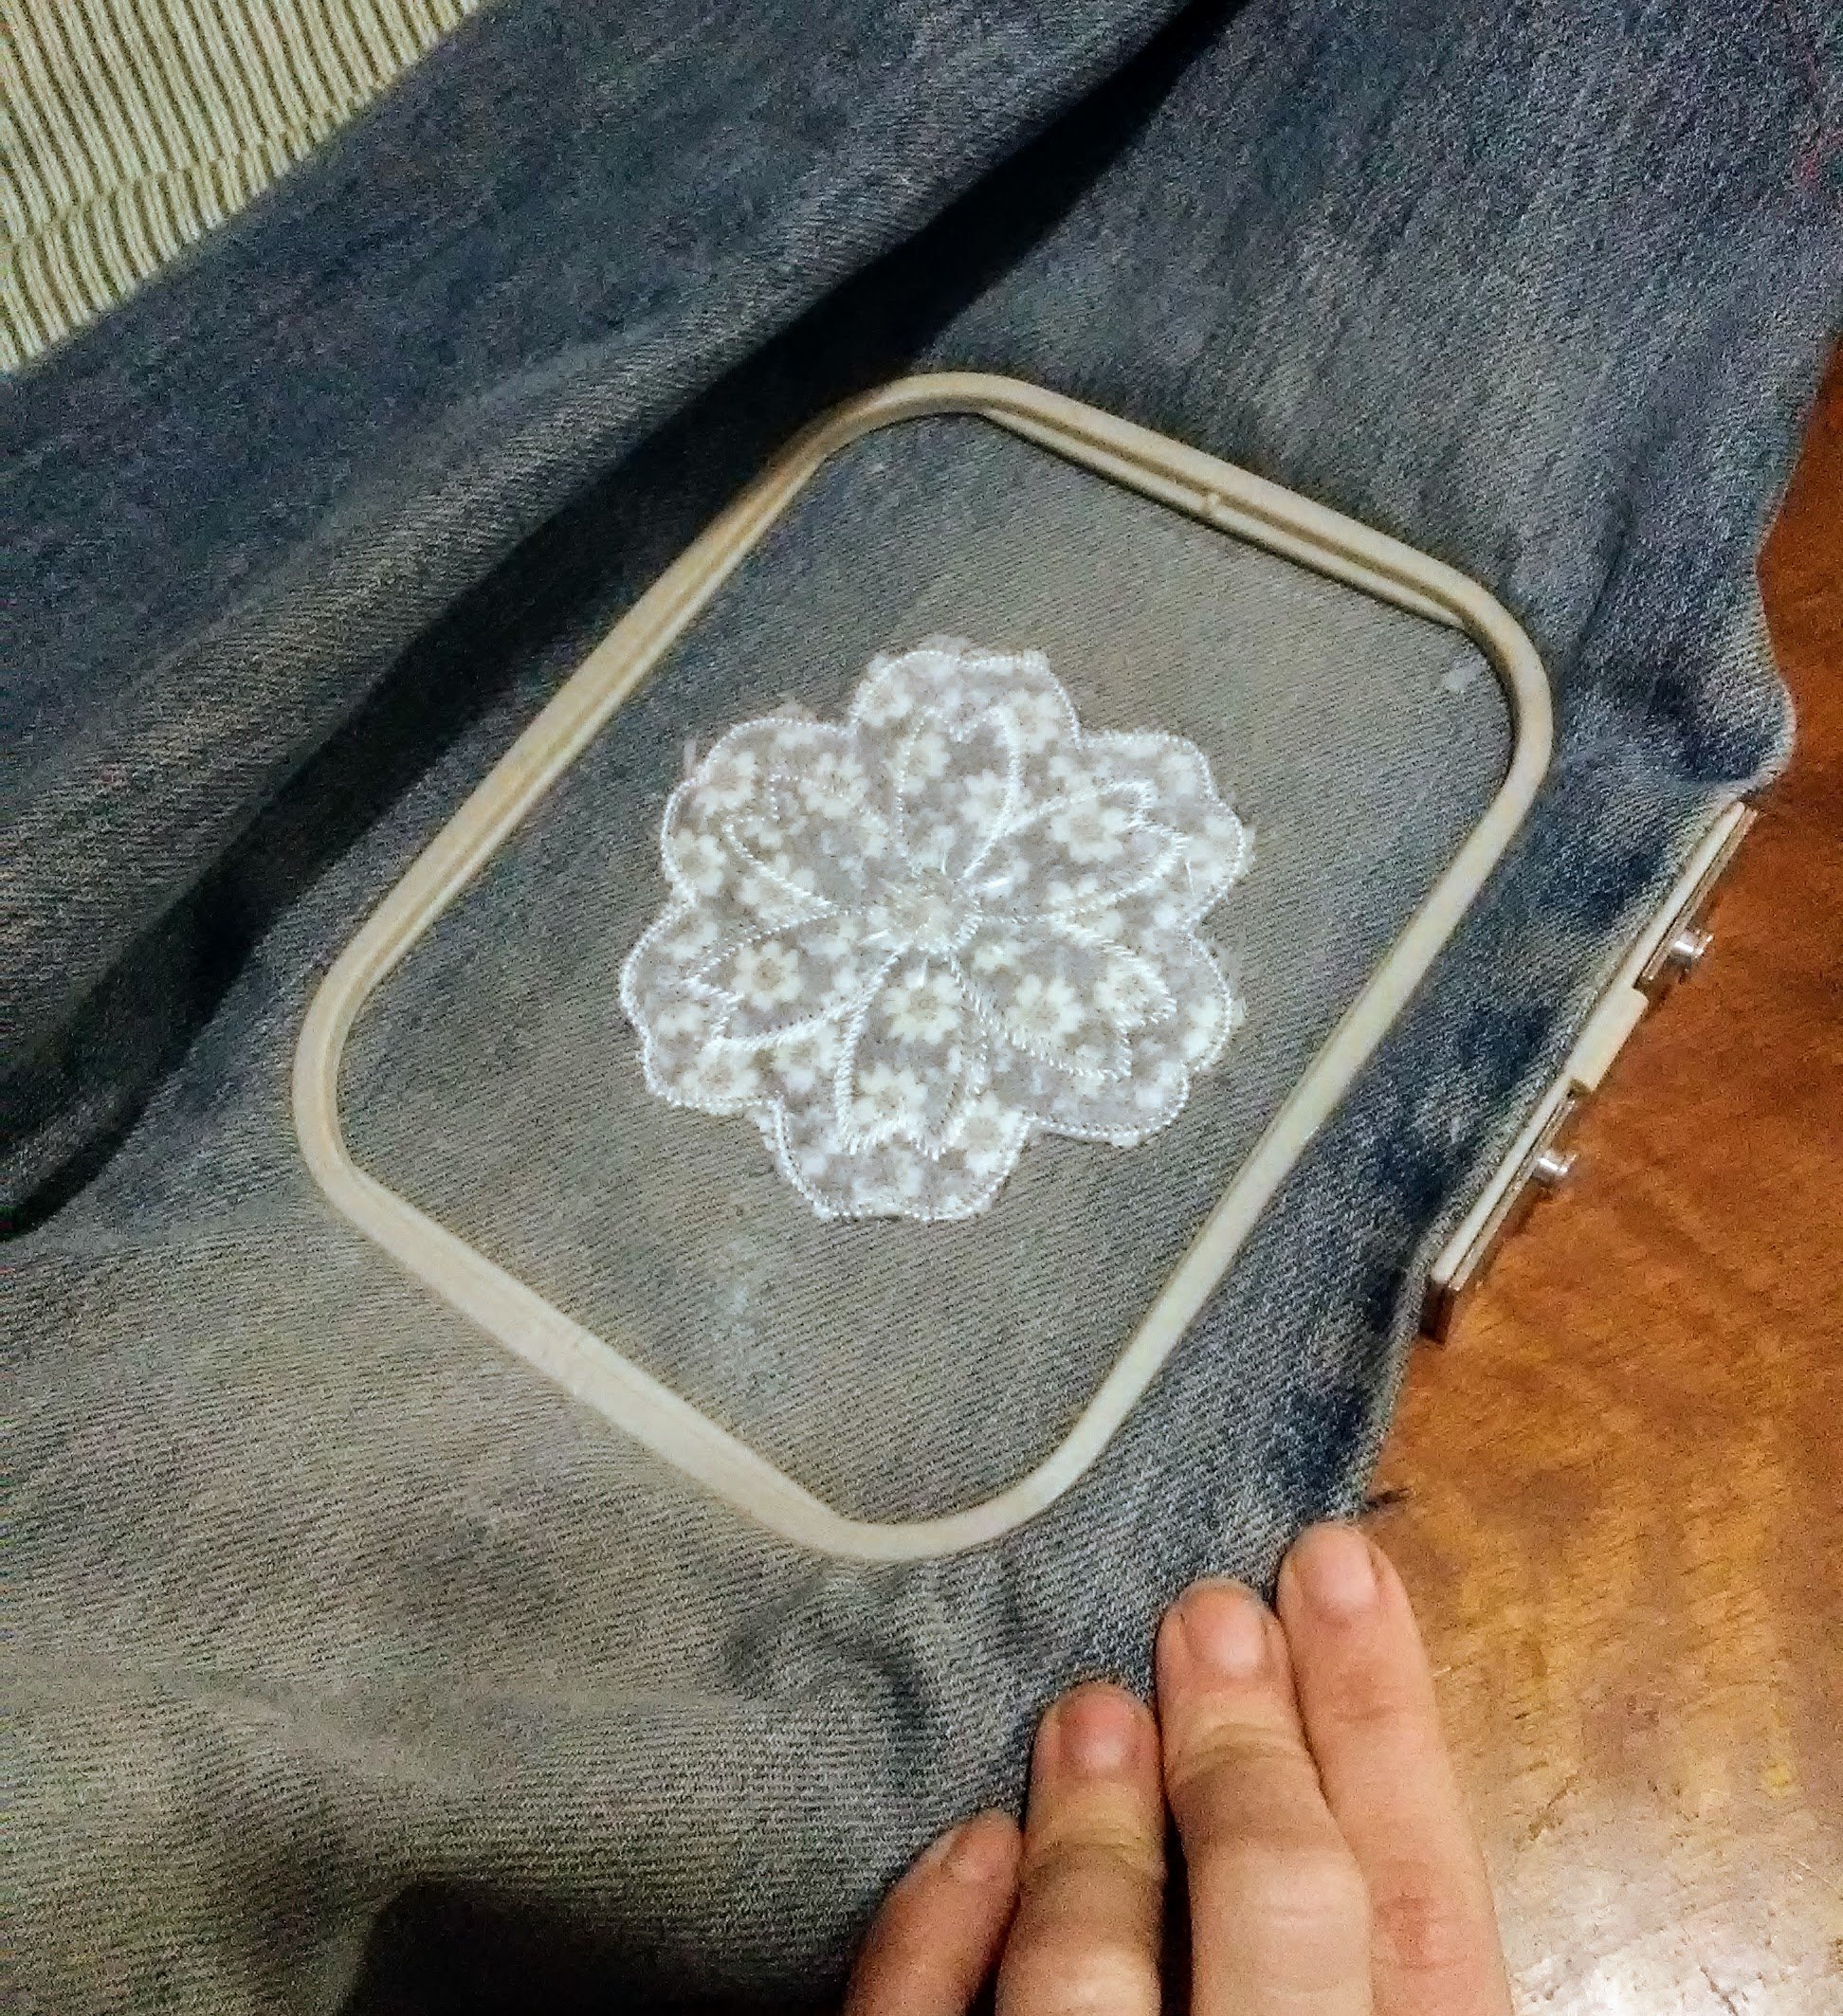
I tend to float projects and only hoop the stabilizer whenever possible. This project seemed like it would work better tightly anchored in the hoop. It took a few tries to center the rip in my hoop so that all edges would be covered by my design. My machine has a 4 in x 4 in embroidery field, so the rip just barely fit. Smaller tears will be easier to fit in my small hoop.
First attempt. Once I put it in my machine and had it circle the embroidery field, I saw it needed re-positioning.
Step 4: Embroidering the patch.
Once it’s properly hooped, it’s time to sew. On my machine, the first color stop said “Applique Material”. I haven’t done much machine applique, but the ones I am used to usually follow the sequence: placement stitch, tack down the applique (then trim excess), sew the final applique stitching. So, confused I just put the applique fabric and a water soluble stabilizer (optional) on top of the rip and pushed start.
What my machine was telling me to do was to just hoop the applique fabric so I could remove it from the hoop and cut it neatly. The second color stop was the positioning stitch. That would be stitched on my jeans and then my neatly trimmed applique could be placed in position and the stitching completed. Since I did everything at once, my applique isn’t as tidy as it could be. I will definitely listen to my machine next time.
Finished sewing.
Step 5: Remove from hoop and cut away excess stabilizer
I also steam pressed over the back of the patch to start softening the stabilizer.
Patch from the back with stabilizer trimmed.
Step 6: Sew the leg seam.
To repair the leg seam, I used a lock stitch setting on my machine. You could also sew the seam twice to reinforce it or just use really heavy thread. I then serged the raw edge. If you don’t have a serger, an overedge stitch or zig-zag stitch would also work.
Finished!
Finished patch. Next time I will use heavier thread so the embroidery shows better.
Not bad. I wish I had used heavier thread so the embroidery would show up better. Listening to my machine and cutting the applique fabric to size before I sew it on to eliminate the raw edges peeking out is another improvement for the next time I’m patching denim.
If you’d like to use this applique design, you can download the file here. You can use the design on items you make to sell as well as for personal use, but please don’t sell the design file.
Floral knee patch applique design image.
Like this tutorial? To make sure you don’t miss out on future tutorial posts, sign up for my newsletter.
Embroidery Files
Embroidery design files and freebies from SubEarthan Cottage. All designs are scaled to fit 4×4 hoops common on home embroidery machines.
I love in the hoop embroidery projects. They, more than anything, are what make me wish my embroidery machine had a bigger stitch area than just 4 inches by 4 inches. Even with such a small hoop size, there’s still plenty of in the hoop projects available.
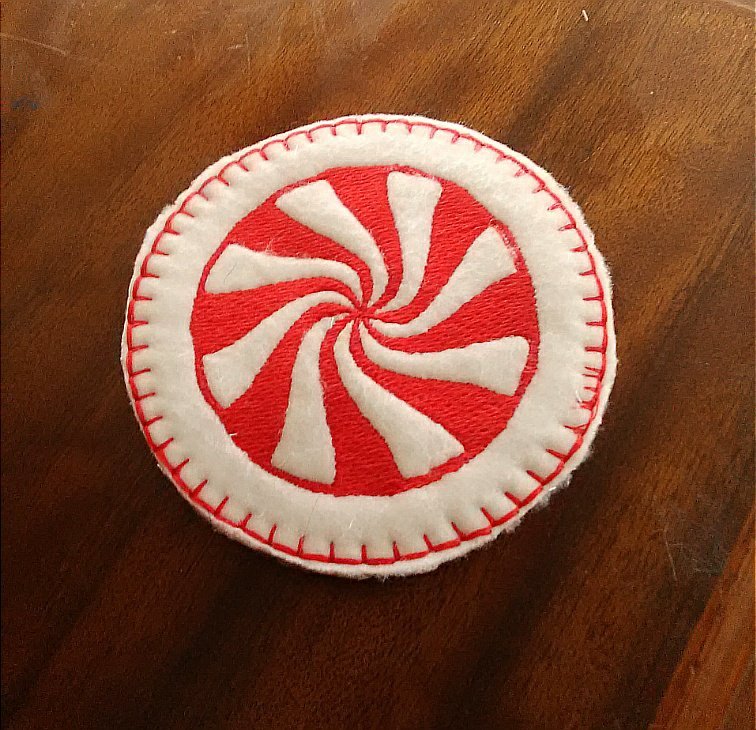
One of the easiest ITH (in the hoop) items to make are coasters. To make these peppermint coasters, all you need is fleece, one or two thread colors, stabilizer, the design file and, of course an embroidery machine. Once you see how they are made, you can easily swap out the design and colors to suit your needs. They are so simple to make, they are perfect for last minute gifts or as decor to match a party’s theme. You could also make a themed set for each month, season or holiday to decorate your home.
In the hoop peppermint coasters
Supplies to make one coaster
Two pieces of fleece cut to your machine’s hoop size
Place one piece of fleece on top of the stabilizer in the hoop. For small projects I sometimes just carefully hold it smooth while my machine stitches. You can also use a glue stick outside the stitching area to glue the fabric to the stabilizer, or pin the fabric to the stabilizer at the top and bottom, outside of the stitching area. I made the mistake of having a pin at the side, and even though it was clear of the design, it caught on my machine’s presser foot. Luckily I caught it quickly, but I will probably use a glue stick whenever possible to prevent that from happening again.
Decision Time: If you want the peppermint to show on both sides, place the other piece of the fabric under your hoop while placing it onto your machine. The bottom fabric usually stays in place on its own, but you could use a glue stick as I mentioned in the previous step. To only have the peppermint show on one side, skip to “Preparing your machine”.
Preparing your machine
If you want the peppermint on both sides, make sure the top and bobbin thread match. For a single-sided design, red or white in the bobbin is fine.
Place your hoop in your machine.
Upload the design file according to your machine’s instructions. The following steps are based on the Brother SE 400, so they may differ depending on your machine.
Resize your design, as desired. I wanted the peppermint as big as possible, so I followed the instructions for my machine to maximize the size. Mine maxed out at 7, which resulted in an overall size of about 6.5 cm. If your machine has a bigger capacity, you’ll need to decide how big you want the design .
Because I used white fleece, I chose to skip the white stitching and only stitch it in red. Again, I followed the instructions to skip to color 2, labeled red. Whatever color you choose, if you’re only sewing one color, skip to color two, because it has the outline. If you want to stitch both colors, skip this step.
Optional: Since fleece has a high loft, placing water soluble stabilizer is recommended. I’ve tried this project both ways, and I don’t see a big difference. For this tutorial, you’ll see the water soluble stabilizer in most photos.
Stitching your in the hoop coaster
Begin stitching according to your machine’s instructions.
If you are stitching both colors and want the peppermint on both sides, be sure to change the bobbin thread to match the top thread after color 1, white, is complete.
Continue stitching until the peppermint design is complete.
Stitching the border.
I like the border to match on top and bottom, so for this step I put red in the bobbin and for the top thread.
If you’re making a single-sided coaster like I did for this tutorial, now is when you add the second piece of fleece. Place it under your hoop as in the last step of “Preparing your hoop”.
On your machine, navigate to frames and select a circle frame.
Select the stitch type. I chose an over edge, blanket-type stitch.
Adjust the frame size. The frame size will determine the final size of your coaster. Make sure it is bigger than your design. Mine maxed out at 9 cm.
Stitch the border. I like a thicker look to the border, so once the border is done, I stitch it again. As long as you haven’t moved the fabric in the hoop, it will stitch directly on top of the first frame.
Finishing the coaster
Remove the project from the hoop.
Carefully remove any pins.
Trim thread tails.
Tear away the tear away stabilizer.
If you used water soluble stabilizer, cut away excess.
Cut fleece as close to the outside edge of the frame stitching as possible without cutting the stitching.
To remove remaining water soluble stabilizer, gently dab with a damp cloth or, swish it in a bowl of lukewarm water until stabilizer is gone and allow coaster to air dry flat.
Done!
I know that looks like a lot, but it’s really simple. I tried to be as detailed as possible, but if anything is confusing, please don’t hesitate to ask for clarification in the comments or through email.
If you notice, in the photo of the finished coaster, there’s a flaw in the border stitching on the left. That is where a pin caught the presser foot. Luckily that was the only damage. In the future, if I use pins, I will only pin at the very top and the very bottom. I really do prefer using washable glue sticks and keeping the glue well outside any stitching. That way my needle and machine don’t get gunked up, and I don’t risk hitting pins.
Finished Peppermint Coaster
Embroidery Files
Embroidery design files and freebies from SubEarthan Cottage. All designs are scaled to fit 4×4 hoops common on home embroidery machines.
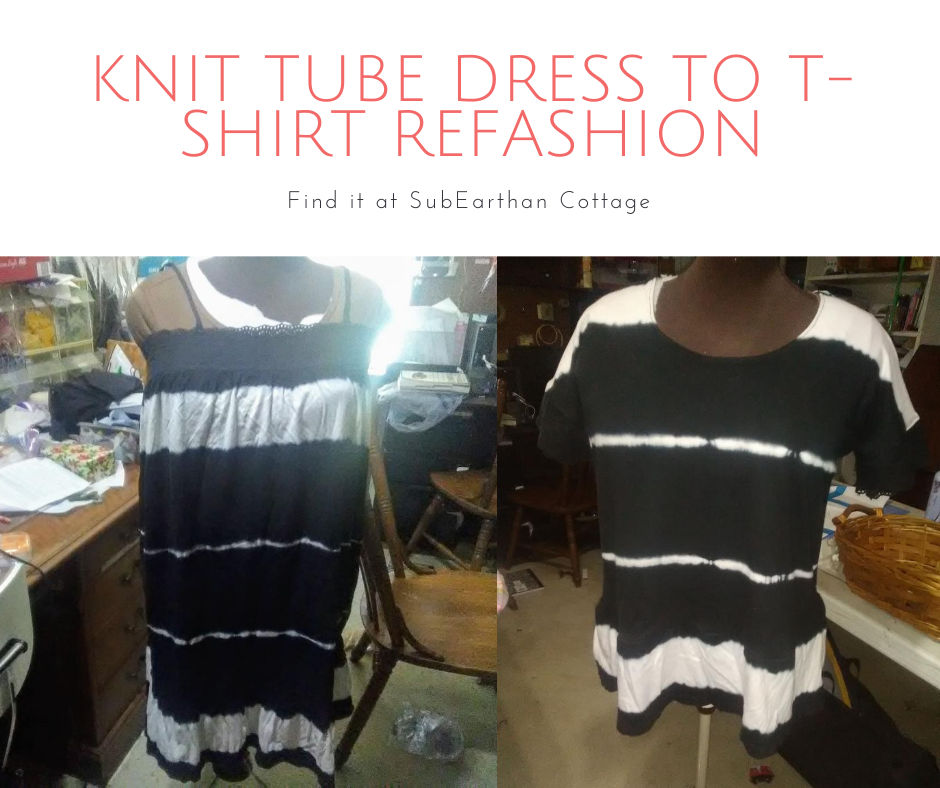
I’ve had two striped knit dresses in my refashion pile for about six months now. One black and white and one navy blue and white. The knit is soft, and I like the tie dye stripe, but the shape is basically a tube with a ruffle on the bottom. They are so unflattering, I don’t even want to wear them around the house. There’s a good amount of fabric in them, though, so I decided to try turn one of the knit tube dresses into a t-shirt.
Here’s the original shapeless dress. Excuse the background, please.
Knit tube dress to T-Shirt Refashion T shirt Process
I wasn’t sure what I would do at first, but I knew whatever it was wouldn’t need the straps, so I cut them off. I briefly considered leaving it close to as-is at that point and turning it into a skirt. It still wouldn’t have been very flattering, and I really don’t need any more casual skirts, so I moved on to other ideas.
T-shirts are always something I need, so that was my next direction. I didn’t take any process photos, so I’ll do my best to describe it. Refashioning always requires a little improvising based on what you have to work with, so consider this more as a guide than a complete how-to.
Turn the dress into fabric
I find it’s easiest to see what I have to work with when I’m looking at deconstructed pieces of fabric. Unless I think I’m going to use an element intact, I cut or rip out all seams and remove elements like buttons so that I can see how much fabric I have to use.
For this project, I cut off the black cotton eyelet band at the top and cut off the ruffle from the bottom before cutting off the side seams. I left the ruffle intact by cutting just above the seam that connected it to the dress because I thought it might come in handy. I chose to cut, rather than rip the seams, because the seams were narrow, so I wasn’t losing much fabric.
The Base Pattern
I thought about using a t-shirt as a pattern, but that doesn’t always work out as well. In my pattern files, I have a copy of the breezy tee from it’s always autumn, so I used that. I didn’t have enough fabric to make it exactly like the pattern, but it was a good starting point.
Laying it out
I squared up the main pieces of fabric and cut out the pattern. The fabric was too short for the pattern’s length, so I just focused on fitting in the top portion. I had to shorten the sleeves slightly because there wasn’t enough width.
Constructing the T-shirt
I serged (overlocked) the neckline folded it over and hemmed. I will probably regret not doing a banded neckline, because I’ve had hemmed necklines get wonky with wear. I can change it later if needed, though.
I serged the shoulder seams and then started thinking about the sleeves. The original pattern has pieces to create wide bands on the sleeves. I didn’t have enough scraps from the sides to create those bands. Instead, I decided to use the eyelet from the top of the dress. Honestly, I really wanted to use some of the ruffle to make flutter sleeves, but I figured that would be needed to add length.
I’m still not sure about this. I may remove it after wearing it a few times.
After attaching the eyelet, I serged the underarm and side seams, then straight stitched just inside the serged seam to reinforce.
The shirt was more of a crop top at that point, so I attached the ruffle to the bottom by serging and then straight stitching like I did on the side seams. Here’s the final result.
Finished, other than steaming the ruffle.
I like it, other than the eyelet on the sleeves. I’m not sure about that. It’s not tight, but it makes the sleeves snug. I’ll probably wear it a few times and decide if I just want to take it off altogether. Overall, though, it’s a cute t-shirt and definitely something more wearable than the original.
Like this post? To make sure you never miss a future post, please sign up for my newsletter.
If you search for refashioning ideas online, you’ll find tons of amazing examples of outdated styles being turned into trendy pieces that bear little resemblance to the original. (https://refashionista.net/ is one of my favorite refashion blogs to browse for inspiration.) It’s easy to get overwhelmed with ideas, especially if you’re new to sewing. The main goal of refashioning is to take a piece that is unflattering or unwearable and turning it into something that will be worn again. Sometimes a few simple tweaks are all that is needed to accomplish that goal.
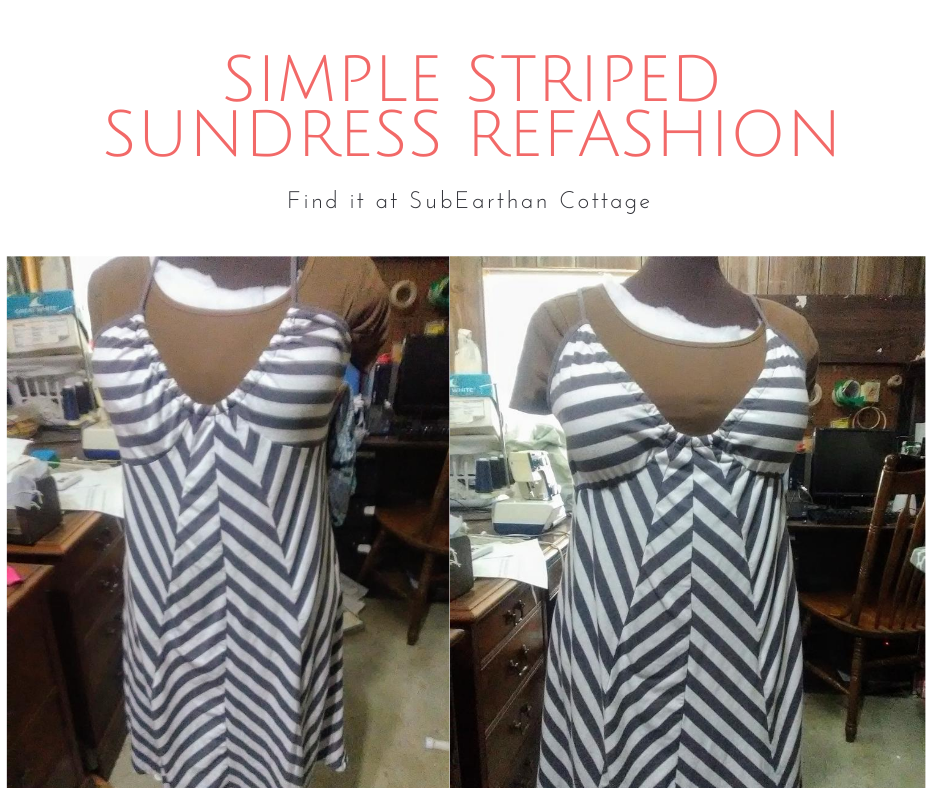
The Dress
Before
This sundress is a perfect example. In it’s original form, it was breezy and comfortable for summer, except that it required a strapless bra to be flattering. Strapless bras tend to be uncomfortable in general. When it’s August in Texas hot, they’re almost unbearable. Having to wear one took away from the comfort of this dress, leaving it regulated to the back of my closet most of the time.
The refashion Fix
In order to fix the problem, I needed to add coverage and a little support to keep the cups in place.
First, I sewed elastic into the seams under the bust. I sewed it onto the seam allowance to keep my stitches invisible from the outside.
I cut the elastic a little shorter than the length of the seam and stretched it to gather it slightly. When worn, it doesn’t look gathered, but it keeps the cups in place.
For coverage, I took the cup inserts from a soft seamless bra and hand stitched them in place. I never use them in the bras, so I have several sets sitting around. By hand stitching, I was able to keep my stitches from showing on the right side of the fabric. Rather than sew all around the cups, I strategically tacked them to keep them secure but invisible from the front.
The result
After
Those two simple tweaks only took about twenty minutes. The final result is a smoother, more flattering fit that doesn’t sacrifice comfort.
What simple refashions have you done that made a huge impact on wear-ability? I’d love to hear about them in the comments.
Like this post? To make sure you never miss a future post, please sign up for my newsletter.
In the past, I often featured handmade or vintage shops on Fridays. Over the years, the world of crafting and blogging has changed dramatically. I would love to resume Feature Fridays, but with a broader scope.
Handmade shop and websites are still welcome. I also want to feature guest writers sharing tutorials, tips, advice, recipes, etc. Categories that I feel are a good fit for this blog are crafting, sewing, sustainability, refashioning, healthy living, parenting, hair and beauty tips for busy moms, homeschooling and homesteading. I am open to other topics as well, so if you are interested but don’t quite fit into one of the above categories, please contact me anyway with your idea.
Guest posts will be promoted across my social media sites frequently throughout the week they are published and then periodically after.
Handmade shop/website features
For handmade shop/website features, answer the questions in the following list and email them to csloan@subearthancottage.com. I will contact you before your shop is featured and if any clarification is needed. You can give as much or a little info for each section as you are comfortable with sharing. Be sure to include links to your shop, web page and blog, if you have them. If you sell your products in a brick and mortar store and would like to include that info, you may include that as well.
I also choose a favorite item from your shop on the week that you’re featured and briefly tell why I like it. The first image from your shop for both your favorite item and my favorite item will be included in the blog.
Name and Business Name
Tell us a little about yourself and your business.
What made you get started in your business?
Anything else you’d like to share?
Tell us about your favorite item listed in your shop.
Links to your shop, website, blog, etc.
Email address (This will NOT be published)
Guest posts, tutorials and everything else
Please contact me at csloan@subearthancottage.com with your idea. If you already blog, a link to your blog or site where your writings are published is also helpful. Newbies are welcome, too. I’m also not opposed to reposts if they are a good fit and your own work.
If I think your idea is a good fit for SubEarthan Cottage, I will let you know and we will work out the details from there.
Making soap is like magic. Seriously, think about it: You take stuff that makes things feel greasy, mix it with stuff that would eat your face off and, if you do it just right, the end result is a wonderful bar of non-drying, skin-loving, fluffy-lathering soap.
Soapmaking is fun, but safety is a priority when dealing with sodium hydroxide, aka lye, aka the eat-your-face-off stuff. This is just a brief overview of the soapmaking process I use. Please do not use this as a complete how to guide. If that’s something you’re interested in, please, leave a comment and I will direct you to some more thorough resources on soapmaking.
Melting the Oils
Creating soap takes two basic things: oils or fats and an alkaline solution. In order to combine the oils and alkaline solution, the oils have to all be in liquid form and uniformly mixed. So, step one is measuring and melting the oils. For precision, all measuring is done by weight. Since I use a Crockpot for my hot process soapmaking, I add all my weighed oils to the Crockpot, then melt and mix them in the pot. For soapmaking, I generally use the low setting, but if I need to jump start the melting process I will start it on high then turn it down after a few minutes. This Crockpot is similar to the one I use.
Melting the Oils
Measuring the Lye
While the oils are warming in the Crockpot, I weigh the lye. It is important to be very precise when measuring the lye. Too little and the soap will be too soft. Too much and the soap could burn your skin. This is also why you need to be very careful about the soap recipes you use. If they are not correctly formulated, the end result could be dangerous.
Before I measure the lye, I measure the water or other liquid for the lye solution, also by weight. I do that first to limit the time I have the lye out.
Weighing the Lye. Gloves and goggles on.
Lye Safety
I make sure to measure the lye into glassware and all containers and utensils that come into contact with lye or the lye solution are reserved solely for that purpose. Once the lye is out, I never leave it unattended. Lye crystals resemble table salt, which would be a potentially deadly mix-up. That’s also why my soap production has slowed since Thaddeus was born. Until they are old enough to understand the importance of staying out of the room and can be trusted out of sight but in earshot for the time it takes to get the soap cooking, I only make it when they are either out of the house or asleep with Chris there to tend to them if they wake up during the process.
Mixing the Lye Solution
Once my lye is measured, I add the lye to the water and stir with a wooden spoon until dissolved. Lye fizzes up when mixed, so it is important to have the liquid in a container with plenty of room. The solution with also get really hot and put off fumes, so be prepared. I like to have a window open or fans and the vent a hood running. Some soap makers mix the solution outside, but I like to stay close to my work space to limit the chance of spills.
Blending the Oils and Lye Solution
For cold process soapmaking, it is important to have the oils and lye solution at about the same temperature. With the Crockpot hot process method I use, I find I can mix the lye solution into the warmed, melted oils without having to measure the temperatures first.
When you first add the lye solution to the melted oils, the color will change from clear to opaque. In order to properly combine the lye and oils, I use a handheld stick blender. You can stir by hand, but it is much harder to get everything properly blended and it takes f-o-r-e-v-e-r. I have had a stick blender die in the middle of making a batch of soap and it is a crazy long arm workout. I do not recommend it.
Adding the Lye Solution
Goal of Blending
The goal for all the hard mixing is called “trace”. Basically, I’m wanting to be able to lift my blender out of the mixture and trace a design on top. With cold process, there are various stages of trace that guide when to add any fragrance, essential oils or other add-ins. Since I use the hot process method, I add almost everything after the cook. Because of that, I can mix my batches to a full, hard trace where my traced design doesn’t melt back into the mix. This limits the possibility of a false trace, or the mix seeming to quickly come to trace when it isn’t thoroughly mixed. When that happens, it might separate or have lye heavy spots.
Hard Trace
Once it is at a hard trace, I stop mixing and put the lid on the Crockpot. If the mix seems too hot, for example, I had a false trace that I had to stir through, I will either turn the Crockpot to warm or off for a few minutes. Otherwise, I make sure it is on low and busy myself with cleaning up, lining my soap molds, and preparing essential oils and other additives.
Cleanup
Any lingering lye solution or soap mixture on the blender is still a risk for lye burns, so I’m cautious with the cleanup. For the whole soapmaking process, I keep a good amount of water with vinegar and a bit of dish soap ready in the sink. The vinegar helps neutralize the lye, so anything that comes into contact with lye goes directly into the vinegar solution, and I use a similar vinegar solution to wipe down my soapmaking area, just in case.
Stages of Saponification
During the cooking, the soap mix will change from an opaque, milky color to a shiny, translucent gel like texture. A pool of liquid also forms on top. that pool of liquid is glycerin, a byproduct of the saponification process. This transformation starts at the edges of the pot and happens in a wave moving towards the center. I find it really fun to watch.
Soap Waves
Finishing the Batch
When the entire soap mixture is translucent and the consistency of mashed potatoes without lumps, I turn off the heat and stir the soap by hand for just a couple of minutes to let it cool. At this point, if done correctly, the mixture completely transformed to soap. I don’t want it to cool too much, or it would be hard to add the essential oils, but too hot and it will burn off the scent.
Glycerin Pool Forming in the Middle
I then add any essential oils blended in my chosen carrier oil and any other add-ins I’m using in that batch, stir thoroughly by hand, and plop it into my molds. Since it is thick, I generally have to tap my molds on my counter firmly to eliminate air pockets.
Adding the Blended Essential Oils and Carrier Oil
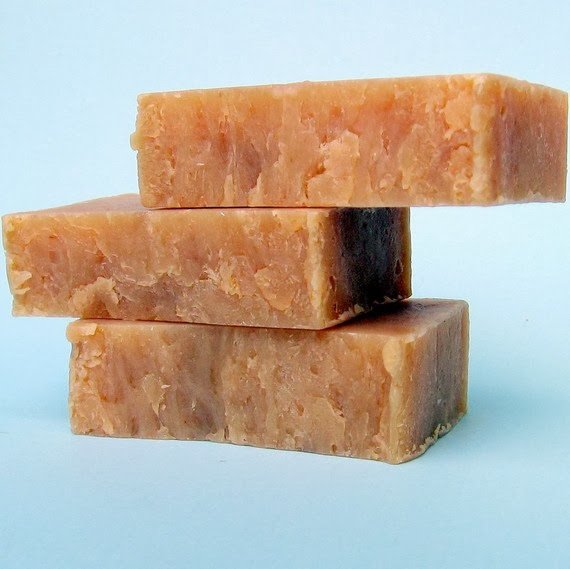
Curing the Final Product
Because the saponification process is completed during the cooking, the soap is totally safe to use as soon as it is cool enough to touch. It needs to cool in the molds for 12-24 hours or so to hold it’s shape, though. Once it is firm enough to cut, I cut and wrap the bars. While not necessary, hot process bars still benefit from curing for at least a week or two to allow excess moisture to evaporate. As I discussed in my Proper Care and Feeding of Your Bar Soap post, the firmer and drier a bar of soap is, the longer it will last. That’s one of the reasons I wrap my soap in cloth rather than plastic. Cloth allows the soap to continue to harden for a longer lasting bar.
I, Charity Sloan, am a participant in the Amazon Services LLC Associates Program, an affiliate advertising program designed to provide a means for sites to earn advertising fees by advertising and linking to Amazon.com. Any purchases through those links will result in my receiving a small percentage in commission.
This only refers to Amazon links found in/on my blog pages. All products in my shop are 100% mine and not linked to Amazon.
Prices are the same whether you click an affiliate link or a non-affiliate link, so you will not be charged more. Thank you for your support!


 Natural Lavender Dryer SachetsPrice range: $10.00 through $40.00