Making Kombucha using the continuous brewing method means you’ll always have plenty of Kombucha ready to drink or flavor in a second ferment. Here’s how to do it.
Supplies for continuous brewing
In addition to the basic Kombucha ingredients listed here, you’ll want to have a jar with a spigot. There’s some debate over the best materials for the jar and spigot. The biggest thing to watch for is something non-metallic, although I think I’ve heard stainless steel is okay. Most people like to avoid plastics to prevent any weird chemicals from leeching into the KT. I went with the cheapest, most available option of a glass sun tea pitcher with a plastic spigot.
Keep about half of the finished KT and the SCOBY in the jar and bottle the rest. Brew about half a gallon of tea. I use two black tea bags, one green tea bag and one half to one cup of sugar. Let it cool and add it to the jar with your finished KT and SCOBY. Since you replaced half of the KT, you’ll want to wait a couple of days before drinking from the new batch. After that, you can drink some fresh from the tap every day. Just replace what you drink with fresh sweet tea. Because you are only adding a small amount of fresh tea in relation to the KT, you can drink a little every day without the wait time. I like to keep a small pitcher of sweet tea in the refrigerator to replenish what gets taken out each day.
Like this post? To make sure you never miss a future post, please sign up for my newsletter.
For those who aren’t familiar with it, Kombucha Tea is tea that is fermented with a culture of beneficial bacteria and yeast (SCOBY). There are many claimed health benefits to it, although the most widely accepted is as a probiotic. It can be a bit fizzy, so many people use it as a soda replacement. It’s becoming much easier to find in mainstream supermarkets, but usually runs about $4 for a small bottle. Yikes! It’s really not that complicated to brew your own and the way to go IMO if you want to drink it daily.
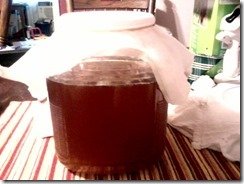
My first batch of Kombucha Tea brewing.
Ingredients to start 1 gallon of Kombucha:
3 Black tea bags 2 Green tea bags 1-2 cups Granulated white sugar 1 gallon Filtered water 1 Kombucha SCOBY (I got mine from here: https://www.etsy.com/shop/OKposeyMom) 2 cup Starter Kombucha tea (KT) or distilled vinegar
Supplies:
1 gallon glass jar (with spigot for continuous brew) tightly woven or knit cloth or coffee filter larger than the mouth of the jar rubber band or elastic big enough to securely fit around the mouth of the jar. Wooden or plastic spoon (metal is fine unless you need to stir after adding the SCOBY)
Make sure all jars and utensils are clean. Rinse everything really well to be sure there’s no soap residue. For the first batch, you’ll need a full gallon of tea. I use both black and green tea with three black and two green tea bags. As long as you are using unflavored, caffeinated tea, any ratio should work. Brew the tea like normal and add the sugar. Stir to dissolve. It needs to be plain white granulated sugar to make it easy for the SCOBY to break down. The sugar can be adjusted to taste, but for the first batch I like to use a full 2 cups. I’ve also found that in warmer months the brew gets strong really fast, so I add closer to the full 2 cups then to compensate. In cooler months, I can cut back on the sugar.
When the tea is cooled to about 80 degrees, add the SCOBY and starter Kombucha Tea (KT) and/or distilled vinegar. The temperature really isn’t that important as long as it’s cool enough to not kill the SCOBY. I usually just feel the jar. When it feels no more than a little warm, I add the SCOBY. If you don’t have enough starter KT you’ll use distilled vinegar to make up the difference. Do NOT use cider vinegar. Cider vinegar contains some of it’s own culture “mother”. If you use cider vinegar you’ll end up with some sort of hybrid culture.
Cover your jar with the cloth or filter and secure with a rubber band or knotted piece of elastic. This allows it to breathe while keeping dust and ickies out. Wait. and wait. and wait. lol. The KT usually takes about 7-10 days to develop. It brews faster in warmer weather, so keep that in mind. Starting around day seven, use a straw to siphon off a little from under the SCOBY. You want it to have a little bit of a vinegary zing to it, but other than that the taste is up to you. My first batch tasted like cider made from honey crisp apples-tart but still really sweet.
The longer it brews the less sweet and more vinegary it will taste. If you think it needs to brew longer, leave it for another day or two and taste again. If you like the taste, great! Time to bottle it and brew batch number two.
For batch brewing, you’ll basically be doing everything you did for your first batch. All but 2 cups of KT from your first batch can go in to bottles. I use Mason jars. If you want to add flavorings you’ll add them to the bottled KT. I’ll do a post about that later. The 2 cups you reserve and your SCOBY will stay in the jar to start the next batch. (Every few batches, you will want to transfer them to a non-metallic bowl so you can wash the jar. If you keep a second jar on hand, you can just switch jars every batch.)
Repeat the above steps including the wait time for each new batch.
With each new batch, you will grow a new SCOBY. Usually the new SCOBY will grow on top of the old SCOBY. Technically you can separate the new SCOBY each time to use in your new batch. I like to leave the SCOBYs alone until it gets to be about a half inch to an inch thick. After that, I’ll separate off a few layers by pulling it apart between two layers. One SCOBY keeps brewing while the other goes into a big jar with some KT and a lid, aka a SCOBY hotel. Many SCOBYs can live in a hotel as long as you have enough KT to keep them moist. It’s always a good idea to have an extra SCOBY or two on hand in case your batch gets contaminated. You can also give your extra SCOBYs to friends so they can start their own brew.
Next week I’ll cover how to move from batch brewing to continuous brewing.
Like this post? To make sure you never miss a future post, please sign up for my newsletter.
For busy weeknights, there’s nothing better than an all in one meal that practically cooks itself. Prepare everything the night before and keep it in the refrigerator until it’s time to cook for even more time in the evening. You could even prep the vegetables and meat and store in the freezer for last minute meals.
The basics
This is more of a how-to than a recipe. You can really use however much of the ingredients based on how much food you need and your pressure cooker’s size. For my family of five with two little appetites, I used about four chicken breasts, three cups of rice and water, one jar of sauce and all the broccoli I could squeeze in and around everything.
You can easily swap out the protein for whatever you prefer. Ideally, it should be cut into small, bite sized pieces prior to cooking. With the chicken breasts, I’ve been able to cook them from frozen first and cut them later, but it’s not ideal.
This time, I used broccoli, but it was a little overdone for my liking. Root vegetables cut into bite sized pieces or frozen peas or green beans are probably better for all in one meals like this.
The sauce
To make it super easy, I started with a jar of Korma simmer sauce from Aldi. You could easily substitute any store bought or homemade sauce. Canned soup, salsa, tomato sauce or even just broth are all options. Tailor it to your family’s tastes.
Assemble the ingredients
I used an old rice cooker pot for the rice. Any heatproof container that is big enough to hold the rice and cooking liquid but small enough to fit in your pressure cooker’s cooking pot would work.
I put the chicken and broccoli under and around the rice pot. Then I filled the rice pot with appropriate amounts of rice, water and salt.
The Korma went on top of the broccoli and chicken, and I added about half a cup of water just to make sure there was plenty of liquid. If you use broth or a thinner, liquid sauce, the water isn’t necessary.
Cooking
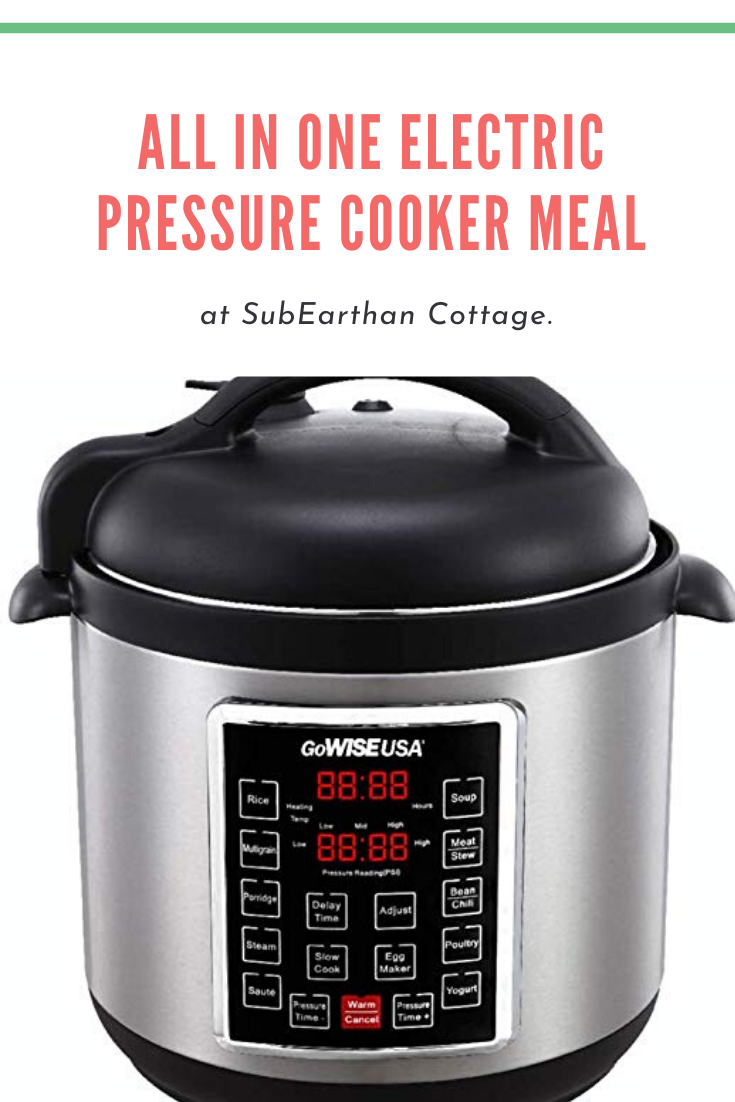
Finally, I set the whole thing in my pressure cooker and cooked it with the “Rice” setting. My electric pressure cooker is a GoWISE USA brand. Recipes for the Instant Pot brand usually work as written for mine, so I assume that setting would work for the Instant Pot and other similar pressure cookers.
Here is a terrible picture of the end result. I promise it tasted better than it looks. A homemade sauce would have been healthier, I’m sure. When you are strapped for time or having to make do without a fully functioning kitchen, though, it’s lots better than having to rely on fast food.
Like this recipe? Sign up for my newsletter to never miss future tips, tutorials and recipes.
Another kitchen gadget I find myself using almost daily is my air fryer. Like my electric pressure cooker, my air fryer was a Christmas gift from my parents. This is the Gourmia model I own. It has a six quart basket and eight preset functions, or I can manually set the timing and temperature.
Unlike with my pressure cooker, I honestly wasn’t sure what to do with the air fryer at first. I don’t fry a lot of things, mainly because it’s messy. I also have the added challenge of making gluten free breading. Even before going gluten-free, I found it hard to get the breading to stick on things like chicken and have it cook all the way through without burning the outside. After some experimenting, though, I’ve found that the air fryer makes frying easier. I’ve also found that the air fryer does so much more than frying.
Ways I use my air fryer
Potatoes Whether it’s fresh home fries or frozen tater tots, the air fryer browns them all nicely. My air fryer has a french fry preset, so I just add the potatoes and start it. Every once in a while during the cooking, I give the basket a shake to keep them from clumping. This is especially important if the basket is fairly full. You can cook them completely without oil, but I do like to toss them lightly with a little olive oil. This seems most important with french fries. They’re okay without it, but I like the flavor better with it.
Sausage and bacon Both turn out beautifully in the air fryer. All the excess grease drains under the basket, leaving the bacon crisp and the sausage not greasy. I use the bacon setting on mine for both, but I reduce the time to nine minutes for sausage.
Reheating leftovers We got rid of our microwave a few years ago. We really only used it to reheat leftovers, which never tasted as good as if I heated them on the stove or in the oven, and it took up a lot of counter space. While I still use our stove and oven to reheat things for the whole family, if I’m just heating a plate of food or other small amount, I’ll use the air fryer. It’s quicker than the oven, and the food heats more evenly than it did in the microwave. The texture is better, too.
Frying I still don’t do this much, but I finally got gluten-free fried chicken to work, so that may change. I did cheat a little by quickly frying it on the stove first, just to lightly brown and set the breading. Then I added it all into the air fryer basket and let it finish it with the chicken preset function. While it’s not as low fat that way, the chicken turned out crisp and juicy but not at all greasy. That also freed up my skillet to make gravy while the chicken finished cooking so it was all hot and perfectly done at the same time.
Baking It is essentially a counter top convection oven, so it bakes as well as an oven. I don’t use this function as much, because, with a family of five, the oven is usually more convenient. If I’m only making a few cookies, though, it works really well. I’ve also baked cheesecake in it using the recipe that came with my air fryer. It turned out delicious and was super easy to make.
What are your tips?
I’m still learning new things to try in my air fryer. With just those five things, I already use it almost every day. I would love to hear more creative ways to use an air fryer. If you have one, please share your favorite tips and recipes in the comments.
To make sure you never miss a post, please sign up for our newsletter. Once you sign up, you’ll get a confirmation email. Sometimes it gets sent to the spam box. Please look for it, because you won’t be signed up until confirmation is complete.
If you click through any of the Amazon links and make a purchase, I will receive a small commission. There is no added cost to you.
In last week’s tutorial, the bottom hem was double stitched but otherwise left raw. Since knits don’t unravel, it is fine to leave it that way. I prefer to finish the raw edge, either with a serger or by enclosing the cut edge.
The top seam is finished by serging the raw edge. If you don’t have a serger/overlock machine, you can use a zig-zag or overcast stitch on a regular sewing machine.
The bottom seam is enclosed. Do do this, when following the first tutorial (found here) do NOT turn the shirt inside out when sewing the first bottom seam. Instead, sew it with the shirt right side out. Once it is sewn, trim any excess material from below the stitch line, leaving about 1/8-1/4 of an inch.
Now, turn the shirt inside out and smooth the bottom seam flat, like in this photo:
Pretend the bag is inside out this time.
Once it is all smooth (ironing helps) sew a seam at least 1/2 inch to 5/8 inch from the bottom. This stitch line encloses the raw edge. Since it is the bottom seam that will get the most stress, I still stitch it twice. Turn it right side out, and you’re done, unless you’d like to add a little shape to your bag.
Boxing the bottom
Boxing the bottom of the bag basically squares off the bottom, similar to a paper bag. I rarely do this with t shirt bags. They are too floppy for it to make much difference without adding a ton of interfacing for support. I also like these bags because they are easy to fold and stash in the car or my purse. Boxing the bottom complicates that a little. Even so, sometimes a boxed bottom can help things like cereal boxes or egg cartons fit neatly, so having one or two is nice.
Step 1
With your bag inside out, flatten the bottom seam so that it forms a triangle. That is a horrible description, so hopefully you can see what I mean from this photo:
The white stitching is the bottom hem of the bag. It should be in the middle, cutting the triangle in half.
Step 2
Measure about 3 inches down from the point of the triangle and draw a straight line perpendicular to the hem stitching.
Step 3
Sew along the line you drew twice to make it a strong seam. This photo shows my stitching in red and my chalk line.
Repeat steps 1-3 on the other side.
Step 4
To finish, you could cut the excess part of the triangles and leave them raw or overcast/zig-zag stitch the cut edges. If you want to add strength and more structure to the bag, leave the triangles intact. Fold them down flat into the bottom of the bag and either tack in place with a few stitches at the point or sew along the loose sides of the triangles.
Inside of the bag with one triangle sewn down. View from the outside of the bottom of the bag.
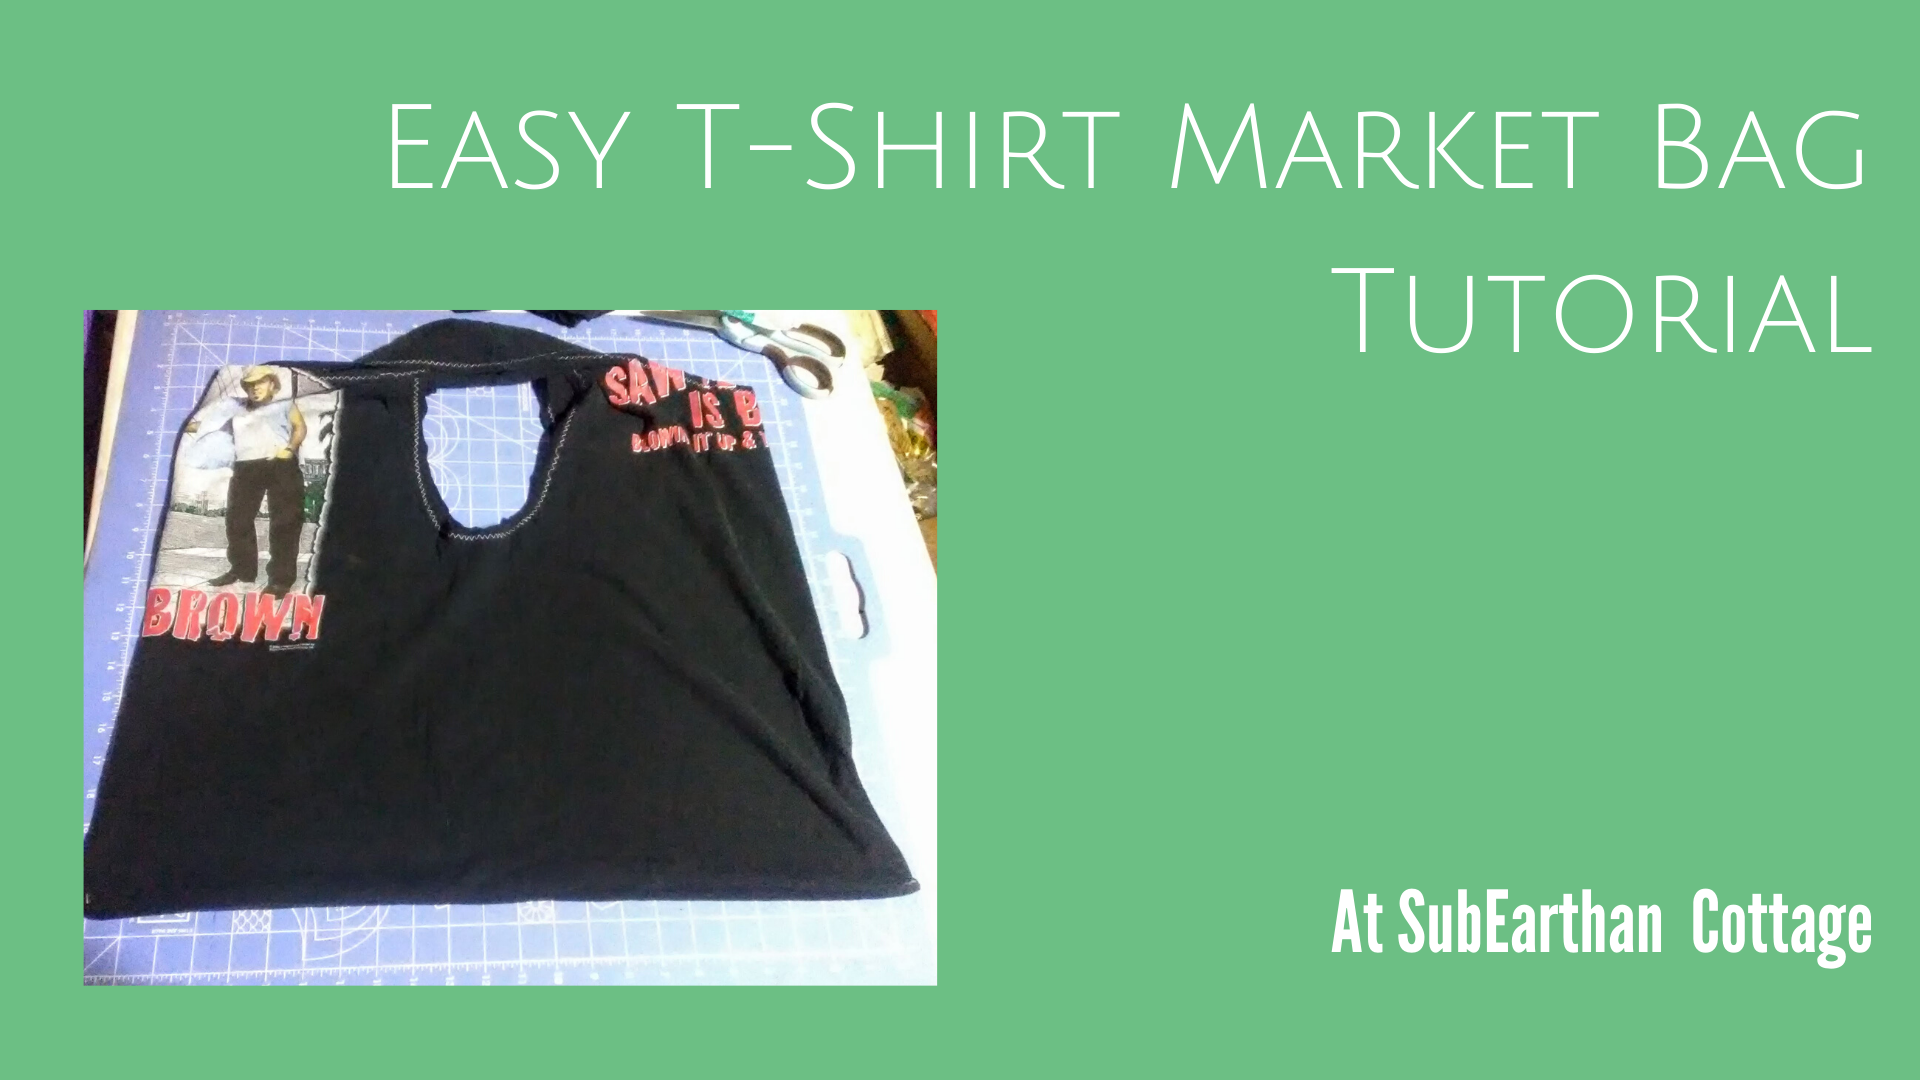
One of my lovely nieces is learning to sew with a sewing machine. To help, I thought I would do a series of beginning sewing project tutorials. Today’s tutorial turns an old t-shirt into a market bag. I’m keeping it simple today, but in the future I’ll do a post on how to make it with and enclosed bottom seam and how to box the bottom. It’s a great way to turn t-shirts that you no longer wear into something useful. If you don’t have a sewing machine, you could even sew it by hand.
Materials:
T-shirt
T-shirts with a high cotton content and no side seams work the best.
Thread in your choice of color.
Fabric scissors
Sewing machine set up with appropriate needle and bobbin threaded in your color choice.
Note: Ball point needles are generally the best for sewing with knits. This project does fine with an all-purpose needle, though, so use what you have.
Preparing the shirt:
Lay the shirt out flat and smooth out any wrinkles. Since this one is just to add to my Aldi bag stash, I didn’t worry too much about wrinkles.
T-shirt. I’m not sure where I got this one. Also, forgive the grainy photos. Lighting in my craft room wasn’t great that day.
Cut off the arms including the armhole seams.
Cut off the neck about 2-3 inches below the neckband. My shirt is pretty big, so I went three inches below the neckband. With smaller shirts you can do less.
I like to fold it in half before cutting to keep everything even. If your scissors aren’t sharp enough to go through all the layers, cut one side and then fold it in half to use as a template for the other side.
Cut straight across the bottom of the shirt to remove the hem. The hemline is often uneven on t-shirts, so focus on keeping the shoulder seams lined up, the shirt smooth and cutting a straight line that removes all of the hem.
Bottom hem removed.
At this point, you should basically have turned the t-shirt into a tank top. Now, decide if you want your bag to look like plastic grocery sacks that have the handles at the top sides (so, your tank top with the bottom sewn closed), or if you want the handles at the top middle, like a purse or market tote.
Looks like a tank top. For a grocery style bag, turn it inside out and lay it back
flat in this position.
For the grocery sack-style, turn your shirt inside out and lay it flat, just like a tank top again. For the purse/market tote, turn it inside out and match the shoulder seams and armholes together, then lay it flat. I’m making a market style tote, so you can see it in the photos.
For a purse/market tote turn it inside out and lay it flat with the shoulder seams at the top, as shown here. I find this style easier to carry on my shoulder.
Once everything is lined up, pin along the bottom to hold it in place.
Pinned hem.
Sewing the bag:
Many sewing machines have an assortment of stitches to use with knit fabric. They are useful for keeping the thread from breaking when the fabric stretches. On my machine, they are labeled “stretch” and shown in brown. Zig-zag stitches also work well on knits.
Normal stitches are in red. Stretch stitches are in brown.
You could use a stretch or zig-zag stitch for the bottom of the bag. Since it really shouldn’t be stretching much, I usually stick with a regular straight stitch set to a long-ish length of 3.
Straight stitch.
Length of 3.
Regardless of the type of stitch you choose, I recommend sewing across the bottom twice to make it nice and strong.
The seam allowance, or distance between the edge of the fabric and the stitches, doesn’t really matter that much as long as you keep it the same all the way across. For this bag, I used a 5/8 inch allowance, marked on the footplate of my machine. To keep a straight line, focus on keeping the fabric lined up with the guideline for the seam allowance rather than watching the needle.
Edge of fabric lined up on 5/8 mark.
At the start , sew about 2-3 stitches then backstitch to secure the stitching before continuing to sew to the end. At the end, backstitch another 2-3 stitches, then sew to the end and cut the threads. Repeat the seam as close to the original line of sewing as possible to make it nice and strong.
Back stitched first seam
Second line stitched for reinforcement.I tried to stay as close to the first line as possible.
Turn the bag right side out. Since knit doesn’t unravel, you could stop there and be done. I like to sew around the arm and neck holes to reinforce the t-shirts original shoulder seams and give it a more finished look.
Finishing around the t-shirt arm and neck hole handles:
I usually use a serger for this, but it’s not necessary. On a sewing machine, I do like to use either a zig-zag or stretch stitch since there is going to be more stretch on the handles so a straight stitch might break.
Zig-zag setting.
This time, I’m using a zig-zag stitch, keeping the stitch length set at 3 and using about a 1/2 inch seam allowance. If your sewing machine has a free-arm, it can make it easier to sew around the armholes if you use it. Sew around each arm hole and the neck hole separately.
Messy zig-zag backstitching.
To start and finish the zig-zag, I backstitched like normal. It looks a little messy that way. You could leave extra thread at the beginning and end, pull the threads to the back side and tie knots to secure them if you want a cleaner look.
Finished t-shirt bag.
That’s it. You now have a purse or reusable bag from what used to be an old t-shirt. Don’t throw the t-shirt scraps away. I’ll post some creative uses for them soon!
To learn how to make this bag a little more polished, read my t-shirt bag upgrades post.
If you read through the tutorial and like the concept but don’t want to diy, I still have a few left in my shop on clearance here.
Like this tutorial? To make sure you don’t miss out on future tutorial posts, sign up for my newsletter.
I have never been a huge fan of corn tortillas. They’re good for some things, like street tacos, but overall I love the soft, slightly chewy texture of flour tortillas. While there are flour gluten free tortillas on the market, they are pricey and hard to find. Which means that since eliminating gluten from our diets, I’ve had to stick to corn. Which is fine, because it’s better than no more tacos, but , I still miss flour.
After much searching, I finally found a recipe that mimics the soft, chewy texture of flour tortillas. They require no real prep work, so it’s easy to make them last minute, if needed. Basically, if you can make a pancake, you can make these gluten free tortillas.
You can also adjust the thickness to be more like a flatbread. I can see pairing them with curries or stews, or cut into chips , toast and serve with hummus.
Soft, chewy gluten free flour tortillas so easy you can make them last minute.
Prep Time5 minutesmins
Cook Time1 minutemin
Course: Side Dish
Ingredients
1Cup Chickpea based gluten free flourCan be straight chickpea flour, or a blend with a high amount of chickpea flour, such as Bob's Red Mill GF flour. (NOT the 1 to 1 flour)
0.5cupTapioca flour
1tspsalt
1cup water
1tspcoconut or other oilIf you use a non-stick skillet or griddle you may not need the oil.
Instructions
Mix the dry ingredients in a large bowl.
Add the water and stir until blended.
Oil a skillet or griddle as needed and heat to medium high.
Pour about 1/4 cup of the batter onto your prepared skillet or griddle.
Cook for 1-2 minutes over medium high heat.
Flip like a pancake and cook for another 1-2 minutes.
Repeat the cooking and flipping for the rest of the batter.
Notes
This recipe is very versatile. For thinner tortillas, add a little more water. For more of a flatbread, reduce the water to about 3/4 of a cup.
I, Charity Sloan, am a participant in the Amazon Services LLC Associates Program, an affiliate advertising program designed to provide a means for sites to earn advertising fees by advertising and linking to Amazon.com. Any purchases through those links will result in my receiving a small percentage in commission.
This only refers to Amazon links found in/on my blog pages. All products in my shop are 100% mine and not linked to Amazon.
Prices are the same whether you click an affiliate link or a non-affiliate link, so you will not be charged more. Thank you for your support!