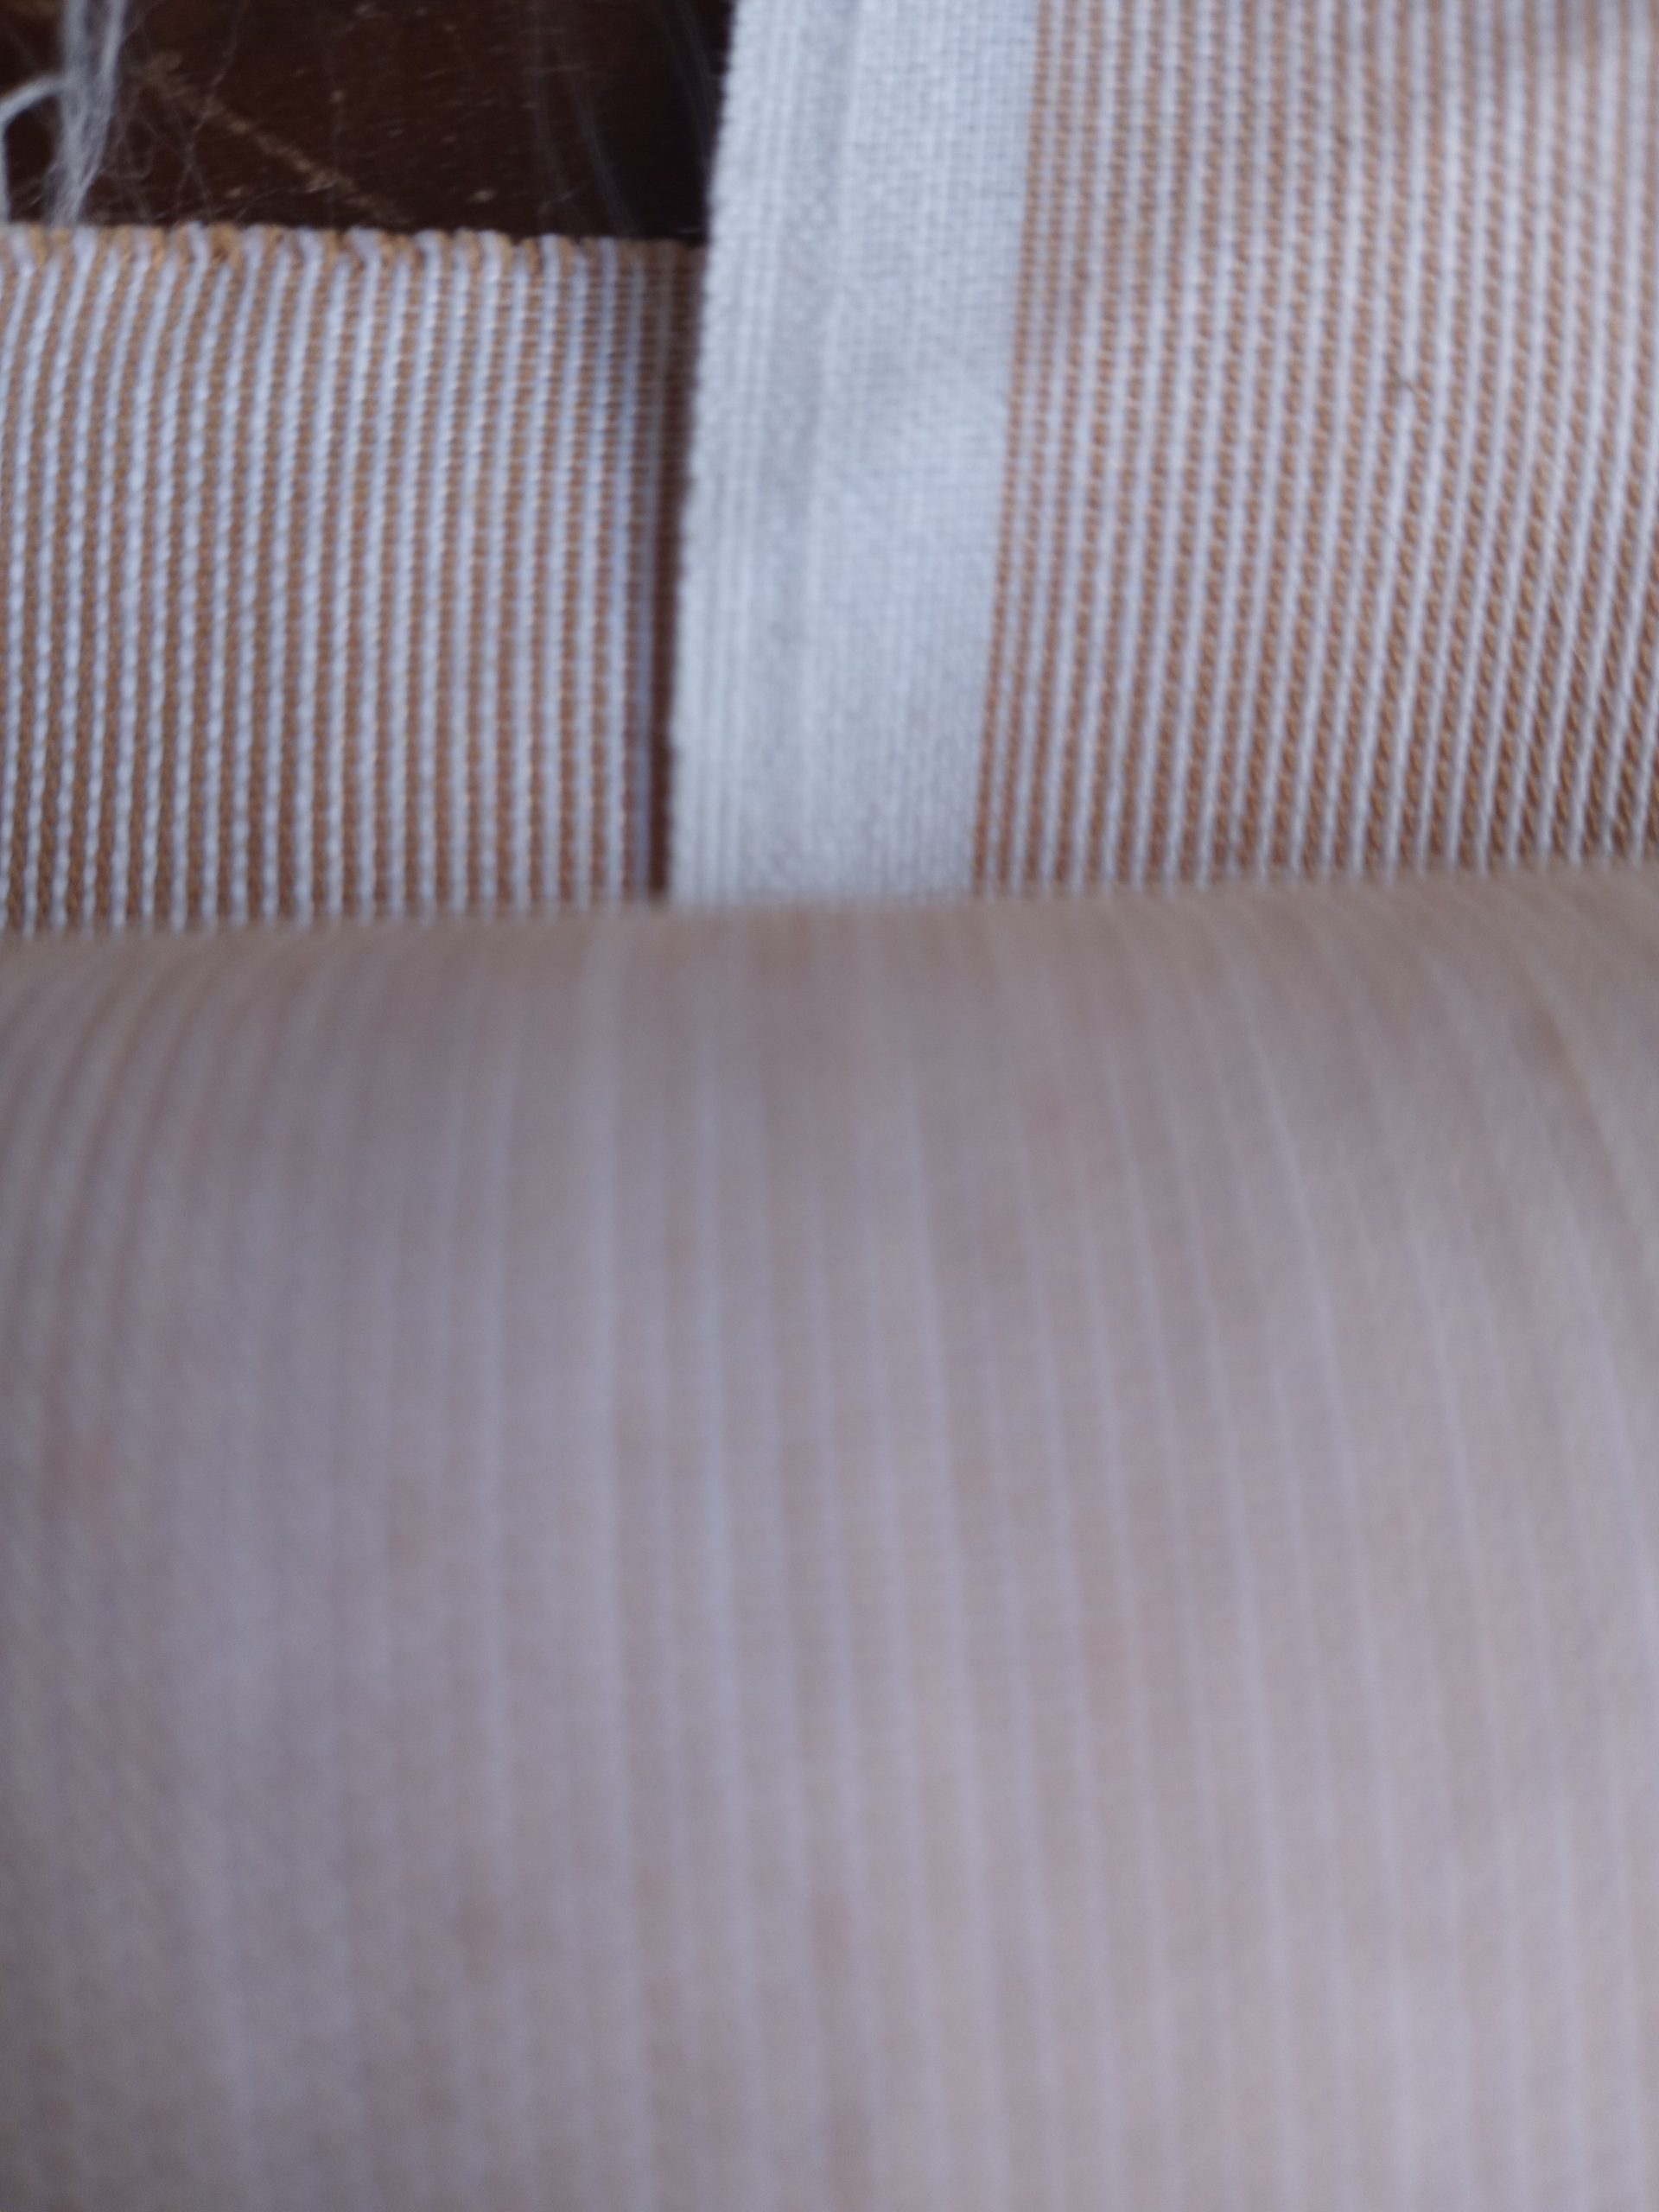
I’ve listed two “new” vintage fabrics in the shop, but wondering if anyone can help with giving more information about them. I love second hand materials, but not having all the details is a bit frustrating. They are:
I’ve burn tested them, and they tend to burn quickly. The burned edge seems more melted than ashy, which leads me to believe they are a synthetic or a synthetic blend. Here’s a video of the beige burn test:
Burn testing some vintage fabric. I think this one is a synthetic or synthetic blend. I’m listing some of my fabric stash at https://subearthancottage.com #sewing#vintagefabric#fabricdestash
Many people eat gluten free (g-free, gf), either by choice or need. For those with celiac, eliminating gluten is an absolute necessity. Others find that, for one reason or another, they feel better when they avoid it. In my case, I kind of accidentally discovered that joint pain in my hands and feet go away and I’m less brain foggy when I avoid gluten. Other family members suffer from breakouts and rashes that flare whenever they eat something with gluten. I strongly believe that if you feel bad after eating something, you should probably stop eating it, so we do our best to avoid gluten all together.
Eliminating something that is such a big part of your diet is daunting at first, but there are a few things that can make the transition easier and less expensive. These tips focus on gluten, but many will also help if you need to eliminate other foods.
1. Start with real foods
Processed foods often have hidden fillers and ingredients, and specialty gluten free foods are expensive. In contrast, fruits, vegetables, meat, nuts, beans, eggs and dairy are naturally gluten free in their pure forms. Rice is a grain that does not contain gluten. Starting from scratch with real food ingredients that you know naturally don’t have gluten is often easier and definitely cheaper than scrutinizing food labels and buying special gluten free versions of normally wheat based foods.
For the most part, single herbs and spices are gluten free. Certain spice blends may have gluten, though. Making your own blends is the safest bet, but if you have a spice blend you love, most manufacturer websites list whether their products contain gluten.
While not technically an herb or spice, most soy sauce contains gluten. La Choy is a major brand that is made without gluten. Bragg’s liquid aminos are another form of g-free soy sauce.
Most vinegar is g-free. Malt vinegar is not. You’ll also want to check the label on flavored vinegar to be sure.
Cooking oils don’t have gluten unless seasoned with something containing gluten.
3. Find your current gluten free staples
Look at the foods that currently stock your pantry. What things that you buy are already gluten free? For us, we usually keep a box or two of cereal around for snacking or a quick breakfast. Most cereals are made with wheat and therefore have gluten, but some that we already bought, like Honey Nut Cheerios, Lucky Charms and Rice Chex are gluten free. Knowing that, I can continue to keep a box or two of cereal we already liked on hand.
Likewise, we keep tortilla chips on hand for snacking or nachos. Most tortilla chips don’t have gluten and inexpensive. Since gluten free crackers are both hard to find and usually expensive, tortilla chips are an easy cracker substitute as well.
4. Look for the easy substitute
Like substituting tortilla chips for crackers, there are other easy swaps. Corn tortillas usually don’t have gluten and can be substituted for flour tortillas. Rice is often a good substitute for pasta, or substitute rice noodles. If you have an Asian grocery nearby, you can usually find rice noodles there for cheaper than a mainstream supermarket, as well as leafy greens and spices for cheap.
5. Make it yourself
It’s fairly easy to find gluten-free flour now, so making your own gluten free cookies, pizza crusts, pancakes, breads, etc. is a good option. I love Bob’s Red Mill 1 to 1 gluten free flour. With it, I can continue to make my favorite deserts just by substituting it for wheat flour. There are other good gluten free flours on the market, too. The most important thing is to know if it is blended to be an exact 1 to 1 substitute or if you need to add something like xanthan gum to give it the stretchiness and rise that you usually get from gluten. For example, Bob’s Red Mill has an All Purpose Gluten Free Flour that is not the 1 to 1 blend. It is a little denser and does not have xanthan gum already blended. I like blending it with tapioca flour, which adds some stretchiness. That works well for things like gluten free flour tortillas. For things that need to rise, though, like cakes or breads, I also add xanthan gum if I’m using the all purpose and not the 1 to 1 blend.
6. When buying gluten free, shop around
Sometimes you really just want to get some gluten free penne pasta or a g-free bagel. More and more grocery stores regularly stock g-free pastas, breads and desserts, but they can be pricey. If you find them on sale, stock up and freeze the extras. Alternative grocery stores sometimes offer better prices, too. Aldi has a decent selection of g-free breads, pastas, and baking mixes at a lower price than most other stores. I even found some gluten free donuts there recently.
Locally, we have a surplus/discount/closeout grocery store called Town Talk. They frequently have udi’s bread in the range of two loaves for $3.00. I periodically stop in and stock up when I can.
To make sure you never miss a post, please sign up for my newsletter.
If you click through any of the Amazon links and make a purchase, I will receive a small commission. There is no added cost to you.
I’ve been working on some summer sewing and refashions lately. Here’s a quick video showing a few of them. The first is a backless halter top made with quilting cotton and ribbon. The second refashion is a halter tube top with a matching loose kimono/beach coverup. They were made from an old maxi dress that wasn’t getting much love. The beach coverup is my favorite. I love how it turned out, especially the print.
I hope you find these inspiring for your own projects. If you like these kinds of videos, follow me on TikTok. I also post on Instagram and YouTube. I tend to prefer the length options on TikTok, so that’s where most of my complete videos are located.
Like this post? To make sure you never miss a future post, please sign up for my newsletter.
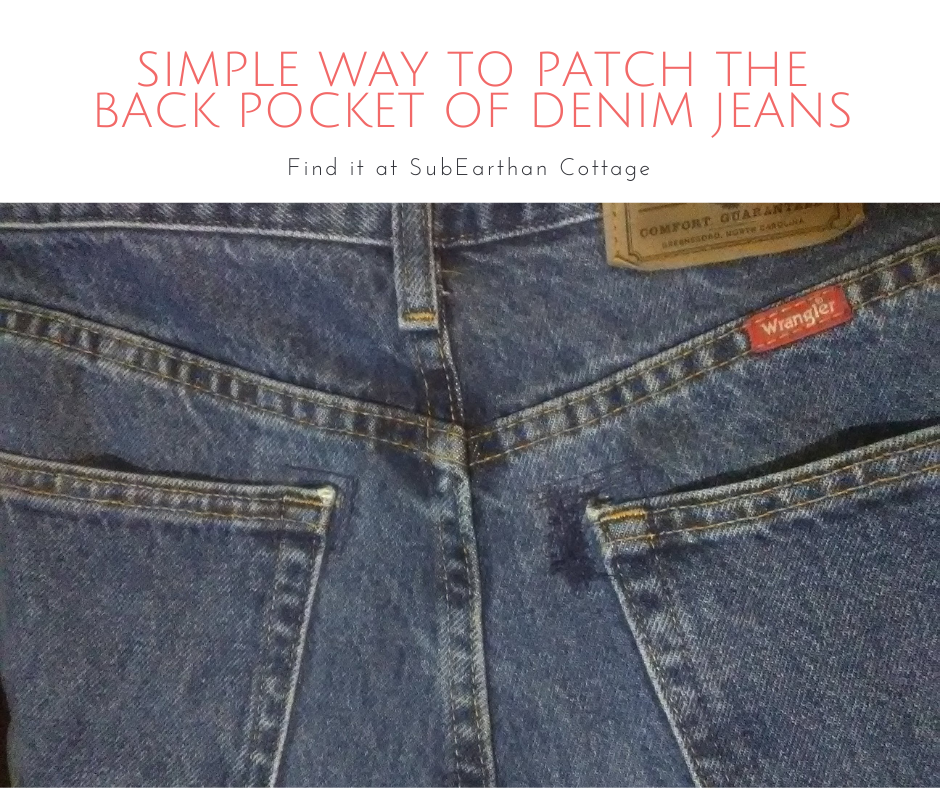
The back pockets of denim jeans are prone to wearing out at the top corners with use. If that’s where you carry your phone or wallet, you’ll almost certainly develop holes at those stress points long before the rest of the jeans are worn out. Luckily, repairing a back pocket is a pretty simple fix.
These are my husband’s work jeans. You can see the inside corner of the right pocket has a small hole and another one is forming on the inside corner of the left pocket. These are the steps I used to repair and reinforce the pockets.
Choosing your patch material
The first thing you’ll want to do is add material to patch the hole. The material should extend past the edges of the hole, overlapping onto the good fabric by about a centimeter or so. I like to use the iron-on denim patches, but fusible webbing or strong interfacing works, too. This product is similar to the one I used. You can also just use a scrap of fabric a bit larger than the hole, but I prefer the added strength of an iron-on product. An iron-on product is also easier in that it won’t shift while you sew it in.
Iron-on patch Wrong side of iron-on patch
Securing the patch to the pocket
If you’re using an iron-on product, iron it on to cover the hole from the inside according to the manufacturer’s instructions. For sewn-in patches, baste in patch to keep it from shifting.
Patches ironed in place on the inside of the jeans.
Reinforce the patch
Regardless of whether you chose an iron-on or sew-in patch, you need to reinforce the patch by sewing a strong row of stitches around the edges. For a less visible patch, I like to sew a square of stitching around the hole, making sure to include the corner of the pocket in the square. I sew over the square a few times to reinforce. Choosing a thread that matches the denim or is slightly darker makes the patch less noticeable.
For the actual hole, I like to sew back and forth over the hole in a matching thread. This secures the area to the patch, hides the frayed edges and prevents further ripping.
For a more visible patch, you can get creative with the patch material and choose a contrasting thread. You can also crazy stitch over the area, similar to what I did here.
Preventing the problem
Whenever I patch one pocket rip, I take the time to reinforce all the corners with iron-on patches and a square of reinforced stitching. It doesn’t take much extra time, and keeps the rest of the corners from needing repair in the near future. You could even do this to new jeans as a preventative measure if you have this problem frequently.
Final result
Here’s the finished patches. I’m pretty satisfied with the results. The work isn’t that noticeable and matches the variations in blue on the rest of the jeans. It’s definitely better than holes that will continue to rip in a revealing location.
Like this post? To make sure you never miss a future post, please sign up for my newsletter.
Shop sales!
For the entire month of September, all of my handmade soaps are 20% off. Shop handmade soaps here.
My machine embroidery files are also on sale all month for just $1 each! Be sure to check out my latest Halloween designs. Shop embroidery designs here.
My local Kroger frequently has bags of kale, spinach and other greens on sale because it’s nearing its “best by” date. I love picking up a few whenever I see them. If I don’t plan to use them right away, I either toss the whole bag into the freezer (this works best with sturdy greens like kale or collard greens) or I dehydrate them for future use.
To dehydrate the greens without a dehydrator, I set my oven to it’s lowest setting (150-200 degrees Fahrenheit) , spread the greens on a baking sheet, and bake until they are dry. I check them about every 10-15 minutes to prevent them from burning.
Once they are done, I crumble them to the consistency of a dried herb and store in a canning jar. The dried greens are great to add to sauces, soups, stews or smoothies. Add a little if you need to hide the taste or a lot to really boost the nutrients.
It’s quick, easy and doesn’t result in a gross bag of kale forgotten in the back of the fridge. Plus, it may help picky eaters get a little more nutrition.
Like this post? Sign up for our newsletter to get post notifications and updates.
This isn’t going to be a full tutorial because I didn’t do a great job of documenting the process. If you’d like a full tutorial, please let me know. I will link to the page I learned it from here.
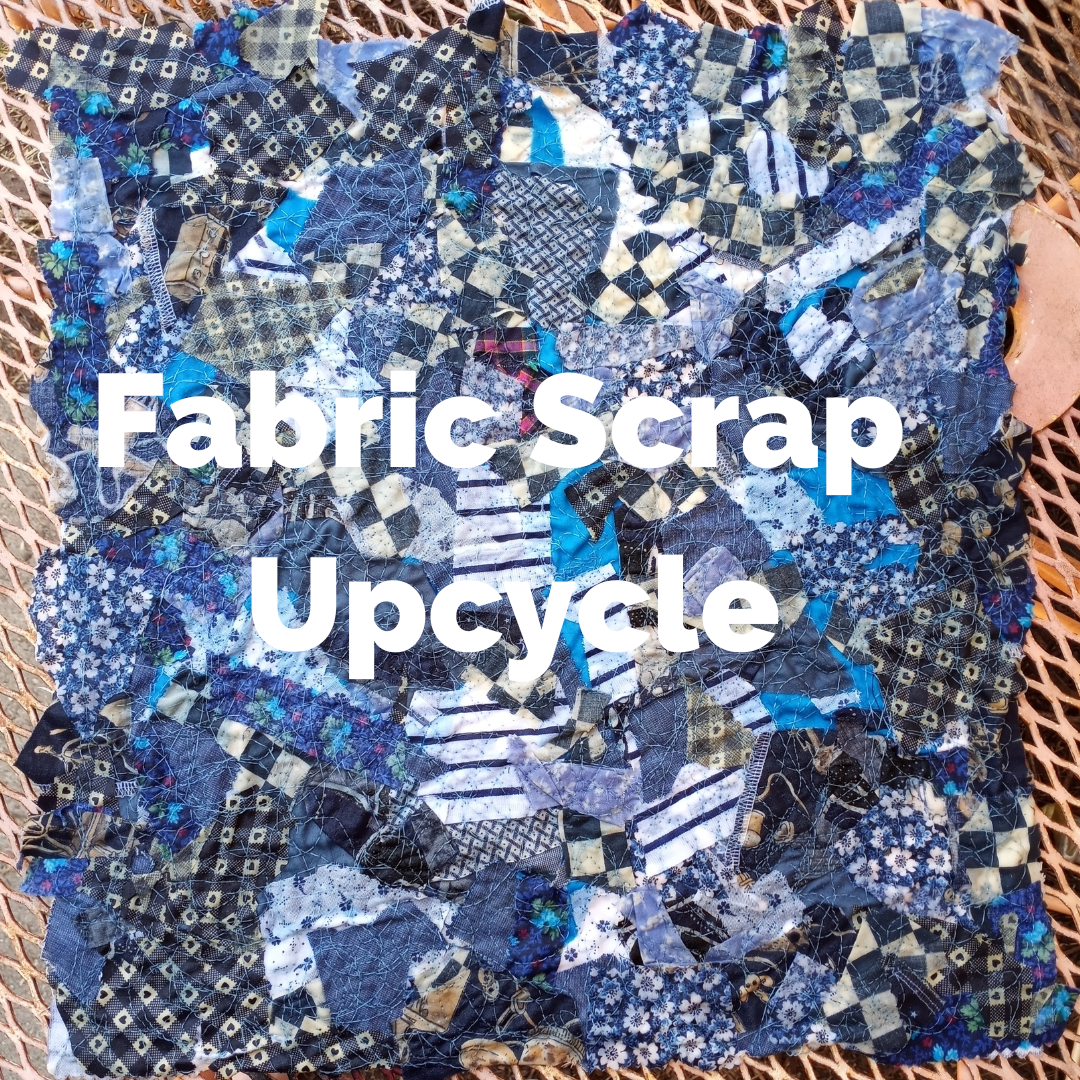
I saw this really cool way to make a bunch of fabric scraps into new, usable fabric that is really textured and cool. First, you need a backing piece of fabric. I used an upholstery sample square that I hadn’t found a use for yet. Then, you cover it in fabric scraps. I went with all pieces from my “blue” sorter bin and let them fall all over randomly. I did try to keep it all in one or two layers and moved pieces around to cover all the empty spots. I left some upside down to add more variety in the colors, and I didn’t worry about ironing the pieces first.
Once I had everything in place, I pressed it with my iron to smooth it down. Then I pinned water soluble stabilizer on top to help hold everything in place for the sewing machine. To sew, I lowered the feed dogs on my machine and crazy free motion quilted everything together. You can see that in the first video below.
That’s it. Now I have this really cool piece of fabric. I can’t decide what to do with it. It almost looks like it could hang on the wall like that as art. I also thought about making a couple of zipper pouches or sets of coasters out of it. It would also be fun to use as patches for clothing.
What would you make with it? Leave your suggestions below. 🙂
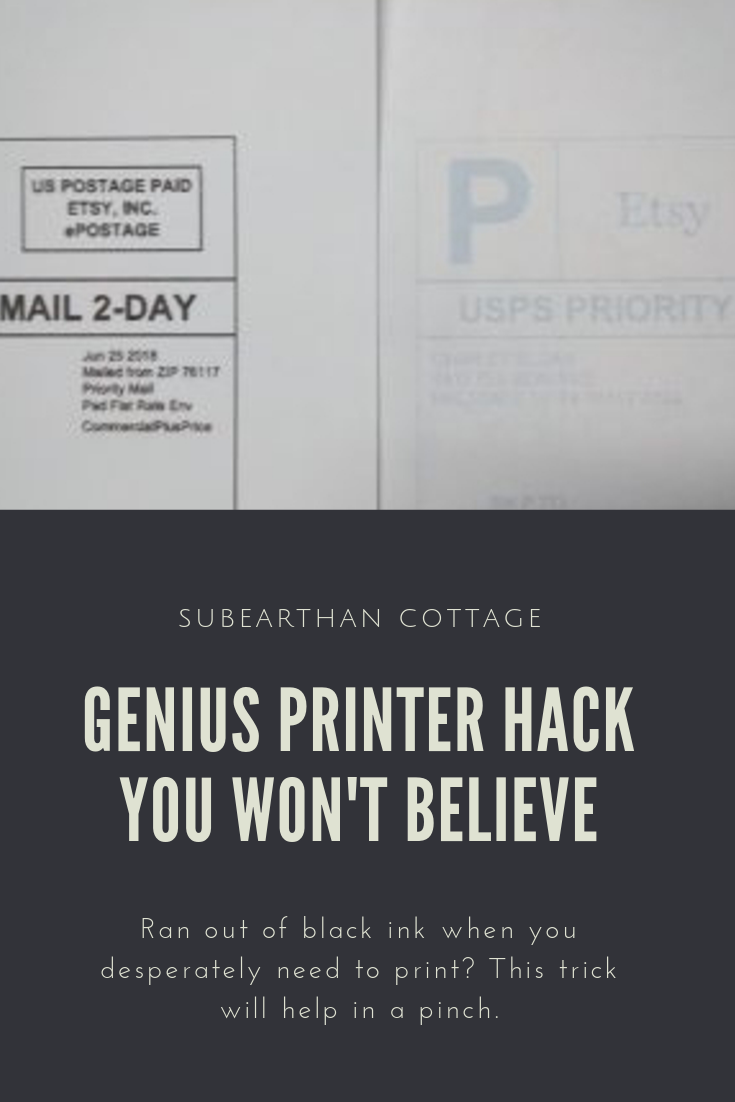
Have you ever had to print a paper or mailing label NOW and realized your black ink cartridge is out of ink? As much as I try to keep an extra on hand, sometimes I run out without a backup. Something I’ve found that works in a pinch is to simply remove the black ink cartridge. This forces the printer to use the color cartridge to print the document instead.
With and without the empty black ink cartridge removed.
The label on the right was my first attempt at printing a mailing label before realizing that I was overdue for a new black cartridge. The label on the right was printed with the black cartridge removed.
My printer will usually print one or two jobs this way without complaining, then I may have to put the old cartridge back in for a bit then remove it again if I need to print something else. Usually by that time I have been able to get a replacement cartridge.
It’s always better to be prepared, but in a pinch this trick works like magic. It has certainly saved me a rushed trip to buy ink on more than one occasion.
I, Charity Sloan, am a participant in the Amazon Services LLC Associates Program, an affiliate advertising program designed to provide a means for sites to earn advertising fees by advertising and linking to Amazon.com. Any purchases through those links will result in my receiving a small percentage in commission.
This only refers to Amazon links found in/on my blog pages. All products in my shop are 100% mine and not linked to Amazon.
Prices are the same whether you click an affiliate link or a non-affiliate link, so you will not be charged more. Thank you for your support!