Posted on Leave a comment

How to Make a Port Pillow

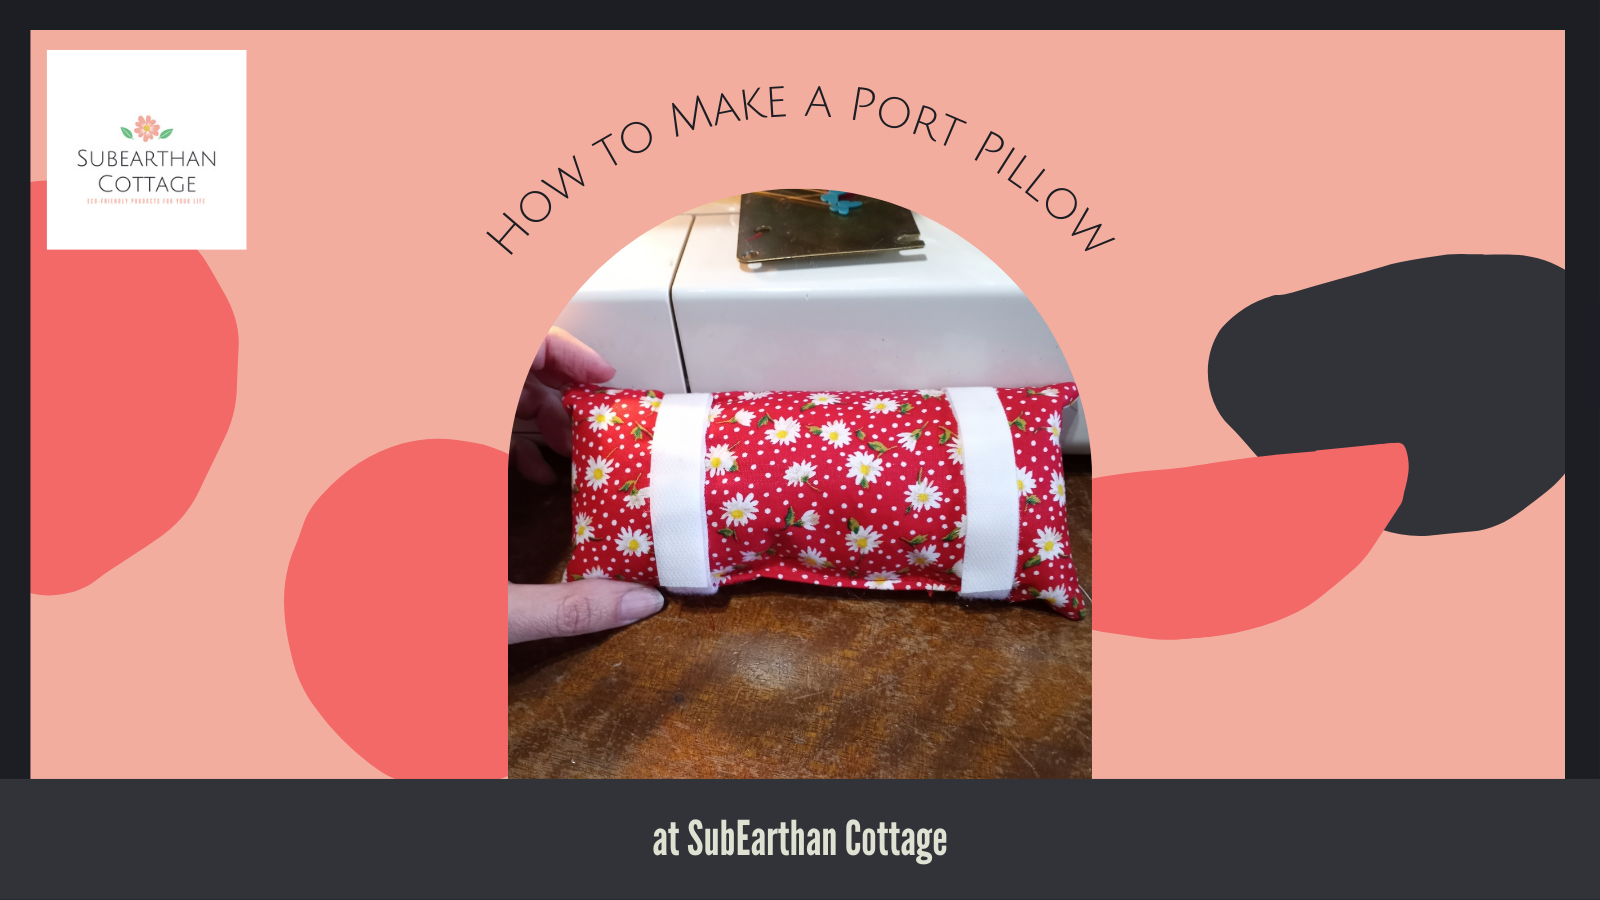
Something that I have found very useful since getting my chemo port put in is a port pillow. Port pillows are small pillows that attach to seatbelts to prevent the seatbelt from irritating the port. Luckily, they are super easy to make with very little materials needed. There are many organizations that accept them as donations to give to cancer patients, so that’s something to consider if you are looking for a charitable way to use up your stash.

Materials for a port pillow.

Materials needed for One Port Pillow

  • 2 rectangles of soft fabric, approximately 4 inches by 7 inches. I like using quilting cotton.  There is enough fabric in my soap’s wrapping to make one pillow, so upcycle if you have it. 
  • 2 pieces of hook and loop tape (Velcro) measuring 3.5 inches each. 
  • Polyfil or other stuffing.
  • Thread

Step one: Baste the Velcro

Separate the Velcro pieces and baste them in place on one piece of the fabric close to the edges. I just eyeball the placement at about halfway between the middle and short edge of the rectangle for each Velcro piece. I like to make the softer piece face up, but it doesn’t really matter. You could also use pins to hold it in place instead of basting, but I find machine basting easier. 

Step Two: Sew the pillow

Sew the fabric rectangles wrong sides together as shown in the photo below. Be sure to leave an opening for turning. I left the opening on a long side for this one, but it’s easier to sew closed if you leave it on a short side. 

Leave the opening on the end next time.

Step Three: Turn and Stuff

Clip the corners, being careful not to cut the thread, turn the pillow right side out and stuff. I like to press the empty pillow before stuffing for a crisper look. Just be careful not to melt the Velcro if you do this too. 


Turned and pressed.
Stuffing. Needs a little more to be semi-firm.

Step Four: Sew it Closed

If you want the seam hidden, you can sew it closed by hand. I don’t mind the seam, so I use my machine to make it quick. This is much easier when the opening is on the end as evidenced by the number of pins I used to hold it closed. I hate using pins. 

I can usually manage without pins when the opening is on the end.

Done

The end result should look something like this.


This is one of those projects that I’ve done so often I may have overlooked something in trying to tell someone else how to do it. If anything is confusing, please ask in the comments. I will clarify it ASAP.

Like this post? To make sure you don’t miss out on future posts, sign up for my newsletter.

Posted on 3 Comments

Quick Drawstring Bag Tutorial or How to Reuse Your SubEarthan Cottage Soap Wrapping

I wrap my soaps in fabric because it looks nice, it allows the soap to breathe (read here for why), and because it feels better than plastic. I often wonder what happens to the wrapping. I’m sure there are some that toss it. I know of one person who collects the fabric for quilts. For those of you who, like me, don’t want to throw away something that could be useful but don’t know what to do with it, I have a tutorial for a drawstring pouch, just for you.

This is done with the wrapping from one of my soaps, but you could make it in any size you like.

Materials
Cloth wrapper from soap (roughly 8×11 inches)
Jute string from soap (about 29 inches)
Thread

Tools
Needle or Sewing machine
Safety pin or Bodkin
Scissors
Iron

First, iron your fabric flat. Then, fold down a long edge about 3/4 of an inch to one inch and press. This is for the casing. It doesn’t have to be super precise.

Sew a straight seam along the bottom of the flap to form the casing. All the sewing can be done by hand or machine. I have no time or patience, so I choose machine. Fold your material in half with right sides together like a book.

The fold is at the bottom of this photo.

Next, starting just below the casing seam, sew down the side and across the bottom. I use anywhere from a 1/4 to 1/2 inch seam allowance for this. Again, it doesn’t have to be precise.

With scissors, clip the bottom corners, being careful not to cut your stitching. You could probably skip this step, but it helps the corners look square and crisp. Turn your bag right side out.

Now it’s time to thread the string. Tie one end of the string to a safety pin, large paper clip, or attach a small bodkin. This makes it easier to work it through the casing. Thread it through the casing, safety pin first.

Once you get the string to the other side, remove your safety pin or other tool and adjust the string so that the ends are even.

Knot the ends together once or twice to keep it from coming out.

Ta-da! It’s done! Perfect for organizing your purse, storing jewelry or other small items, or as a small gift bag.

Or holding your favorite bar of soap.

Tutorials are always a little complicated to write because it’s easy to overlook small steps in things you do frequently. If something is unclear, please ask. 🙂

If you have any other creative uses for a SubEarthan Cottage soap wrapper, I would love to hear it!

Posted on Leave a comment

Homemade Candles are the Way To Go

I love candles. Making your own is a great way to recycle old wax into something uniquely yours. This post from Crafting a Green World shares several methods for candle making.

Whether you’re rolling beeswax candles with kids or pouring a multi-color, multi-layer jarred candle, homemade candles give you the power to fill …

Homemade Candles are the Way To Go
Posted on 1 Comment

Peppermint Coasters in the Hoop Tutorial

I love in the hoop embroidery projects. They, more than anything, are what make me wish my embroidery machine had a bigger stitch area than just 4 inches by 4 inches. Even with such a small hoop size, there’s still plenty of in the hoop projects available.

One of the easiest ITH (in the hoop) items to make are coasters. To make these peppermint coasters, all you need is fleece, one or two thread colors, stabilizer, the design file and, of course an embroidery machine. Once you see how they are made, you can easily swap out the design and colors to suit your needs. They are so simple to make, they are perfect for last minute gifts or as decor to match a party’s theme. You could also make a themed set for each month, season or holiday to decorate your home.

In the hoop peppermint coasters

Supplies to make one coaster

  • Two pieces of fleece cut to your machine’s hoop size
  • Red thread
  • White thread (optional)
  • Tear away stabilizer to fit your hoop size
  • Water soluble stabilizer (optional)
  • Peppermint Candy Design File

Prepare your hoop

  • Hoop the tear away stabilizer Hooped Stabilizer
  • Place one piece of fleece on top of the stabilizer in the hoop. For small projects I sometimes just carefully hold it smooth while my machine stitches. You can also use a glue stick outside the stitching area to glue the fabric to the stabilizer, or pin the fabric to the stabilizer at the top and bottom, outside of the stitching area. I made the mistake of having a pin at the side, and even though it was clear of the design, it caught on my machine’s presser foot. Luckily I caught it quickly, but I will probably use a glue stick whenever possible to prevent that from happening again.Fabric pinned to stabilizer
  • Decision Time: If you want the peppermint to show on both sides, place the other piece of the fabric under your hoop while placing it onto your machine. The bottom fabric usually stays in place on its own, but you could use a glue stick as I mentioned in the previous step. To only have the peppermint show on one side, skip to “Preparing your machine”.Backing fleece.

Preparing your machine

  • If you want the peppermint on both sides, make sure the top and bobbin thread match. For a single-sided design, red or white in the bobbin is fine.
  • Place your hoop in your machine.
  • Upload the design file according to your machine’s instructions. The following steps are based on the Brother SE 400, so they may differ depending on your machine.
  • Resize your design, as desired. I wanted the peppermint as big as possible, so I followed the instructions for my machine to maximize the size. Mine maxed out at 7, which resulted in an overall size of about 6.5 cm. If your machine has a bigger capacity, you’ll need to decide how big you want the design .
  • Because I used white fleece, I chose to skip the white stitching and only stitch it in red. Again, I followed the instructions to skip to color 2, labeled red. Whatever color you choose, if you’re only sewing one color, skip to color two, because it has the outline. If you want to stitch both colors, skip this step.
  • Optional: Since fleece has a high loft, placing water soluble stabilizer is recommended. I’ve tried this project both ways, and I don’t see a big difference. For this tutorial, you’ll see the water soluble stabilizer in most photos.

Stitching your in the hoop coaster

  • Begin stitching according to your machine’s instructions.
  • If you are stitching both colors and want the peppermint on both sides, be sure to change the bobbin thread to match the top thread after color 1, white, is complete.
  • Continue stitching until the peppermint design is complete.Ready for the border

Stitching the border.

  • I like the border to match on top and bottom, so for this step I put red in the bobbin and for the top thread.
  • If you’re making a single-sided coaster like I did for this tutorial, now is when you add the second piece of fleece. Place it under your hoop as in the last step of “Preparing your hoop”.
  • On your machine, navigate to frames and select a circle frame.
  • Select the stitch type. I chose an over edge, blanket-type stitch.
  • Adjust the frame size. The frame size will determine the final size of your coaster. Make sure it is bigger than your design. Mine maxed out at 9 cm.
  • Stitch the border. I like a thicker look to the border, so once the border is done, I stitch it again. As long as you haven’t moved the fabric in the hoop, it will stitch directly on top of the first frame.In the hoop peppermint coaster stitching the border

Finishing the coaster

  • Remove the project from the hoop.Out of the hoop
  • Carefully remove any pins.
  • Trim thread tails.
  • Tear away the tear away stabilizer.
  • If you used water soluble stabilizer, cut away excess.
  • Cut fleece as close to the outside edge of the frame stitching as possible without cutting the stitching.
  • To remove remaining water soluble stabilizer, gently dab with a damp cloth or, swish it in a bowl of lukewarm water until stabilizer is gone and allow coaster to air dry flat.
  • Done!

I know that looks like a lot, but it’s really simple. I tried to be as detailed as possible, but if anything is confusing, please don’t hesitate to ask for clarification in the comments or through email.

If you notice, in the photo of the finished coaster, there’s a flaw in the border stitching on the left. That is where a pin caught the presser foot. Luckily that was the only damage. In the future, if I use pins, I will only pin at the very top and the very bottom. I really do prefer using washable glue sticks and keeping the glue well outside any stitching. That way my needle and machine don’t get gunked up, and I don’t risk hitting pins.

Finished Peppermint Coaster
Posted on Leave a comment

Kombucha Frequently Asked Questions

Here’s a few common questions about Kombucha. I’ve answered them based on my research and personal experience.

Kombucha questions

How much should I drink?

If you’ve never had Kombucha before, you’ll want to start slowly. Kombucha can have a detoxifying effect that can be unpleasant if you rush it. It is recommended to start with about an ounce per day at first and gradually increase until you reach a comfortable level for you. If you notice any ill effects cut back or stop for a few days to let your body catch up. Drinking lots of water can help, too.

Of course, you should always listen to your body. If you feel like you can’t tolerate kombucha don’t push it. There are plenty of other ways to get probiotics. Also, I’m not a doctor, and the above might not apply to everyone depending on your personal health. If you have any concerns, definitely consult your doctor.

Can I use metal utensils when making Kombucha?

Metal tea kettles for boiling the water are fine. It’s fine to stir the tea and sugar together with a metal spoon before adding the SCOBY. What you want to avoid is the SCOBY coming into contact with metal as that can damage the SCOBY. Even then, I have heard very brief contact is ok, such as when cutting up a giant SCOBY. I prefer to peel apart the layers and avoid metal touching my SCOBYs, though.

Can I use honey/stevia/coconut sugar/some other sweetener?

The sugar is food for the SCOBY and plain white sugar is recommended because it is easy for the SCOBY to digest. I have heard of some people having success with other sugars, but I haven’t tried it myself. If you want to try another form of sugar, I would start with a small batch and keep another SCOBY in a tea/white sugar brew as backup.

Stevia or other zero calorie sweeteners will not work because they don’t provide food for the SCOBY.

Can I use flavored teas?

Not for the main brew. You can use flavored teas to add flavor in a second ferment.

Can I use decaf teas?

This is another one where I’ve heard conflicting information. Most say not to use decaf tea. If you want to try decaf, as with different sugars, I would start with a small batch and keep another SCOBY in a regular tea/white sugar brew as backup.

My SCOBY looks funny. Is it bad?

Most SCOBYs look funny. They can be smooth and creamy colored or have air pockets and brown spots. The bottoms usually have brown stringy tentacle things hanging down. New SCOBYs grow on top of older ones until they look like a stack of slimy pancakes. (Eww.) All of this is normal, and there’s probably a million variations I haven’t described.

There are two main things to watch for: mold and black. If your SCOBY molds, it will look like blue-green dusty mold, just like what grows on bread. If you get mold, throw it all out and start over.

Black means the SCOBY is dead or dying. Toss it.

My Kombucha tastes like vinegar. What happened?

Kombucha is supposed to taste vinegary, but if it’s too strong you can always mix it with something like juice to make it more palatable. You can also use super-vinegary Kombucha in place of apple cider vinegar in recipes. If it’s straight vinegar with no sugariness left, you could use it as a hair rinse or for household cleaning where you would use ACV.

To make future batches less vinegary, there’s a couple of things to try.

1. Kombucha brews faster in warmer weather. If it’s been hot, try a shorter brew time and/or increasing the amount of sugar in the brew.

2. If your SCOBY is getting super thick, split off some layers. More SCOBY = shorter brew time.

My Kombucha is too sweet. What happened?

The easiest fix is to let it brew longer. If it’s cold, moving your jar to a warmer location may help. I think the ideal range is somewhere around 70-80 degrees Fahrenheit.

You should also check the condition of your SCOBY. If it is turning black, you’ll want to replace it.

Should I store my SCOBYs in the refrigerator?

No. You want to avoid extreme temperatures because they can damage the SCOBYs. The best range is between 70-80 degrees Fahrenheit.

To store your extra SCOBYs, place them in a lidded jar with at least enough Kombucha for them to float and store in a cool-ish location, such as a pantry or shelf out of direct sunlight and away from heat sources.

Find more of my kombucha posts here:  https://subearthancottage.com/search/label/Kombucha

Like this post? To make sure you never miss a future post, please sign up for my newsletter.


Posted on 1 Comment

Flavoring Your Kombucha Tea

When you get your homebrew timing right, kombucha is pretty yummy on it’s own. Sometimes you want something a little different, though. Or maybe straight kombucha just isn’t your thing but you still want the probiotic benefits. Luckily you can easily change the taste of your kombucha to make it more palatable or fix a soda craving. Here’s my tips for flavoring your Kombucha tea.


Mixing with juice


The simplest way to flavor kombucha is to mix it with juice or another beverage. This is a great way to get started drinking kombucha. To start, add 1-2 ounces of kombucha to a glass of your favorite juice. As your body and tastes adjust to drinking kombucha you can increase the kombucha to juice ratio.


I like to dilute 3-4 ounces kombucha with sparkling or still water, add a splash of lemon or lime juice and a bit of stevia. This makes a refreshing summer drink when served over ice.

Kombucha is also nice as an add in for smoothies. It can be fizzy on it’s own, though, so make sure to account for that when adding it to blended drinks. Leaving a little extra headspace in the blender is a good idea. Or, stir it in after everything else is blended.

Flavoring your Kombucha Tea
Flavored with peach and cherry teas in a second ferment.

Flavoring your Kombucha with a second ferment

You can also add flavoring in a second, shorter ferment. Basically you’ll put your flavorings in a bottle or jar (I like canning jars), fill almost to the top with your brewed kombucha and cap the jar. Leave at room temperature for 2-4 days and then refrigerate or drink.


The second ferment can increase the carbonation in your kombucha, so it’s a good idea to be cautious when opening and storing the jars. I’ve never had a jar break from the pressure, but I have had the metal disks on canning jar lids pop up in the middle. If I think too much pressure is building up, I “burp” the jars by opening them just enough to release some of the pressure and recap.

There’s a variety of things you can add for the second ferment. Really, any herbs, spices or fruits can be added. If you want to increase the carbonation, add a little bit of sugar, honey, raisins or a sweet fruit. My favorite thing to do is put enough orange peel to fill the jar halfway, add a teaspoon of sugar or honey, top with kombucha and let it sit for two days. It makes a kind of healthier orange soda and uses something that would normally have been tossed.

Flavoring your Kombucha orange and honey
Orange peel and honey Kombucha

Other flavorings I’ve tried:

  • Lemons and limes cut into wedges, sliced or just the peels. You can also use a lemon or lime half after juicing it for another recipe.
  • Fresh sliced ginger, plain or with a dash of chai spice and squirt of honey.
  • Fruit flavored herbal teas, one bag per quart jar.
  • Blueberries.

If you brew your own Kombucha tea, I would love to hear your tips for flavoring your Kombucha. Please share them in the comments below.

Next week I plan to do a FAQ/kombucha myths post. If you have any questions please share them in the comments and I’ll do my best to answer them.

Like this post? To make sure you never miss a future post, please sign up for my newsletter.


Posted on 1 Comment

Simple DIY Rainbow Cupcake Crayons

rainbow cupcake crayons

I originally shared this tutorial for rainbow cupcake crayons almost ten years ago when Finn was my little preschooler and I made rainbow cupcake crayons for him using all of our broken crayons. It’s easy, and you can get little ones to help with peeling the paper off of the broken crayons, and they get fun new crayons to play with once they have cooled.

Unfortunately my photos of our project got lost, but a quick Etsy search shows lots of examples of similar multicolored crayons in fun shapes. If you like the idea but don’t have tons of broken crayons around, consider supporting one of the shops on Etsy by purchasing from them.

rainbow cupcake crayons
Photo by Kristin Brown on Unsplash

DIY Rainbow Cupcake Crayons Tutorial

  • Line a muffin pan with foil or a double thickness of cupcake liners. (Note: The wax will likely melt through, so you probably want to use a pan that you reserve for non-food projects.)
  • Remove all the paper from your crayons.
  • Break into smaller pieces if needed. I just broke them as small as I could with my fingers. Most pieces were about an inch long or smaller.
  • Sort the pieces into the lined cups. I sorted by color, but you could also mix for super swirly crayons.
  • Fill the cups to the top but don’t overfill.
  • Melt in the oven at about 200-250 degrees F. I recommend setting a baking sheet under the muffin pan. You really don’t want to have to scrape melted crayon off your oven.
  • Check about every 10-15 minutes. I let them cook until there were just a few solid chunks in the middle. Then I gently swirled them with toothpicks to sink the chunks and blend the colors.
  • When they are sufficiently melted, turn off the oven. You can carefully remove them at this point or let them cool in the oven. I didn’t need my oven, so I let them cool in there overnight.
  • Once they’ve cooled completely you can remove the papers and color away.

Mask Update

I made a few of the fitted masks I mentioned in Wednesday’s post. Overall, I think they fit well, but they are a little tedious to make, particularly if you have lots of interruptions.

Awkward photo of me modeling a fitted mask.

I looked into it a little more and found that it seems more hospitals are asking for a more simplified mask, so I’m switching to ones made by this tutorial. With batch cutting and then sewing two or three assembly line style, I can make 3-4 in a hour, even with interruptions.

Shop update: Freebies and a sale

Knowing that so many are stuck at home right now needing distractions, I’ve decided to make all of my machine embroidery design files free until April 7. That’s the day my area’s shelter in place order expires. If it is extended, I’ll extend the embroidery design freebies, too. If you make something with one of my designs, I would love to see it.

My full shop is still open, and will be as long as everyone in my household is healthy. I’m using extra care with handwashing and using hand sanitizer before coming into contact with products and packaging as well.

All of my handmade soaps are currently on sale for 20% off. You can find them here.

Like this post? To make sure you never miss a future post, please sign up for my newsletter.