Posted on Leave a comment

T-Shirt to Yoga Shorts Refashion

If you’re new to refashioning or sewing clothing in general, loungewear is a great place to start. It’s less intimidating because, since you’ll only be wearing it at home, it doesn’t have to be perfect. This refashion project is perfect for a beginner because you only need two t-shirts to make it, and it’s mostly straight lines or slight curves.

I originally shared this tutorial a few years ago, before Thaddeus. The weather is beginning to warm up , so it’s a great time to sew some shorts.


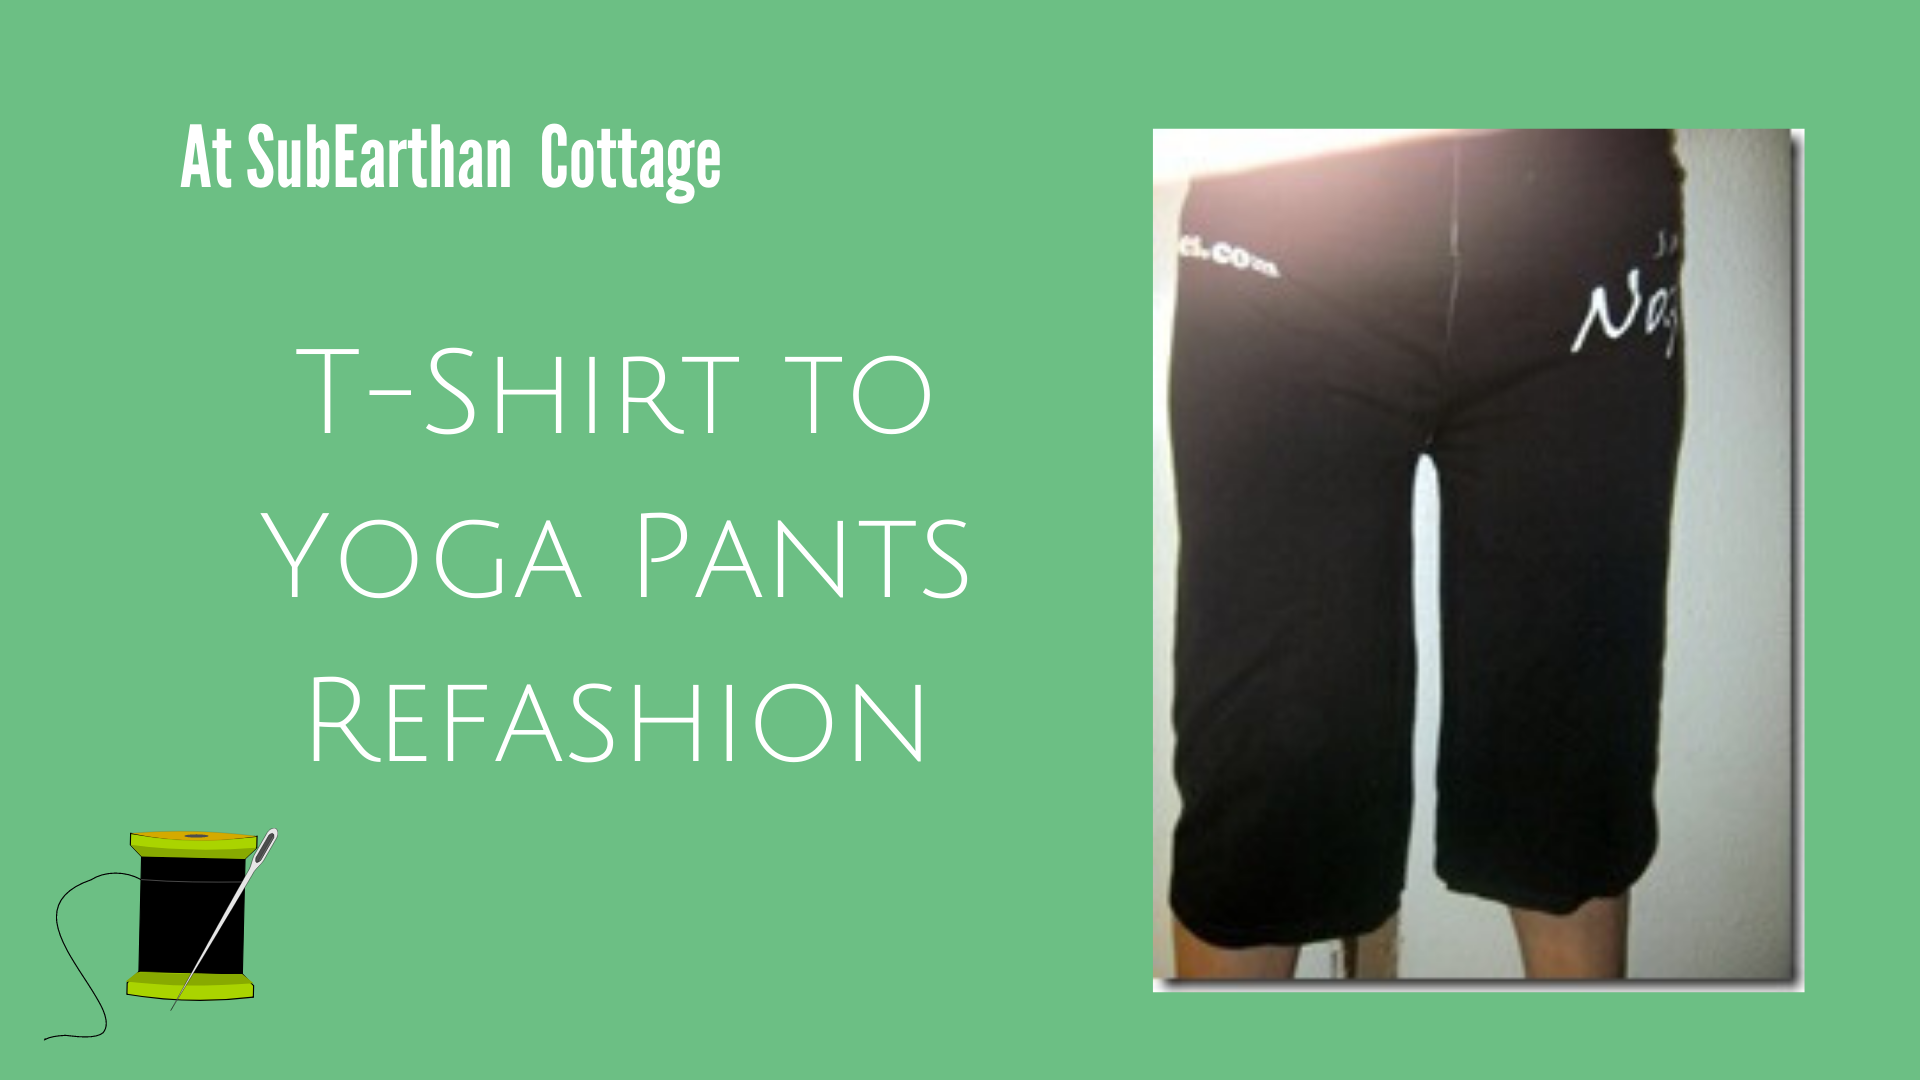
I went on a little Pinterest binge a couple days ago looking for ideas to help clear my refashion stash. Saturday night I decided to make a pair of yoga pants out of a t-shirt using this tutorial. I wear a size eight on average, and used an XL adult t-shirt.

Adaptations from the original refashion project

I did make a few changes to the design. First, instead of cutting the shirt down the middle, I cut it down the sides from the middle of the underarm to the hem. This also means youโ€™ll have an inseam and no side seams. That keeps any design on the front or back intact and moves them to the hips.

For the waistband, I cut the underarm seam from the sleeves and squared them up to be two equal rectangles, leaving the hem intact. I sewed the short sides together making a big, short tube from the sleeves. I then put the tube inside the waist of the pants with the pants right side out and the right side of the tube facing the inside of the pants. The raw edge of the tube lines up with the raw edge of the pants. I serged the top together like that. This made it so when the tube is folded down to the outside, the seam is covered.

T-shirt yoga pants refashion
IMG_4452
IMG_4459
Sorry for the awkward pictures. No one was around to take the pictures and Doctor Who was about to start.

I sewed it all on my serger. The entire refashion project took less than ten minutes. I probably should have added two minutes and switched from white to black thread. Or not.

If you don’t have a serger, you can use a zig-zag stitch to prevent breakage. Many sewing machines have specialty stitches for sewing knits, too, so check your machine to see if that is an option. This DIY T-Shirt Bag Tutorial has more information on stitch selection for knits.

Final verdict

They are a little loose at the waist. If I were planning to actually do yoga or wear them in public I should probably add some elastic at the seam. Since they will probably be used mainly for watching Doctor Who while sitting on the sofa, I probably wonโ€™t bother.

I personally don’t mind the length, but you could easily make them shorter by cutting them off to the length you prefer. Knit doesn’t unravel, so you can leave the edges raw, or turn them under and hem.

To make sure you never miss a post, please sign up for myย newsletter.

T-shirt to yoga pants refashion

If you click through any of the Amazon links and make a purchase, I will receive a small commission.ย There is no added cost to you.

Posted on Leave a comment

Goodwill Finds and Refashion Ideas

Pink tunic after removing the lining.

This weekend, we visited a local Goodwill store. Unlike the other Goodwill’s in our area, this one has everything in big bins and they charge a flat, by-the-pound fee. Thrift stores always have unique items, but this one seems to have some really good finds, if you’re willing to dig.

In addition to a few household odds and ends, I found a couple of dresses and a shirt that need a little bit of refashioning, and a pair of skinny boyfriend cut jeans that are like new and fit perfectly. I also found a pretty floral vintage bed sheet. Vintage linens are somewhat in demand among crafters, and I rarely have luck finding them, so it was a nice surprise.ย 

ย 

Vintage Pink and Purple Floral Bed Sheet

Green Dress

The first dress is a casual, green knit dress with interesting cutwork and stitching at the neckline and hem.

Green knit dress
Green knit dress

Pros: It’s comfortable, easy to wear and chase after kiddos, and I like the color and detailing. Cons: It’s a size or two too big. This makes the underarms gappy and the waistline droopy. It’s too short to be a maxi dress, but not short enough to not be frumpy. I could wear it as is around the house, but I think I can make it into something better.

My plan: Separate it at the waist into the bodice and skirt. Tighten the bodice at the side seams. Reattach the skirt to the bodice after removing a few inches from the top of the skirt to make it somewhere between tunic and knee length. Add new, tighter elastic at the waist.

Long, Floral Shirtdress

The pretty blue and floral pattern is what caught my attention with this dress.

Blue, long floral shirtdress

Pros: The print is very pretty, and there is a lot of fabric to work with. Cons: The fabric is a stiff, non-breathing 100% polyester. It’s a size too small through the middle.

My plan: I have a few ideas for this one. The top (bodice) fits pretty well. The only fit issue is right through the middle. I could separate the bodice from the skirt, raise the skirt so that a wider section that fits me better is at the waist and reattach. Factoring in the button placket might make it tricky, but not that difficult.

I’m not sure I would wear it enough to go through that trouble, though. Option two is to use the skirt portion to make a slip-style nightgown by shaping a neckline and cutouts for armholes, then adding bias tape trim and snaps. I would probably use it more this way, but I still worry about the feel of the fabric. I usually avoid things without at least some natural fiber content. Texas is hot and I need my clothes to breathe.

My final idea is to salvage the buttons and use the fabric for things like bag linings, makeup pouches or other accessories. I will probably try one of my first two ideas before this one. I can always use option three if one or two don’t work out.

Pink Tunic Shirt

I think the flowiness of the outer layer and the stitching around the neckline is what made me grab this tunic shirt from the bin.

Flowy Pink Tunic Shirt

Pros: Flowy, comfortable fit. Detailing at the neckline keeps it from being too plain. Nice, bright color. Cons: The top layer seems to have shrunk, exposing the lining layer. The lining is 100% polyester knit, which is stretchy and comfortable, but doesn’t breathe.

My plan: This one was so simple, I actually did it in about five minutes this morning. I thought about shortening the lining by a few inches. The top, gauzy layer didn’t really have to have a lining, though, so I decided to remove the lining altogether by simply cutting it out. This made it super easy, and now the tunic is lighter and more suitable to Texas summers.

Pink tunic after removing the lining.

It’s not the most dramatic refashion, but it fixed a problem and made it so much more comfortable to wear. I wore it Sunday over my new-to-me Goodwill blue jeans to The Modern art museum and then to Central Market with the family for a treat and playtime on their playground. Without the lining, the tunic was lightweight, and the drapiness of the fabric kept it from feeling frumpy. I totally see it becoming one of my new favorites.

Speaking of The Modern, if you’re on Instagram, I’ve shared a video to @subearthancottage of Thadd and Beckett having fun with the crazy acoustics inside the Vortex sculpture out front. It was so much fun to watch them play, as well as just about anyone walking by. Few people passed without stepping inside to stomp their feet or shout.

Posted on Leave a comment

Early Morning Gauzy Tunic Refashion

In keeping with my desire to be more conscientious with my clothing, I shopped my closet for clothes that aren’t bad, but need a little refashioning to make me feel comfortable in them.ย  I’ve had this gauzy tunic top hanging in my closet for a while. It felt nice and lightweight, but I just never felt like wearing it.

Originally it was a pale, pastel blue. I thought maybe a color change would help, since I’m not big on pastels. I added it to a black Rit dye batch a few weeks ago, turning it a nice, dark grey. When I put it on yesterday morning, though, it still wasn’t quite right.

Early morning=terrible lighting

The sleeves had weird cuffs sewn on that were an awkward length and oddly tight. I decided they had to go.

See the blue thread? That was the original shirt color.

Rather than ripping out the seam, I simply cut away the cuffs as close to the seam as possible. I could have folded and hemmed the sleeves, but I planned to wear the tunic that day, so I wanted a quicker way of finishing them.

Still too dark.


Instead of hemming, I used my serger to make a rolled overcast edge where I had removed the cuffs. Not only was this quick, it gave the sleeves a light, breezy feel that, in my opinion, fits better with the overall style of the shirt. With the new color and sleeves, I can see myself getting much more wear out of this tunic shirt.ย 

Posted on Leave a comment

Embroidery Machine Tips: Paw Patrol and Using My Brother SE-400

Thaddeus turns three next week! When asked what he wants for his birthday, he exclaims, “Paw Patrol stuuuuuufff!” He is also constantly asking me to sew basically the entire cast of Paw Patrol for him. I may be crafty, but that is a bit beyond my skill set. So, since I have a lovely embroidery machine that doesn’t get used nearly enough, I thought I’d purchase a Paw Patrol design set for my machine.

The set came from Etsy seller OhMyArtDesigns. It comes with all the main pups, Rider, Robo Dog, and the Paw Patrol Logo. They also come in a few different sizes and file types to accommodate different brands and machines. So far, I love the designs. The stitch density is great, and they have a lot of detail. The only problems I’ve had fall completely in the “user error” category.

Embroidery Color Charts Matter

My first mistake was using the thread colors displayed on the machine and my manual chart to choose my threads.

The thread colors and names used by different machine brands varies, so if a design is drafted using different colors than yours, the color suggestions can seem a bit off. I was in a hurry and didn’t pay attention to the color chart provided by the designer, so some of my color choices weren’t quite right.

Everest would be less blue if I had used the appropriate chart. Lesson learned. This also highlights the need to test run any new patterns before stitching them on your final product. Embroidery machine stitching is so dense that it’s almost impossible to remove without ruining the fabric.

Hoop Tightly

The other problem I encountered is also easily fixed. I just need to learn how to hoop my fabric properly. If you look closely, you can see the black outline on both Everest and Rider strays from the edge of the design on one side. I still have trouble getting the fabric and stabilizer drum-taut, so by the time the outline is stitched, the design stitches puckered the fabric in places. I have a magnetic hoop set on my wish list to see if that would help, but honestly it’s probably a case of needing more practice. Considering how many pups I have left to stitch, I may be an expert at hooping by the end of the week!

Rider in embroidery.

It is so fun to watch the designs being sewn. It’s like putting together a puzzle.

Embroidery. Everest after embroidering the first color.
Everest after stitching the first color.

Looking for new designs to try on your embroidery machine? Find my embroidery files and freebies here.

To stay informed about new posts, products and sales, sign up for my newsletter here.

Tips for successful machine embroidery.


Posted on Leave a comment

Children’s Messenger Bag

This morning I made a messenger bag using Merriment Design’s Kid-sized Messenger Bag Free Pattern and Sewing Tutorial. The size is also nice for a small messenger-style purse.

Her tutorial is awesome, so I’m just going to share the minor change I made. Instead of making a fabric strap, I used some webbing I had on hand. Not only did that save time, but it allowed me to make the whole thing with two fat quarters. You could also use a thick ribbon, upcycle an old belt or an old purse strap for the handle.

I like using a light colored fabric for the lining in most bags I make. It makes it easier to find whatever is inside.

The fabric is from a fat quarter bundle I found at Tuesday Morning. I always find fun things in their sewing and craft section.