Posted on 2 Comments

How to Create a Self-Care Sunday

I originally published this last year. As we’re coming up on the weekend, I felt like this was the perfect time to revisit creating a self-care Sunday. Have a great weekend!

Self-care has transformed a lot over the last few years. It began as a way to encourage people to do more for themselves, which is amazing. But somewhere along the way, it became something people felt like they were forced to do.

If you are feeling a little overwhelmed with this idea of the perfect self-care routine, it’s time to take a step back. Instead of focusing on having to fit it into your daily life, why not just start one day a week?

Why do Self-Care on Sunday?

Sunday is actually the perfect day to dedicate to yourself, since it is often already a day of rest for many people. You are winding down after a fun weekend, and likely getting ready for a new week to begin. For me, Saturdays are usually the day that I take care of leftover chores from the week and grocery shopping, so Sunday is freed from those tasks as well. Take advantage of the downtime by adding some self-care activities to your routine.

1. Setting Up Your Weekly Self-Care Routine

First thing’s first – figure out what your routine is going to be before Sunday. Taking a few minutes to plan ahead of time makes it more likely to happen! Don’t forget that self-care doesn’t have to be done alone, so if you have a busy house on Sundays, you can still do this!

What you want to do is focus on your self-care on Sundays, whether that means an hour during the day, or changing the entire routine for the day.

Think of Sundays like a reset day. When you not only get your planning done for the week, but you give yourself some time to relax and unwind, reset your body and your mind for another busy week.

How is it Different from Daily Self-Care?

To put it simply, it’s not. You still want to choose activities that help you to relax, are good for your body and mind, and overall wellness. But you might have a little more free time on Sundays, so you won’t feel as pressured to fit it all in before or after work, or during your bedtime routine.

Sundays opens new possibilities for self-care, whether you do it alone or with family.

Think About Your Current Sunday Routine

In order to turn Sunday into your weekly self-care day, you need to consider what you tend to do on Sundays. This self-reflection helps you determine if these are things that can only be done on Sundays or can be moved to another day to give you more time for yourself.

Make a list of things you do every Sunday first. Then look at your list, and cross off anything that isn’t necessary or might no longer be serving you. With what is left, determine if any of those activities can be moved to Saturday.

For example, if you do a lot of cleaning and chores on Sundays, could they be moved to other days during the week, freeing up a bit more self-care time for you?

2. Ideas for Sunday Self-Care Activities

The good news is that self-care on Sunday is pretty much the same as what you would do any other day of the week. It is more about dedicating a day to yourself each week, especially if you don’t have much time during the week to really focus on you.

Here are some activities that can be great to do on Sundays:


Let yourself sleep in – If you don’t get to sleep in during the rest of the week, at the very least give yourself this time on Sundays! Your body (and mind) needs the rest.

Go to brunch with friends – Self-care can also mean doing something you enjoy with other people. Grab a group of friends on Sunday to go to brunch.

Head to a park or the beach with your kids – You can also enjoy more time with your kids without cell phones and TV. Go outside to enjoy the fresh air and exercise. Ride bicycles around your neighborhood, have a beach day, or do a picnic at the park.

Have an hour of pampering – You might not be able to dedicate the entire day just to self-care, but at least fit in some pampering time. Spending quiet time soaking in the bath or giving yourself a facial are a couple ideas.

Catch up on your reading or creative projects – This is the perfect time to pick activities you enjoy, but rarely have time for. Maybe there is a book you have been wanting to finish or a creative project you would love to do.

Image by Free Photos from Pixabay

Get ready for the week – Self-care can also mean just giving yourself time to really reset and prepare for the week ahead.

3. Self-Care for Introverts and Extroverts

Something to keep in mind is that what you consider self-care might change depending on if you are more of an introverted or extroverted person.

Self-Care for Introverts

If you are an introvert, you probably find that you are the most relaxed when you are alone. This doesn’t mean you want to be or should be alone all the time, but that you often need a little bit of time to yourself each day to recharge and gain your composure.

Have Quiet Solitude on Sunday – Self-care for an introvert can be as simple as just making sure you have some alone, quiet time on Sundays. You need this time to yourself to regroup and relax. It can be hard when you go all day around other people and never give yourself this time.

Find Nature-Inspired Activities – If you’re an introvert that enjoys time outdoors, try to find some solo outdoor activities to encourage you to spend more time outside. Hiking, gardening, visiting a quiet park or creating a niche in your own yard to sit and read or meditate are all peaceful ways to get outside.

Image by Larisa Koshkina from Pixabay

Embrace Your Creative Side – An amazing way to practice self-care as an introvert is to do something creative. Learn how to sew, crochet, write a poem or short story, color in an adult coloring book, or start painting.


Self-Care for Extroverts

Extroverts are more social creatures, getting their energy from being around other people. If you consider yourself an extrovert, you probably enjoy time with others more than time alone. But what does that mean for your self-care routine? Here are some tips for practicing self-care when you are an extrovert.

Enjoy Social Time with Friends – What might be a little more up your alley is scheduling in time with friends. What better way to practice self-care than spend time with those you love the most?

Volunteer Your Time – Looking for something more meaningful and fulfilling? You might like to volunteer somewhere as your self-care. Look into local community centers or animal shelters that are open on Sunday and see if they need any help.

Join a Local Club – Another social activity that helps with your self-care is joining a local club, like a book club. Not only will you be encouraged to read more, but you can get together once a week with your book club to chat and talk about the book.

4. Tips for Your Sunday Self-Care Routine

Here are a few more tips for making sure you have a good Sunday self-care routine, and really understand what self-care means and how to avoid the common mistakes.

It Encompasses Emotional, Mental, and Physical Health

Self-care does not fulfill just one need in your life. Different activities provoke different benefits in your life, including helping with your emotional, mental, and physical health.

What works best for you is going to be something that helps you feel relaxed, de-stressed, improves your mood, and is something you absolutely love to do.


Your Self-Care Needs Can Change Regularly

Just because you have committed to writing in your journal and meditating every morning for an hour as your self-care routine, doesn’t mean you have to do this forever. Sometimes, what you choose as your self-care activity changes, or you need to adjust based on your schedule.

Revisit what you are doing for self-care often. As your life and the seasons change, so will your self-care and what is going to benefit you the most.

A Common Mistake is Forcing Your Self-Care

This can’t be said enough – your self-care routine should not make you more stressed! This is a sign that you are forcing yourself to do something you don’t want to do and that is doing nothing for you.

It might be because your friend is participating in this form of self-care, or you read that it is a good idea. But remember everyone is different and everyone is going to benefit from different things.

Likewise, everyone’s schedule is different, and Sunday might not be the day that works best for you. Figure out what works with your schedule and apply these tips to your best day for self-care.

Like this post? To make sure you don’t miss out on future posts, sign up for my newsletter.

Posted on 2 Comments

Drafting a Pants (Trousers) Pattern from RTW Shorts

Pants pattern drafting

Lately Christopher and I have been talking a lot about fashion. It started as a discussion about not being able to find comfortable clothes, especially pants (trousers for British English speakers) and how hard it is to find clothing that goes against the trends. Being crafty, we explored making our own clothing. The cost of fabric, supplies, time it takes to cut and sew all highlighted how impossible it is to produce clothing ethically at the low prices charged for much ready-to-wear clothing. That doesn’t even take into account the raw materials that are used to make the fabric and problems with content, pesticides, sustainability, etc.

At the same time, like many, our budget, doesn’t allow us to spend a ton on clothes. We try to make the most of our clothing budget guilt-free by shopping thrift stores and second hand shops. That way we aren’t adding to the problem by purchasing new. Most thrift shops are charity-based, so our purchases help others. We often find better quality items than what we would otherwise be able to afford this way, too.

With thrift shopping, you’re not as limited by trends. If you’re looking for something in particular, unless it’s a common item, you’re still likely to come up empty handed. That has been our problem when it comes to comfortable men’s and boy’s pants. Both Finn and Christopher would prefer something a little roomier, like karate gi pants. Unfortunately, nothing like that has been in fashion since M.C. Hammer. That means it’s time to put my sewing machines to use.

Making a Pattern from Shorts

This summer, I started by trying to copy a pair of the cotton knit gym shorts they practically lived in, adding a gusset for comfort and mobility. I used to buy bulk bags of t-shirts from Thrift Town before they closed, so instead of using new fabric, I used some XL t-shirts I had on hand. That way, if things went horribly wrong I wouldn’t feel as bad.

If you follow me on Instagram, you might remember seeing this photo with some enticing caption like, “Working on a new project!” Then, nothing else was said. Sorry.

I have zero experience with pattern making, so this was a learning experience. Here’s a brief overview of how I did it.

shorts pattern

I laid the shorts inside out and folded in half, front to the inside, smoothing them as flat as possible. Then I traced them, adding about an inch all around. The inch is for seam allowance and to account for the fact that it’s impossible to get finished shorts to lay flat. I always err on the side of too big, because that is much easier to fix.

At the waistband, I measured the waistband and extended the pattern by that amount plus seam allowance above the waistband. This allows it to be folded down for elastic and a drawstring casing. At the hem, I extended the lines two times the width of the hem to allow enough fabric to fold and hem. On the pattern, I drew lines straight across to show where the finished hem and waistband hit on the original shorts for reference.

Then I folded them in half , backs to the inside and repeated the above steps since the back is cut differently than the front.

Drafting the Gusset

For the gusset, I drew kind of a triangle with the top point cut off. To do this evenly, I folded a piece of paper in half, drew a half inch line perpendicular to the fold, moved over about four inches and drew another perpendicular line measuring one and a half inches. Then I drew a straight line connecting the tops of the lines.  I cut along the lines and opened it up to get my gusset pattern. Sewing the gusset in with the wider part at the crotch seam and using a half inch seam allowance results the gusset tapering down to a point.

Shorts to Pants

Shorts work for summer, but I needed to come up with a pants pattern for fall and winter. Chris suggested just making the shorts pattern longer, so I did by measuring the waist to floor measurement and extending my pattern the needed amount, including seam allowances.

pants pattern drafting

I did this by taping the bottom of the pattern to a big piece of paper, sketching out the needed length and side seams and cutting it out.

Final Pants Result

My pattern isn’t perfect. I think I’ve tweaked it each time I’ve used it. Since the pants are made to be loose and flowy it hides the imperfections.

These are my first attempt. I made them with a linen blend, elastic and drawstring combo waistband and no pockets. I added side-seam pockets later.

Pants

My goal is to find or draft a few more basic, customizable patterns for pants and shirts that can be made in linen or a similar material. Then I can buy a bulk amount of undyed fabric and dye it as needed.

Like this post? To make sure you never miss a future post, please sign up for my newsletter.


Posted on Leave a comment

Goodwill Finds and Refashion Ideas

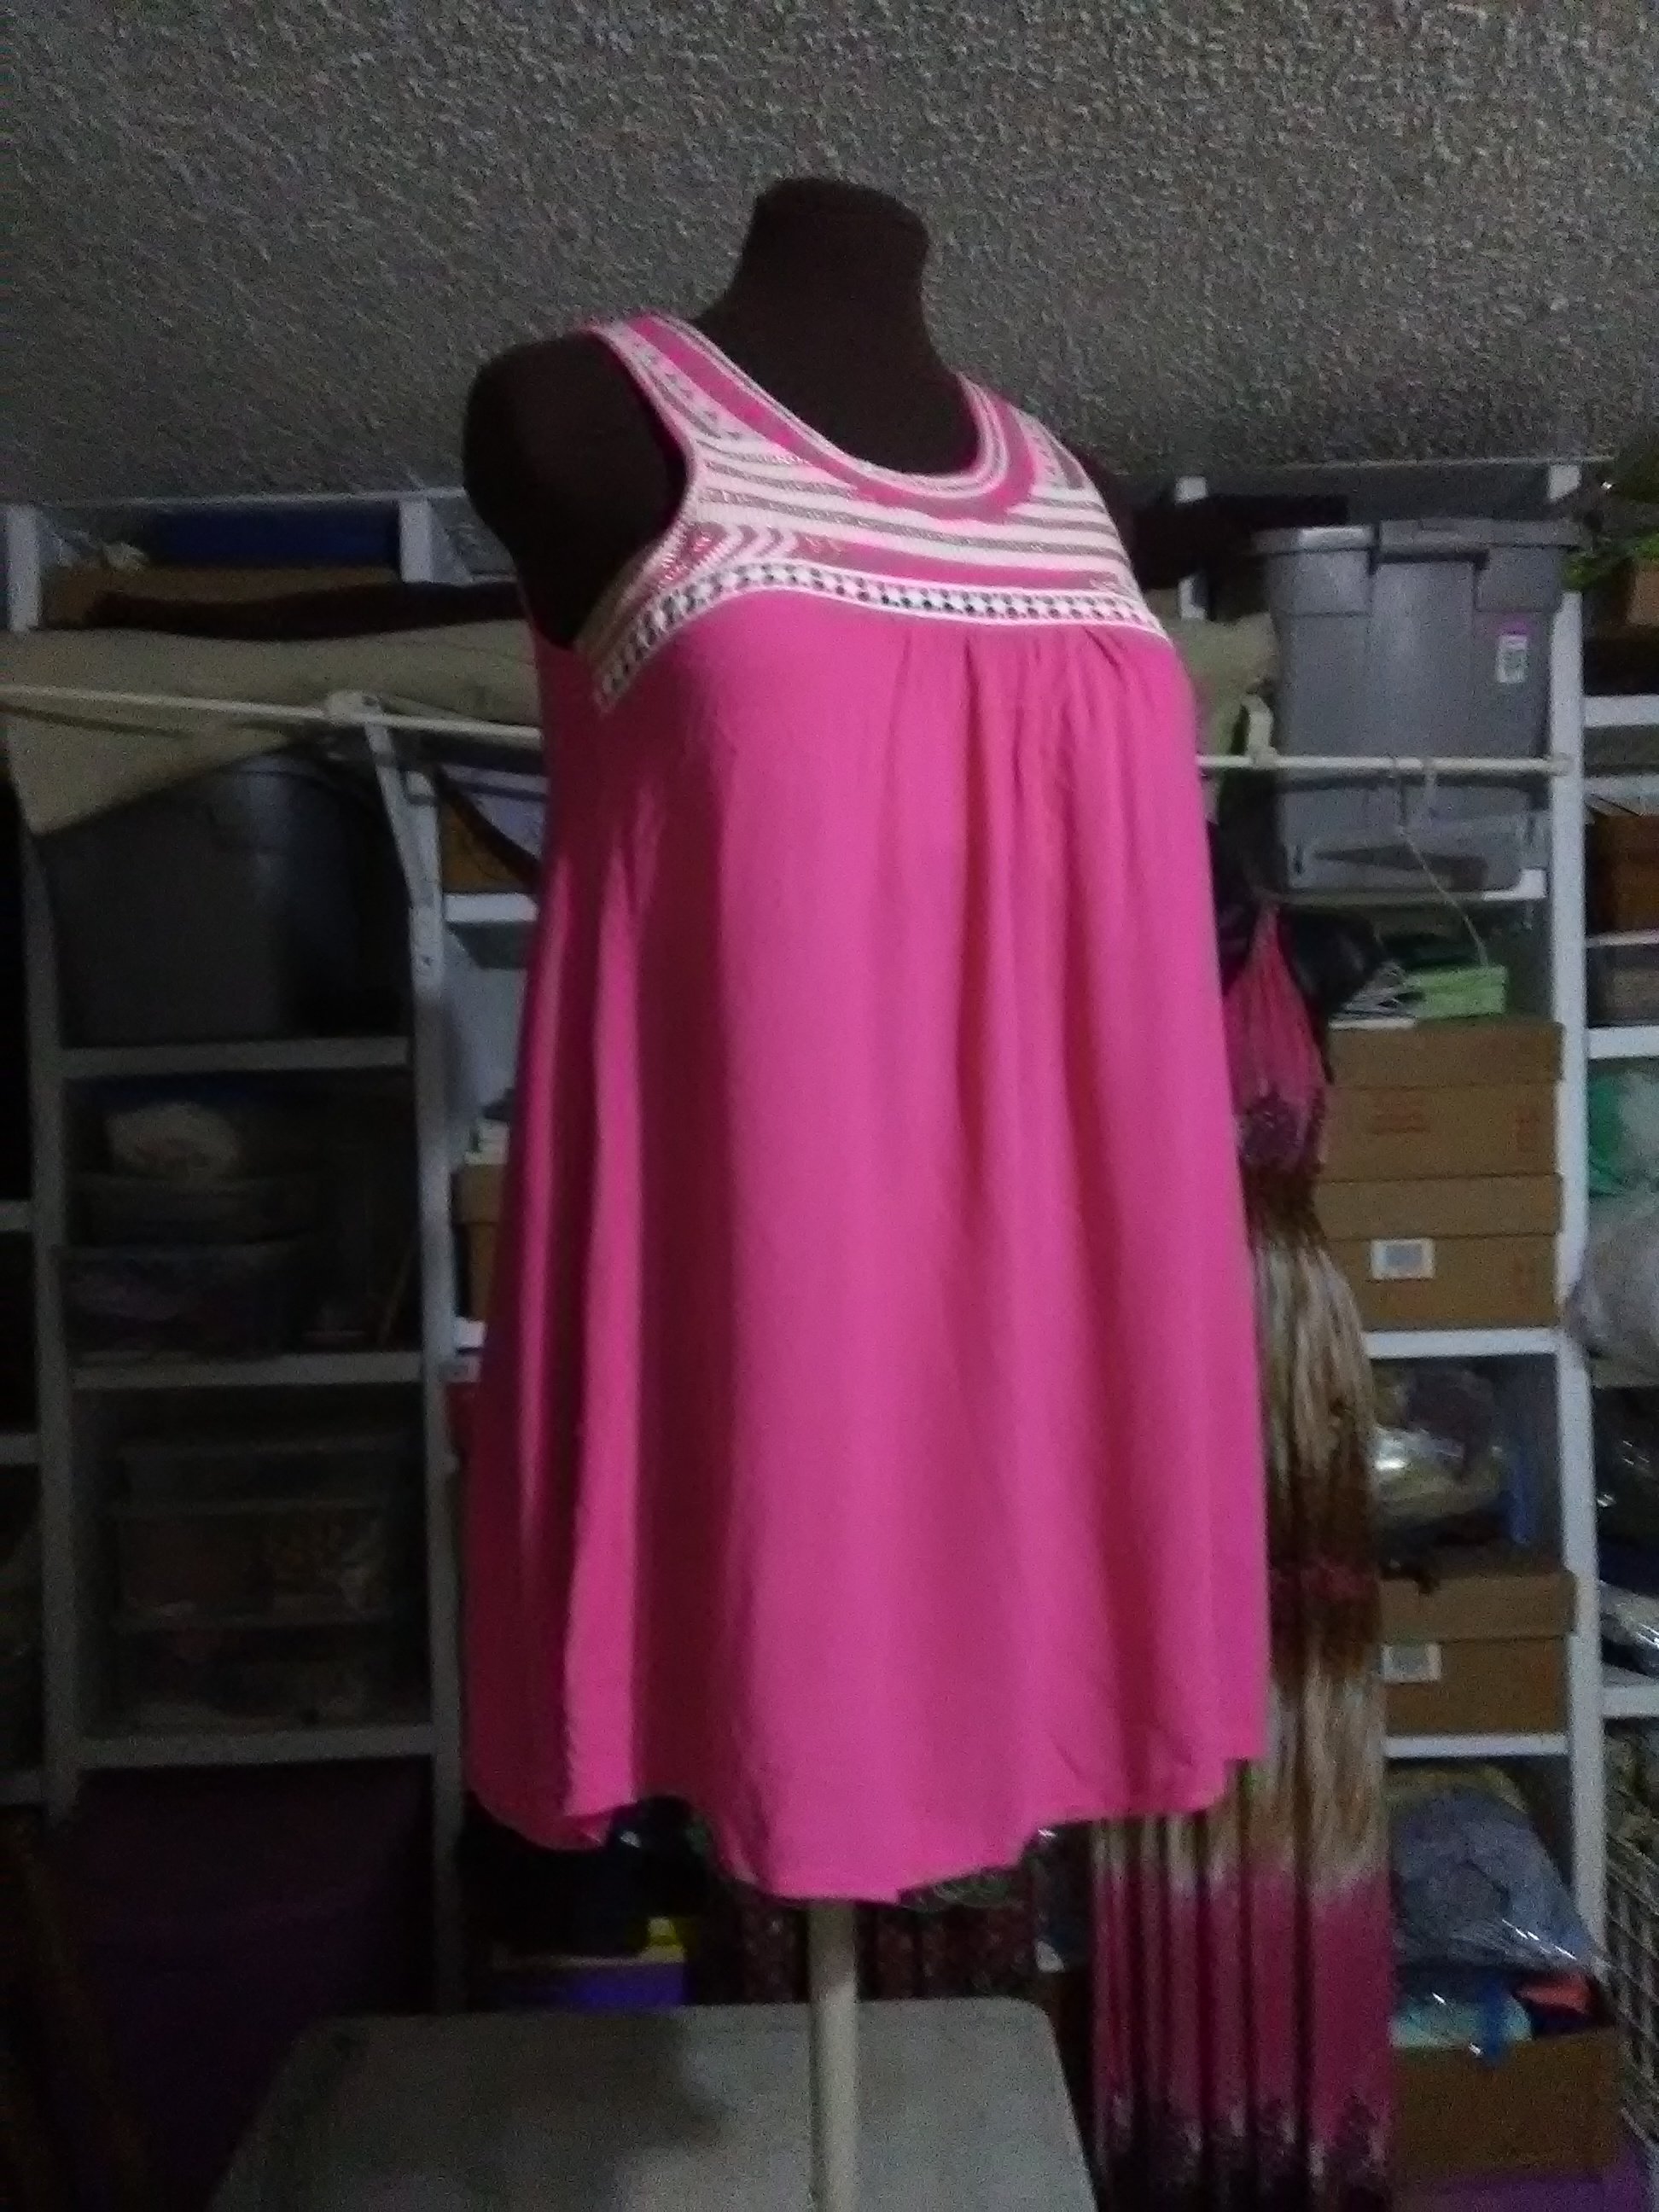
Pink tunic after removing the lining.

This weekend, we visited a local Goodwill store. Unlike the other Goodwill’s in our area, this one has everything in big bins and they charge a flat, by-the-pound fee. Thrift stores always have unique items, but this one seems to have some really good finds, if you’re willing to dig.

In addition to a few household odds and ends, I found a couple of dresses and a shirt that need a little bit of refashioning, and a pair of skinny boyfriend cut jeans that are like new and fit perfectly. I also found a pretty floral vintage bed sheet. Vintage linens are somewhat in demand among crafters, and I rarely have luck finding them, so it was a nice surprise. 


Vintage Pink and Purple Floral Bed Sheet

Green Dress

The first dress is a casual, green knit dress with interesting cutwork and stitching at the neckline and hem.

Green knit dress
Green knit dress

Pros: It’s comfortable, easy to wear and chase after kiddos, and I like the color and detailing. Cons: It’s a size or two too big. This makes the underarms gappy and the waistline droopy. It’s too short to be a maxi dress, but not short enough to not be frumpy. I could wear it as is around the house, but I think I can make it into something better.

My plan: Separate it at the waist into the bodice and skirt. Tighten the bodice at the side seams. Reattach the skirt to the bodice after removing a few inches from the top of the skirt to make it somewhere between tunic and knee length. Add new, tighter elastic at the waist.

Long, Floral Shirtdress

The pretty blue and floral pattern is what caught my attention with this dress.

Blue, long floral shirtdress

Pros: The print is very pretty, and there is a lot of fabric to work with. Cons: The fabric is a stiff, non-breathing 100% polyester. It’s a size too small through the middle.

My plan: I have a few ideas for this one. The top (bodice) fits pretty well. The only fit issue is right through the middle. I could separate the bodice from the skirt, raise the skirt so that a wider section that fits me better is at the waist and reattach. Factoring in the button placket might make it tricky, but not that difficult.

I’m not sure I would wear it enough to go through that trouble, though. Option two is to use the skirt portion to make a slip-style nightgown by shaping a neckline and cutouts for armholes, then adding bias tape trim and snaps. I would probably use it more this way, but I still worry about the feel of the fabric. I usually avoid things without at least some natural fiber content. Texas is hot and I need my clothes to breathe.

My final idea is to salvage the buttons and use the fabric for things like bag linings, makeup pouches or other accessories. I will probably try one of my first two ideas before this one. I can always use option three if one or two don’t work out.

Pink Tunic Shirt

I think the flowiness of the outer layer and the stitching around the neckline is what made me grab this tunic shirt from the bin.

Flowy Pink Tunic Shirt

Pros: Flowy, comfortable fit. Detailing at the neckline keeps it from being too plain. Nice, bright color. Cons: The top layer seems to have shrunk, exposing the lining layer. The lining is 100% polyester knit, which is stretchy and comfortable, but doesn’t breathe.

My plan: This one was so simple, I actually did it in about five minutes this morning. I thought about shortening the lining by a few inches. The top, gauzy layer didn’t really have to have a lining, though, so I decided to remove the lining altogether by simply cutting it out. This made it super easy, and now the tunic is lighter and more suitable to Texas summers.

Pink tunic after removing the lining.

It’s not the most dramatic refashion, but it fixed a problem and made it so much more comfortable to wear. I wore it Sunday over my new-to-me Goodwill blue jeans to The Modern art museum and then to Central Market with the family for a treat and playtime on their playground. Without the lining, the tunic was lightweight, and the drapiness of the fabric kept it from feeling frumpy. I totally see it becoming one of my new favorites.

Speaking of The Modern, if you’re on Instagram, I’ve shared a video to @subearthancottage of Thadd and Beckett having fun with the crazy acoustics inside the Vortex sculpture out front. It was so much fun to watch them play, as well as just about anyone walking by. Few people passed without stepping inside to stomp their feet or shout.

Posted on Leave a comment

Billboard Art

This weekend we held a rather slow garage sale. It was still fun, though, and we met some nice people, including a gentleman who shares our fondness of TBI Suburbans.

Chris took full advantage of the time to create a few billboard art pieces he’s been picturing for months.

Queen of Hearts
Queen of Hearts

I think this is my favorite. I love the weathered door.

Show Stopper
Show Stopper

This is the one everyone slowed down to see. He may decide to shorten it from the bottom to make it more manageable. As it is, though, in the right space it is impressive.

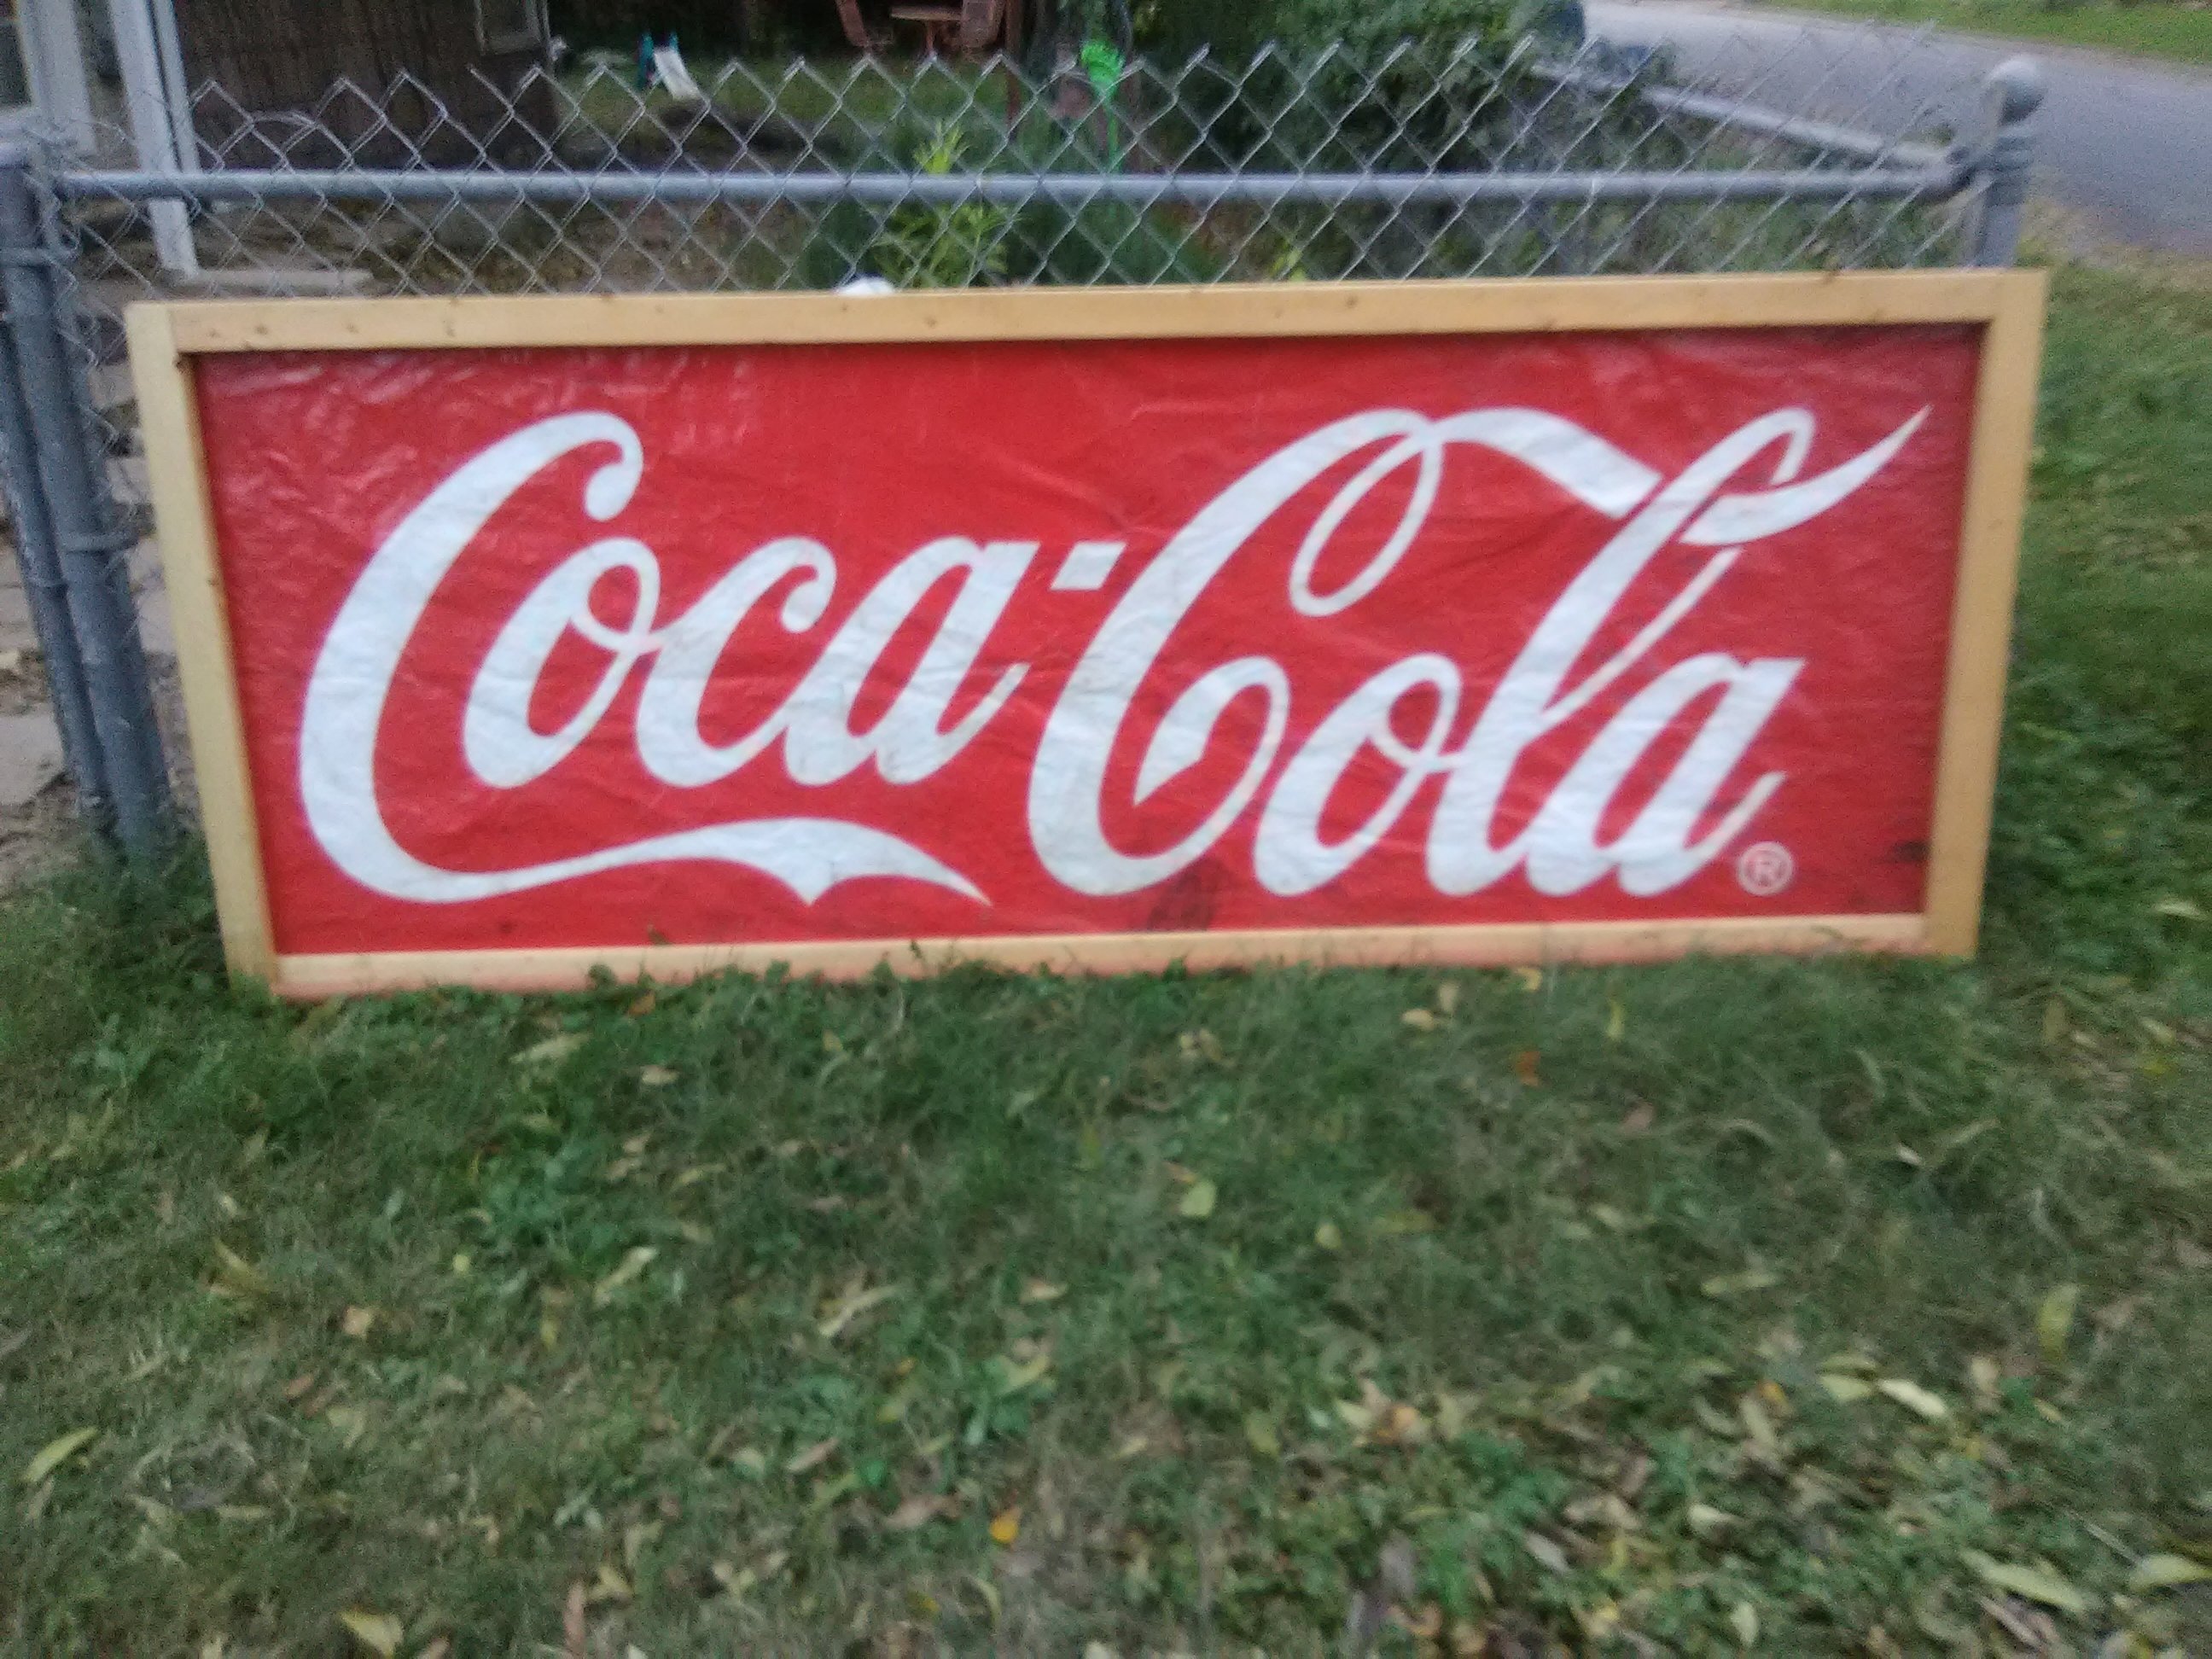
Coca Cola
Coca Cola

This one just screams Americana. We held it up to see what it looks like on the outside of our house. I loved the pop of red against our brown. I can totally see this alongside other signs in rustic decor.

Posted on 2 Comments

Thrifty Knitting Machine – Singer Silver Reed LK-140

A couple of years ago, I really wanted a knitting machine. I like yarn and the thought of making pretty things with yarn has always appealed to me. I started teaching myself to knit and crochet while I was pregnant with Finn. He is eleven now, and it takes me two days of work to make a single dishcloth. So, a knitting machine seemed like a good compromise to speed things up a bit. They are kind of hard to come by, though, especially a well made machine. Besides, I knew nothing about how a knitting machine works, so I got my embroidery machine instead.

Fast forward to two Sundays ago. The family and I were having fun thrift shopping for some office furniture. (That could also read as, “Chris and I were dragging the kids around to thrift stores, with much protesting on their part.”) The first Goodwill store we went to didn’t have much in the way of office furniture. They did have lots of bins out full of miscellaneous stuff that I really wasn’t interested in digging through, until I happened to notice this long rectangular box poking up out of one bin.

That’s the one. It for is a Singer LK-140, made by Silver Reed. It is a plastic bed hobby machine, but a durable hobby machine. I’ve since learned that, except for having ten fewer needles, it is identical to the newer LK-150 knitting machine. That means parts are easy to come by.

The box was so well taped, and it had a good weight to it, so I decided not to even open it before buying it. I figured I probably wouldn’t even know what may have been missing. Also, let’s zoom in on the price tag:

Back when I was actively looking for a knitting machine, I would have thought getting one for $80 on eBay was a fairly good deal. At $5.49, it was worth it even if it was only good for parts.

When I finally opened it at home, I did notice a few parts were missing, but only the table clamps, manual and transfer tools. I found a free manual online, and the other two items are easily and inexpensively replaced. They also aren’t essential, so I have played with it a bit.

I did need to replace the sponge strip. That’s pretty standard for an older machine. Luckily on this machine, foam weatherstripping works great as an inexpensive replacement. I also needed to clean the needles, because they were covered with gunk from the old sponge strip. With that, I was able to set it up and play.

There is definitely a learning curve, but it is fun. I have noticed, though, that you can still tell it is my own handiwork.

See the dropped stitch. It’s like my signature. The best part, though, is it only took me a minute or two to make that swatch, as opposed to a day or two. A little more practice, and I might be able to make two or three dishcloths a day without dropped stitches, or a scarf with a few holes. Seriously, though, it is fun, and I look forward to coming up with new projects and products to make.

As for office furniture, I felt bad that I got a new toy but we hadn’t found the thing we really needed, so I did a quick craigslist search. There just happened to be a desk posted locally in the free section.

Excuse the mess. That photo was taken while everything was getting tossed around with moving in the desk. There is a trim piece that needs to be put in place on the top. Overall, it is in good shape. More importantly, it provides us with the two main things we needed for the office: more desk space and shelving. Best of all, it was free!

Like this thrift store finds? To make sure you don’t miss out on future posts, sign up for my newsletter.

LK-140 Knitting Machine