I love wearing denim blue jeans, but chasing my boys and taking care of my small zoo, they get lots of wear and tear. One of the worst things is having to scrap a favorite pair because of one too many rips. I’ve repaired rips in a utilitarian way in the past. This time I thought I’d try patching denim using my embroidery machine. I haven’t done much applique, so I learned some things along the way.
This tutorial makes use of an embroidery machine and serger. You could also adapt it to use a sewing machine or applique by hand and embellishing with hand embroidery.
Items needed
- Denim jeans or other item to repair
- Interfacing
- Thread in colors of choice
- Seam ripper or similar tool
- Scrap of fabric at least 4 in x 4 inches
- Stabilizers: Cut away or tear away, water soluble optional
- Floral denim patch applique design file
Step 1: Open the side seam.
Since I’m repairing a ripped knee, I needed to take out one of the side leg seams on my jeans. Using a seam ripper made this easy, but you could use small scissors, too. I left the seam intact at the hip and ankle, only removing what was necessary to lay the ripped area flat in the hoop without risking sewing it to the back. Leaving a little intact makes it easier to resew the seam at the end.
Step 2: Prepare the rip.
Iron the area around the rip so it’s smooth and flat. If there’s a lot of loose threads around the rip, trim them. I caught this rip before it frayed too badly, so no trimming was needed.

I wanted the embroidered area to be solid, so I applied some interfacing to the back of the rip. I used some medium weight interfacing, but any should work, since it’s job is just to hold it together while the jeans are embroidered. This is a perfect project for using whatever scraps are handy.

Step 3: Hooping.
For denim, tear away or cutaway stabilizer is best. I chose cutaway for the most stability. It’s stiff, but it should soften in the wash. If not, I’ll switch to tear away next time.
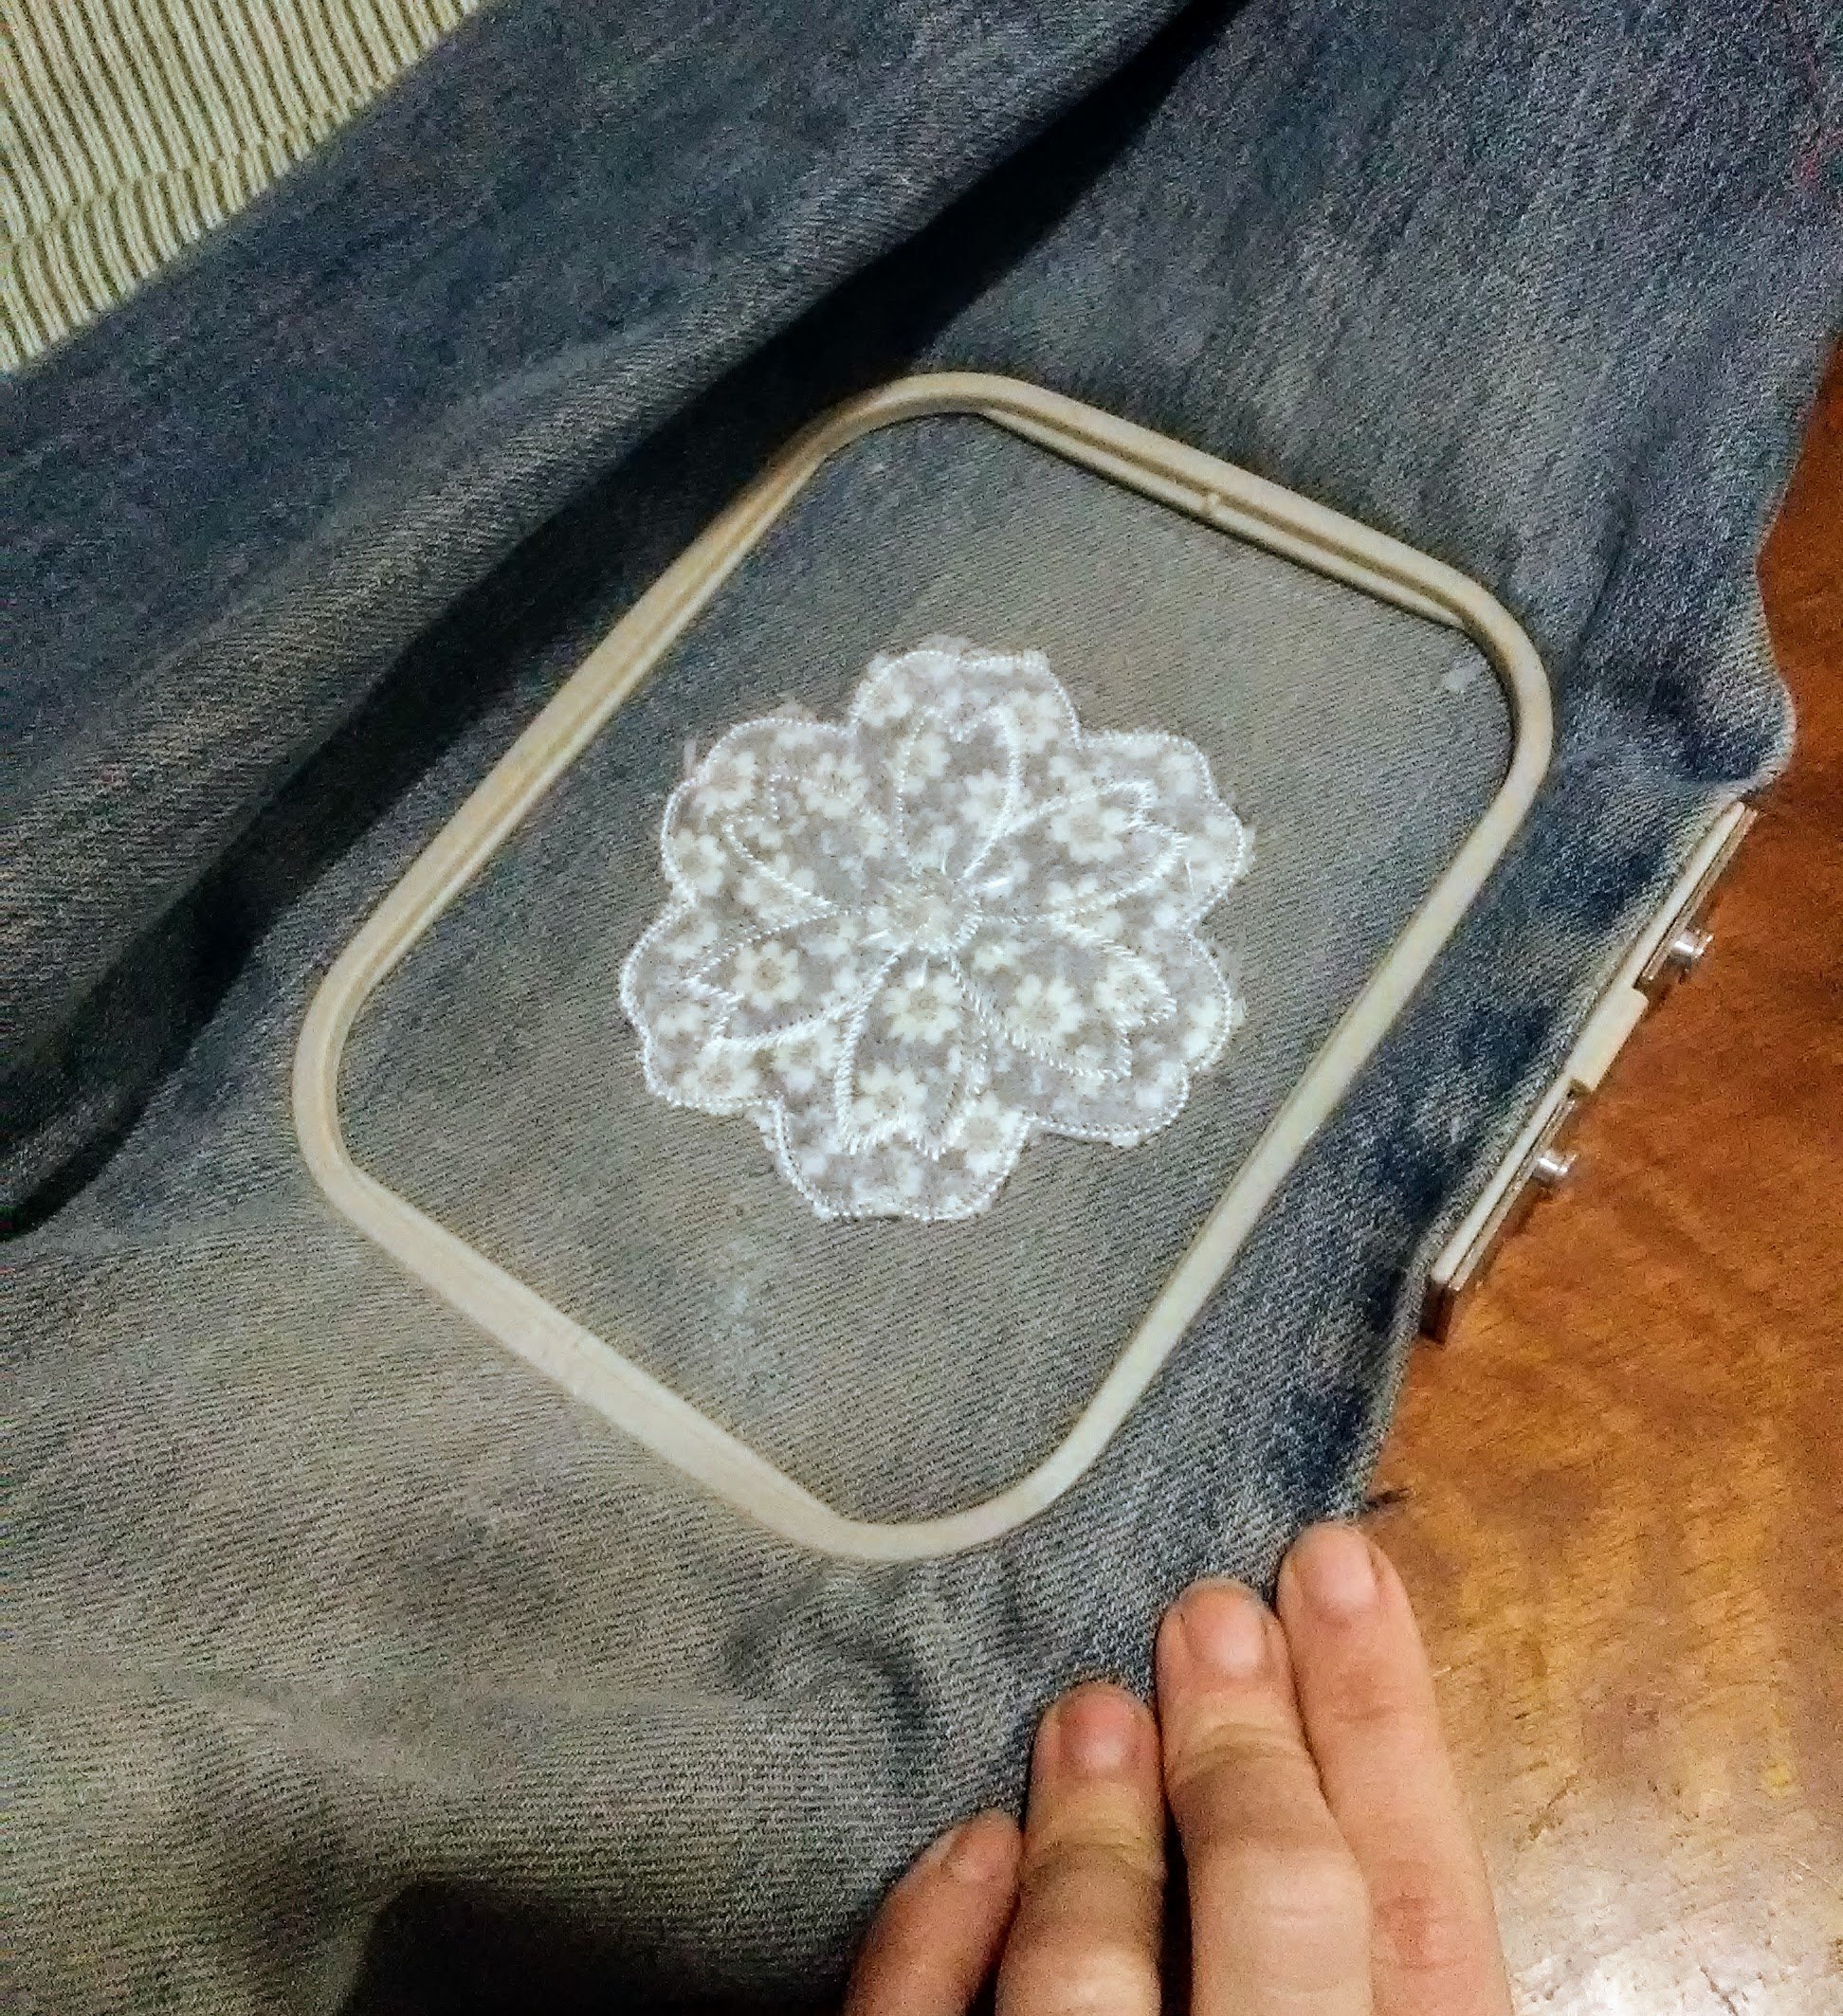
I tend to float projects and only hoop the stabilizer whenever possible. This project seemed like it would work better tightly anchored in the hoop. It took a few tries to center the rip in my hoop so that all edges would be covered by my design. My machine has a 4 in x 4 in embroidery field, so the rip just barely fit. Smaller tears will be easier to fit in my small hoop.

Step 4: Embroidering the patch.
Once it’s properly hooped, it’s time to sew. On my machine, the first color stop said “Applique Material”. I haven’t done much machine applique, but the ones I am used to usually follow the sequence: placement stitch, tack down the applique (then trim excess), sew the final applique stitching. So, confused I just put the applique fabric and a water soluble stabilizer (optional) on top of the rip and pushed start.

What my machine was telling me to do was to just hoop the applique fabric so I could remove it from the hoop and cut it neatly. The second color stop was the positioning stitch. That would be stitched on my jeans and then my neatly trimmed applique could be placed in position and the stitching completed. Since I did everything at once, my applique isn’t as tidy as it could be. I will definitely listen to my machine next time.

Step 5: Remove from hoop and cut away excess stabilizer
I also steam pressed over the back of the patch to start softening the stabilizer.

Step 6: Sew the leg seam.
To repair the leg seam, I used a lock stitch setting on my machine. You could also sew the seam twice to reinforce it or just use really heavy thread. I then serged the raw edge. If you don’t have a serger, an overedge stitch or zig-zag stitch would also work.
Finished!

Not bad. I wish I had used heavier thread so the embroidery would show up better. Listening to my machine and cutting the applique fabric to size before I sew it on to eliminate the raw edges peeking out is another improvement for the next time I’m patching denim.
If you’d like to use this applique design, you can download the file here. You can use the design on items you make to sell as well as for personal use, but please don’t sell the design file.


Like this tutorial? To make sure you don’t miss out on future tutorial posts, sign up for my newsletter.

Embroidery Files and Freebies
Embroidery design files and freebies from SubEarthan Cottage. All designs are scaled to fit 4×4 hoops common on home embroidery machines.